


27
AZ7000SDR-8, 7500SDR-8
6.Adjustment of sewing machine
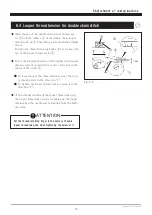
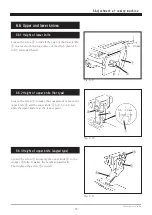
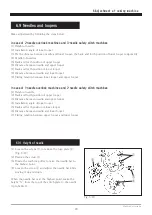
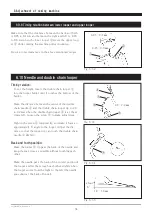
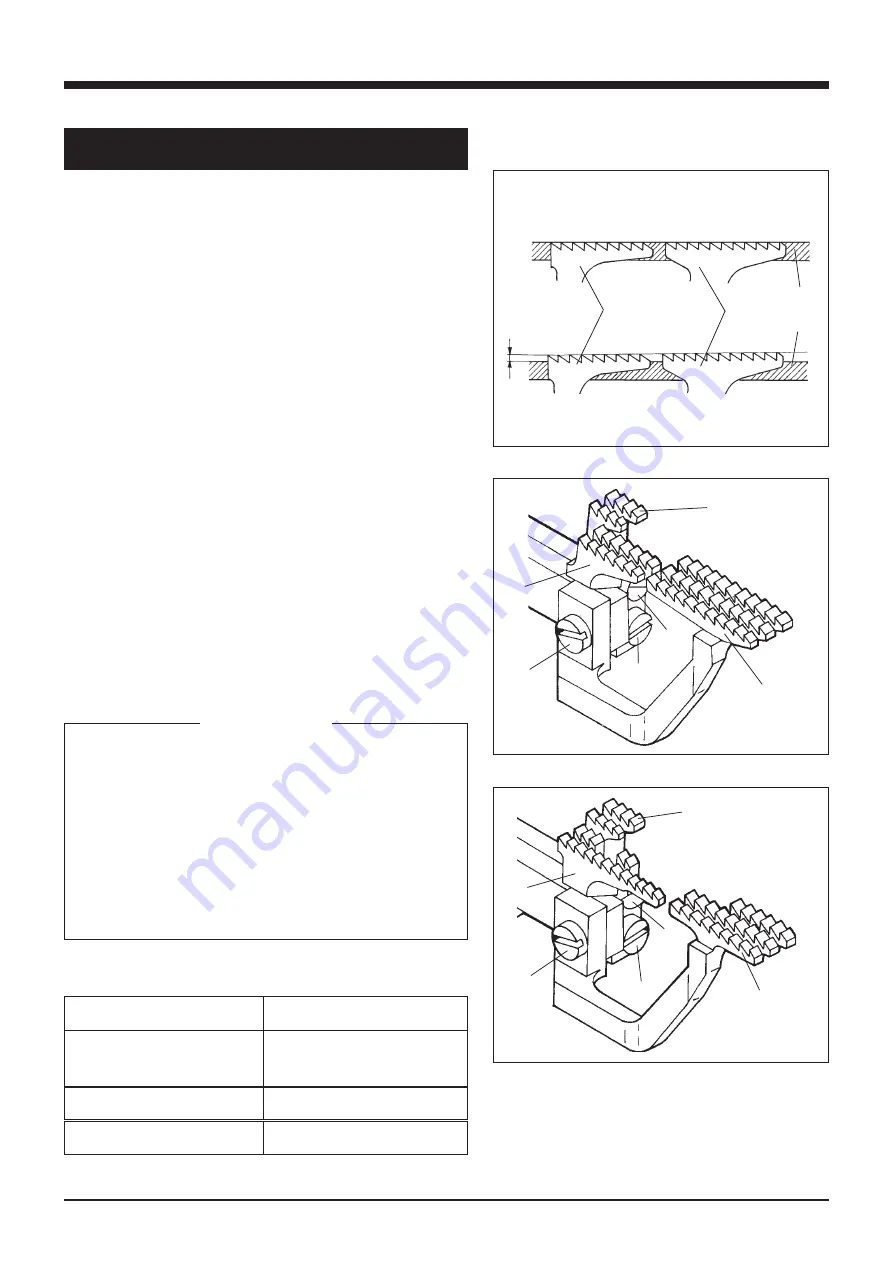
6.7 Height of feed dogs
Fig. 6-14
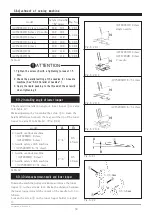
Fig. 6-15 AZ7000SDR-8 class
Fig. 6-16 AZ7500SDR-8/-31 class
0.8 ㎜
Loosen the screws ②④⑥ to adjust the differential feed
dog ①, the main feed dog ③, and the auxiliary feed do ⑤
respectively.
Table 10
Difference between main feed dog and auxiliary feed dog
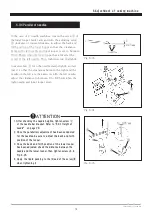
1. Be sure to make no difference of installing height be-
tween the main feed dog ③ and the differential feed
dog ①. If different, it can cause the unstable feeding
and feed scratch mark.
2. For sewing heavy weight knitted fabric or the mate-
rial having uneven thickness parts, adjust differential
feed dog ① and main feed dog ③ 1.0 mm higher than
standard position respectively.
①
②
③
④
⑤
⑥
①
②
③
④
⑤
⑥
To set the standard position, set the tops of the main ①
and differential feed dogs ③ parallel to that of the stitch
plate when the tops of the feed dogs are raised and even
with that of the stitch plate.
Make the height between the top of the stitch plate and
the rear side of the main feed dog ③ to 0.8 mm when the
feed dog is at the highest point.
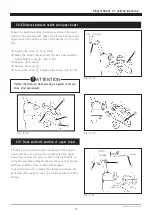
Install the auxiliary feed dog ⑤ depending on the machine
class as below.
AZ7000SDR-8 class
AZ7020SDR-8 class
(Refer to Table 10)
Install the auxiliary feed dog ⑤ 0.5 mm lower than the
main feed dog ③ as standard.
AZ7500SDR-8 class
(Refer to Table 10)
Install the auxiliary feed dog ⑤ even with the main feed
dog ③.
③
①
stitch
plate
model
difference (mm)
AZ7000SDR-8 class
( exclude below )
0.5
( lower than main feed dog )
AZ7016SDR-8
0
AZ7500SDR-8/-31 class
0
�
ÁÄÖÉÃÅ