


13
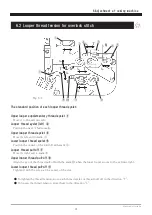
AZ7000SDR-8, 7500SDR-8
5.
Proper operation
5.1 Needle system
AZ7000SDR-8
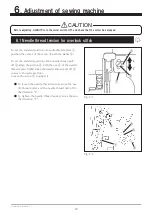
: DC×1 ( or 81×1 )
AZ7003SDR-8,AZ7020SDR-8,
AZ7120SDR-8 class
: DC×27 ( or B27, 1886 )
AZ7500SDR-8 class
: DC×27 ( or B27, 1886 )
Select proper needles in size according to the thickness
and the type of the material.
Table 5
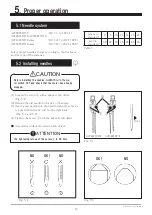
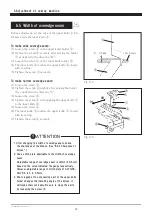
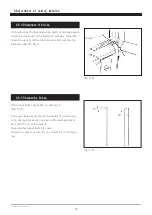
5.2 Installing needles
Fig. 5-1
Fig. 5-3
Fig. 5-2
NO OK! NO
OK! NO
(1) Loosen the screw ① with a minus screw driver.
(Fig. 5-1)
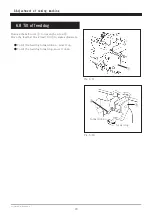
(2) Remove the old needle with a pair of tweezers.
(3) Insert a new needle into the needle clamp ② as far as
it goes with facing its scarf to the right back.
(Fig. 5-2 and 5-3)
(4) Tighten the screw ① with the minus screw driver.
● Accessories include the minus screw driver.
②
① ①
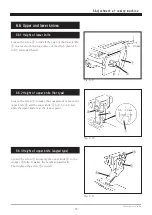
AZ7500SDR-8
AZ7020SDR-8
front
japanese
standard
8
9
10
11
12
13
14
metric
standard
60 65
70
75 80 85
90
The tightening torque of the screw ① is 0.6 N・m.
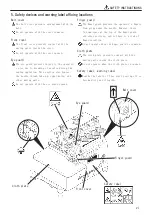
ÁÔÔÅÎÔÉÏÎ
Before installing the needles, ALWAYS turn the mo-
tor switch OFF and check that the motor has already
stopped.
ÃÁÕÔÉÏÎ