4-31
WATER PUMP
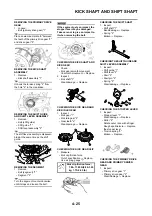
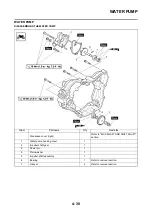
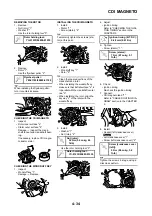
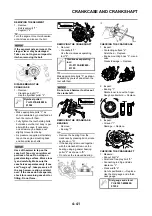
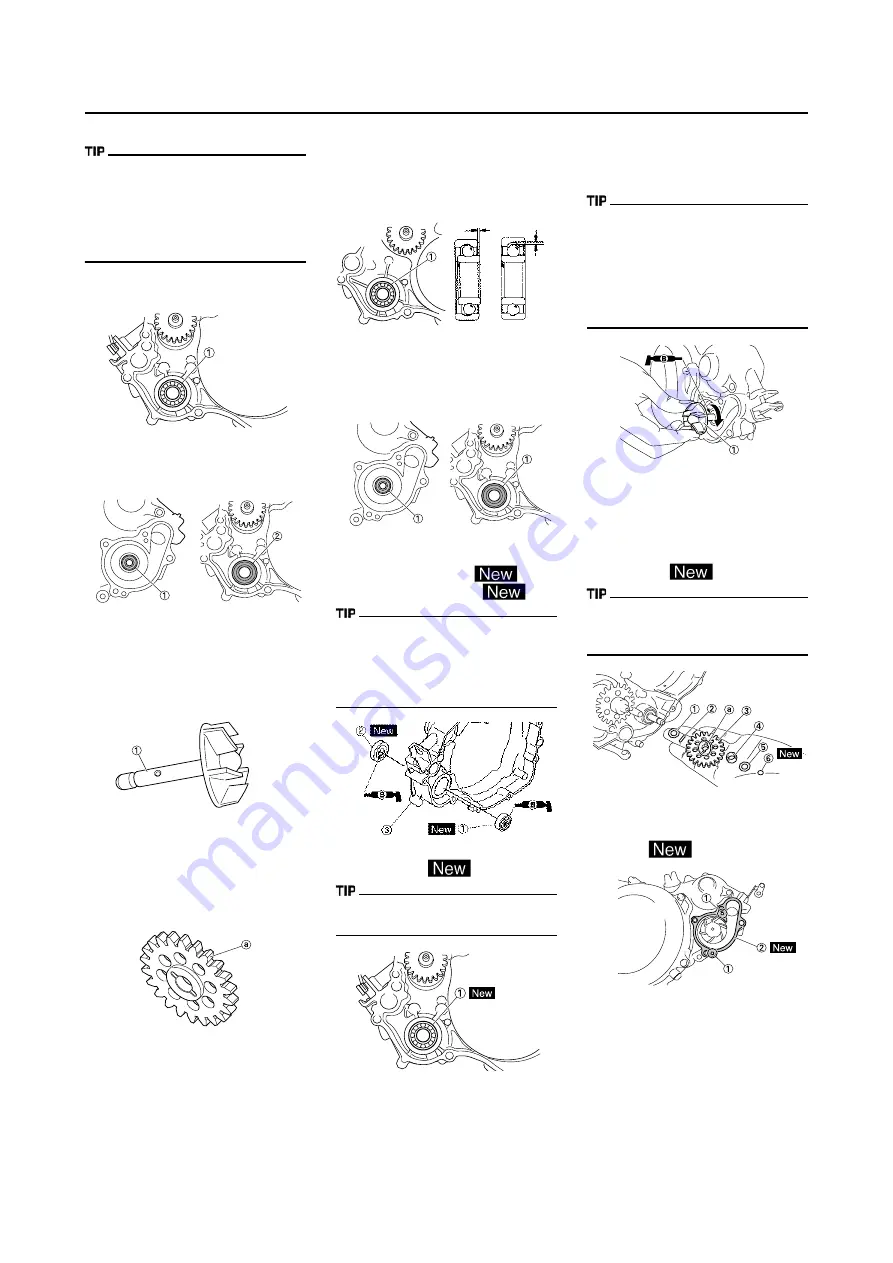
REMOVING THE OIL SEAL
• Replace the oil seal when transmis-
sion oil or coolant leaks out from the
water pump housing hole at the bot-
tom.
• Do not reuse the removed bearing
and oil seal.
1. Remove:
• Bearing "1"
2. Remove:
• Oil seal (outside) "1"
• Oil seal (inside) "2"
CHECKING THE IMPELLER SHAFT
1. Inspect:
• Impeller shaft "1"
Bend/wear/damage
→
Replace.
Fur deposits
→
Clean.
CHECKING THE IMPELLER SHAFT
GEAR
1. Inspect:
• Gear teeth "a"
Wear/damage
→
Replace.
CHECKING THE BEARING
1. Inspect:
• Bearing "1"
Rotate inner race with a finger.
Rough spot/seizure
→
Replace.
CHECKING THE OIL SEAL
1. Inspect:
• Oil seal "1"
Wear/damage
→
Replace.
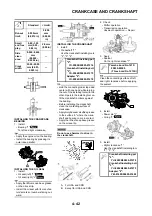
INSTALLING THE OIL SEAL
1. Install:
• Oil seal (inside) "1"
• Oil seal (outside) "2"
• Apply the lithium soap base grease
on the oil seal lip.
• Install the oil seal with its manufac-
ture's marks or numbers facing the
right crankcase cover "3".
2. Install:
• Bearing "1"
Install the bearing by pressing its out-
er race parallel.
INSTALLING THE IMPELLER
SHAFT
1. Install:
• Impeller shaft "1"
• Take care so that the oil seal lip is
not damaged or the spring does not
slip off its position.
• When installing the impeller shaft,
apply the lithium soap base grease
on the oil seal lip and impeller shaft.
And install the shaft while turning it.
2. Install:
• Washer "1"
• Dowel pin "2"
• Impeller shaft gear "3"
• Collar "4"
• Washer "5"
• Circlip "6"
Install the Impeller shaft gear with the
dowel pin fitted in the groove "a" in
the same gear.
3. Install:
• Dowel pin "1"
• Gasket (water pump housing cov-
er) "2"
Summary of Contents for YZ125 2015
Page 4: ......
Page 12: ...1 2 LOCATION OF IMPORTANT LABELS EUROPE...
Page 13: ...1 3 LOCATION OF IMPORTANT LABELS AUS NZ ZA...
Page 61: ...3 18 CHASSIS...
Page 165: ......
Page 166: ...PRINTED IN JAPAN E PRINTED ON RECYCLED PAPER...

