background image

PERIODIC MAINTENANCE AND ADJUSTMENT

7-40

7

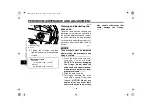
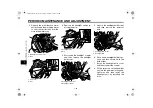
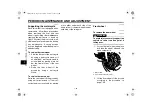
3. Lift the rear wheel off the ground

according to the procedure on
page 7-38.

4. Remove the axle nut.
5. Push the wheel forward, and then

remove the drive chain from the
rear sprocket.

TIP

If the drive chain is difficult to re-
move, remove the wheel axle first,
and then lift the wheel upward
enough to remove the drive chain
from the rear sprocket.

The drive chain does not need to
be disassembled in order to re-
move and install the rear wheel.

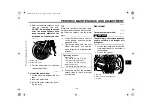
6. While supporting the brake caliper

and slightly lifting the wheel, pull
the wheel axle out.

TIP

A rubber mallet may be useful to tap the
wheel axle out.

7. Remove the wheel. 

NOTICE:

 Do

not apply the brake after the
wheel has been removed to-
gether with the brake disc, oth-
erwise the brake pads will be
forced shut.

 [ECA11071]

EAU34431

To install the rear wheel

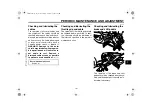
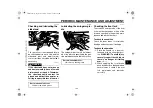
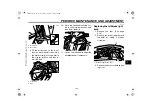
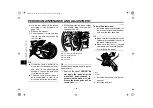
1. Install the wheel and the brake cal-

iper bracket by inserting the wheel
axle from the right-hand side.

TIP

Make sure that the retainer on the
swingarm is inserted into the slot in
the brake caliper bracket.

Make sure that there is enough
space between the brake pads be-
fore installing the wheel.

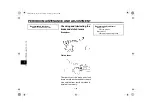
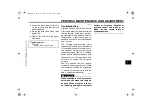
2. Install the drive chain onto the rear

sprocket.

3. Install the axle nut.

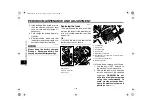
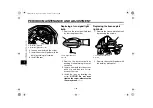
1. Locknut
2. Drive chain slack adjusting nut

3. Brake caliper bracket

4. Brake caliper
5. Wheel axle

1

4

3

2

5

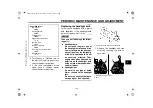
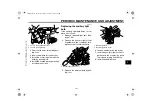
1. Slot

2. Retainer

1

2

U20S20E0.book  Page 40  Wednesday, October 15, 2008  2:05 PM

ProCarManuals.com

Summary of Contents for XJ6 2008

Page 1: ...DIC183 XJ6NY OWNER S MANUAL Read this manual carefully before operating this vehicle 20S 28199 20 ProCarManuals com...

Page 2: ...EAU46090 Read this manual carefully before operating this vehicle This manual should stay with this vehicle if it is sold U20S20E0 book Page 1 Wednesday October 15 2008 2 05 PM ProCarManuals com...

Page 3: ...he many tips given in this manual will help keep your motorcycle in the best possible condition If you have any further questions do not hesitate to contact your Yamaha dealer The Yamaha team wishes y...

Page 4: ...y messages that follow this symbol to avoid possible injury or death A WARNING indicates a hazardous situation which if not avoided could result in death or serious injury A NOTICE indicates special p...

Page 5: ...Yamaha Motor Co Ltd 1st edition October 2008 All rights reserved Any reprinting or unauthorized use without the written permission of Yamaha Motor Co Ltd is expressly prohibited Printed in Japan U20S2...

Page 6: ...rol system 7 2 General maintenance and lubrication chart 7 3 Removing and installing the cowling and panels 7 7 Checking the spark plugs 7 8 Engine oil and oil filter cartridge 7 9 Coolant 7 12 Replac...

Page 7: ...light bulb 7 37 Supporting the motorcycle 7 38 Front wheel 7 38 Rear wheel 7 39 Troubleshooting 7 41 Troubleshooting charts 7 42 MOTORCYCLE CARE AND STORAGE 8 1 Matte color caution 8 1 Care 8 1 Stora...

Page 8: ...contain important information for safe and proper operation of your vehicle Never remove any labels from your vehicle If a label becomes difficult to read or comes off a replacement label is available...

Page 9: ...o leggete il manuale di istruzioni Lire le manuel du propri taire avant d utiliser ce v hicule Lesen Sie die Bedienungsanleitung bevor Sie dieses Fahrzeug fahren Antes de conducir este veh culo lea el...

Page 10: ...e failure of motorists to detect and recognize motorcycles in traf fic is the predominating cause of automobile motorcycle accidents Many accidents have been caused by an automobile driver who did not...

Page 11: ...to an impairment of vision that could delay seeing a hazard The use of a jacket heavy boots trousers gloves etc is effective in preventing or reducing abrasions or lacerations Never wear loose fittin...

Page 12: ...rcycle to minimize imbalance or instabili ty Shifting weights can create a sud den imbalance Make sure that ac cessories and cargo are securely attached to the motorcycle before riding Check accessory...

Page 13: ...ution or aerody namic changes If accessories are added to the handlebar or front fork area they must be as lightweight as possible and should be kept to a minimum Bulky or large accessories may seriou...

Page 14: ...rew page 7 17 3 Seat lock page 4 16 4 Main fuse page 7 32 5 Fuse box page 7 32 6 Owner s tool kit page 7 1 7 Storage compartment page 4 18 8 Shift pedal page 4 13 9 Engine oil filter cartridge page 7...

Page 15: ...voir page 7 23 4 Engine oil filler cap page 7 9 5 Radiator cap page 7 12 6 Coolant reservoir page 7 12 7 Coolant drain bolt page 7 14 8 Engine oil dipstick page 7 9 9 Brake pedal page 4 13 10 Shock ab...

Page 16: ...andlebar switches page 4 11 3 Main switch steering lock page 4 2 4 Multi function meter unit page 4 7 5 Front brake fluid reservoir page 7 23 6 Right handlebar switches page 4 11 7 Throttle grip page...

Page 17: ...IT IS LOST If the code re reg istering key is lost registering new codes in the standard keys is impossible The standard keys can still be used to start the vehicle however if code re registering is r...

Page 18: ...re registering EAU38530 ON All electrical circuits are supplied with power the meter lighting taillight li cense plate light and auxiliary light come on and the engine can be start ed The key cannot...

Page 19: ...d then turn it to OFF while still pushing it EAU34341 Parking The steering is locked and the taillight license plate light and auxiliary light are on The hazard lights and turn signal lights can be tu...

Page 20: ...model is also equipped with a self diagnosis device for the oil level detection circuit If a problem is detected in the oil level detection circuit the following cycle will be repeated until the malfu...

Page 21: ...equipped vehi cles the radiator fan s automati cally switch on or off according to the coolant temperature in the ra diator If the engine overheats see page 7 42 for further instructions U20S20E0 book...

Page 22: ...with riding 117 139 C 243 283 F Temperature display flashes Warning light comes on Stop the vehicle and allow it to idle until the coolant temperature goes down If the temperature does not go down sto...

Page 23: ...amaha dealer check the electrical cir cuit When the key is turned to OFF and 30 seconds have passed the indicator light will start flashing indicating the im mobilizer system is enabled After 24 hours...

Page 24: ...y is turned to ON the ta chometer needle will sweep once across the r min range and then return to zero r min in order to test the electri cal circuit NOTICE ECA10031 Do not operate the engine in the...

Page 25: ...a tripmeter select it by push ing the SELECT button and then push the RESET button for at least one second If you do not reset the fuel reserve tripmeter manually it will reset itself automatically an...

Page 26: ...cates error code 52 this could be caused by transponder in terference If this error code appears try the following 1 Use the code re registering key to start the engine TIP Make sure there are no othe...

Page 27: ...h the headlight EAU12400 Dimmer switch Set this switch to for the high beam and to for the low beam EAU12460 Turn signal switch To signal a right hand turn push this switch to To signal a left hand tu...

Page 28: ...ion EAU12733 Hazard switch With the key in the ON or posi tion use this switch to turn on the haz ard lights simultaneous flashing of all turn signal lights The hazard lights are used in case of an em...

Page 29: ...brake lever position adjusting dial To adjust the distance between the brake lever and the handlebar grip turn the adjusting dial while holding the lever pushed away from the handlebar grip Make sure...

Page 30: ...fire hazard EAU13221 Fuel Make sure there is sufficient gasoline in the tank WARNING EWA10881 Gasoline and gasoline vapors are extremely flammable To avoid fires and explosions and to reduce the risk...

Page 31: ...line spills on your clothing change your clothes EAU13332 NOTICE ECA11400 Use only unleaded gasoline The use of leaded gasoline will cause severe damage to internal engine parts such as the valves and...

Page 32: ...has cooled down before do ing any maintenance work Do not allow the engine to idle more than a few minutes Long idling can cause a build up of heat NOTICE ECA10701 Use only unleaded gasoline The use o...

Page 33: ...trap as shown and then hook the cable loop over the helmet holder 3 Place the helmet on the right side of the vehicle and then install the seat WARNING Never ride with a helmet attached to the helmet...

Page 34: ...Owner s Manual or other documents in the storage com partment be sure to wrap them in a plastic bag so that they will not get wet When washing the vehicle be careful not to let any water enter the sto...

Page 35: ...to make the adjustment WARNING EWA10221 This shock absorber assembly con tains highly pressurized nitrogen gas Read and understand the fol lowing information before handling the shock absorber assemb...

Page 36: ...to assist the operator in fulfilling the respon sibility of raising the sidestand be fore starting off Therefore check this system regularly as described below and have a Yamaha dealer re pair it if i...

Page 37: ...destand up 11 Keep the clutch lever pulled 12 Push the start switch Does the engine start The system is OK The motorcycle can be ridden The neutral switch may not be working correctly The motorcycle s...

Page 38: ...ore using this vehicle check the following points ITEM CHECKS PAGE Fuel Check fuel level in fuel tank Refuel if necessary Check fuel line for leakage 4 14 Engine oil Check oil level in engine If neces...

Page 39: ...and lubricate cable and grip housing 7 18 7 27 Control cables Make sure that operation is smooth Lubricate if necessary 7 27 Drive chain Check chain slack Adjust if necessary Check chain condition Lu...

Page 40: ...ghten if necessary Instruments lights signals and switches Check operation Correct if necessary Sidestand switch Check operation of ignition circuit cut off system If system is not working correctly h...

Page 41: ...an engine auto stop system The engine stops automatically if left idling for 20 minutes In this case the multi function display indicates error code 70 but this is not a mal function Push the start sw...

Page 42: ...71 Shifting Shifting gears lets you control the amount of engine power available for starting off accelerating climbing hills etc The gear positions are shown in the il lustration TIP To shift the tra...

Page 43: ...the engine is brand new do not put an excessive load on it for the first 1600 km 1000 mi The various parts in the engine wear and polish themselves to the correct operating clearances During this peri...

Page 44: ...stem can become very hot park in a place where pedestri ans or children are not likely to touch them and be burned Do not park on a slope or on soft ground otherwise the vehicle may overturn increasin...

Page 45: ...ser vice have a Yamaha dealer perform service WARNING EWA15121 Turn off the engine when performing maintenance unless otherwise specified A running engine has moving parts that can catch on body part...

Page 46: ...aintenance chart for the emission control system NO ITEM CHECK OR MAINTENANCE JOB ODOMETER READING ANNUAL CHECK 1000 km 600 mi 10000 km 6000 mi 20000 km 12000 mi 30000 km 18000 mi 40000 km 24000 mi 1...

Page 47: ...s Whenever worn to the limit 4 Rear brake Check operation fluid level and vehicle for fluid leakage Replace brake pads Whenever worn to the limit 5 Brake hoses Check for cracks or damage Replace Every...

Page 48: ...ver pivot shaft Lubricate with silicone grease 14 Brake pedal pivot shaft Lubricate with lithium soap based grease 15 Clutch lever pivot shaft Lubricate with lithium soap based grease 16 Shift pedal p...

Page 49: ...Cooling system Check coolant level and vehicle for coolant leakage Change Every 3 years 24 Front and rear brake switches Check operation 25 Moving parts and cables Lubricate 26 Throttle grip hous ing...

Page 50: ...ssary correct the brake fluid level Every two years replace the internal components of the brake master cylinders and calipers and change the brake fluid Replace the brake hoses every four years and i...

Page 51: ...owling off To install the cowling Place the cowling in the original posi tion and then install the bolts EAU46770 Panel A To remove the panel Remove the bolt and the quick fasten er and then take the...

Page 52: ...an re veal the condition of the engine The porcelain insulator around the cen ter electrode of each spark plug should be a medium to light tan the ideal color when the vehicle is ridden normally and a...

Page 53: ...uld be checked before each ride In addition the oil must be changed and the oil filter car tridge replaced at the intervals speci fied in the periodic maintenance and lubrication chart To check the en...

Page 54: ...dge replace ment 1 Remove cowling A See page 7 7 2 Start the engine warm it up for several minutes and then turn it off 3 Place an oil pan under the engine to collect the used oil 4 Remove the engine...

Page 55: ...and tighten the oil filler cap TIP Be sure to wipe off spilled oil on any parts after the engine and exhaust sys tem have cooled down NOTICE ECA11620 In order to prevent clutch slip page since the eng...

Page 56: ...el and correct it if necessary 12 Install the cowling EAU20070 Coolant The coolant level should be checked before each ride In addition the cool ant must be changed at the intervals specified in the p...

Page 57: ...s been used instead of coolant replace it with coolant as soon as possi ble otherwise the cooling sys tem will not be protected against frost and corrosion If water has been added to the coolant have...

Page 58: ...EWA10381 5 Remove the coolant reservoir breather hose from the guide and then remove the coolant reservoir cap 6 Remove the coolant reservoir cov er and coolant reservoir by remov ing the bolts 7 Dra...

Page 59: ...dd sufficient coolant until it reaches the top of the radia tor and then install the radiator cap radiator cap retainer and radi ator cap retaining bolt 17 Check the coolant level in the res ervoir If...

Page 60: ...ently if you are riding in un usually wet or dusty areas 1 Remove the seat See page 4 16 2 Remove the fuel tank bolts and then lift the fuel tank away from the air filter case 3 Remove the air filter...

Page 61: ...w hose are not dam aged that they are properly con nected and routed and that they are not pinched If any hose is damaged have a Yamaha dealer replace the hose before starting the engine otherwise fue...

Page 62: ...check the throttle cable free play and if neces sary have a Yamaha dealer adjust it EAU21401 Valve clearance The valve clearance changes with use resulting in improper air fuel mixture and or engine n...

Page 63: ...e could cause an accident Tire inspection Always check the tires before operating the motorcycle If a tire tread shows crosswise lines minimum tread depth if the tire has a nail or glass fragments in...

Page 64: ...hich could lead to an accident Always make sure that the valve caps are securely installed to prevent air pressure leakage Use only the tire valves and valve cores listed below to avoid tire deflation...

Page 65: ...or warpage be fore each ride If any damage is found have a Yamaha dealer re place the wheel Do not attempt even the smallest repair to the wheel A deformed or cracked wheel must be replaced The wheel...

Page 66: ...22272 Adjusting the rear brake light switch The rear brake light which is activated by the brake pedal should come on just before braking takes effect If neces sary adjust the rear brake light switch...

Page 67: ...int that the wear indicator groove has almost disap peared have a Yamaha dealer replace the brake pads as a set EAU22500 Rear brake pads Check each rear brake pad for damage and measure the lining thi...

Page 68: ...formance Be careful that water does not en ter the brake fluid reservoir when refilling Water will significantly lower the boiling point of the fluid and may result in vapor lock Brake fluid may deter...

Page 69: ...swingarm 2 To tighten the drive chain turn the drive chain slack adjusting nut at each end of the swingarm in direc tion a To loosen the drive chain turn the adjusting nut at each end of the swingarm...

Page 70: ...otorcycle and riding in the rain 1 Clean the drive chain with kero sene and a small soft brush NOTICE To prevent damaging the O rings do not clean the drive chain with steam cleaners high pressure was...

Page 71: ...in ner cable to rust Replace a damaged cable as soon as possible to prevent unsafe conditions EWA10721 EAU23111 Checking and lubricating the throttle grip and cable The operation of the throttle grip...

Page 72: ...tion of the brake and clutch levers should be checked before each ride and the lever pivots should be lu bricated if necessary Recommended lubricant Lithium soap based grease Recommended lubricants Br...

Page 73: ...e and lubrication chart EAU23272 Checking the front fork The condition and operation of the front fork must be checked as follows at the intervals specified in the periodic main tenance and lubricatio...

Page 74: ...d See page 7 38 for more information WARNING To avoid injury securely support the vehicle so there is no danger of it falling over EWA10751 2 Hold the lower ends of the front fork legs and try to move...

Page 75: ...charging it in an enclosed space KEEP THIS AND ALL BATTER IES OUT OF THE REACH OF CHILDREN To charge the battery Have a Yamaha dealer charge the bat tery as soon as possible if it seems to have discha...

Page 76: ...4 16 TIP To access the main fuse remove the starter relay cover as shown If a fuse is blown replace it as follows 1 Turn the key to OFF and turn off the electrical circuit in question 2 Remove the bl...

Page 77: ...minosity of the bulb and the bulb life will be adversely affected Thor oughly clean off any dirt and fin gerprints on the headlight bulb using a cloth moistened with al cohol or thinner Headlight lens...

Page 78: ...t out bulb 6 Place a new headlight bulb into po sition and then secure it with the bulb holder 7 Install the headlight bulb cover and then connect the coupler 8 Fit the projection on the headlight uni...

Page 79: ...l position and then install the bolts 11 Have a Yamaha dealer adjust the headlight beam if necessary EAU47020 Replacing the tail brake light bulb 1 Remove the seat See page 4 16 2 Remove the socket to...

Page 80: ...into the socket push it in and then turn it clock wise until it stops 4 Install the lens by installing the screw NOTICE Do not over tighten the screw otherwise the lens may break ECA11191 EAU24312 Rep...

Page 81: ...light unit See page 7 33 2 Remove the auxiliary light socket together with the coupler by turn ing the socket counterclockwise 3 Remove the burnt out bulb by pull ing it out 4 Insert a new bulb into t...

Page 82: ...er the frame in front of the rear wheel 2 Raise the front wheel off the ground by using a motorcycle stand To service the rear wheel Raise the rear wheel off the ground by using a motorcycle stand or...

Page 83: ...then put the sidestand down 5 Tighten the wheel axle the front wheel axle pinch bolt and the brake caliper bolts to the specified torques 6 Push down hard on the handlebar several times to check for...

Page 84: ...ful to tap the wheel axle out 7 Remove the wheel NOTICE Do not apply the brake after the wheel has been removed to gether with the brake disc oth erwise the brake pads will be forced shut ECA11071 EAU...

Page 85: ...ystems your self However should your motorcycle require any repair take it to a Yamaha dealer whose skilled technicians have the necessary tools experience and know how to service the motorcycle prope...

Page 86: ...r check the vehicle Remove the spark plugs and check the electrodes 3 Ignition Wipe off with a dry cloth and correct the spark plug gaps or replace the spark plugs Have a Yamaha dealer check the vehic...

Page 87: ...nd has stopped press down on the cap while turning it counterclockwise and then remove the cap TIP If coolant is not available tap water can be temporarily used instead provided that it is changed to...

Page 88: ...plastic bag after the engine has cooled down 2 Make sure that all caps and covers as well as all electrical couplers and connectors including the spark plug caps are tightly in stalled 3 Remove extre...

Page 89: ...t and a soft clean sponge and then rinse thoroughly with clean water Use a toothbrush or bottlebrush for hard to reach areas Stubborn dirt and insects will come off more easily if the area is covered...

Page 90: ...ut treat them with a suitable care product Avoid using abrasive polishing compounds as they will wear away the paint TIP Consult a Yamaha dealer for ad vice on what products to use Washing rainy weath...

Page 91: ...d then install the spark plugs and the spark plug caps 4 Lubricate all control cables and the pivoting points of all levers and pedals as well as of the side stand centerstand 5 Check and if necessary...

Page 92: ...eplacement 2 80 L 2 96 US qt 2 46 Imp qt Cooling system Coolant reservoir capacity up to the maximum level mark 0 25 L 0 26 US qt 0 22 Imp qt Radiator capacity including all routes 2 00 L 2 11 US qt 1...

Page 93: ...3 psi Rear 250 kPa 2 50 kgf cm 36 psi Loading condition 90 195 kg 198 430 lb Front 250 kPa 2 50 kgf cm 36 psi Rear 290 kPa 2 90 kgf cm 42 psi High speed riding Front 225 kPa 2 25 kgf cm 33 psi Rear 25...

Page 94: ...ht 12 V 5 0 W 1 License plate light 12 V 5 0 W 1 Meter lighting LED Neutral indicator light LED High beam indicator light LED Oil level warning light LED Turn signal indicator light LED Coolant temper...

Page 95: ...number is stamped into the key tag Record this number in the space provided and use it for reference when ordering a new key EAU26400 Vehicle identification number The vehicle identification number is...

Page 96: ...Owners are warned that the law may prohibit a The removal or rendering inopera tive by any person other than for purposes of maintenance repair or replacement of any device or element of design incor...

Page 97: ...icator light 4 4 Horn switch 4 12 I Identification numbers 10 1 Ignition circuit cut off system 4 20 Immobilizer system 4 1 Immobilizer system indicator light 4 7 Indicator and warning lights 4 4 K Ke...

Page 98: ...cator light 4 4 Turn signal light bulb replacing 7 36 Turn signal switch 4 11 V Valve clearance 7 18 Vehicle identification number 10 1 W Wheel bearings checking 7 30 Wheel front 7 38 Wheel rear 7 39...

Page 99: ...U20S20E0 book Page 3 Wednesday October 15 2008 2 05 PM ProCarManuals com...

Page 100: ...PRINTED ON RECYCLED PAPER YAMAHA MOTOR CO LTD PRINTED IN JAPAN 2008 10 0 3 1 CR E DIC183 ProCarManuals com...

Reviews: