background image

6-3

6

6

6

6

6

PERIODIC MAINTENANCE AND MINOR REP

PERIODIC MAINTENANCE AND MINOR REP

PERIODIC MAINTENANCE AND MINOR REP

PERIODIC MAINTENANCE AND MINOR REP

PERIODIC MAINTENANCE AND MINOR REPAIR

AIR

AIR

AIR

AIR

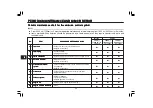
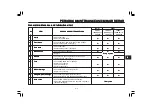
General maintenance and lubrication chart

General maintenance and lubrication chart

General maintenance and lubrication chart

General maintenance and lubrication chart

General maintenance and lubrication chart

INITIAL

EVERY

600 mi

1800 mi

     3000mi

(1000 km) or

(3000 km) or   (5000 km) or

1 month

3 months

      6 months

No.

No.

No.

No.

No.

ITEM

ITEM

ITEM

ITEM

ITEM

CHECKS AND MAITENANCE JOBS

CHECKS AND MAITENANCE JOBS

CHECKS AND MAITENANCE JOBS

CHECKS AND MAITENANCE JOBS

CHECKS AND MAITENANCE JOBS

1

1

1

1

1

2

2

2

2

2

*****

3

3

3

3

3

*****

4

4

4

4

4

*****

5

5

5

5

5

*****

6

6

6

6

6

*****

7

7

7

7

7

*****

8

8

8

8

8

*****

9

9

9

9

9

Clutch

Clutch

Clutch

Clutch

Clutch

Front brake

Front brake

Front brake

Front brake

Front brake

Rear brake

Rear brake

Rear brake

Rear brake

Rear brake

Brake hoses

Brake hoses

Brake hoses

Brake hoses

Brake hoses

Wheels

Wheels

Wheels

Wheels

Wheels

T

T

T

T

Tires

ires

ires

ires

ires

Wheel bearings

Wheel bearings

Wheel bearings

Wheel bearings

Wheel bearings

Swingarm pivot bearings

Swingarm pivot bearings

Swingarm pivot bearings

Swingarm pivot bearings

Swingarm pivot bearings

Drive chain

Drive chain

Drive chain

Drive chain

Drive chain

• Check operation.
• Adjust or replace cable.

• Check operation, fluid level, and for fluid leakage.
• Replace brake pads if necessary.

• Check operation.
• Replace brake shoes if necessary.

• Check for craks or damage.
• Replace.

• Check runout, spoke tightness and for damage.
• Tighten spokes if necessary.

• Check tread depth and for damage.
• Replace if necessary.
• Check air pressure.
• Correct if necessary.

• Check bearing for smooth operation.
• Replace if necessary.

• Check bearing assemblies for looseness.
• Moderately repack with lithium-soap-based grease.

• Check chain slack/alignment and condition.
• Adjust and lubricate chain with a special O-ring chain
  lubricant thoroughly.

c

c

c

c

c

c

c

c

c

c

c

c

c

c

c

c

c

c

c

c

c

c

c

c

c

c

c

c

c

c

c

c

c

c

c

c

c

c

c

c

c

c

c

c

c

c

c

c

c

c

c

c

c

c

c

c

c

c

c

c

c

c

c

c

c

c

c

c

c

c

c

c

c

c

c

c

c

c

c

c

c

c

c

c

c

c

c

c

c

c

c

c

c

c

c

c

c

c

c

c

c

c

c

c

c

c

c

c

c

c

c

c

c

c

c

c

c

c

c

c

Every ride

Every ride

Every ride

Every ride

Every ride

Every 4 years

Every 4 years

Every 4 years

Every 4 years

Every 4 years

Summary of Contents for TT-R230X 2007

Page 1: ...YAMAHA MOTOR DA AMAZÔNIA LTDA 1C6 F8199 14 LIT 11626 21 14 OWNER S MANUAL TT R230X ...

Page 2: ......

Page 3: ...and pacesetting racing machines It represents the high degree of craftsmanship and reliability that have madeYamaha a leader in these fields This manual will give you an understanding of the operation inspection and basic maintenance of this motorcycle If you have any questions concerning the operation or maintenance of your motorcycle please consult a Yamaha dealer ...

Page 4: ...rator operator operator operator a bystander or a person inspecting or repairing the motorcycle a bystander or a person inspecting or repairing the motorcycle a bystander or a person inspecting or repairing the motorcycle a bystander or a person inspecting or repairing the motorcycle a bystander or a person inspecting or repairing the motorcycle A A A A A CAUTION indicates special precautions that...

Page 5: ...IDING SKILLS WILL MAINTENANCE ALONG WITH GOOD RIDING SKILLS WILL ENSURE THA ENSURE THA ENSURE THA ENSURE THA ENSURE THAT T T T T YOU SAFEL YOU SAFEL YOU SAFEL YOU SAFEL YOU SAFELY Y Y Y Y ENJOY ENJOY ENJOY ENJOY ENJOY THE THE THE THE THE CAP CAP CAP CAP CAPABILITIES AND THE RELIABILITY ABILITIES AND THE RELIABILITY ABILITIES AND THE RELIABILITY ABILITIES AND THE RELIABILITY ABILITIES AND THE RELIA...

Page 6: ...R230X OWNER S MANUAL 2007 byYamaha Motor da Amazônia Ltda 1st edition May 2007 All rights reserved Any reprinting or unauthorized use without the written permission of Yamaha Motor da Amazônia Ltda is expressly prohibited Printed in Brazil P N LIT 11626 21 14 ...

Page 7: ...rting a warm engine 5 2 Shifting 5 2 Engine break in 5 3 Parking 5 4 PERIODIC MAINTENANCE AND PERIODIC MAINTENANCE AND PERIODIC MAINTENANCE AND PERIODIC MAINTENANCE AND PERIODIC MAINTENANCE AND MINOR REP MINOR REP MINOR REP MINOR REP MINOR REPAIR AIR AIR AIR AIR 6 1 6 1 6 1 6 1 6 1 Periodic maintenance chart for theemission control system 6 2 General maintenance and lubrication chart 6 3 Removing ...

Page 8: ...1 7 1 7 1 7 1 Care 7 1 Storage 7 3 SPECIFICA SPECIFICA SPECIFICA SPECIFICA SPECIFICATIONS TIONS TIONS TIONS TIONS 8 1 8 1 8 1 8 1 8 1 CONSUMER INFORMA CONSUMER INFORMA CONSUMER INFORMA CONSUMER INFORMA CONSUMER INFORMATION TION TION TION TION 9 1 9 1 9 1 9 1 9 1 Identification numbers 9 1 Motorcycle noise regulation 9 2 Maintenance record 9 3 YAMAHA MOTOR CORPORATION U S A OFF ROAD MOTORCYCLE LIMI...

Page 9: ...or only No passengers l Many accidents involve inexperienced operators Make sure that you are qualified and that you only lend your machine to other qualified operators Know your skills and limits Staying within your limits may help you to avoid an accident l Many accidents have been caused by error of the machine operator A typical error made by the operator is veering wide on a turn due to EXCES...

Page 10: ...Here are some general guidelines to follow if loading cargo or adding accessories to your machine Loading The total weight of the operator accessories and cargo must not exceed the maximum load limit of 90 0 kg 198 lb When loading within this weight limit keep the following in mind l Cargo and accessory weight should be kept as low and close to the machine as possible Make sure to distribute the w...

Page 11: ...exhaust gas Gasoline and exhaust gas Gasoline and exhaust gas Gasoline and exhaust gas l GASOLINE IS HIGHLY FLAMMABLE Always turn the engine off when refueling Take care not to spill any gasoline on the engine or exhaust pipe s muffler s when refueling Never refuel while smoking or in the vicinity of an open flame l Never start the engine or let it run for any length of time in a closed area The e...

Page 12: ...Y SAFETY SAFETY INFORMA INFORMA INFORMA INFORMA INFORMATION TION TION TION TION see your doctor immediately If any gasoline spills on your skin or clothing immediately wash the affected area with soap and water and change your clothes ...

Page 13: ...1 5 1 1 1 1 1 SAFETY SAFETY SAFETY SAFETY SAFETY INFORMA INFORMA INFORMA INFORMA INFORMATION TION TION TION TION ...

Page 14: ...1 6 1 SAFETY INFORMATION Location of important labels Please read the following important labels carefully before operating this vehicle Untitled 2 10 5 2007 16 49 6 ...

Page 15: ... BEFORE YOU OPERATE THIS VEHICLE READ THE OWNER S MANUAL AND ALL LABELS NEVER CARRY A PASSENGER You increase your risk of losing control if you carry a passenger NEVER OPERATE THIS VEHICLE ON PUBLIC ROADS You can collide with another vehicle if you operate this vehicle on a public road ALWAYS WEAR AN APPROVED MOTORCYCLE HELMET eye protection and protective clothing WARNING 2 4AA 22259 80 This unit...

Page 16: ... DESCRIPTION DESCRIPTION DESCRIPTION DESCRIPTION DESCRIPTION Left view Left view Left view Left view Left view 1 Fuel cock page 3 5 2 Starter choke knob page 3 6 3 Air filter element page 6 11 4 Shift pedal page 3 2 ...

Page 17: ...TION DESCRIPTION Right view Right view Right view Right view Right view 1 Spark arrester page 6 13 2 Fuse page 6 27 3 Battery page 6 26 4 Shock absorver assembly spring preload adjusting nut page 3 7 5 Engine oil filter element page 6 8 6 Brake pedal page 3 3 ...

Page 18: ... instruments Controls and instruments Controls and instruments Controls and instruments Controls and instruments 1 Clutch lever page 3 2 2 Engine stop switch page 3 1 3 Main switch page 3 1 4 Start switch page 3 1 5 Brake lever page 3 2 6 Throttle grip page 6 14 7 Fuel tank cap page 3 3 ...

Page 19: ...Left Left Left Left Left 1 Engine stop switch Right Right Right Right Right 1 Start switch Engine stop switch Engine stop switch Engine stop switch Engine stop switch Engine stop switch Push this switch to stop the engine in case of an emergency such as when the motorcycle overturns or when the throttle cable is stuck Start switch Start switch Start switch Start switch Start switch Push this switc...

Page 20: ...ed rapidly and released slowly for smooth clutch operation The clutch lever is equipped with a clutch switch which is part of the starting circuit cut off system See page 3 8 Shift pedal Shift pedal Shift pedal Shift pedal Shift pedal 1 Shift pedal The shift pedal is located on the left side of the engine and is used in combination with the clutch lever when shifting the gears of the 6 speed const...

Page 21: ... is properly closed before riding properly closed before riding properly closed before riding properly closed before riding properly closed before riding Fuel Fuel Fuel Fuel Fuel 1 2 1 Fuel tank filter tube 2 Fuel lever Make sure that there is sufficient fuel in the tank Fill the fuel tank to the bottom of the filler tube as shown l l l l l Do not overfill the fuel tank Do not overfill the fuel ta...

Page 22: ...se severe of leaded gasoline will cause severe of leaded gasoline will cause severe of leaded gasoline will cause severe of leaded gasoline will cause severe damage to internal engine parts damage to internal engine parts damage to internal engine parts damage to internal engine parts damage to internal engine parts such as the valves and piston rings such as the valves and piston rings such as th...

Page 23: ...nd replace it if damaged l Make sure that the end of the fuel tank breather hose is not blocked and clean it if necessary Fuel cock Fuel cock Fuel cock Fuel cock Fuel cock The fuel cock supplies fuel from the tank to the carburetor while filtering it also The fuel cock has three positions OFF OFF OFF OFF OFF RES ON FUEL OFF 1 1 Arrow mark positioned over OFF With the lever in this position fuel wi...

Page 24: ...oke knob Starter choke knob Starter choke knob Starter choke knob 1 a b 1 Starter choke knob Starting a cold engine requires a richer air fuel mixture which is supplied by the starter choke Move the knob in direction a to turn on the starter choke Move the knob in direction b to turn off the starter choke Seat Seat Seat Seat Seat T T T T To remove the seat o remove the seat o remove the seat o rem...

Page 25: ...rn an adjusting Never attempt to turn an adjusting mechanism beyond the maximum or mechanism beyond the maximum or mechanism beyond the maximum or mechanism beyond the maximum or mechanism beyond the maximum or minimum settings minimum settings minimum settings minimum settings minimum settings Spring preload Spring preload Spring preload Spring preload Spring preload 1 Locknut 2 Adjusting nut 1 L...

Page 26: ...handling improper handling improper handling l l l l l Do not tamper with or attempt Do not tamper with or attempt Do not tamper with or attempt Do not tamper with or attempt Do not tamper with or attempt to open the gas cylinder to open the gas cylinder to open the gas cylinder to open the gas cylinder to open the gas cylinder l l l l l Do not subject the shock Do not subject the shock Do not sub...

Page 27: ...3 9 3 3 3 3 3 INSTRUMENT INSTRUMENT INSTRUMENT INSTRUMENT INSTRUMENT AND CONTROL AND CONTROL AND CONTROL AND CONTROL AND CONTROL FUNCTIONS FUNCTIONS FUNCTIONS FUNCTIONS FUNCTIONS ...

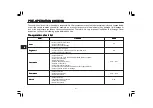
Page 28: ...in fuel tank Refuel if necessary Check fuel line for leakage Check oil level in engine If necessary add recommended oil to specified level Check vehicle for oil leakage Check operation If soft or spongy have Yamaha dealer bleed hydraulic system Check lever free play Adjust if necessary Check brake pads for wear Replace if necessary Check fluid level in reservoir If necessary add recommended brake ...

Page 29: ...e properly tightened Tighten if necessary Check operation Correct if necessary Check operation P P P P PAGE AGE AGE AGE AGE 6 14 6 23 6 23 6 21 6 22 6 15 6 17 6 24 6 23 6 24 _ _ 3 1 ITEM ITEM ITEM ITEM ITEM Throttle grip Throttle grip Throttle grip Throttle grip Throttle grip Control cables Control cables Control cables Control cables Control cables Drive chain Drive chain Drive chain Drive chain ...

Page 30: ...roperly If any item in the Pre operation check list is not working properly If any item in the Pre operation check list is not working properly If any item in the Pre operation check list is not working properly If any item in the Pre operation check list is not working properly have it inspected and repaired before operating have it inspected and repaired before operating have it inspected and re...

Page 31: ...ld contact the it could contact the it could contact the it could contact the ground and distract the ground and distract the ground and distract the ground and distract the ground and distract the operator operator operator operator operator resulting in a possible resulting in a possible resulting in a possible resulting in a possible resulting in a possible loss of control loss of control loss ...

Page 32: ...tarting a warm engine Starting a warm engine Follow the same procedure as for starting a cold engine with the exception that the starter choke is not required when the engine is warm Shifting Shifting Shifting Shifting Shifting 1 Shift pedal 2 Neutral position Shifting gears lets you control the amount of engine power available for starting off accelerating climbing hills etc The gear positions ar...

Page 33: ...igned to which are not designed to which are not designed to which are not designed to withstand the shock of forced withstand the shock of forced withstand the shock of forced withstand the shock of forced withstand the shock of forced shifting shifting shifting shifting shifting Engine break in Engine break in Engine break in Engine break in Engine break in There is never a more important period...

Page 34: ...come very hot system can become very hot park in a place where park in a place where park in a place where park in a place where park in a place where pedestrians or children are not pedestrians or children are not pedestrians or children are not pedestrians or children are not pedestrians or children are not likely to touch them likely to touch them likely to touch them likely to touch them likel...

Page 35: ...h pressured water using water using water using water using water using W W W W Water comes in exhaust ater comes in exhaust ater comes in exhaust ater comes in exhaust ater comes in exhaust silencer port and going to silencer port and going to silencer port and going to silencer port and going to silencer port and going to inside of the engine if no inside of the engine if no inside of the engine...

Page 36: ...e breather Crankcase breather system system system system system Carburetor Carburetor Carburetor Carburetor Carburetor Exhaust system Exhaust system Exhaust system Exhaust system Exhaust system Engine oil Engine oil Engine oil Engine oil Engine oil Engine oil filter elements Engine oil filter elements Engine oil filter elements Engine oil filter elements Engine oil filter elements Check fuel hose...

Page 37: ...es Wheel bearings Wheel bearings Wheel bearings Wheel bearings Wheel bearings Swingarm pivot bearings Swingarm pivot bearings Swingarm pivot bearings Swingarm pivot bearings Swingarm pivot bearings Drive chain Drive chain Drive chain Drive chain Drive chain Check operation Adjust or replace cable Check operation fluid level and for fluid leakage Replace brake pads if necessary Check operation Repl...

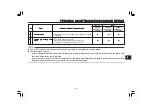
Page 38: ...afts pivot shafts pivot shafts pivot shafts Sidestand pivot Sidestand pivot Sidestand pivot Sidestand pivot Sidestand pivot Spark arrester Spark arrester Spark arrester Spark arrester Spark arrester Front fork Front fork Front fork Front fork Front fork Shock absorber assembly Shock absorber assembly Shock absorber assembly Shock absorber assembly Shock absorber assembly Rear suspension link Rear ...

Page 39: ...using and Throttle grip housing and Throttle grip housing and Throttle grip housing and cable cable cable cable cable l The air filter needs more frequent service if you are riding in unusually wet or dusty areas l Hydraulic brake service After disassembling the brake master cylinder and caliper always change the fluid Regularly check the brake fluid level and fill the reservoir as required Every ...

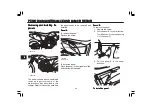
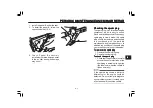
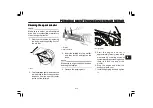
Page 40: ...ved to perform some of the maintenance jobs described in this chapter Refer to this section each time the panel needs to be removed and installed Panel A Panel A Panel A Panel A Panel A To remove the panel Remove the screw 1 Screw 2 Painel A To install the panel Place the panel in the original position and then install the screw Panel B Panel B Panel B Panel B Panel B To remove the panel 1 Remove ...

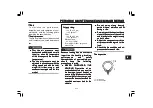
Page 41: ...g to slowly erode the spark plug should be removed and checked in accordance with the periodic maintenance and lubrication chart In addition the condition of the spark plug can reveal the condition of the engine T T T T To remove the spark plug o remove the spark plug o remove the spark plug o remove the spark plug o remove the spark plug 1 Remove the spark plug cap 2 Remove the spark plug T T T T...

Page 42: ...lug 18 Nm 1 8 m kgf 13 ft lbf If a torque wrench is not available when installing a spark plug a good estimate of the correct torque is 1 4 1 2 turn past finger tight However the spark plug should be tightened to the specified torque as soon as possible 4 Install the spark plug cap Engine oil and oil filter Engine oil and oil filter Engine oil and oil filter Engine oil and oil filter Engine oil an...

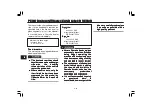
Page 43: ...the engine to collect the used oil 3 Remove the engine oil filler bolt and drain bolt to drain the oil from the crankcase 1 Engine oil filter bolt 1 Drain plug 2 O ring 3 Compression spring 4 Oil strainer When removing the oil drain plug When removing the oil drain plug When removing the oil drain plug When removing the oil drain plug When removing the oil drain plug the o ring compression spring ...

Page 44: ... oil and then install and tighten the oil filler cap Recommended oil Recommended oil Recommended oil Recommended oil Recommended oil See page 8 1 Oil quantity Without oil filter element replacement 1 0 L 1 06 us qt 0 91 imp qt With oil filter element replacement 1 10 L 1 16 us qt 0 97 imp qt In order to prevent clutch In order to prevent clutch In order to prevent clutch In order to prevent clutch...

Page 45: ...nute turn the engine off immediately so it the engine off immediately so it the engine off immediately so it the engine off immediately so it the engine off immediately so it will not seize If this occurs have will not seize If this occurs have will not seize If this occurs have will not seize If this occurs have will not seize If this occurs have a Y a Y a Y a Y a Yamaha dealer repair the amaha d...

Page 46: ... sure that the air filter Make sure that the air filter Make sure that the air filter Make sure that the air filter element is properly seated in the element is properly seated in the element is properly seated in the element is properly seated in the element is properly seated in the air filter case air filter case air filter case air filter case air filter case l l l l l The engine should never ...

Page 47: ...by removing the bolts and then pulling it out of the muffler 1 3 1 Bolt 2 Tap the tailpipe lightly and then use a wire brush to remove any carbon deposits from the spark arrester portion of the tailpipe 2 1 1 Tailpipe 2 Spark arrester 3 Insert the tailpipe into the muffler and then install and tighten the bolts Make sure to align the bolt holes when inserting the tailpipe 4 Remove the purging bolt...

Page 48: ... these settings without sufficient technical without sufficient technical without sufficient technical without sufficient technical without sufficient technical knowledge may result in poor knowledge may result in poor knowledge may result in poor knowledge may result in poor knowledge may result in poor performance of or damage to the performance of or damage to the performance of or damage to th...

Page 49: ...the following should keep the following should keep the following precautions in mind precautions in mind precautions in mind precautions in mind precautions in mind l l l l l NEVER OVERLOAD THE NEVER OVERLOAD THE NEVER OVERLOAD THE NEVER OVERLOAD THE NEVER OVERLOAD THE VEHICLE Operation of an VEHICLE Operation of an VEHICLE Operation of an VEHICLE Operation of an VEHICLE Operation of an overloade...

Page 50: ...ler replace amaha dealer replace excessively worn tires Besides excessively worn tires Besides excessively worn tires Besides excessively worn tires Besides excessively worn tires Besides being illegal operating the being illegal operating the being illegal operating the being illegal operating the being illegal operating the machine with excessively worn machine with excessively worn machine with...

Page 51: ... the inherent stability of the maintain the inherent stability of the original design Genuine Y original design Genuine Y original design Genuine Y original design Genuine Y original design Genuine Yamaha amaha amaha amaha amaha Parts and Accessories are designed Parts and Accessories are designed Parts and Accessories are designed Parts and Accessories are designed Parts and Accessories are desig...

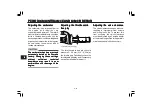
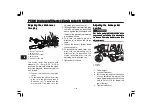
Page 52: ...on a to loosen the clutch cable 5 Loosen the locknut further down the clutch cable 6 To increase the clutch lever free play turn the adjusting nut in direction a To decrease the clutch lever free play turn the adjusting nut in direction b 7 Tighten both locknuts Adjusting the brake pedal Adjusting the brake pedal Adjusting the brake pedal Adjusting the brake pedal Adjusting the brake pedal positio...

Page 53: ...moved and then reisntalled removed and then reisntalled removed and then reisntalled removed and then reisntalled If it is impossible to make proper If it is impossible to make proper If it is impossible to make proper If it is impossible to make proper If it is impossible to make proper adjustment consult a Y adjustment consult a Y adjustment consult a Y adjustment consult a Y adjustment consult ...

Page 54: ...ndicate worn brake pads and or brake system leakage If the brake fluid level is low be sure to check the brake pads for wear and the brake system for leakage Observe these precautions l When checking the fluid level make sure that the top of the brake fluid reservoir is level l Use only the recommended quality brake fluid otherwise the rubber seals may deteriorate causing leakage and poor braking ...

Page 55: ...o check the drive chain slack o check the drive chain slack 1 Place the motorcycle on a level surface and hold it in an upright position When checking and adjusting the drive chain slack the motorcycle should be positioned straight up and there should be no weight on it 2 Shift the transmission into the neutral position 3 Move the rear wheel by pushing the motorcycle to locate the tightest portion...

Page 56: ...cation chart otherwise it will quickly wear out especially when riding in dusty or wet areas Service the drive chain as follows The drive chain must be lubricated The drive chain must be lubricated The drive chain must be lubricated The drive chain must be lubricated The drive chain must be lubricated after washing the motorcycle or after washing the motorcycle or after washing the motorcycle or a...

Page 57: ...rence with cable movement Replace damaged cables movement Replace damaged cables movement Replace damaged cables movement Replace damaged cables movement Replace damaged cables as soon as possible to prevent as soon as possible to prevent as soon as possible to prevent as soon as possible to prevent as soon as possible to prevent unsafe conditions unsafe conditions unsafe conditions unsafe conditi...

Page 58: ...maha amaha amaha amaha dealer check or repair it dealer check or repair it dealer check or repair it dealer check or repair it dealer check or repair it Recommended lubricant Recommended lubricant Recommended lubricant Recommended lubricant Recommended lubricant Lithium soap based grease all purpose grease Checking the front fork Checking the front fork Checking the front fork Checking the front f...

Page 59: ...epair it Checking the steering Checking the steering Checking the steering Checking the steering Checking the steering Worn or loose steering bearings may cause danger Therefore the operation of the steering must be checked as follows at the intervals specified in the periodic maintenance and lubrication chart 1 Place a stand under the engine to raise the front wheel off the ground Securely suppor...

Page 60: ...when always shield your eyes when working near batteries In case working near batteries In case working near batteries In case working near batteries In case working near batteries In case of contact administer the of contact administer the of contact administer the of contact administer the of contact administer the following FIRST following FIRST following FIRST following FIRST following FIRST A...

Page 61: ...rmanent battery can cause permanent battery can cause permanent battery damage battery damage battery damage battery damage battery damage l l l l l T T T T To charge a sealed type MF o charge a sealed type MF o charge a sealed type MF o charge a sealed type MF o charge a sealed type MF battery battery battery battery battery a special constant a special constant a special constant a special const...

Page 62: ...added stability T T T T To service the front wheel o service the front wheel o service the front wheel o service the front wheel o service the front wheel 1 Stabilize the rear of the motorcycle by using a motorcycle stand or if an additional motorcycle stand is not available by placing a jack under the frame in front of the rear wheel 2 Raise the front wheel off the ground by using a motorcycle st...

Page 63: ... applying the front brake push down hard on the handlebars several times to check if the front fork compresses and rebounds smoothly Rear wheel Rear wheel Rear wheel Rear wheel Rear wheel T T T T To remove the rear wheel o remove the rear wheel o remove the rear wheel o remove the rear wheel o remove the rear wheel l l l l l It is advisable to have a Y It is advisable to have a Y It is advisable t...

Page 64: ...rque ightening torque ightening torque ightening torque ightening torque Axle nut 80 Nm 8 0 m kgf 58 ft lbf 7 Adjust the rear brake see pag 6 18 T T T T Troubleshooting roubleshooting roubleshooting roubleshooting roubleshooting Although Yamaha motorcycles receive a thorough inspection before shipment from the factory trouble may occur during operation Any problem in the fuel compression or igniti...

Page 65: ...e The engine does not start Have a Yamaha dealer check the vehicle The engine does not start Check the battery Operate the electric starter 4 Battery The engine turns over quickly The engine turns over slowly The battery is good Check the battery lead connections and charge the battery if necessary Dry Wet Open the throttle halfway and operate the electric starter T T T T Troubleshooting chart rou...

Page 66: ... detergent and water to with mild detergent and water to with mild detergent and water to with mild detergent and water to clean plastic clean plastic clean plastic clean plastic clean plastic l l l l l Do not use any harsh chemical Do not use any harsh chemical Do not use any harsh chemical Do not use any harsh chemical Do not use any harsh chemical products on plastic parts Be products on plasti...

Page 67: ...ction of the salt salt salt salt salt 2 Apply a corrosion protection spray on all metal including chrome and nickel plated surfaces to prevent corrosion After cleaning After cleaning After cleaning After cleaning After cleaning 1 Dry the motorcycle with a chamois or an absorbing cloth 2 Immediately dry the drive chain and lubricate it to prevent it from rusting 3 Use a chrome polish to shine chrom...

Page 68: ...while it is covering it with a tarp while it is covering it with a tarp while it is covering it with a tarp while it is still wet will allow water and still wet will allow water and still wet will allow water and still wet will allow water and still wet will allow water and humidity to seep in and cause humidity to seep in and cause humidity to seep in and cause humidity to seep in and cause humid...

Page 69: ... while turning the engine over the engine over the engine over the engine over the engine over 6 Lubricate all control cables and the pivoting points of all levers and pedals as well as of the sidestand centerstand 7 Check and if necessary correct the tire air pressure and then lift the motorcycle so that both of its wheels are off the ground Alternatively turn the wheels a little every month in o...

Page 70: ...vice SE SF SG type or higher Engine oil quantity Engine oil quantity Engine oil quantity Engine oil quantity Engine oil quantity Without oil filter element replacement 1 0 L 1 1 us qt 0 90 Imp qt With oil filter element replacement 1 1 L 1 2 us qt 1 0 Imp qt Air filter Air filter Air filter Air filter Air filter Air filter element Wet element Fuel Fuel Fuel Fuel Fuel Recommended fuel Unleaded gaso...

Page 71: ...cm2 Rear 100 kPa 15 psi 1 00 kgf cm2 Front wheel Front wheel Front wheel Front wheel Front wheel Wheel type Spoke wheel Rim size 21x1 60 Rear wheel Rear wheel Rear wheel Rear wheel Rear wheel Wheel type Spoke wheel Rim size 18x1 85 Front brake Front brake Front brake Front brake Front brake Type Single disc brake Operation Right hand operation Recommended fluid Dot 4 Rear brake Rear brake Rear bra...

Page 72: ... V Vehicle identification number ehicle identification number ehicle identification number ehicle identification number ehicle identification number 1 Vehicle identification number The vehicle identification number is stamped into the steering head pipe Record this number in the space provided The vehicle identification number is used to identify your motorcycle and may be used to register your mo...

Page 73: ... rendering inoperative by any person other than for purposes of maintenance repair or replacement of any device or element of design incorporated into any new vehicle for the purpose of noise control prior to its sale or delivery to the ultimate purchaser or while it is in use or 2 the use of the vehicle after such device or element of design has been removed or rendered inoperative by any person ...

Page 74: ...en the motorcycle is serviced Maintenance Maintenance Maintenance Maintenance Maintenance Date of Date of Date of Date of Date of Mileage Mileage Mileage Mileage Mileage Servicing dealer Servicing dealer Servicing dealer Servicing dealer Servicing dealer Remarks Remarks Remarks Remarks Remarks interval interval interval interval interval service service service service service name and address nam...

Page 75: ...torcycle available at that time for inspection and repairs at such dealer s place of business WARRANTY TRANSFER To tranfer the warranty from the original purchaser to any subsequent purchaser s it is imperative that the motorcycle be inspected and registered for warranty by an authorized Yamaha motorcycle dealer In order for this warranty to remain in effect this inspection and registration must t...

Page 76: ...ction at the time of sale and upon your request at any later date 3 Each Yamaha Motorcycle dealer is held responsible for his setup service and warranty repair work Q Is the warranty transferable to second owner s A Yes The remainder of the existing warranty can be transferred upon request The unit has to be inspected and re registered by an authorized Yamaha Motorcycle dealer for the policy to re...

Page 77: ... at your Yamaha dealer to see how comforting uninterrupted factory backed protection can be You don t have to pay anything for covered repairs There s no deductible to pay and repairs aren t pro rated You don t have any out of pocket expenses for covered repairs In addition Travel and Recreation Interruption Protection TRIP is included at no extra cost TRIP gives you up to 150 reimbursement per oc...

Page 78: ...ge right away and you ll rest easy knowing you ll have strong factory backed protection even after your Yamaha Limited Warranty expires A special note If visiting your dealer isn t convenient contact Yamaha with your Primary ID number your frame number We ll be happy to help you get the Y E S coverage you need Yamaha Service Marketing P O Box 6555 Cypress CA 90630 1 866 YES EXTD 1 866 937 3983 ...

Page 79: ...YAMAHA MOTOR DA AMAZÔNIA LTDA 1C6 F8199 12 LIT 11626 19 56 OWNER S MANUAL TT R230V ...

Reviews: