En
59
SETUP
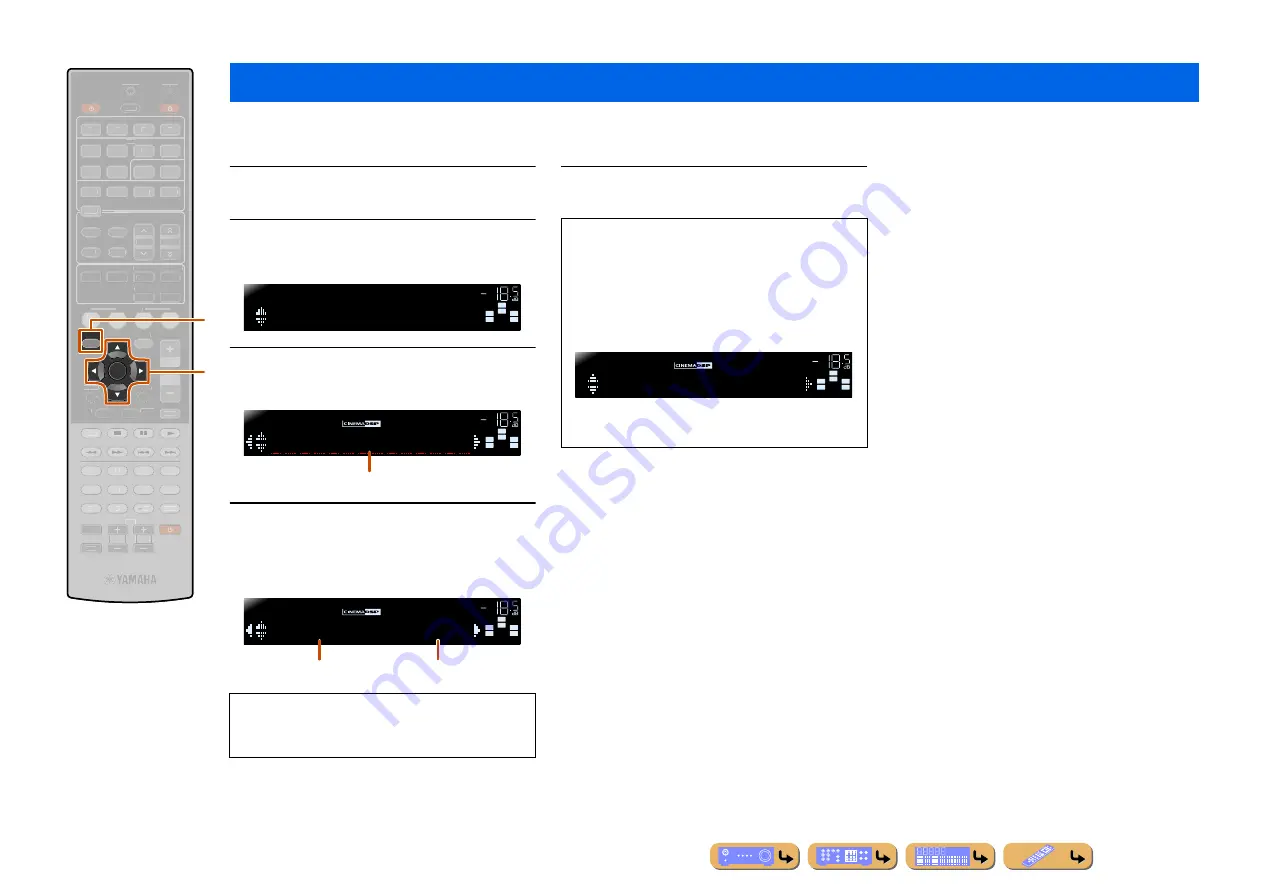
Although the sound field programs would satisfy you as they are with the default parameters, you can arrange the effect by setting the sound field elements (parameters).
To adjust the sound effects suitable for acoustical conditions of audio/video sources or rooms, perform the following operations.
1
Press
i
SETUP
to display the Setup menu.
2
Use
j
Cursor
B
/
C
to select “DSP
Parameter” and press
j
ENTER
.
3
Use
j
Cursor
D
/
E
to choose the sound
field program you want to edit.
4
Press
j
Cursor
B
/
C
to select the
parameter that you want to change, and
press
j
Cursor
D
/
E
to change the
parameter.
5
Once you have completed editing, press
i
SETUP
to close the Setup menu.
Setting sound field program parameters
i
SETUP
j
Cursor
B
/
C
/
D
/
E
j
ENTER
SETUP
ENTER
RECEIVER
SCENE
OPTION
RETURN
VOLUME
ENHANCER SUR. DECODE
STRAIGHT
DIRECT
HDMI
AV
AUDIO
TRANSMIT
SLEEP
1
2
3
4
1
2
3
4
1
2
5
6
V-AUX
TUNER
FM
INFO
MEMORY
AM
PRESET
TUNING
MOVIE
MUSIC
STEREO
BD
DVD
TV
CD
RADIO
MUTE
7
8
5
6
9
0
10
1
2
3
4
REC
ENT
TV
TV VOL
TV CH
TOP
MENU
POP-UP
MENU
DISPLAY
SOURCE
CODE SET
INPUT
MUTE
DOCK
[ A ]
[ B ]
j
i
When there are multiple parameters in the sound field
program you are configuring, repeat step 4 as
necessary to change other parameters.
SW
C
L
SL
SR
R
;
DSPParameter
SETUP
VOL.
SW
C
L
SL
SR
R
Sci-Fi
DSPPRM
VOL.
Sound field program to be edited
SW
C
L
SL
SR
R
DSPLevel
;;
0dB
DSPPRM
VOL.
Sound field parameter
Choices
■
To initialize the sound field parameters
To set the parameters of the sound field program back
to default, press
j
Cursor
C
repeatedly during
editing to select “Initialize” and press
j
Cursor
E
.
When following message is displayed, press
j
Cursor
E
again to initialize.
To cancel operations, press
j
Cursor
D
when “Press
Again” appears and return to the original display.
SW
C
L
SL
SR
R
Press Again
DSPPRM
VOL.
Summary of Contents for RX-V467
Page 1: ...Owner s Manual AV Receiver English ...
Page 83: ... 2010 Yamaha Corporation All rights reserved YC504A0 OMEN ...
Page 94: ...YST SW216 Subwoofer System UB OWNER S MANUAL ...
Page 111: ......
Page 112: ......


