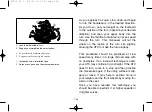
background image

7-49

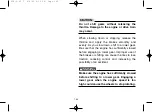
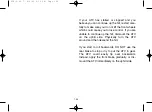
w

8

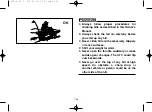
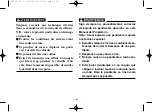
Always follow proper procedures for
climbing hills as described in this Owner’s
Manual.

8

Always check the terrain carefully before
you start up any hill.

8

Never climb hills with excessively slippery
or loose surfaces.

8

Shift your weight forward.

8

Never open the throttle suddenly or make
sudden gear changes. The ATV could flip
over backwards.

8

Never go over the top of any hill at high
speed. An obstacle, a sharp drop, or
another vehicle or person could be on the
other side of the hill.

OK

OK

 5TH-9-62 7  4/8/03 6:10 PM  Page 192

Summary of Contents for RAPTOR YFM80WS

Page 1: ...ROPRIÉTAIRE MANUAL DEL PROPIETARIO PRINTED IN JAPAN 2003 4 0 2 1 E F S 5TH 28199 62 YFM80WS PRINTED ON RECYCLED PAPER IMPRIME SUR PAPIER RECYCLE IMPRESO EN PAPEL RECICLADO YAMAHA MOTOR CO LTD 5TH 9 62 Hyosi 4 8 03 9 07 PM Page 1 ...

Page 2: ...5TH 9 62 3 4 8 03 6 06 PM Page 1 ...

Page 3: ...ability that have made Yamaha a leader in these fields This manual will provide you with a good basic understanding of the features and operation of this machine This manual includes important safety infor mation It provides information about special techniques and skills necessary to ride your machine It also includes basic maintenance and inspec tion procedures If you have any questions regardin...

Page 4: ... duda respecto al mantenimiento o manejo de la máquina consulte a su concesionario Yamaha FBU01050 INTRODUCTION Félicitations pour l achat du YFM80W de Yamaha Ce modèle représente le fruit de nom breuses années d expérience Yamaha dans la production de véhicules de sport de tourisme et de course Ce véhicule permettra à son pilote de pleinement apprécier la perfection technique et la fiabilité qui ...

Page 5: ... OPERATING YOUR MACHINE MAKE SURE YOU UNDERSTAND ALL INSTRUCTIONS 8 PAY CLOSE ATTENTION TO THE WARN ING AND CAUTION LABELS ON THE MACHINE 8 THIS ATV AND ANY OTHER ATV OVER 70cc SHOULD NOT BE OPERATED BY A CHILD UNDER 12 YEARS OF AGE 5TH 9 62 3 4 8 03 6 06 PM Page 4 ...

Page 6: ... PERMETTRE AUX MOINS DE 12 ANS DE PILOTER CE VTT ET TOUT VTT DE PLUS DE 70 cm3 MENSAJE IMPORTANTE SOBRE SEGURI DAD 8 LEA ÍNTEGRAMENTE ESTE MANUAL ANTES DE UTILIZAR LA MAQUINA ASEGÚRESE DE HABER COMPRENDIDO TODAS LAS INSTRUCCIONES 8 PRESTE GRAN ATENCIÓN A TODAS LAS ETIQUETAS DE PRECAUCIÓN Y ADVER TENCIA DE LA MAQUINA 8 ESTE ATV Y EN GENERAL CUALQUIER OTRO DE CILINDRADA SUPERIOR A 70 cc NO DEBE SER ...

Page 7: ...e only if they determine that the child has the ability to operate the ATV safely Your ATV was delivered with an adjustable speed limiter and also with an air intake restric tor plate Yamaha recommends that all begin ners start off with the speed limiter screw turned in and the air intake restrictor plate installed to limit the amount of speed available while they learn The limiter screw may be gr...

Page 8: ...sserrer progressivement la vis de réglage du limiteur au fur et à mesure qu il s est familiarisé avec son véhicule NOTA IMPORTANTE PARA LOS PADRES Este ATV no es un juguete Antes de permitir que su hijo conduzca este ATV deberá haber comprendido las instrucciones y advertencias contenidas en este Manual del Propietario Después asegúrese de que el niño las entienda y respete No todos los niños tien...

Page 9: ...ke restrictor plate can be removed Since removal of this plate will result in a significant increase in power turn the speed limiter completely back in again adjust it out in stages as you did before If your child is a beginner or is inexperienced he or she should take a training course 5TH 9 62 3 4 8 03 6 06 PM Page 8 ...

Page 10: ... EL tornillo del limitador podrá ir aflojándose poco a poco para ir aumentando la velocidad máxima a medida que el principiante se familia riza con el funcionamiento de este ATV Los padres deberán ser los que decidan el momento de darle más potencia al ATV después de haber comprobado que el joven ha mejorado su des treza Una vez el joven pueda operar el ATV con destreza a la velocidad máxima permi...

Page 11: ...afety Alert Symbol means ATTENTION BECOME ALERT YOUR SAFETY IS INVOLVED w Failure to follow WARNING instructions could result in severe injury or death to the machine operator a bystander or a person inspecting or repairing the machine cC A CAUTION indicates special precautions that must be taken to avoid damage to the machine NOTE A NOTE provides key information to make pro cedures easier or clea...

Page 12: ...implification des diverses opérations SBU00801 INFORMACIÓN IMPORTANTE SOBRE ESTE MANUAL LA INOBSERVANCIA DE LAS ADVERTENCIAS CONTENIDAS EN ESTE MANUAL PUEDE ACARRE AR LESIONES GRAVES O INCLUSO MORTALES La información de especial importancia se señala en este manual con las siguientes notaciones Q El símbolo de alerta de seguridad significa ATENCIÓN MANTÉNGASE ALERTA PELI GRA SU SEGURIDAD XR La ino...

Page 13: ...to operate this machine on any public street road or highway This machine complies with all applicable OFF ROAD noise level and spark arrester laws and regulations in effect at the time of manufacture Please check your local riding laws and regula tions before operating this machine 5TH 9 62 3 4 8 03 6 06 PM Page 12 ...

Page 14: ...éhicule SBU00011 AVISO IMPORTANTE Esta máquina ha sido fabricada y diseñada úni camente para su utilización FUERA DE CARRETERA Por lo tanto es ilegal y al mismo tiempo peligroso circular con ella por autopis tas carreteras o cualquier otra vía pública La máquina satisface todos los requisitos sobre nivel sonoro y emisión de chispas en circulación FUERA DE CARRETERA establecidos por la reglamentaci...

Page 15: ...2003 by Yamaha Motor Co Ltd 1st edition April 2003 All rights reserved Any reprinting or unauthorized use without the written permission of Yamaha Motor Co Ltd is expressly prohibited Printed in Japan 5TH 9 62 3 4 8 03 6 06 PM Page 14 ...

Page 16: ...sión o uso no autorizado sin el consenti miento escrito de Yamaha Motor Co Ltd Impreso en Japón YFM80WS MANUEL DU PROPRIÉTAIRE 2003 par Yamaha Motor Co Ltd 1ère édition Avril 2003 Tous droits réservés Toute réimpression ou utilisation non autorisée sans la permission écrite de la Yamaha Motor Co Ltd est formellement interdite Imprimé au Japon 5TH 9 62 3 4 8 03 6 06 PM Page 15 ...

Page 17: ...r switches 4 3 Throttle lever 4 7 Speed limiter 4 9 Front brake lever 4 13 Rear brake pedal and lever 4 15 Parking brake 4 17 Shift pedal 4 19 Fuel tank cap 4 19 Fuel cock 4 21 Choke lever 4 23 Seat 4 25 PRE OPERATION CHECKS 5 1 Front and rear brakes 5 5 Fuel 5 9 Engine oil 5 11 Final gear oil 5 15 Throttle lever 5 17 Fittings and fasteners 5 17 Switches 5 17 Battery 5 17 Tires 5 19 How to measure...

Page 18: ...iding downhill 7 57 Crossing a slope 7 61 Crossing through shallow water 7 65 Riding over rough terrain 7 69 Sliding and skidding 7 71 What to do if 7 75 What to do 7 75 PERIODIC MAINTENANCE AND ADJUSTMENT 8 1 Owner s manual and tool kit 8 3 Periodic maintenance lubrication 8 7 Engine oil 8 13 Final gear oil 8 19 Spark plug inspection 8 23 Air filter cleaning 8 27 Air intake restrictor plate remov...

Page 19: ...ke lever lubrication 8 55 Knuckle shaft and steering shaft lubrication 8 55 Wheel removal 8 57 Wheel installation 8 57 Battery 8 59 Replenishing the battery fluid 8 63 Fuse replacement 8 67 Troubleshooting 8 69 Troubleshooting chart 8 73 CLEANING AND STORAGE 9 1 A Cleaning 9 1 B Storage 9 7 SPECIFICATIONS 10 1 Conversion Table 11 1 9 10 11 5TH 9 62 3 4 8 03 6 06 PM Page 18 ...

Page 20: ...e de transmission finale 5 16 Levier d accélération 5 18 Visserie 5 18 Contacteurs 5 18 EMPLACEMENTS DES ÉTIQUETTES D AVERTISSEMENT ET DE CARACTÉRISTIQUES 1 3 CONSIGNES DE SÉCURITÉ 2 2 DESCRIPTION ET IDENTIFICATION DU VÉHICULE 3 2 Numéros d identification 3 4 Numéro d identification de la clé 3 6 Numéro d identification du véhicule 3 8 Étiquette de modèle 3 10 FONCTION DES COMMANDES 4 2 Contacteur...

Page 21: ...ite du VTT 7 2 Se familiariser avec le VTT 7 4 Conduire avec attention et discernement 7 6 Être attentif aux conditions du terrain 7 28 Prise de virages 7 42 Montée des pentes 7 46 Descente des pentes 7 58 Traversée latérale d une pente 7 62 Traversée des eaux peu profondes 7 66 Conduite sur terrain accidenté 7 70 Dérapage et patinage 7 72 Que faire si 7 76 Que faire 7 76 ENTRETIENS ET RÉGLAGES PÉ...

Page 22: ...in arrière 8 48 Réglage de l embrayage 8 52 Contrôle et lubrification des câbles 8 54 Lubrification du levier de frein et des pédales de frein et de sélection 8 56 Lubrification de l axe d articulation et de l arbre de direction 8 56 Dépose des roues 8 58 Repose des roues 8 58 Batterie 8 60 Ajustement du niveau de liquide de batterie 8 64 Remplacement du fusible 8 68 Dépannage 8 70 Tableau de dépa...

Page 23: ...e control 4 4 Interruptores del manillar 4 4 Palanca de aceleración 4 8 Limitador de velocidad 4 10 Palanca del freno delantero 4 14 Palanca y pedal del freno trasero 4 16 Freno de estacionamiento 4 18 Pedal del cambio 4 20 Tapón del depósito de combustible 4 20 Grifo de combustible 4 22 Palanca del starter 4 24 Asiento 4 26 COMPROBACIONES A EFFECTUAR ANTES DE PONER EN MARCHA LA MAQUINA 5 3 Frenos...

Page 24: ...movimiento y acelerar 6 16 Para decelerar 6 20 Rodaje del motor 6 22 Estacionamiento 6 26 Estacionamiento en pendiente 6 28 Accesorios y carga 6 30 Conducción del ATV 7 2 Familiarizandose con su ATV 7 4 Conduzca con cuidado y sentido común 7 6 Vigile donde conduce 7 28 Como girar con su ATV 7 42 Subida de pendientes 7 46 Bajada de pendientes 7 58 Cruce de pendientes 7 62 Cruce de aguas poco profun...

Page 25: ...spección de las zapatas de los frenos delantero y trasero 8 42 Ajuste del juego libre de la palanca del freno delantero 8 44 Ajuste de la palanca y el pedal de freno trasero 8 48 Ajuste del embrague 8 52 Inspección y lubricación de los cables 8 54 Lubricación del padal del freno y de cambios palanca del freno 8 56 Engrase del eje de la articulación y del eje de dirección 8 56 Desmontaje de una rue...

Page 26: ...LIMPIEZA Y ALMACENAMIENTO 9 2 A Limpieza 9 2 B Almacenamiento 9 8 ESPECIFICACIONES 10 11 Tabla de conversion 11 2 9 11 10 5TH 9 62 3 4 8 03 6 06 PM Page 25 ...

Page 27: ...he labels on your machine They contain important information for safe and proper operation of your ATV Never remove any labels from your ATV If a label becomes difficult to read or comes off a replacement label is available from your Yamaha dealer 1 3 4 5 2 5TH 9 62 3 4 8 03 6 06 PM Page 26 ...

Page 28: ...ng this ATV if you are under the age of 12 increases your chance of severe injury or death NEVER permit children under age 12 to operate this ATV 4EM 21697 31 Adult supervision required for children under age 16 q WARNING NEVER ride as a passenger Passengers can cause a loss of control resulting in SEVERE INJURY or DEATH 5FE 2151H 01 4EM 21697 31 5FE 2151H 01 5TH 9 62 3 4 8 03 6 06 PM Page 27 ...

Page 29: ...SSUREOROVERLOADINGCAN CAUSELOSS OF CONTROL LOSS OF CONTROL CAN RESULT IN SEVERE INJURYORDEATH OPERATINGTIREPRESSURE Set with tires cold 9Recommended FRONT 20 kPa 0 20 kgf cm2 2 9 psi REAR 20 kPa 0 20 kgf cm2 2 9 psi 9Minimum FRONT 17 kPa 0 17 kgf cm2 2 5 psi REAR 17 kPa 0 17 kgf cm2 2 5 psi 9Never set tire pressure below minimum It could cause the tire to dislodge from the rim LOADING 9Maximum Veh...

Page 30: ...TV use can result in SEVERE INJURY or DEATH ALWAYS USE NEVER USE NEVER CARRY NEVER USE AN APPROVED ON PUBLIC PASSENGERS WITH DRUGS HELMET AND ROADS OR ALCOHOL PROTECTIVE GEAR NEVER operate 9 without proper training or instruction 9 at speeds too fast for your skills or the conditions 9 on public roads a collision can occur with another vehicle 9 with a passenger passengers affect balance and steer...

Page 31: ...apposées sur le véhicule Elles contiennent des informations importantes pour la sécurité et le bon fonctionnement du VTT Ne jamais décoller d étiquette se trouvant sur le VTT Si une étiquette devient difficile à lire ou se décolle s adresser à un concessionnaire Yamaha qui en fournira une autre 1 3 4 5 2 5TH 9 62 3 4 8 03 6 06 PM Page 30 ...

Page 32: ...perating this ATV if you are under the age of 12 increases your chance of severe injury or death NEVER permit children under age 12 to operate this ATV 4EM 21697 31 Adult supervision required for children under age 16 q WARNING NEVER ride as a passenger Passengers can cause a loss of control resulting in SEVERE INJURY or DEATH 5FE 2151H 01 4EM 21697 31 5FE 2151H 01 5TH 9 62 3 4 8 03 6 06 PM Page 3...

Page 33: ...EPRESSUREOROVERLOADINGCAN CAUSELOSS OF CONTROL LOSS OF CONTROL CAN RESULT IN SEVERE INJURYORDEATH OPERATINGTIREPRESSURE Set with tires cold 9Recommended FRONT 20 kPa 0 20 kgf cm2 2 9 psi REAR 20 kPa 0 20 kgf cm2 2 9 psi 9Minimum FRONT 17 kPa 0 17 kgf cm2 2 5 psi REAR 17 kPa 0 17 kgf cm2 2 5 psi 9Never set tire pressure below minimum It could cause the tire to dislodge from the rim LOADING 9Maximum...

Page 34: ...r ATV use can result in SEVERE INJURY or DEATH ALWAYS USE NEVER USE NEVER CARRY NEVER USE AN APPROVED ON PUBLIC PASSENGERS WITH DRUGS HELMET AND ROADS OR ALCOHOL PROTECTIVE GEAR NEVER operate 9 without proper training or instruction 9 at speeds too fast for your skills or the conditions 9 on public roads a collision can occur with another vehicle 9 with a passenger passengers affect balance and st...

Page 35: ...odas las etiquetas de la máquina Contienen información importante para la utilización correcta y segura de su ATV No elimine ninguna de las etiquetas colocadas en la ATV Si alguna de ellas se vuelve difícil de leer o se des prende su concesionario Yamaha podrá facilitarle una de recambio 1 3 4 5 2 5TH 9 62 3 4 8 03 6 06 PM Page 34 ...

Page 36: ...ing this ATV if you are under the age of 12 increases your chance of severe injury or death NEVER permit children under age 12 to operate this ATV 4EM 21697 31 Adult supervision required for children under age 16 q WARNING NEVER ride as a passenger Passengers can cause a loss of control resulting in SEVERE INJURY or DEATH 5FE 2151H 01 4EM 21697 31 5FE 2151H 01 5TH 9 62 3 4 8 03 6 06 PM Page 35 ...

Page 37: ...RESSUREOROVERLOADINGCAN CAUSELOSS OF CONTROL LOSS OF CONTROL CAN RESULT IN SEVERE INJURYORDEATH OPERATINGTIREPRESSURE Set with tires cold 9Recommended FRONT 20 kPa 0 20 kgf cm2 2 9 psi REAR 20 kPa 0 20 kgf cm2 2 9 psi 9Minimum FRONT 17 kPa 0 17 kgf cm2 2 5 psi REAR 17 kPa 0 17 kgf cm2 2 5 psi 9Never set tire pressure below minimum It could cause the tire to dislodge from the rim LOADING 9Maximum V...

Page 38: ...ATV use can result in SEVERE INJURY or DEATH ALWAYS USE NEVER USE NEVER CARRY NEVER USE AN APPROVED ON PUBLIC PASSENGERS WITH DRUGS HELMET AND ROADS OR ALCOHOL PROTECTIVE GEAR NEVER operate 9 without proper training or instruction 9 at speeds too fast for your skills or the conditions 9 on public roads a collision can occur with another vehicle 9 with a passenger passengers affect balance and stee...

Page 39: ...precautions SEVERE INJURY OR DEATH can result if you do not follow these instructions 8 Read this manual and all labels carefully and follow the operating procedures described 8 Never operate an ATV without proper instruc tion 8 Always follow the age recommendation A child under 12 years old should never operate an ATV with engine size greater than 70cc A child under 16 years old should never oper...

Page 40: ...ée de plus de 70 cm3 Un enfant de moins de 16 ans ne doit jamais conduire un VTT d une cylindrée de plus de 90 cm3 SBU01042 EL ATV NO ES UN JUGUETE SU CONDUCCION PUEDE RESULTAR PELIGROSA El ATV se con duce de modo distinto a otros vehículos como los coches o las motocicletas Se puede producir rápi damente una colisión o un vuelco incluso durante maniobras de rutina como giros conducción en laderas...

Page 41: ...n any paved surfaces including sidewalks driveways parking lots and streets 8 Never operate an ATV on any public street road or highway even a dirt or gravel one 8 Never operate an ATV without wearing an approved motorcycle helmet that fits properly You should also wear eye protection goggles or face shield gloves boots long sleeved shirt or jacket and long pants 8 Never consume alcohol or drugs b...

Page 42: ...s ou une veste et un pantalon 8 Ne jamais consommer d alcool certains médicaments ou des drogues avant ou pen dant la conduite de ce VTT 8 No permita que un muchacho menor de 16 años maneje un ATV sin la supervisión de un adulto ni que utilice el vehículo de forma con tinuada si carece de la destreza suficiente para manejarlo con seguridad 8 No lleve nunca un pasajero en el ATV 8 Evite siempre cir...

Page 43: ... ATV each time you use it to make sure it is in safe operating condition Always follow the inspection and maintenance procedures and schedules described in this manual 8 Always keep both hands on the handlebars and both feet on the footrests of the ATV dur ing operation 8 Always go slowly and be extra careful when operating on unfamiliar terrain Always be alert to changing terrain conditions when ...

Page 44: ...èrement attentif au changement des conditions du ter rain 8 No conduzca nunca a velocidades excesivas para su técnica o las condiciones reinantes Circule siempre a la velocidad adecuada al terreno la visibilidad las condiciones de manejo y su experiencia 8 No intente hacer acrobacias saltos u otras habilidades 8 Inspeccione siempre el ATV cada vez que vaya a utilizarlo para asegurarse de que se en...

Page 45: ...at faster speeds Do not turn at excessive speed 8 Never operate the ATV on hills too steep for the ATV or for your abilities Practice on smaller hills before attempting larger hills 8 Always follow proper procedures for climbing hills as described in this manual Check the terrain carefully before you start up any hill Never climb hills with excessively slippery or loose surfaces Shift your weight ...

Page 46: ...nner trop brusquement des gaz ne changer abruptement de vitesse Ne jamais passer le sommet d une colline à vitesse élevée 8 No conduzca nunca sobre terreno excesiva mente accidentado suelto o resbaladizo hasta que haya aprendido y practicado las destrezas necesarias para controlar el ATV sobre tales terrenos Observe siempre la máxima precaución en este tipo de terrenos 8 Siga los procedimientos ad...

Page 47: ...hicle to lean sharply to one side Go straight down the hill where possible 8 Always follow proper procedures for crossing the side of a hill as described in this manual Avoid hills with excessively slippery or loose surfaces Shift your weight to the uphill side of the ATV Never attempt to turn the ATV around on any hill until you have mastered the turning technique described in this manual on leve...

Page 48: ...ns ce manuel Éviter dans la mesure du possible d effectuer la traversée latérale d une pente trop raide 8 Para bajar pendientes o frenar en las mis mas observe siempre los procedimientos adecuados que se indican en este manual Estudie a fondo el terreno antes de comenzar a bajar la pendiente Desplace su peso hacia atrás No baje nunca una pendiente a toda velocidad Evite bajar pendientes en un ángu...

Page 49: ...edure described in this manual 8 Always check for obstacles before operating in a new area 8 Never attempt to operate over large obsta cles such as large rocks or fallen trees Always follow proper procedures when oper ating over obstacles as described in this man ual 8 Always be careful when skidding or sliding Learn to safely control skidding or sliding by practicing at low speeds and on level sm...

Page 50: ...isque de perte de contrôle du véhicule 8 Siga siempre los procedimientos adecuados si se cala el motor o el vehículo rueda hacia atrás mientras sube una pendiente Cuando suba una pendiente utilice la marcha adecuada y man tenga una velocidad uniforme para evitar que se cale el motor Si se cala éste o el vehículo rueda hacia atrás siga el procedimiento espe cial de frenado descrito en este manual A...

Page 51: ... ability Test your brakes after leaving water If necessary apply them several times to let friction dry out the linings 8 Always use the size and type tires specified in this manual 8 Always maintain proper tire pressure as described in this manual 8 Never modify an ATV through improper instal lation or use of accessories 5TH 9 62 3 4 8 03 6 06 PM Page 50 ...

Page 52: ...e des pneus recommandée dans ce manuel 8 Ne jamais modifier un VTT en installant ou utilisant incorrectement des accessoires 8 No conduzca nunca el ATV en aguas rápidas o más profundas que las recomendadas en este manual Recuerde que si se mojan los frenos puede disminuir su capacidad para detener la máquina Compruebe los frenos cuando salga del agua Si es necesario aplí quelos varias veces para q...

Page 53: ...g w 8 Always turn off the engine when refueling 8 Do not refuel right after the engine has been running and is still very hot 8 Do not spill gasoline on the engine or exhaust pipe muffler when refueling Never refuel while smoking or while in the vicinity of sparks open flames or other sources of ignition such as the pilot lights of water heaters and clothes dryers Gasoline can catch fire You could...

Page 54: ...e les chauffe eau et séchoirs Ne pas fumer L essence peut s enflammer Il y a risque de brûlures 8 No sobrepase nunca la capacidad de carga especificada para el ATV La carga deberá ir convenientemente distribuida y sujeta Reduzca la velocidad y siga las instrucciones del manual cuando tenga que transportar car gas o efectuar un remolque Observe una dis tancia de frenado mayor XR 8 Pare siempre el m...

Page 55: ...e or inhale a lot of gaso line vapor or get some gasoline in your eyes see your doctor immediately If gasoline spills on your skin wash with soap and water If gasoline spills on your clothing change your clothes w Always operate your ATV in an area with adequate ventilation Never start or run the engine in a closed area Exhaust fumes are poisonous and may cause loss of con sciousness and death wit...

Page 56: ...ont toxiques et peuvent entraîner très rapidement une syncope et la mort 8 Cuando transporte la máquina en otro vehículo asegúrese de que se mantenga vertical y que el grifo de combustible se encuentre en posición OFF Cerrado De lo contrario podrían producirse fugas en el carburador o en el depósito de com bustible 8 La gasolina es venenosa En caso de ingestión de gasolina inhalación abun dante de...

Page 57: ...cator light 4 Fuel cock 12 Front brake lever 5 Rear wheel 13 Throttle lever 6 Footrest 14 Main switch 7 Shift pedal 15 Fuel tank cap 8 Front wheel 16 Handlebar switches NOTE The machine you have purchased may differ slightly from those shown in the figures of this manual q w e y o 0 1 2 3 4 5 6 r t y u i 5TH 9 62 3 4 8 03 6 06 PM Page 56 ...

Page 58: ...t légèrement différer de ce modèle tout terrain SBU00032 DESCRIPCION E IDENTIFICA CION DE LA MAQUINA 1 Sillín 10 Freno de estacionamiento 2 Cubierta delantera 11 Luz de control de punto 3 Pedal del freno muerto 4 Grifo de combustible 12 Palanca del freno delantero 5 Rueda trasera 13 Palanca del aceleración 6 Apoyapié 14 Interruptor principal 7 Pedal del cambio 15 Tapón del depósito 8 Rueda delante...

Page 59: ...cation number and model label informa tion in the spaces provided for assistance when ordering spare parts from a Yamaha dealer or for reference in case the vehicle is stolen 1 KEY IDENTIFICATION NUMBER 2 VEHICLE IDENTIFICATION NUMBER 3 MODEL LABEL INFORMATION 1 6 5TH 9 62 3 4 8 03 6 06 PM Page 58 ...

Page 60: ...IFICATION DU VÉHICULE 3 RENSEIGNEMENTS FOURNIS SUR L ÉTIQUETTE DE MODÈLE SBU00600 Registro de los números de identificación Anote el número de identificación de la llave el de identificación del vehículo y la información de la etiqueta de modelo en los espacios provistos al efecto para facilitar los trámites cuando pida repuestos a un concesionario Yamaha o como referencia en caso de sustracción d...

Page 61: ...tion number is stamped on the key as shown in the following illustration This number can be used for ordering a new key q 1 Key identification number 1 Numéro d identification de la clé 1 Número de identificación de la llave 5TH 9 62 3 4 8 03 6 06 PM Page 60 ...

Page 62: ...ation suivan te Ce numéro sert de référence lors de la com mande d une nouvelle clé SBU00035 Número de identificación de la llave El número de identificación de la llave va estam pado en la misma como puede verse en la siguiente ilustración Este número puede utili zarse para pedir una llave nueva 5TH 9 62 3 4 8 03 6 06 PM Page 61 ...

Page 63: ...tification number is stamped into the frame NOTE The vehicle identification number is used to identify your machine q 1 Vehicle identification number 1 Numéro d identification du véhicule 1 Número de identificación del vehículo 5TH 9 62 3 4 8 03 6 06 PM Page 62 ...

Page 64: ...N B Le numéro d identification du véhicule permet d identifier le véhicule SBU00036 Número de identificación del vehículo El número de identificación del vehículo va estampado en el chasis NOTA El número de identificación del vehículo se emplea para la identificación de la máquina 5TH 9 62 3 4 8 03 6 06 PM Page 63 ...

Page 65: ...e location in the illustration Record the information on this label in the space provided This information will be needed to order spare parts from your Yamaha dealer 1 1 Model label 1 Étiquette de modèle 1 Etiqueta de modelo 5TH 9 62 3 4 8 03 6 06 PM Page 64 ...

Page 66: ... seront nécessaires lors de la com mande de pièces de rechange auprès d un concessionnaire Yamaha SBU00787 Etiqueta de modelo La etiqueta de modelo se encuentra en el lugar indicado en la ilustración Anote la información de esta etiqueta en los espacios previstos al efecto Esta información facilitará los trámites cuando pida repuestos a un concesionario Yamaha 5TH 9 62 3 4 8 03 6 06 PM Page 65 ...

Page 67: ...n switch Functions of the respective switch positions are as follows ON The engine can be started only at this position OFF All electrical circuits are switched off The key can be removed in this position OFF ON 5TH 9 62 3 4 8 03 6 06 PM Page 66 ...

Page 68: ...rrêt Tous les circuits électriques sont coupés La clé peut être retirée SBU00040 FUNCIONES DE CONTROL SBU00042 Interruptor principal Las funciones del interruptor según su posición son las siguientes ON El motor sólo se puede poner en marcha en esta posición OFF Todos los circuitos eléctricos están desconecta dos En esta posición puede extraerse la llave 4 5TH 9 62 4 5 4 8 03 6 07 PM Page 1 ...

Page 69: ...op switch controls ignition and can be used at all times to stop the engine especially in an emergency The engine will not start or run when the engine stop switch is turned to OFF q 1 Neutral indicator light N 1 Témoin de point mort N 1 Luz de control de punto muerto N q w 1 Engine stop switch ENG STOP 2 Start switch START 1 Coupe circuit du moteur ENG STOP 2 Contacteur du démarreur START 1 Inter...

Page 70: ...u ne tourne pas quand son coupe circuit est sur OFF SBU00043 Luces de control SBU00603 Luz de control de punto muerto N Se enciende cuando la transmisión está en punto muerto SBU00053 Interruptores del manillar SBU11580 Interruptor de parada del motor ENG STOP Asegúrese de que el interruptor de parada del motor esté en la posición RUN antes de arran car el motor El interruptor de parada del motor ...

Page 71: ... for details NOTE If the starter switch is pushed with the main switch ON and the engine stop switch OFF the starter motor will be activated but the engine will not start To start the engine be sure to position the engine stop switch at RUN 1 1 Start switch START 1 Contacteur du démarreur START 1 Interruptor de arranque START 5TH 9 62 4 5 4 8 03 6 07 PM Page 4 ...

Page 72: ...eur en marche s assurer que le coupe circuit du moteur est sur RUN SBU00056 Interruptor de arranque START Cuando se pulsa este interruptor el motor de arranque hace que gire el motor principal yY Antes de poner en marcha el motor ver ins trucciones de arranque para más detalles ver página 6 4 NOTA Si se pulsa el interruptor de arranque con el interruptor principal en ON contacto y el inte rruptor ...

Page 73: ...ngine check the throttle to be sure it is operating smoothly Make sure it returns to the idle position as soon as the lever is released w Malfunction of the throttle could make it diffi cult to speed up or slow down when you need to This could cause an accident Check the operation of the throttle lever before you start the engine If the throttle does not work smoothly check for the cause Correct t...

Page 74: ...iger le pro blème avant de conduire le véhicule ou consul ter un concessionnaire Yamaha SBU00063 Palanca de aceleración Una vez que el motor gira con desplazando la palanca de aceleración se aumenta la velocidad de giro Para regular la velocidad del vehículo varíe la posición del acelerador Este lleva un muelle de retorno que hace que disminuya la velocidad y el motor vuelva al ralentí cuando se r...

Page 75: ...ed in and the air intake restrictor plate installed to limit the amount of speed available while they learn The limiter screw may be gradually turned out to increase maximum speed as the beginner becomes more familiar with operating the ATV Parents should decide when to adjust the ATV for more power as their youngster s riding skills improve Once the ATV rider can operate with skill at the top spe...

Page 76: ...a vitesse maxi male permise par le limiteur de vitesse il peut alors retirer le cache réducteur d air admis SBU01051 Limitador de velocidad El limitador de velocidad evita que se abra por completo el acelerador incluso cuando se pre siona al máximo la palanca del acelerador Enroscando el ajustador se limita la potencia máxima del motor disponible y se reduce la velocidad máxima del ATV El ATV se s...

Page 77: ... restrictor plate will cause the engine to run roughly at higher speeds For air intake restrictor plate removal instruc tions see page 8 33 w Improper adjustment of the speed limiter and throttle could cause throttle cable damage or improper throttle operation You could lose control have an accident or be injured Do not turn the speed adjuster out more than 20 mm or the throttle cable could be dam...

Page 78: ... el joven pueda operar el ATV con destre za a la velocidad máxima permitida sólo por el ajus te del limitador de velocidad podrá pensarse en extraer la placa de restricción de la admisión de aire Puesto que la extracción de esta placa ocasio nará un incremento significante de la potencia deberá volver a apretar el limitador de la velocidad luego vaya aflojándolo poco a poco como había hecho antes ...

Page 79: ...lever The front brake lever is located on the right han dlebar Pull it toward the handlebar to apply the front brake q 1 Front brake lever 1 Levier de frein avant 1 Palanca del freno delantero 5TH 9 62 4 5 4 8 03 6 07 PM Page 12 ...

Page 80: ...uve sur la droite du guidon Le serrer pour actionner le frein avant SBU00070 Palanca del freno delantero La palanca del freno delantero se encuentra en el manillar derecho Apriétela contra el manillar para aplicar el freno delantero 5TH 9 62 4 5 4 8 03 6 07 PM Page 13 ...

Page 81: ...nd the rear brake lever is located on the left handlebar Push down on the pedal or pull the lever toward the handlebar to apply the rear brake q q 1 Brake pedal 1 Pédale de frein 1 Pedal del freno 1 Rear brake lever 1 Levier de frein arrière 1 Palanca del freno trasero 5TH 9 62 4 5 4 8 03 6 07 PM Page 14 ...

Page 82: ...a pédale ou actionner le levier vers le guidon afin de faire fonctionner le frein arrière SBU00732 Pedal del freno y palanca del freno trasero El pedal de freno se encuentra situado en el lado derecho del ATV y la palanca de freno tra sero en el manillar izquierdo Pise el pedal o apriete la palanca contra el manillar para aplicar el freno trasero 5TH 9 62 4 5 4 8 03 6 07 PM Page 15 ...

Page 83: ...could start mov ing unexpectedly if the parking brake is not applied This could cause loss of con trol or a collision 8 Always be sure you have released the parking brake before you begin to ride The brake could overheat if you ride the ATV without releasing the parking brake You could lose braking performance which could cause an accident You could also wear out the brakes prematurely q 1 1 Lock ...

Page 84: ...sque de surchauffer Les performances de freinage pourraient être réduites ce qui pourrait entraîner un accident De plus les freins risquent de s user prématu rément SBU00075 Freno de estacionamiento Utilizar el freno de estacionamiento siempre que se desee poner en marcha el motor o aparcar la máquina sobre todo en pendientes Para apli car el freno de estacionamiento accionar la palanca del freno ...

Page 85: ... the bottom position EBU00092 Fuel tank cap Remove the fuel tank cap by turning it counter clockwise q 3 2 1 N q 1 Shift pedal N Neutral position 1 Pédale de sélection N Position de la point mort 1 Pedal del cambio N Posición del punto muerto 1 Fuel tank cap 1 Bouchon de réservoir de carburant 1 Tapón del depósito de combustible 5TH 9 62 4 5 4 8 03 6 07 PM Page 18 ...

Page 86: ...oir de carburant en le tournant dans le sens inverse des aiguilles d une montre SBU00083 Pedal del cambio Esta motocicleta va provista de una caja de cambios de 3 velocidades en toma constante El pedal del cambio se encuentra situado en el lado izquierdo del motor El punto muerto corresponde a la posición inferior SBU00092 Tapón del depósito de combustible Quite el tapón del depósito de combustibl...

Page 87: ...this position when the engine is not running ON With the lever in this position fuel flows to the carburetor Normal riding is done with the lever in this position RES This indicates reserve If you run out of fuel while riding turn the lever to this position THEN FILL THE FUEL TANK AT THE FIRST OPPORTUNITY After refuelling return the fuel cock lever to the ON position 5TH 9 62 4 5 4 8 03 6 07 PM Pa...

Page 88: ...OIR DÈS QUE POS SIBLE Après le ravitaillement replacer le levier sur ON SBU00093 Grifo de combustible Este grifo suministra combustible desde el depósito al carburador El grifo tiene tres posiciones OFF cerrado Con la palanca en esta posi ción no circula combustible Gire siem pre la palanca a esta posición cuando el motor no esté en marcha ON abierto Con la palanca en esta posi ción circula combus...

Page 89: ...on See page 6 3 a 1 2 3 a Choke lever 2 Half open warming up position 1 Fully open ON 3 Closed OFF a Levier de choke 2 Mi course position de chauffe 1 Pleine course ON 3 Fermé OFF a Palanca del starter 1 Abierto completamente ON 2 Semiabierto posición de calentamiento 3 Cerrado OFF 5TH 9 62 4 5 4 8 03 6 07 PM Page 22 ...

Page 90: ... est décrite à la section Mise en marche d un moteur froid Pour plus de détails voir à la page 6 4 SBU00096 Palanca del starter El starter se utiliza para poner en marcha el motor cuando está frío Para su correcto mane jo ver Arranque del motor en frío Consulte la página 6 4 5TH 9 62 4 5 4 8 03 6 07 PM Page 23 ...

Page 91: ...jection on the front of the seat into the seat holder and push down on the seat at the rear NOTE Make sure that the seat is securely fitted q q w 1 Seat lock lever 1 Loquet de selle 1 Palanca de bloqueo del sillín 1 Projection 2 Seat holder 1 Saillie 2 Supports de selle 1 Saliente 2 Soporte del asiento 5TH 9 62 4 5 4 8 03 6 07 PM Page 24 ...

Page 92: ... à l arrière de la selle N B S assurer que la selle est bien fixée SBU00566 Asiento Para extraer el asiento tire de la palanca de bloqueo del asiento haca arriba y levante el asiento por la parte trasera Para instalar el asiento inserte el saliente de la parte frontal del asiento en el soporte del asien to y empuje hacia abajo el asiento por la parte trasera NOTA Asegúrese de que el asiento quede ...

Page 93: ... 5 9 5 11 Engine oil 9 Check oil level 9 Fill with oil if necessary 5 11 5 15 8 13 8 17 Final gear oil 9 Check for leakage 5 15 8 19 8 21 Throttle 9 Check for proper throttle cable operation 5 17 Wheels and tires 9 Check tire pressure wear and damage 5 19 5 25 8 57 Fittings and fasteners 9 Check all fittings and fasteners 5 17 Battery 9 Check fluid level 5 17 8 59 8 65 9 Fill with distilled water ...

Page 94: ...iveau d huile 9 Ajouter de l huile si nécessaire 5 12 5 16 8 14 8 18 Huile du carter de 9 Contrôler s il n y a pas de fuites transmission finale 5 16 8 20 8 22 Accélérateur 9 Vérifier le fonctionnement des câbles d accélérateur 5 18 Roues et pneus 9 Vérifier la pression de gonflage des pneus le voile 5 20 5 26 8 58 la tension des rayons les écrous d axes Visserie 9 Contrôler tous les assemblages e...

Page 95: ...cesario 5 10 5 12 Aceite de motor 9 Verifique el nivel 9 Rellene aceite si es necesario 5 12 5 16 8 14 8 18 Aceite del engranaje final 9 Controlar las pérdidas visualmente 5 16 8 20 8 22 Acelerador 9 Verifique el funcionamiento del cable 5 18 Ruedas y neumáticos 9 Verifique la presión desgaste y dañados 5 20 5 26 8 58 Accesorios y elementos de 9 Verifique todos apriételos según sea necesario 5 18 ...

Page 96: ...T peut être utili sé en toute sécurité Toujours respecter les procédés et intervalles de contrôle et d entretien repris dans ce manuel Omettre ces contrôles accroît les risques d accident ou d endommagement du véhicule XR Inspeccionar siempre el ATV cada vez que vaya a utilizarse para asegurarse de que está en condiciones de funcionar sin peligro Seguir siempre los procedimientos y programas de in...

Page 97: ...e brake levers and brake pedal They should move smoothly and there should be a firm feeling when the brakes are applied If not have the ATV inspected by a Yamaha dealer Brake operation Test the brakes at slow speed after starting out to make sure they are working properly If the brakes do not provide proper braking perfor mance inspect the brake linings for wear See page 8 41 5TH 9 62 4 5 4 8 03 6...

Page 98: ...s de frein ne sont pas usées Voir page 8 42 SBU04773 Frenos delantero y trasero Palancas de los frenos y pedal del freno 8 Compruebe si las palancas de los frenos y el pedal del freno tienen el juego libre correcto Si el juego libre no es correcto ajústelo Vea las páginas 8 44 8 50 8 Compruebe el funcionamiento de las palan cas de los frenos y del pedal del freno Deberán moverse con suavidad y tra...

Page 99: ...ATV if you find any problem with the brakes or you could lose braking ability which could lead to an acci dent If a problem cannot be corrected by the adjustment procedures provided in this man ual have the ATV inspected by a Yamaha dealer 5TH 9 62 4 5 4 8 03 6 07 PM Page 32 ...

Page 100: ...nt les procédés repris dans ce manuel faire inspecter le VTT par un concessionnaire Yamaha XR Compruebe siempre los frenos al poner en movimiento el ATV No circule con el ATV si se detecta algún fallo o si se prevé que podría perderse capacidad de frenada ya que esto podría dar lugar a un accidente Si un problema no puede subsanarse por los procedimientos de ajuste indicados en este manual pida a ...

Page 101: ... damage to internal engine parts such as the valves and piston rings as well as to the exhaust system Recommended fuel Regular gasoline For Europe Regular unleaded gasoline only with a research octane number of 91 or higher For Australia Unleaded gasoline only Fuel tank capacity Total 6 8 L Reserve 0 9 L 1 Filler tube 2 Fuel level 1 Tube de remplissage 2 Niveau de carburant 1 Tubo de llenado 2 Niv...

Page 102: ... detonación emplee una marca diferente de gasolina o un octanaje mayor yY Emplee sólo gasolina sin plomo El empleo de gasolina con plomo causaría graves daños en las partes internas del motor como por ejemplo en le válvulas anillos de pistón sistema de escape etc Carburant recommandé Pour l Europe uniquement essence nor male sans plomb d un indice d octane recherche de 91 ou plus Pour l Australie ...

Page 103: ...uel especially on the engine or exhaust pipe which can cause a fire and severe injury Wipe up any spilled fuel immediately 8 Do not refuel right after the engine has been running and is still very hot 8 Be sure the fuel tank cap is closed secure ly EBU10842 Engine oil Make sure the engine oil is at the specified level Add oil as necessary See page 8 13 5TH 9 62 4 5 4 8 03 6 07 PM Page 36 ...

Page 104: ...st conforme aux spécifications Ajouter de l huile si nécessaire Voir page 8 14 XR 8 No llene el depósito de combustible en exceso ya que el combustible se dilata al calentarse y si se llena demasiado el depósito podría derramarse debido al calor del motor o del sol 8 Tenga cuidado de no derramar combusti ble especialmente sobre el motor o el tubo de escape ya que podría producirse un incendio con ...

Page 105: ... additives Do not use oils with a diesel specification of CD or oils of a higher quality than specified In addition do not use oils labeled ENERGY CONSERVING II or higher 8 Make sure that no foreign material enters the crankcase Recommended engine oil type and quantity See page 10 2 5TH 9 62 4 5 4 8 03 6 07 PM Page 38 ...

Page 106: ...qu aucun corps étranger ne pénètre dans le carter yY 8 Para evitar patinaje del embrague porque el aceite de motor también lubrica el embrague no mezcle ningún aditivo quí mico No emplee aceites con especifica ción diesel de CD ni aceites de calidad más alta que la especificada Adicionalmente no emplee aceites etique tados con ENERGY CONSERVING II ni superiores 8 Asegúrese de que no se introduzca ...

Page 107: ...as necessary See pages 8 19 8 21 for details If desired an SAE 80W90 hypoid gear oil may be used for all conditions NOTE GL 4 is a quality and additive rating GL 5 or GL 6 rated hypoid gear oils may also be used Recommended oil SAE80API GL 4 Hypoid gear oil 5TH 9 62 4 5 4 8 03 6 07 PM Page 40 ...

Page 108: ...lement être utilisées SBU00493 Aceite del engranaje final Asegúrese de que el aceite del engranaje final está al nivel especificado Añada aceite si es necesario Para más detalles vea las páginas 8 20 8 22 Si lo desea podrá utilizar un aceite de engrana jes hipoidales SAE 80W90 para todas las condi ciones NOTA El GL 4 es un aceite de calidad con aditivos y también pueden emplearse los aceites de en...

Page 109: ...s Always check the tightness of chassis fittings and fasteners before a ride Take the machine to a Yamaha dealer or refer to the Service Manual for correct tightening torque EBU11700 Switches Check the operation of all switches Have a Yamaha dealer repair as necessary for proper operation EBU00499 Battery Check fluid level and fill if necessary Use only distilled water if refilling is necessary Se...

Page 110: ...eau distillée pour rétablir le niveau Voir pages 8 60 à 8 66 SBU01083 Palanca del acelerador Compruebe si es correcto el funcionamiento de la palanca del acelerador Deberá acelerar con suavidad y volver a la posición de ralentí al sol tarla Si es necesario solicite su reparación a un concesionario Yamaha para que funcione correctamente SBU11620 Accesorios y elementos de fijación Antes de emprender...

Page 111: ...attention to the following 1 The tires listed below have been approved by Yamaha Motor Co Ltd for this model Other tire combinations are not recommended 2 The tires should be set to the recom mended pressure 8 Recommended tire pressure Front 20 kPa 0 20 kgf cm2 0 20 bar Rear 20 kPa 0 20 kgf cm2 0 20 bar Manufacturer Size Type Front DUNLOP AT18 7 7 KT586 Rear DUNLOP AT18 8 7 KT587 5TH 9 62 4 5 4 8 ...

Page 112: ...ticos Utilice siempre los neumáticos recomendados XR El uso de neumáticos inadecuados o la con ducción del vehículo con los neumáticos inflados a presiones incorrectas o desigua les puede dar lugar a pérdidas de control con riesgo de accidente Preste atención a los puntos siguientes 1 Los neumáticos incluidos en la lista que sigue han sido aprobados por Yamaha Motor Co Ltd para este mode lo No es ...

Page 113: ...g condi tions The following are minimums Front 17 kPa 0 17 kgf cm2 0 17 bar Rear 17 kPa 0 17 kgf cm2 0 17 bar 4 Use no more than the following pres sures when seating the tire beads Front 230 kPa 2 3 kgf cm2 2 3 bar Rear 230 kPa 2 3 kgf cm2 2 3 bar Higher pressures may cause the tire to burst Inflate the tires very slowly and carefully Fast inflation could cause the tire to burst 5TH 9 62 4 5 4 8 ...

Page 114: ...Gonfler les pneus très lentement et avec beaucoup de pré caution Un gonflage rapide risque de faire éclater le pneu 8 Compruebe y ajuste las presiones con los neumáticos fríos 8 Las presiones deberán ser iguales en ambos lados 3 Si las presiones son inferiores a las previstas en condiciones extremas de marcha los neumáticos pueden llegar a separarse de las llantas Las siguientes presiones son las ...

Page 115: ...rst reading to be incorrect Set pressure with tires cold Set tire pressures to the following specifications q 1 Low pressure tire gauge 1 Manomètre basse pression pour pneus 1 Manómetro de baja presión 20 kPa 0 20 kgf cm2 0 20 bar 17 kPa 0 17 kgf cm2 0 17 bar 23 kPa 0 23 kgf cm2 0 23 bar Recommended pressure Minimum Maximum 20 kPa 0 20 kgf cm2 0 20 bar 17 kPa 0 17 kgf cm2 0 17 bar 23 kPa 0 23 kgf ...

Page 116: ...manómetro de baja presión va incluido en el equipo standard Efectúe dos mediciones de la presión del neumático y utilice la segunda El polvo o la suciedad depositados en el manóme tro pueden hacer que la primera sea incorrecta Ajuste la presión con los neumáticos fríos Ajuste la presión de los neumáticos a los siguientes valores 20 kPa 0 20 kgf cm2 0 20 bar 17 kPa 0 17 kgf cm2 0 17 bar 23 kPa 0 23...

Page 117: ...00160 Tire wear limit When the tire groove decreases to 3 mm due to wear replace the tire a a Tire wear limit a Límite d usure de pneu a Límite de desgaste de los neumáticos 5TH 9 62 4 5 4 8 03 6 07 PM Page 50 ...

Page 118: ...n pneu dont la profondeur de sculptu re est réduite à 3 mm SBU00160 Límite de desgaste de los neumáticos Sustituya el neumático cuando la profundidad del dibujo de éste se haya reducido a 3 mm debido al desgaste 5TH 9 62 4 5 4 8 03 6 07 PM Page 51 ...

Page 119: ...before riding the ATV w Read the Owner s Manual carefully to become familiar with all controls Loss of control could cause an accident or injury If there is a control or function you do not understand ask your Yamaha dealer 5TH 9 62 4 5 4 8 03 6 07 PM Page 52 ...

Page 120: ... Si l explication d une commande ou d une fonction pose un problème consulter un concessionnaire Yamaha SBU00162 MANEJO Antes de empezar a conducir el ATV lea aten tamente el Manual del Propietario XR Lea atentamente el Manual del Propietario para familiarizarse con todos los mandos La pérdida del control podría ocasionar un acci dente o lesiones Si no entiende algún mando o función pregunte a su ...

Page 121: ...r If the control cables are frozen or do not work smoothly you could be unable to control the ATV which could lead to an accident or collision 1 Set the parking brake 2 Turn the fuel cock to ON 3 Turn the main switch to ON and the engine stop switch to RUN 4 Shift the transmission into neutral 5TH 9 62 6 4 8 03 9 06 PM Page 2 ...

Page 122: ... le coupe circuit du moteur sur RUN 4 Mettre la boîte de vitesses au point mort SBU00580 Arranque del motor en frío XR En tiempo frío asegúrese siempre de que todos los cables de mando funcionen con suavidad antes de poner en movimiento el ATV Si los cables están congelados o no funcionan con suavidad podría perderse el control del vehículo y producirse un acci dente 1 Aplique el freno de estacion...

Page 123: ...eference to the fig ure Position 1 Cold engine start ambient temperature below 30 C Position 2 Warming up position Position 3 Cold engine start ambient temperature above 25 C and warm engine start position CHOKE ON O F F 0 10 20 30 C a 3 1 1 2 3 1 Fully open ON 2 Half open warming up position 3 Closed OFF a Choke lever 1 Pleine course ON 2 Mi course position de chauffe 3 Fermé OFF a Levier de chok...

Page 124: ...moteur Position 3 Moteur froid température ambiante supérieure à 25 C et moteur chaud NOTA Este modelo va provisto de un sistema de corte del circuito de encendido El motor puede ponerse en marcha en las siguientes condicio nes a Cuando la transmisión esté en punto muerto Deberá encenderse la luz indica dora de punto muerto Si no se enciende pida a un concesionario Yamaha que la inspeccione b Con ...

Page 125: ...ranking should be as short as possible to preserve battery ener gy Do not crank the engine more than 10 sec onds on each attempt 7 If the engine is started with the starter choke in position 1 the choke lever should be returned to position 2 to warm up the engine If the engine is started with the starter choke in position 2 keep the starter choke in this position to warm up the engine 5TH 9 62 6 4...

Page 126: ...pour réchauffer le moteur Si le moteur est mis en marche sur la position 2 conserver cette position pour r échauffer le moteur 6 Cierre por completo la palanca del acelera dor y ponga en marcha el motor pulsando el interruptor de arranque NOTA Si el motor no arranca suelte el interruptor de arranque y vuelva a pulsarlo Espere unos segundos antes del siguiente intento Los inten tos deberán ser lo m...

Page 127: ...e warming up the engine until it idles smoothly and return the choke lever to position 3 before riding cC See the Engine break in section prior to operating engine for the first time 5TH 9 62 6 4 8 03 9 06 PM Page 8 ...

Page 128: ...ction Rodage du moteur avant la première utilisation du véhicule 8 Deje que el motor se caliente hasta que el ralentí se mantenga uniforme y devuelva la palanca del estrangulador a la posición 3 antes de poner el vehículo en movimiento yY Antes de poner en marcha el motor por pri mera vez consulte el apartado Rodaje del motor 5TH 9 62 6 4 8 03 9 06 PM Page 9 ...

Page 129: ...be used The throttle should be opened slightly EBU00184 Warming up To get maximum engine life always warm up the engine before starting off Never accelerate hard with a cold engine To see whether or not the engine is warm check if it responds to the throttle normally with the choke lever turned off 5TH 9 62 6 4 8 03 9 06 PM Page 10 ...

Page 130: ...ès qu il répond immédiatement aux accélérations avec le levier de starter en position fermée SBU00181 Arranque en caliente Para poner en marcha el motor estando calien te consultar la sección Arranque en frío No deberá utilizarse la palanca del starter ESTRANGULADOR DE ARRANQUE Acelerar ligeramente SBU00184 Calentamiento Para que el motor alcance su máxima duración permita siempre que se caliente ...

Page 131: ...ts original posi tion and repeatedly depress the shift pedal until it stops cC Do not coast for long periods with the engine off and do not tow the machine a long dis tance Even with gears in neutral the trans mission is only properly lubricated when the engine is running Inadequate lubrication may damage the transmission q 3 2 1 N 1 Shift pedal N Neutral position 1 Pédale de sélection N Position ...

Page 132: ...suffisant risque d endomma ger la boîte de vitesses SBU00200 Cambio de velocidades Este modelo está dotado de una caja de cam bios de 3 velocidades hacia delante con embra gue centrífugo automático La caja de cambios le permite controlar la canti dad de potencia disponible en una velocidad dada o para la puesta en marcha aceleración subida de pendientes maniobras marcha atrás etc Para cambiar a pu...

Page 133: ...ive train may result 2 Shift into first gear and release the shift pedal 3 Open the throttle gradually 4 Once the machine has attained adequate speed release the throttle lever 5 Shift into second gear and release the shift pedal 6 Open the throttle gradually 7 Follow the same procedure when shifting to the next higher gear 5TH 9 62 6 4 8 03 9 06 PM Page 14 ...

Page 134: ...nt 7 Procéder de la même façon pour engager la vitesse suivante SBU00650 Para poner la máquina en movimiento y ace lerar 1 Suelte la palanca de aceleración yY Cierre siempre el acelerador cuando cambie las marchas De lo contrario podrían produ cirse daños en el motor y en la cadena de transmisión 2 Seleccione la primera velocidad y suelte el pedal del cambio 3 Acelere gradualmente 4 Cuando la máqu...

Page 135: ...6 17 w Always open the throttle gradually Opening the throttle abruptly would increase the chance of an accident It could make the machine wheelie or overturn 5TH 9 62 6 4 8 03 9 06 PM Page 16 ...

Page 136: ...es augmentent les risques díaccident Le véhicule pourrait se cabrer ou se renverser XR Acelere siempre de modo gradual ya que si lo hiciese con brusquedad aumentaría el riesgo de accidente La máquina podría pati nar en redondo o volcar 5TH 9 62 6 4 8 03 9 06 PM Page 17 ...

Page 137: ...per use of the brakes or shifting can cause the tires to lose traction reducing control and increasing the possibility of an accident w Make sure the engine has sufficiently slowed before shifting to a lower gear Engaging a lower gear when the engine speed is too high could make the wheels stop rotating This could cause loss of control an accident and injury It could also cause engine or drive tra...

Page 138: ...r conséquent un acci dent Cela risque également d endommager le moteur ou la transmission SBU00208 Para decelerar Para decelerar o parar soltar el acelerador y aplicar los frenos suave y uniformemente Al perder velocidad el vehículo cambiar a una marcha más corta Antes de reducir a una mar cha inferior esperar a que el régimen del motor descienda lo suficiente El uso incorrecto de los frenos o del...

Page 139: ...put an excessive load on it for the first several hours of running During the first 20 hours the various parts in the engine wear and polish themselves to the correct oper ating clearances During this period prolonged full throttle opera tion or any condition which might result in exces sive engine heating must be avoided However momentary 2 3 seconds maximum full throttle operation under load doe...

Page 140: ...tefois l utilisation momentanée 2 à 3 secondes maximum à pleine accélération en charge n est pas préjudiciable SBU02091 Rodaje del motor No hay un período más importante en la vida de su máquina que las primeras 20 horas Por ello le rogamos que lea cuidadosamente las siguientes observaciones Puesto que se trata de un motor nuevo no lo sobrecargue durante las primeras horas de marcha Durante las pr...

Page 141: ...rs 8 Avoid continuous operation above half throt tle Allow a cooling off period of five to ten minutes after every hour of operation Vary the speed of the machine from time to time Do not operate it at one set throttle position 10 20 hours 8 Avoid prolonged operation above 3 4 throttle Rev the machine freely through the gears but do not use full throttle at any time After break in 8 Avoid prolonge...

Page 142: ...ine ouverture des gaz Varier la vitesse de temps à autre Cada secuencia de aceleración a fondo debe ir seguida de un período de reposo suficientemen te largo con el motor rodando a bajas revolucio nes para que pueda disipar el calor temporal mente acumulado Si observa alguna anomalía durante este período consulte a un concesiona rio Yamaha 0 10 horas 8 Evite el funcionamiento continuado de la máqu...

Page 143: ...top the engine and shift into neutral Turn the fuel cock to OFF and apply the parking brake q 1 1 Lock plate 1 Plaque de verrouillage 1 Placa de bloqueo 1 Locked position 1 Verrouillé 1 Posición bloqueada 5TH 9 62 6 4 8 03 9 06 PM Page 24 ...

Page 144: ...Placer le robinet de carburant sur OFF et serrer le frein de stationnement SBU00211 Estacionamiento Al estacionar la máquina pare el motor y cam bie a punto muerto Cierre el grifo del combusti ble colocándolo en posición OFF y aplique el freno de estacionamiento 5TH 9 62 6 4 8 03 9 06 PM Page 25 ...

Page 145: ...ut the ATV in low gear apply the parking brake and block the front and rear wheels with rocks or other objects Do not park the ATV at all on hills that are so steep you could not walk up them easily 1 Bring the machine to a stop by applying the brakes in low gear 2 Stop the engine 3 With the rear brake lever and pedal applied apply the parking brake and slowly release the rear brake pedal 5TH 9 62...

Page 146: ...frein arrière puis actionner le frein de stationne ment Relâcher ensuite lentement la pédale de frein SBU02201 Estacionamiento en pendientes XR Evite el estacionamiento en cuestas u otros terrenos inclinados Si se estaciona en una cuesta u otro terreno inclinado el ATV podría ponerse en movimiento sin control con riesgo de accidente Si es necesario aparcar en una pendiente ponga la transmi sión de...

Page 147: ...s 8 Choose only accessories designed for your ATV Your Yamaha dealer has a variety of genuine Yamaha accessories Other acces sories may also be available on the market However it is not possible for Yamaha to test all non Yamaha accessories nor have any control over the quality or suitability of them Choose a genuine Yamaha accessory or one that is equivalent in design and quality 5TH 9 62 6 4 8 0...

Page 148: ...ilité Choisir des accessoires Yamaha d origine ou des accessoires de conception et qualité équi valentes SBU00221 Accesorios y carga SBU00222 Accesorios Los accesorios pueden afectar al manejo y con trol de su ATV Si piensa montar un accesorio o de una ATV con accesorios tenga en cuenta lo siguiente 8 Elija solamente accesorios diseñados para su ATV Su concesionario Yamaha dispone de una amplia va...

Page 149: ...nterfere with your ability to control the ATV Examples include but are not limited to a heavy or bulky object attached to the handle bars which could make steering difficult an accessory that limits your ability to move around on the seat or one that limits your view 8 Use extra caution when riding an ATV with accessories The ATV may handle differently than it does without accessories 5TH 9 62 6 4...

Page 150: ...enue de route et sa maniabilité pourraient changer 8 Los accesorios deben montarse de manera rígida y firme Un accesorio que pueda cam biar de posición o que se salga durante la marcha puede afectar a su capacidad para controlar la ATV 8 No monte un accesorio donde pueda interferir con su capacidad para controlar la ATV por ejemplo no fije al manillar un objeto pesado que pueda dificultar el manej...

Page 151: ...ories so that you can carry cargo or tow a trailer you must use common sense and good judgement Keep the following points in mind 8 Never exceed the weight limits shown An overloaded ATV can be unstable MAXIMUM LOADING LIMIT Vehicle loading limit total weight of rider cargo and accessories 95 kg 5TH 9 62 6 4 8 03 9 06 PM Page 32 ...

Page 152: ...e SBU00224 Carga Con su equipamiento original este ATV no está diseñado para transportar cargas ni arrastrar remolques Si se decide añadir accesorios para poder transportar cargas o arrastrar remolques deberá hacerse con sentido común y sensatez Tenga en cuenta lo siguiente 8 No sobrepase nunca los límites de peso esti pulados Con exceso de carga el ATV puede volverse inestable CARGA MAXIMA Límite...

Page 153: ...ve around A shifting load can cause an accident 8 Make sure the load does not interfere with controls or your ability to see where you are going 8 Ride more slowly than you would without a load The more weight you carry the slower you should go Although conditions vary it is good practice not to exceed 2nd gear when ever you are carrying heavier loads or when towing a trailer 8 Allow more braking ...

Page 154: ...tance de freinage plus grande Un véhicule plus lourd nécessite en effet une distance d arrêt supérieure 8 Coloque la carga en las bandejas lo más cerca posible del centro del vehículo Situé la carga en la parte delantera de la bandeja tra sera Centre los pesos en sentido transversal 8 Ate firmemente la carga a los portabultos Asegúrese de que la carga del remolque no pueda moverse de un lado a otr...

Page 155: ...ATV w Never exceed the stated load capacity for this ATV Overloading this ATV or carrying or towing cargo improperly could cause changes in vehicle handling which could lead to an accident Cargo should be proper ly distributed and securely attached Reduce speed when carrying cargo or pulling a trail er Allow greater distance for braking 5TH 9 62 6 4 8 03 9 06 PM Page 36 ...

Page 156: ...e lors de la conduite avec un charge ment ou lors du remorquage Prévoir une plus grande distance de freinage 8 Si es inevitable tomar curvas muy cerradas hágalo a muy baja velocidad 8 Evite las pendientes y los terrenos accidenta dos Elija el terreno con cuidado El peso aña dido al vehículo afecta a su estabilidad y su manejabilidad XR No sobrepase nunca la carga máxima estipu lada para este ATV E...

Page 157: ...7 1 OK OK OK Riding Your ATV 5TH 9 62 7 4 8 03 6 10 PM Page 144 ...

Page 158: ...7 2 Conduite Conducción du del VTT ATV 7 OK 5TH 9 62 7 4 8 03 6 10 PM Page 145 ...

Page 159: ... the basic techniques well before attempting more difficult maneuvers Riding your new ATV can be a very enjoyable activity providing you with hours of pleasure But it is essential to familiarize yourself with the operation of the ATV to achieve the skill neces sary to enjoy riding safely Before you begin to ride be sure you have read this Owner s Manual completely and understand the operation of t...

Page 160: ...8 Lea también todas las etiquetas de advertencia y precaución de su ATV 7 4 FBU10531 SE FAMILIARISER AVEC LE VTT Ce VTT est un véhicule de loisirs Cette section Conduite du VTT donne des instructions géné rales de conduite récréative du VTT Les compé tences et les techniques décrites dans cette section peuvent toutefois s appliquer à tous les types de conduite La conduite du VTT exige la maîtrise ...

Page 161: ...til you are totally familiar with the machine s handling and performance character istics w Never operate this ATV without proper instruction Beginning and inexperienced operators should regularly practice the skills and the operating techniques described in this Owner s Manual The risk of an accident is greatly increased if the operator does not know how to operate the ATV properly in dif ferent ...

Page 162: ... adecuado del ATV en las diferentes situaciones y tipos de terreno 7 6 CONDUIRE AVEC ATTENTION ET DIS CERNEMENT L utilisateur inexpérimenté doit suivre des cours de pilotage Les pilotes débutants ou inexpérimentés doivent suivre un cours de formation auprès d un ins tructeur certifié Même un pilote expérimenté doit se familiariser avec ce nouveau VTT en le conduisant lente ment Ne pas exploiter à ...

Page 163: ...es well before attempting more difficult maneuvers Not recommended for children under 12 years of age w A child under 12 should never operate an ATV with engine size greater than 70cc Use by children of ATVs that are not recommend ed for their age can lead to severe injury or death of the child 5TH 9 62 7 4 8 03 6 10 PM Page 150 ...

Page 164: ...omendados para su edad puede causar lesiones graves e inclu so la muerte del menor 7 8 La conduite du véhicule exige la maîtrise de techniques spéciales qui s acquièrent au fur et à mesure de son utilisation Veiller à bien maîtriser les techniques de base avant d entreprendre des manœuvres plus diffi ciles Ne jamais permettre aux moins de 12 ans de conduire ce véhicule XG Ne jamais permettre aux m...

Page 165: ... seat is to allow the operator to shift position as need ed during operation It is not for carrying passengers Carrying a passenger on this ATV greatly reduces your ability to balance and control this ATV It could cause an acci dent resulting in harm to you and or your passenger 5TH 9 62 7 4 8 03 6 10 PM Page 152 ...

Page 166: ...a un accidente con el consiguiente riesgo de lesiones para el conductor y o el pasajero 7 10 Ce véhicule est destiné uniquement au trans port du pilote les passagers sont interdits XG Ne jamais transporter de passager La longue selle est conçue afin de permettre au pilote d adapter sa position aux conditions du ter rain Elle n est pas destinée au transport d un passager La présence d un passager p...

Page 167: ...eases your chances of a severe head injury or death in the event of an accident Operating without eye protection can result in an acci dent and increases your chances of a severe injury in the event of an accident Operating without protective clothing increases your chances of severe injury in the event of an accident e w r t q 1 Protective clothing 2 Goggles 3 Gloves 4 Boots 5 Helmet 1 Vêtement d...

Page 168: ... conduite sans vêtements de protection augmente les risques de blessures graves en cas d accident Equipo Lleve siempre un casco homologado de su talla Asimismo deberá llevar protección ocular gafas o visera guantes botas camisa o chaqueta de manga larga pantalones largos XR No conduzca nunca este ATV sin llevar puesto un casco de motociclista homologa do protección ocular y la vestimenta ade cuada...

Page 169: ...cks listed on page 5 1 before riding for safety and proper care of the machine w Always inspect your ATV each time you use it to make sure the ATV is in safe operating condition Always follow the inspection and maintenance procedures and schedules described in the Owner s Manual Failure to inspect the ATV before operating or failure to properly maintain the ATV increases the pos sibility of an acc...

Page 170: ...veiller à son entretien correct augmente les risques d accident ou d endommagement No conduzca después de haber consumido alcohol o drogas La capacidad de conducción del piloto disminuye debido a la influencia de las drogas o el alcohol XR No consuma alcohol o drogas antes o duran te la conducción de este ATV Comprobaciones previas a la conducción Para la debida seguridad y el cuidado correcto de ...

Page 171: ...roper or uneven tire pressure may cause loss of con trol increasing your risk of an accident Do not operate at speeds too fast for your skills or the conditions w Always go at a speed that is proper for the terrain visibility and operating conditions and your experience Operating this ATV at speeds too fast for your skills or the condi tions increases your chances of losing con trol of the ATV whi...

Page 172: ...augmente les risques d accidents dus à une perte de contrôle XR Utilice siempre los neumáticos del tamaño y tipo especificados para este vehículo en las páginas 5 20 5 22 de este Manual del Propietario Mantenga siempre los neumáticos a la presión de inflado correcta que se indica en la página 5 24 de este Manual del Propietario El uso de neumáticos inadecuados en este ATV o la con ducción del mism...

Page 173: ... limit the amount of speed available while they learn The limiter may be grad ually adjusted to increase maximum speed as the beginner becomes more familiar with operating the ATV Parents should decide when to adjust the ATV for more power as their youngster s riding skills improve Once the ATV rider can operate with skill at the top speed permitted by adjusting the speed limiter alone the air int...

Page 174: ...t en place sous peine de provoquer des à coups à hauts régimes Limitador de régimen Para los conductores sin experiencia en el manejo de este modelo el vehículo va provisto de un limitador de velocidad en el alojamiento de la palanca del ace lerador El limitador controla la potencia y la velocidad punta de la máquina Girando el tornillo hacia dentro disminuye la velocidad punta girándolo hacia fue...

Page 175: ...hen adding addi tional loads w 8 Never exceed the stated load capacity for this ATV 8 Cargo should be properly distributed and securely attached 8 Reduce speed when carrying cargo or pulling a trailer Allow greater distance for braking 8 Always follow the instructions in your Owner s Manual for carrying cargo or pulling a trailer MAXIMUM LOADING LIMIT Vehicle loading limit total weight of cargo ri...

Page 176: ... las instrucciones para la extracción de la placa de restricción de la admisión de aire vea la página 8 34 Carga y accesorios Extreme las precauciones cuando conduzca la máquina con un peso suplementario como por ejemplo accesorios o simplemente una carga La manejabilidad de la máquina puede verse afectada negativamente Cuando transporte car gas adicionales reduzca la velocidad XR 8 No sobrepase n...

Page 177: ...d both feet on the footboards of your ATV during operation Removing even one hand or foot can reduce your ability to control the ATV or could cause you to lose your balance and fall off of the ATV If you remove a foot from a footboard your foot or leg may come into contact with the rear wheels which could injure you or cause an accident 5TH 9 62 7 4 8 03 6 10 PM Page 164 ...

Page 178: ...er les roues arrière ce qui risque de provoquer un accident ou de blesser le conducteur Durante la conducción Mantenga siempre los pies sobre las estriberas mientras conduce De lo contrario los pies podrían entrar en contacto con las ruedas trase ras XR Durante la conducción mantenga siempre las manos sobre el manillar y ambos pies sobre las estriberas del ATV Soltar una mano o levantar un pie pod...

Page 179: ...ssories All parts and accessories added to this vehicle should be genuine Yamaha or equivalent compo nents designed for use on this ATV and should be installed and used according to instructions Improper installation of acces sories or modification of this vehicle may cause changes in handling which in some situations could lead to an accident If you have questions consult an authorized ATV dealer...

Page 180: ...Dans le moindre doute ne pas hésiter à consulter un concessionnaire Yamaha Evite los saltos y las acrobacias Podría perder el control de la máquina o volcar XR No intente nunca realizar acrobacias tales como giros o saltos No trate de presumir Modificaciones XR No modifique nunca este ATV mediante el montaje o empleo inadecuado de acceso rios Las piezas y accesorios añadidos a este vehículo han de...

Page 181: ...vent burns avoid touching the exhaust system Park the machine in a place where pedestrians or children are not likely to touch it w Do not touch the hot exhaust system Do not park the machine during or after operation in a place where others might be likely to touch it 5TH 9 62 7 4 8 03 6 10 PM Page 168 ...

Page 182: ...e puisse toucher l échappe ment pendant et après une randonnée Sistema de escape El sistema de escape de la máquina está muy caliente durante el funcionamiento del vehículo y cuando éste lleva poco tiempo parado Para prevenir quemaduras evite tocar el sistema de escape Estacione la máquina en un lugar en el que sea poco probable que un peatón o un niño la toquen XR No toque el sistema de escape mi...

Page 183: ... can cause loss of con trol w Always avoid paved surfaces including side walks driveways parking lots and streets ATVs are designed for off road use only Paved surfaces may seriously affect han dling and control of the ATV and may cause the vehicle to go out of control 5TH 9 62 7 4 8 03 6 10 PM Page 170 ...

Page 184: ...é du VTT et provoquer sa perte de contrôle VIGILE DONDE CONDUCE Esta máquina está diseñada exclusivamente para su empleo fuera de carretera La conduc ción sobre superficies pavimentadas puede pro vocar una pérdida del control XR Evite siempre circular por superficies pavi mentadas como aceras caminos privados zonas de estacionamiento y calles Los ATV están diseñados únicamente para su uso fuera de...

Page 185: ... result in collisions with other vehicles w Never operate this ATV on any public street road or highway even a dirt or gravel one You can collide with another vehicle In many areas it is illegal to operate ATVs on public streets roads and highways 5TH 9 62 7 4 8 03 6 10 PM Page 172 ...

Page 186: ... véhi cules La conduite des VTT sur des rues routes ou autoroutes est illégale dans la plupart des pays No conduzca por calles carreteras u otras vías públicas La conducción por vías públicas puede dar lugar a la colisión con otros vehículos XR No conduzca nunca este ATV por calles carreteras u otras vías públicas ni siquiera por caminos de tierra o grava Podría colisio nar con otro vehículo En mu...

Page 187: ...errain Always be alert to changing terrain conditions when operating the ATV w Do not operate on excessively rough slip pery or loose terrain until you have learned and practiced the skills necessary to control the ATV on such terrain Failure to use extra care when operating on excessively rough slippery or loose terrain could cause loss of traction or vehicle control which could result in an acci...

Page 188: ...sque d entraîner la perte de trac tion ou de contrôle du véhicule ce qui pour rait causer un accident ou un capotage Conozca el terreno en el que va a conducir Conduzca con precaución si no conoce la zona Esté atento a los hoyos piedras o raíces del terreno y a otros riesgos ocultos que podrían desestabilizar a la máquina XR Circule despacio y extreme las precauciones cuando conduzca este ATV por ...

Page 189: ...bracket as a trailer hitch w Always mount a caution flag on the machine to make you more visible when operating in areas where you might not be seen by other off road vehicles Watch carefully for other vehicles Do not ride in areas posted no trespassing Do not ride on private property without getting per mission 5TH 9 62 7 4 8 03 6 10 PM Page 176 ...

Page 190: ...s propriétés Ne pas rouler sur des ter rains privés avant d en avoir obtenu la permis sion Cuando conduzca por zonas en las que pudiera no ser visto con facilidad tales como terrenos desérticos lleve una bandera de precaución en la máquina NO utilice el soporte del mástil de esta bandera como enganche de remolque XR Lleve siempre colocada una bandera de pre caución en la máquina para hacerle más v...

Page 191: ...faces the ATV is designed for off road use only and handling maneuvers are more difficult to perform on pavement Set the parking brake and follow the instruction on page 6 3 to start the engine Once it has warmed up you are ready to begin riding your ATV As you get on the ATV be sure not to accidentally move the shift pedal Remember that the engine and exhaust pipe will be hot when riding and afte...

Page 192: ... échappement sont chauds pendant et après la conduite Il convient donc de ne pas toucher ces pièces Escoja una zona grande y llana para familiari zarse con su ATV Asegúrese de que la zona en cuestión esté libre de obstáculos y de la presen cia de otros conductores Practique el control del acelerador los frenos el cambio y las técni cas de giro en esta zona antes de tratar de hacerlo en terrenos má...

Page 193: ...he shift pedal and apply the throttle smoothly Use this same procedure as you move into the high er gears Be sure to coordinate the use of the throttle and shift pedal properly If the throttle is applied too abruptly or if the throttle is not released during shifting or if the shift pedal is not released before applying the throttle the front wheels may lift off the ground resulting in a loss of d...

Page 194: ...ssives avant de s être entièrement familiari sé avec le fonctionnement du VTT Con el motor en ralentí levante el pedal del cambio hasta la posición de 1ª velocidad y a continuación suelte el freno de estacionamien to Acelere despacio y con suavidad Cuando se acople el embrague centrífugo empiece a ace lerar Una vez que el ATV haya alcanzado la velocidad adecuada suelte el acelerador y levante el p...

Page 195: ... gear Be sure that the engine has sufficiently slowed before engaging a lower gear Improper use of the brakes or shifting can cause the tires to lose traction reducing control and increasing the possibility of an accident w Make sure the engine has sufficiently slowed before shifting to a lower gear Engaging a lower gear when the engine speed is too high could cause the wheels to stop rotating 5TH...

Page 196: ...infé rieure est engagée alors que le régime du moteur est trop élevé yY No cambie de velocidad sin soltar el acelera dor Podrían resultar dañados el motor o a la cadena cinemática Para decelerar o parar suelte el acelerador y aplique los frenos suave y uniformemente Al perder velocidad el vehículo cambie a una mar cha más corta Antes de reducir a una marcha inferior espere a que el régimen del mot...

Page 197: ... traction the ATV will resist turning A special turning technique must be used to allow the ATV to make turns quickly and easily It is essential that this skill be learned first at low speed w Always follow proper procedures for turning as described in this Owner s Manual Practice turning at low speeds before attempting to turn at faster speeds Do not turn at speeds too fast for your skills or the...

Page 198: ...e à une vites se dépassant les limites imposées par les conditions du terrain et sa propre expérience COMO GIRAR CON SU ATV Para conseguir la máxima fuerza de tracción en el uso fuera de carretera las dos ruedas trase ras van montadas rígidamente en un mismo eje y giran conjuntamente a la misma velocidad Por lo tanto a menos que se permita que la rueda de la parte interior del giro patine o pierda...

Page 199: ...to maintain an even speed through the turn This maneuver will let the wheel on the inside of the turn slip slightly allowing the ATV to make the turn properly This procedure should be practiced at slow speed many times in a large off road area with no obstacles If an incorrect technique is used your ATV may continue to go straight If the ATV doesn t turn come to a stop and then practice the proced...

Page 200: ...éle vées ou de prendre des virages plus serrés Al aproximarse a una curva reduzca la veloci dad y comience a girar el manillar en la direc ción deseada Mientras lo hace así cargue su peso sobre la estribera del lado exterior del giro el lado opuesto a la dirección deseada e incli ne la parte superior del cuerpo hacia la curva Utilice el acelerador para mantener una veloci dad uniforme durante todo...

Page 201: ...de of the turn to avoid tipping over Remember Avoid higher speeds until you are thoroughly familiar with the operation of your ATV CLIMBING UPHILL Use proper riding techniques to avoid vehicle overturns on hills Be sure that you can maneu ver your ATV well on flat ground before attempt ing any incline and then practice riding first on gentle slopes Try more difficult climbs only after you have dev...

Page 202: ... qui comportent des obstacles risquant de faire perdre le contrôle du véhicule Los procedimientos de conducción incorrectos tales como las aceleraciones y deceleraciones bruscas las frenadas excesivas los movimien tos inadecuados del cuerpo o una velocidad excesiva para lo cerrado de la curva puede pro vocar el vuelco del ATV Si la máquina comien za a volcar hacia el exterior mientras se toma una ...

Page 203: ...vel surfaces or small hills Practice on smaller hills before attempting large hills It is important when climbing a hill to make sure that your weight is transferred forward on the ATV This can be accomplished by leaning for ward and on steeper inclines standing on the footboards and leaning forward over the handle bars 5TH 9 62 7 4 8 03 6 10 PM Page 190 ...

Page 204: ...ient de se soulever de la selle et de s incliner au dessus du guidon en veillant à bien garder les pieds sur les repose pieds XR No conduzca el ATV en pendientes demasia do pronunciadas para la máquina o para su pericia El vehículo puede volcar con mayor facilidad en pendientes muy pronunciadas que en superficies llanas o con pendientes suaves Practique en este tipo de pendientes antes de probar c...

Page 205: ...ver climb hills with excessively slippery or loose surfaces 8 Shift your weight forward 8 Never open the throttle suddenly or make sudden gear changes The ATV could flip over backwards 8 Never go over the top of any hill at high speed An obstacle a sharp drop or another vehicle or person could be on the other side of the hill OK OK 5TH 9 62 7 4 8 03 6 10 PM Page 192 ...

Page 206: ... une dénivella tion importante ou encore un autre véhicu le ou une personne peuvent se trouver de l autre côté de la colline XR 8 Para subir pendientes siga siempre los procedimientos correctos descritos en este Manual del Propietario 8 Antes de comenzar a subir cualquier pen diente compruebe siempre el terreno con atención 8 No suba nunca pendientes con terreno suelto o resbaladizo 8 Desplace su ...

Page 207: ...he ATV around on any hill until you have mastered the turning tech nique as described in the Owner s Manual on level ground Be very careful when turning on any hill Avoid crossing the side of a steep hill if pos sible When crossing the side of a hill 8 Always follow proper procedures as described in the Owner s Manual 8 Avoid hills with excessively slippery or loose surfaces 8 Shift your weight to...

Page 208: ...ant ou meuble 8 8 Déplacer son poids du côté de la montée Si está subiendo una pendiente y descubre que no ha calculado correctamente su destreza para llegar a la cima gire en redondo con el ATV mientras tenga tracción hacia delante y espacio suficiente para hacerlo y empiece a descender XR No intente girar en redondo con el ATV en una pendiente hasta que domine la técnica del giro en terreno llan...

Page 209: ...you are unable to continue up the hill dismount the ATV on the uphill side Physically turn the ATV around and then descend the hill If you start to roll backwards DO NOT use the rear brake to stop or try to put the ATV in gear The ATV could easily tip over backwards Instead apply the front brake gradually or dis mount the ATV immediately on the uphill side 5TH 9 62 7 4 8 03 6 10 PM Page 196 ...

Page 210: ...n avant ou de descendre immédiatement du VTT du côté amont Si se ha calado o parado el ATV y cree que puede continuar subiendo la pendiente arran que de nuevo con sumo cuidado para que las ruedas delanteras no se levanten del suelo y le hagan perder el control Si es incapaz de conti nuar desmonte del ATV por el lado de subida de la pendiente Haga girar el vehículo emple ando la fuerza física y a c...

Page 211: ...you begin rolling backwards 8 Keep weight uphill 8 Never apply the rear brake while rolling backwards Apply the front brake When fully stopped apply the rear brake as well and then lock the parking brake Dismount on uphill side or to a side if point ed straight uphill Turn the ATV around and remount following the procedure described in the Owner s Manual 5TH 9 62 7 4 8 03 6 10 PM Page 198 ...

Page 212: ...na pendiente utilice la mar cha adecuada y mantenga una velocidad uni forme Si pierde totalmente la velocidad hacia ade lante 8 Mantenga el peso hacia el lado ascenden te de la pendiente 8 Aplique los frenos 8 Bloquee el freno de estacionamiento des pués de haber parado Si el vehículo comienza a rodar hacia atrás 8 Mantenga el peso hacia el lado ascenden te de la pendiente 8 No aplique nunca los f...

Page 213: ...raking may cause a loss of traction Use caution while descending a hill with loose or slippery surfaces Braking ability and traction may be adversely affected by these surfaces Improper braking may also cause a loss of trac tion Whenever possible ride your ATV straight downhill Avoid sharp angles which could allow the ATV to tip or roll over Carefully choose your path and ride no faster than you w...

Page 214: ...e toujours en mesure de maîtriser son véhi cule si un obstacle devait surgir BAJADA DE PENDIENTES Cuando baje una pendiente con el ATV despla ce su peso hacia atrás todo lo posible en el sentido ascendente de la pendiente Desplácese hacia atrás en el sillín y permanez ca sentado con los brazos rectos Elija una velo cidad corta que permita que la compresión del motor actúe como freno principal Una ...

Page 215: ... braking as you go down a hill 8 Always check the terrain carefully before you start down any hill 8 Shift your weight backward 8 Never go down a hill at high speed 8 Avoid going down a hill at an angle that would cause the vehicle to lean sharply to one side Go straight down the hill where possible OK 5TH 9 62 7 4 8 03 6 10 PM Page 202 ...

Page 216: ...le d un côté Dans la mesure du possible descendre tout droit dans une pente XR Siga siempre los procedimientos correctos de bajada de pendientes descritos en este Manual del Propietario Nota frenar bajando una pendiente requiere una técnica especial 8 Estudie siempre el terreno cuidadosamen te antes de iniciar el descenso de una pen diente 8 Desplace su peso hacia atrás 8 No baje nunca una pendien...

Page 217: ...empting to cross a sloping surface Avoid slopes with slippery surfaces or rough ter rain that may upset your balance As you travel across a slope lean your body in the uphill direction It may be necessary to cor rect the steering when riding on loose surfaces by pointing the front wheels slightly uphill When riding on slopes be sure not to make sharp turns either up or down hill 5TH 9 62 7 4 8 03 ...

Page 218: ...ter tout braquage brusque dans les descentes que ce soit d un côté ou de l autre CRUCE DE PENDIENTES Para cruzar transversalmente una superficie en pendiente con su ATV es necesario que coloque su peso de manera que pueda mantener el equilibrio adecuado Antes de intentar cruzar una pendiente asegúrese de que ha aprendido las habilidades básicas sobre terreno llano Evite las pendientes con superfic...

Page 219: ...on any hill until you have mastered the turning tech nique as described in the Owner s Manual on level ground Be very careful when turning on any hill Avoid crossing the side of a steep hill if possible When crossing the side of a hill 8 Always follow proper procedures as described in the Owner s Manual 8 Avoid hills with excessively slippery or loose surfaces 8 Shift your weight to the uphill sid...

Page 220: ...s au sol trop glissant ou meuble 8 8 Déplacer son poids du côté de la montée Si el ATV comienza a volcar gire gradualmente la dirección en sentido descendente si no hay ningún obstáculo en su camino Al recuperar el equilibrio gire de nuevo la dirección en el senti do en que desea circular XR No intente girar en redondo con el ATV en una pendiente hasta que domine la técnica del giro en terreno lla...

Page 221: ...rive slowly and carefully w Never operate this ATV in fast flowing water or in water deeper than that specified in your Owner s Manual Remember that wet brakes may have reduced stopping ability Test your brakes after leaving water If necessary apply them several times to let friction dry out the lin ings If the ATV is operated through deep or fast flowing water the tires may float caus ing loss of...

Page 222: ...de ou à courant rapide les pneus pourraient flotter entraînant une perte de traction et de contrô le ce qui peut provoquer un accident CRUCE DE AGUAS POCO PROFUNDAS Con el ATV se pueden cruzar a baja velocidad aguas poco profundas de hasta 20 cm de pro fundidad Antes de entrar en el agua escoja el camino cuidadosamente Entre en un punto donde no existan caídas bruscas y evite las pie dras u otros ...

Page 223: ...braking ability cC After riding your ATV in water be sure to drain the trapped water by removing the check hose at the bottom of the air filter case Wash the ATV in fresh water if it has been operated in salt water or muddy condi tions q 1 Check hose 1 Tuyau de contrôle 1 Manguito de retención 5TH 9 62 7 4 8 03 6 10 PM Page 210 ...

Page 224: ...air Nettoyer le VTT à l eau douce après avoir roulé dans une eau salée ou boueuse Compruebe los frenos después de salir del agua No siga conduciendo el ATV sin compro bar que ha recuperado su capacidad de frena da yY Después de conducir el ATV por el agua no olvide eliminar el agua atrapada desmontan do el manguito de retención situado en el fondo de la caja del filtro de aire Lave el ATV con agua...

Page 225: ...eep your feet firmly mounted on the footboards at all times Avoid jumping the ATV as loss of control and damage to the ATV may result w Before operating in a new area check for obstacles Never attempt to ride over large obstacles such as large rocks or fallen trees When you go over obstacles always follow proper pro cedures as described in the Owner s Manual 5TH 9 62 7 4 8 03 6 10 PM Page 212 ...

Page 226: ... sur des obs tacles toujours suivre minutieusement les procédés décrits dans le manuel CONDUCCIÓN EN TERRENO ACCIDENTADO La conducción por terrenos accidentados debe realizarse con precaución Esté alerta a cual quier obstáculo que pueda causar daños al ATV desestabilizarlo o provocar un accidente Mantenga los pies firmemente apoyados sobre las estriberas en todo momento Evite los saltos con el veh...

Page 227: ...the front wheels to slide in loose or slippery conditions positioning your weight over the front wheels will sometimes help If the rear wheels of your ATV start to slide side ways control can usually be regained if there is room to do so by steering in the direction of the slide Applying the brakes or accelerating is not recommended until you have corrected the slide 5TH 9 62 7 4 8 03 6 10 PM Page...

Page 228: ...fisant en manœuvrant dans la direction du dérapage Il est déconseillé de freiner ou d accélérer avant d avoir repris le contrôle du véhicule PATINAZOS Y DERRAPES Cuando conduzca sobre superficies sueltas o resbaladizas hágalo con cuidado ya que el ATV podría derrapar Un patinazo inesperado y no corregido puede dar lugar a un accidente Para reducir la tendencia de las ruedas delante ras a patinar s...

Page 229: ... in mind that sliding maneu vers should always be avoided on extremely slippery surfaces such as ice since all control may be lost w Learn to safely control skidding or sliding by practicing at low speeds and on level smooth terrain On extremely slippery surfaces such as ice go slowly and be very cautious in order to reduce the chance of skidding or sliding out of control 5TH 9 62 7 4 8 03 6 10 PM...

Page 230: ...ment et être très prudent afin de limiter le risque de perte de contrôle du véhicule Con práctica al cabo de algún tiempo se puede dominar el derrape controlado Antes de intentar tales maniobras hay que elegir el terreno cuida dosamente ya que al realizarlas se reducen tanto la estabilidad como el control Tenga en cuenta que han de evitarse las maniobras de derrape en superficies extremadamente re...

Page 231: ...practice the turn ing maneuvers again Be sure you are putting your weight on the footboard to the outside of the turn Position your weight over the front wheels for better control See pages 7 41 7 45 8 If your ATV begins to tip while turning Lean more into the turn to regain balance If necessary gradually let off the throttle and or steer to the outside of the turn See pages 7 41 7 45 5TH 9 62 7 4...

Page 232: ... nécessaire lâcher progressivement les gaz et ou manœu vrer vers l extérieur du virage Voir pages 7 42 à 7 46 QUE HACER SI Esta sección está concebida únicamente con fines orientativos Lea íntegramente todas las secciones relativas a las técnicas de conduc ción QUE HACER 8 Si el ATV no gira cuando Vd quiere Pare la máquina y practique de nuevo las maniobras de giro Asegúrese de cargar su peso sobr...

Page 233: ... your ATV can t make it up a hill you are try ing to climb Turn the ATV around if you still have forward speed If not stop dismount on the uphill side of the ATV and physically turn the ATV around If the ATV starts to slip backwards DO NOT USE THE REAR BRAKE the ATV may tip over on top of you Instead apply the front brake or dismount the ATV on the uphill side See pages 7 45 7 55 5TH 9 62 7 4 8 03...

Page 234: ...actionner le frein avant ou de descendre du VTT du côté amont Voir pages 7 46 à 7 56 8 Si su ATV comienza a derrapar lateralmente Gire en la dirección del derrape si hay espa cio suficiente No se recomienda acelerar ni frenar hasta haber corregido el derrape Ver páginas 7 72 7 74 8 Si su ATV no puede con la pendiente que está intentando subir Gire en redondo con la máquina si todavía puede avanzar...

Page 235: ... you discover that the ATV is going to tip over dismount on the uphill side See pages 7 61 7 63 8 If your ATV encounters shallow water Ride slowly and carefully through slow mov ing water watching for obstacles Be sure to let water drain from the ATV and CHECK YOUR BRAKES FOR PROPER OPERATION when you come out of the water Do not con tinue to ride your ATV until you have regained adequate braking ...

Page 236: ...ouveau Voir pages 7 66 à 7 68 8 Si está cruzando transversalmente una pen diente con el ATV Conduzca con su peso desplazado hacia el costado de la máquina más próximo al lado ascendente de la pendiente para mantener el equilibrio Si la máquina comienza a volcar gire la dirección en el sentido de descenso siempre que no haya obstáculos en su cami no para recuperar el equilibrio Si ve que la máquina...

Page 237: ...machine inspection adjustment and lubrication are explained on the following pages w Never service an engine while it is running Moving parts can catch clothing or parts of the body causing injury Electrical compo nents can cause shocks or can start fires Turn off the engine when performing mainte nance unless otherwise specified Have a Yamaha dealer perform service if you are not familiar with ma...

Page 238: ...s au courant des tech niques d entretien est invité à s adresser à un concessionnaire Yamaha SBU00516 MANTENIMIENTO Y AJUSTE PERIODICOS Las inspecciones ajustes y lubricación periódicos mantienen la máquina en las mejores condiciones posibles de seguridad y eficacia La seguridad es una obligación del propietario de la máquina En las páginas siguientes se explican los puntos más importantes relacio...

Page 239: ... tool kit are sufficient for this purpose except that a torque wrench is also necessary to properly tighten nuts and bolts NOTE If you do not have a torque wrench available during a service operation requiring one take your machine to a Yamaha dealer to check the torque settings and adjust them as necessary q w e 1 Owner s manual 2 Low pressure tire gauge 3 Owner s tool kit 1 Manuel du propriétair...

Page 240: ...ouples de serrage par un concessionnaire Yamaha SBU01222 Manual del Propietario y equipo de herramientas Se recomienda poner este Manual del Propietario y el comprobador de presión de los neumáticos en la bolsa de vinilo y guardar ésta en la caja portamaletas de la forma que se ve en la ilustración Los datos de servicio incluidos en este manual tienen por finalidad proporcionar al propietario del ...

Page 241: ...se changes in handling which in some situations could lead to an accident All parts and accessories added to this vehicle should be genuine Yamaha or equivalent components designed for use on this ATV and should be installed and used according to instructions If you have ques tions consult an authorized Yamaha ATV dealer 5TH 9 62 8 4 8 03 9 05 PM Page 8 5 ...

Page 242: ...ions Dans le moindre doute consulter un concessionnaire Yamaha XR No modificar nunca el ATV montando o utili zando accesorios incorrectamente El mon taje incorrecto de accesorios o la modifica ción indebida del vehículo pueden alterar las características de manejo del mismo y en determinadas situaciones causar un acci dente Las piezas y accesorios que se mon ten en el vehículo deberán ser original...

Page 243: ...en in wet or dusty areas Carburetor 9 Check idle speed choke lever operation 2 2 2 2 9 Adjust if necessary Crankcase breather 9 Check breather hose for cracks or damage system 9 Replace if necessary 2 2 2 9 Check for leakage Exhaust system 9 Tighten if necessary 2 2 2 9 Replace gasket if necessary Fuel line 9 Check fuel hose for cracks or damage 2 2 2 9 Replace if necessary Engine oil 9 Replace wa...

Page 244: ...ring assemblies for looseness Wheel bearings damage 2 2 2 2 9 Replace if damaged 9 Check operation Steering system 9 Replace if damage 2 2 2 2 2 9 Check toe in 9 Adjust if necessary Knuckle shafts 9 Lubricate every 6 months with Lithium soap based 2 2 2 steering shaft grease Fittings and fasteners 9 Check all chassis fittings and fasteners 2 2 2 2 2 9 Correct if necessary 9 Check specific gravity ...

Page 245: ...humide ou poussière uses 9 Contrôler le régime de ralenti fonctionnement Carburateur du levier de choke 2 2 2 2 9 Régler si nécessaire Ventilation du 9 Contrôler l état de la durit de mise à l air 2 2 2 carter 9 Remplacer si elle craquelée ou endommagée 9 Contrôler s il y a fuite Système 9 Serrer si nécessaire 2 2 2 d échappement 9 Remplacer le joint si nécessaire Tuyauterie d essence 9 Contrôler ...

Page 246: ...ent faux rond 2 2 2 2 9 Changer si nécessaire Roulements de roue 9 Contrôler les ens roulement jeu endommagement 2 2 2 2 9 Changer si endommagé 9 Contrôler le fonctionnement Direction 9 Changer si endommagée 2 2 2 2 2 9 Vérifier la convergence 9 Régler si nécessaire Arbres d articulation 9 Lubrifier tous les 6 mois de la graisse à base de 2 2 2 arbre de direction savon au lithium Visserie 9Vérifie...

Page 247: ... en las que exista polva 9 Controlar velocidad en vacío funcionamiento de Carburador la palanca del choke 2 2 2 2 9 Ajustar si es necesario Sistema del 9 Compruebe si hay grietas o daños en la manguera respiradero del respiradero 2 2 2 del cárter 9 Reemplace si es necesario 9 Compruebe si hay fugas Sistema de escape 9 Apretar si es necesario 2 2 2 9 Reemplace la empaquetadura si es necesario Condu...

Page 248: ...Cojinetes de ruedas 9 Controlar el conjunto de cojinetes juego daños 2 2 2 2 9 Cambiar si fuera dañado 9 Revisar el funcionamiento Dirección 9 Cambiar si fuera dañada 2 2 2 2 2 9 Verificar la convergencia 9 Ajustar si en necesario Eje de la articulación 9 Lubricar cada 6 meses con grasa a base de jabón 2 2 2 eje de dirección de litio 9 Verificar la torsion de ajuste de todas las Accesorios y eleme...

Page 249: ...ntil the oil level settles before checking 4 Remove the dipstick and inspect the oil level 5 The oil level should be between the mini mum and maximum marks If the level is low add oil to raise it to the specified level cC Be sure no foreign material enters the crankcase q w e 1 Dipstick 2 Maximum level mark 3 Minimum level mark 1 Jauge 2 Repère de niveau maximum 3 Repère de niveau minimum 1 Varill...

Page 250: ...qu au niveau adéquat fF S assurer qu aucun corps étranger ne pénètre dans le carter SBU14180 Aceite del motor Medición del nivel de aceite del motor 1 Ponga el ATV sobre una superficie nivela da 2 Deje que se caliente el motor durante unos minutos y párelo 3 Extraiga la varilla de nivel de aceite y lím piela con un trapo limpio Introduzca la varilla en el orificio de llenado sin roscarla NOTA Espe...

Page 251: ...ace a container under the engine 4 Remove the dipstick and drain bolt to drain the oil 5 Inspect the O ring and replace if damaged 6 Install the drain bolt and tighten to specifi cation q 1 Drain bolt 1 Bouchon de vidange 1 Perno de drenaje Tightening torque Drain bolt 20 Nm 2 0 m0kgf 5TH 9 62 8 4 8 03 9 05 PM Page 8 15 ...

Page 252: ... et le serrer comme spécifié Cambio del aceite del motor 1 Ponga el ATV sobre una superficie nivela da 2 Deje que se caliente el motor durante unos minutos y párelo 3 Coloque un recipiente debajo del motor 4 Extraiga la varilla de nivel y el perno de drenaje para drenar el aceite 5 Examine la junta tórica y sustitúyala si está dañada 6 Instale el perno de drenaje y apriételo al par de apriete espe...

Page 253: ...rs the crankcase 8 Warm up the engine for several minutes at idle speed Check for oil leakage while warming up cC If oil leakage is found stop the engine imme diately and check for the cause Recommended oil See page 10 2 Oil quantity Periodic oil change 0 8 L 5TH 9 62 8 4 8 03 9 05 PM Page 8 17 ...

Page 254: ...er la cause 7 Llene de aceite el motor y coloque la vari lla de nivel yY Asegúrese de que no entren materias extra ñas en el cárter 8 Mantenga el motor funcionando en ralentí durante unos minutos para que se calien te Mientras se calienta compruebe si hay fugas de aceite yY Si encuentra alguna fuga de aceite pare el motor inmediatamente y averigüe la causa Aceite recomendado ver página 10 12 Canti...

Page 255: ... oil level should be between the maxi mum and minimum marks If the level is low add oil to raise it to the proper level cC Be sure no foreign material enters the final gear case 5 Install the dipstick Final gear oil replacement 1 Place the ATV on a level place 1 Dipstick 2 Maximum level mark 3 Minimum level mark 1 Jauge 2 Repère de niveau maximum 3 Repère de niveau minimum 1 Varilla de medición 2 ...

Page 256: ...eau d huile de transmis sion finale 1 Placer le VTT sur un plan horizontal SBU00869 Aceite del engranaje final Medición del aceite del engranaje final 1 Ponga el ATV sobre una superficie nivela da 2 Extraiga la varilla de medición y frótela con un paño limpio Inserte la varilla de medi ción en el orificio de relleno sin enroscarla 3 Extraiga la varilla de medición e inspeccio ne el nivel de aceite...

Page 257: ...inal gear case with oil cC Be sure no foreign material enters the final gear case 6 Install the dipstick 7 Check for oil leakage If oil leakage is found check for the cause q 1 Drain bolt 1 Boulon de vidange 1 Perno de drenaje Tightening torque Drain bolt 23 Nm 2 3 m0kgf Recommended oil SAE80API GL 4 Hypoid gear oil Oil quantity 0 12 L 5TH 9 62 8 4 8 03 9 05 PM Page 8 21 ...

Page 258: ...3 Extraiga la varilla de medición y el perno de drenaje para drenar el aceite 4 Instale el perno de drenaje y apriételo a la torsión especificada 5 Llene de aceite la caja del engranaje final yY Asegúrese de que no se introducen materias extrañas en la caja del engranaje final 6 Instale la varilla de medición 7 Compruebe si hay fugas de aceite Si encuentra alguna fuga de aceite busque la causa Cou...

Page 259: ...ould indicate an intake air leak or carburetion problem for that cylinder Do not attempt to diagnose such problems yourself Instead take the ATV to a Yamaha dealer You should periodically remove and inspect the spark plug because heat and deposits will cause the spark plug to slowly break down and erode If electrode erosion becomes excessive you should replace the spark plug with one of the proper...

Page 260: ...ie par une de type approprié SBU11820 Inspección de las bujías La bujía es un componente importante del motor que resulta fácil inspeccionar El estado de la bujía puede ser indicativo del estado del motor Por ejemplo un color muy blanco de la porcela na del electrodo central podría indicar la exis tencia de una fuga de aire de admisión o un pro blema de carburación en ese cilindro No trate de diag...

Page 261: ...lways clean the gasket surface and its mating surface Wipe off any grime from the threads and tighten it to the specified torque a a Spark plug gap a Écartement des électrodes a Separación entre electrodos de la bujía Spark plug gap 0 6 0 7 mm Tightening torque Spark plug 12 5 Nm 1 25 m0kgf Standard spark plug CR7HS NGK 5TH 9 62 8 4 8 03 9 05 PM Page 8 25 ...

Page 262: ...trodos con una galga y ajuste dicha separación al valor especificado Cuando vaya a instalar una bujía limpie primero la zona de la empaquetadura y su superficie de acoplamiento Elimine cualquier suciedad depo sitada en las roscas y apriete la bujía al par especificado Écartement des électrodes 0 6 à 0 7 mm Separación entre electrodos de la bujía 0 6 0 7 mm Couple de serrage Bougie 12 5 Nm 1 25 m0k...

Page 263: ...ollects in this hose empty the hose and clean the air filter element and air filter case 1 Remove the front cover by removing the bolts q q w w 1 Check hose 1 Flexible de contrôle 1 Manguito de retención 1 Front cover 2 Bolt 2 1 Cache avant 2 Boulon 2 1 Cubierta delantera 2 Perno 2 5TH 9 62 8 4 8 03 9 05 PM Page 8 27 ...

Page 264: ...nt ainsi que le boîtier de filtre à air 1 Déposer le cache avant après avoir retiré ses boulons SBU10552 Limpieza del filtro de aire NOTA Existe un manguito de retención en el fondo de la caja del filtro de aire Si se acumula el polvo o el agua en este manguito vacíelo y limpie la caja y el elemento del filtro de aire 1 Extraiga la cubierta delantera extrayendo los pernos 5TH 9 62 8 4 8 03 9 05 PM...

Page 265: ...e to clean the air fil ter element because the engine could catch fire or explode 5 Squeeze the excess solvent out of the air filter element and let it dry cC Do not twist the air filter element when squeezing it 6 Inspect the air filter element If damaged replace it 7 Apply Yamaha foam air filter oil or other quality foam air filter oil to the air filter ele ment If foam air filter oil is not ava...

Page 266: ... est pas disponible utiliser de l huile de moteur SAE10W30 2 Desenganche las sujeciones y extraiga la cubierta de la caja del filtro de aire 3 Desenganche la sujeción y extraiga el ele mento del filtro de aire 4 Lave el elemento del filtro de aire con cui dado pero a fondo en disolvente XR Limpie siempre el elemento del filtro de aire con disolvente para la limpieza de piezas Nunca utilice disolve...

Page 267: ... be cleaned every 20 40 hours It should be cleaned and lubricat ed more often if the machine is operated in extremely dusty areas Each time air filter ele ment maintenance is performed check the air inlet of the air filter case for obstructions Check the air cleaner rubber joint to the carburetor and manifold fittings for an airtight seal Tighten all fittings securely to avoid the possibility of u...

Page 268: ...r Resserrer tous ces éléments pour éviter que de l air non filtré ne pénètre dans le moteur NOTA El elemento del filtro de aire deberá estar húme do pero sin gotear 8 Instale el elemento del filtro de aire 9 Instale la cubierta de la caja del filtro de aire en la caja del filtro de aire enganchan do los fijadores 10 Instale la cubierta delantera colocando los pernos NOTA El elemento del filtro de ...

Page 269: ...plate removal To obtain full engine performance capability removing the air intake restrictor plate is required 1 Remove the air filter element See page 8 27 for removal and installation procedures 2 Remove the air intake restrictor plate NOTE Store the air intake restrictor plate with the owner s manual so you can install it whenever you want to reduce the top speed available 3 Install the air fi...

Page 270: ... Remettre l élément de filtre à air en place yY No ponga nunca en marcha el motor con el filtro de aire extraído Podría entrar aire sin filtrar en el motor causando un rápido des gaste y posibles daños al motor Asimismo el funcionamiento sin el elemento del filtro afectará los surtidores del carburador con el mal funcionamiento consiguiente y posible sobrecalentamiento del motor SBU01035 Extracció...

Page 271: ...professional knowledge and experience to do so However the idling speed may be per formed by the owner as a part of the usual main tenance routine cC The carburetor was set at the Yamaha facto ry after many tests If the settings are dis turbed by someone without sufficient techni cal knowledge poor engine performance and damage may result 8 35 5TH 9 62 8 4 8 03 9 05 PM Page 8 35 ...

Page 272: ...os pueden producirse averías y un rendimiento defectuoso del motor FBU00296 Réglage de carburateur Le carburateur est une pièce vitale du moteur et il exige un réglage très précis La plupart des réglages doivent être confiés à un concessionnai re Yamaha qui dispose des connaissances pro fessionnelles et de l expérience nécessaires pour effectuer ces opérations Le régime de ralenti peut toutefois ê...

Page 273: ...n The engine is warm when it quickly responds to the throttle 2 Connect the tachometer and set the idle to the specified idling speed by adjusting the throttle stop screw Turn the screw in direc tion a to increase the engine speed and in direction b to decrease the engine speed q a b 1 Throttle stop screw 1 Vis de butée de papillon 1 Tornillo tope del acelerador Specified idle speed 1 700 1 900 r ...

Page 274: ...ara reducirla 8 38 FBU01143 Réglage du ralenti N B Le recours à un compte tours est indispensable pour mener à bien ce travail 1 Mettre le moteur en marche et le faire chauffer pendant quelques minutes à une vitesse d environ 1 000 à 2 000 tr mn De temps en temps pousser le moteur à un régime entre 4 000 et 5 000 tr mn Le moteur est chaud dès qu il réagit rapide ment à l accélération 2 Connecter l...

Page 275: ...adjusted regularly This adjustment however should be left to a professional Yamaha service technician EBU00304 Cam chain adjustment The cam chain becomes loose with use result ing in improper valve timing and engine noise To prevent this the cam chain tensioner must be adjusted regularly This adjustment should be left to a Yamaha service technician 5TH 9 62 8 4 8 03 9 05 PM Page 8 39 ...

Page 276: ...e la cadena periódicamente Este ajuste debe realizarlo un técnico de manteni miento Yamaha 8 40 FBU00303 Réglage du jeu des soupapes L usure augmente progressivement le jeu des soupapes ce qui dérègle l alimentation en car burant air et génère un bruit de moteur anormal Il convient donc de vérifier régulièrement le jeu des soupapes Ce réglage doit être effectué par un mécanicien Yamaha FBU00304 Ré...

Page 277: ...or reaches the wear limit line or mark ask a Yamaha dealer to replace the shoes as a set w q w q 1 Wear limit line 2 Wear indicator 1 Ligne de limite d usure 2 Indicateur d usure 1 Línea de límite de desgaste 2 Inidcador de desgaste 1 Wear limit mark 2 Wear indicator 1 Marque de limite d usure 2 Indicateur d usure 1 Marca de límite de desgaste 2 Indicador de desgaste Front Avant Delantero Rear Arr...

Page 278: ...ur atteint la ligne de limite d usure faire remplacer les deux mâchoires par un concessionnaire Yamaha SBU01218 Inspección de las zapatas de los frenos delantero y trasero Cada freno va provisto de un indicador de des gaste que permite comprobar el desgaste de la zapata sin desmontar el freno Aplique el freno y compruebe la posición del indicador Si ha llega do a la línea de límite desgaste solici...

Page 279: ... EBU00324 Front brake lever free play adjustment NOTE Before adjusting the brake inspect the front brake shoes The front brake lever free play should be adjust ed to 10 12 mm at the brake lever pivot If the free play is incorrect adjust as follows 1 Loosen the upper locknut and fully turn in the adjusting bolt 2 Loosen the lower locknut 3 Turn the lower adjusting bolt until specified free play is ...

Page 280: ...ire el perno de ajuste inferior hasta obte ner el recorrido libre especificado FBU00324 Réglage du jeu du levier de frein avant N B Avant de procéder au réglage du frein avant il convient de contrôler ses mâchoires Le jeu au pivot du levier de frein avant doit être de 10 à 12 mm Si le jeu est incorrect le régler comme suit 1 Desserrer le contre écrou supérieur et ser rer à fond le boulon de réglag...

Page 281: ...y serviced or adjusted brakes could cause loss of braking ability which could lead to an accident After servicing 8 Make sure the brakes operate smoothly and that the free play is correct 8 Make sure the brakes do not drag Replacement of brake components requires professional knowledge These procedures should be performed by a Yamaha dealer q a a a a 1 Cable joint 1 Raccord de câble 1 Conexión del...

Page 282: ...onocimientos profesionales Estas operaciones deberán efectuarse en los talle res de un concesionario Yamaha 8 46 4 Serrer le contre écrou inférieur 5 Tout en actionnant le frein avant desserrer le boulon de réglage supérieur jusqu à ce que la longueur des câbles inférieur et supérieur soit identique Le raccord de câble se place à la verticale 6 Serrer le contre écrou supérieur XG Il est dangereux ...

Page 283: ... locknut NOTE If specified free play cannot be obtained tighten the brake cable adjusting nut at the rear wheel hub until brake lever free play is 5 8 mm w q a q 1 Locknut 2 Adjusting bolt 1 Contre écrou 2 Boulon de réglage 1 Contratuerca 2 Perno de ajuste a Free play a Jeu a Juego 1 Brake cable adjusting nut 1 Ecrou de réglage du câble de frein 1 Tuerca de ajuste del cable de freno 5TH 9 62 8 4 8...

Page 284: ...del cable de freno situada en el buje de la rueda trasera hasta que el juego libre de la palanca sea de 5 8 mm 8 48 FBU03361 Réglage de la pédale et du levier de frein arrière Réglage du jeu au levier de frein 1 Desserrer le contre écrou du câble de frein 2 Tourner le boulon de réglage situé sur le levier de frein pour obtenir un jeu de 5 à 8 mm 3 Serrer le contre écrou N B Si le jeu spécifié ne p...

Page 285: ...lead to an accident After servicing 8 Make sure the brakes operate smoothly and that the free play is correct 8 Make sure the brakes do not drag 8 Replacement of brake components requires professional knowledge These procedures should be performed by a Yamaha dealer a q a Free play a Jeu a Juego 1 Brake rod adjusting nut 1 Ecrou de réglagede la tringle de frein 1 Tuerca de ajuste de la varilla de ...

Page 286: ...mation Confier ce travail à un concession naire Yamaha Ajuste del juego libre del pedal de freno Gire la tuerca de ajuste de la varilla de freno situado en el cubo de la rueda trasera hasta que el juego libre del pedal del freno sea de 20 30 mm XR La utilización del vehículo con los frenos incorrectamente mantenidos o ajustados puede dar lugar a pérdidas de capacidad de frenado y accidentes Despué...

Page 287: ... the specified torque NOTE Turn the adjusting bolt clockwise to decrease the clutch free play and turn it counterclockwise to increase the free play 5 Install the rubber cap securely q w e 1 Rubber cap 2 Locknut 3 Adjusting bolt 1 Bouchon en caoutchouc 2 Contre écrou 3 Boulon de réglage 1 Tapa de goma 2 Contratuerca 3 Perno de ajuste Tightening torque 8 Nm 0 8 m0kgf 5TH 9 62 8 4 8 03 9 05 PM Page ...

Page 288: ...rse des aiguilles d une montre pour l augmenter 5 Bien fixer le capuchon en caoutchouc SBU00872 Ajuste del embrague 1 Quite la tapa de goma 2 Afloje la contratuerca 3 Haga girar lentamente el perno de ajuste en el sentido de las agujas del reloj hasta notar cierta resistencia A continuación gire 1 8 de vuelta en sentido contrario a las agujas del reloj 4 Apriete la contratuerca al par prescrito NO...

Page 289: ...of control cables becomes dam aged Cables can also become frayed or kinked Operation of controls could be restricted which could cause an accident or injury Lubricate the inner cables and the cable ends If the cables do not operate smoothly ask a Yamaha dealer to replace them Recommended lubricant Engine oil 5TH 9 62 8 4 8 03 9 05 PM Page 8 53 ...

Page 290: ...s faire remplacer par un concessionnaire Yamaha SBU00570 Inspección y lubricación de los cables XR Inspeccione los cables con frecuencia y reemplácelos si están dañados Cuando la cubierta exterior de los cables de control está dañada puede producirse corrosión Los cables también pueden pelarse o dañar se La operación de los controles podría res tringirse lo cual puede ser causa de un acci dente o ...

Page 291: ...U01220 Knuckle shaft and steering shaft lubrication Lubricate the pivot points using a grease gun Recommended lubricant Lithium soap based grease all purpose grease Recommended lubricant Lithium soap based grease all purpose grease 1 1 Grease nipple 1 Graisseur 1 Boquilla de engrase 5TH 9 62 8 4 8 03 9 05 PM Page 8 55 ...

Page 292: ...ca del freno Lubrique las partes pivotantes de cada palanca y pedal SBU01220 Engrase del eje de la articulación y del eje de dirección Engrase los puntos pivotantes utilizando una pistola de engrase Lubricante recomendado Grasa a base de jabón de litio grasa polivalente Lubricante recomendado Grasa a base de jabón de litio grasa polivalente Lubrifiant recommandé Graisse à base de savon au lithium ...

Page 293: ... place a suitable stand under the frame 3 Remove the nuts from the wheel 4 Remove the wheel EBU00871 Wheel installation When installing the wheels reverse the removal procedure Tighten the wheel nuts to the specified torque Tightening torque Wheel nut Front 28 Nm 2 8 m0kgf Rear 28 Nm 2 8 m0kgf 1 1 2 Front Avant Delantera Rear Arrière Trasera 5TH 9 62 8 4 8 03 9 05 PM Page 8 57 ...

Page 294: ...2 Desmontaje de una rueda 1 Afloje las tuercas de la rueda 2 Levante el ATV y coloque un soporte ade cuado debajo del chasis 3 Quite las tuercas de la rueda 4 Extraiga la rueda SBU00871 Montaje de la rueda Para instalar la rueda siga el procedimiento inverso al de la extracción Apriete las tuercas de la rueda a los pares de apriete especificados Pares de apriete Tuerca de rueda Delantera 28 Nm 2 8...

Page 295: ...n inspecting the battery be sure the breather hose is routed correctly If it touch es the frame or exists in such a way as to cause battery electrolyte or gas to exit onto the frame structural and cosmetic damage to the machine can occur q w 1 Battery 2 Battery breather hose 1 Batterie 2 Reniflard de batterie 1 Batería 2 Manguera del respiradero de batería 5TH 9 62 8 4 8 03 9 05 PM Page 8 59 ...

Page 296: ...ir des dégâts esthétiques et mécaniques SBU00379 Batería Compruebe el nivel del electrólito líquido de la batería y el apriete de los bornes Si el nivel está bajo añada agua destilada yY No deje la batería volcada sobre un costado ni almacenarla en esta posición Al inspec cionar la batería asegúrese de que la man guera de ventilación siga el recorrido correc to Si entra en contacto con el chasis o...

Page 297: ...ilk Follow with milk of magnesia beaten egg or vegetable oil Call a physician imme diately EYES Flush with water for 15 minutes and get prompt medical attention Batteries produce explosive gases Keep sparks flame cigarettes or other sources of ignition away Ventilate when charging or using in an enclosed space Always shield your eyes when working near batteries KEEP OUT OF REACH OF CHILDREN 5TH 9 ...

Page 298: ... dans un espace clos Toujours se protéger les yeux lors de travaux à proximité d une batterie TENIR HORS DE PORTÉE DES ENFANTS XR El electrólito de la batería es venenoso y peligroso puede causar graves quemadu ras Contiene ácido sulfúrico Evite que entre en contacto con la piel los ojos o la ropa Antídoto EXTERNO Lave con chorro de agua INTERNO Beba grandes cantidades de agua o leche Siga con lec...

Page 299: ...cessary 2 Disconnect the negative lead 3 Disconnect the positive lead and then remove the battery cC Normal tap water contains minerals which are harmful to a battery Therefore refill only with distilled water q w e r 1 Maximum level mark 2 Minimum level mark 3 Negative lead 4 Positive lead 1 Repére de niveau maximum 2 Repére de niveau manimum 3 Fil négatif 4 Fil positif 1 Marca de máximo 2 Marca ...

Page 300: ...aux qui sont nuisibles à la batterie N utiliser que de l eau distillée SBU11950 Reposición del nivel de electrólito de la bate ría Una batería deficientemente mantenida se corroe y descarga rápidamente El electrólito de la batería deberá comprobarse al menos una vez al mes 1 El nivel deberá estar entre las marcas de nivel máximo y mínimo Si es necesario rellenar utilice exclusivamente agua desti l...

Page 301: ... the battery is to be stored for a longer period than the above check the specific gravity at least once a month and recharge the battery when it is too low 6 Always make sure the connections are cor rect when putting the battery back in the machine Make sure the breather hose is properly connected and is not damaged or obstructed 5TH 9 62 8 4 8 03 9 05 PM Page 8 65 ...

Page 302: ... effectuées correctement S assurer que le reniflard est raccordé correctement et qu il n est ni endommagé ni bouché 4 Cuando no vaya a utilizar la máquina durante un mes o más desmonte la bate ría y guárdela en un sitio oscuro y fresco Recargue la batería completamente antes de utilizarla de nuevo 5 Si va a guardar la batería por un tiempo superior al indicado compruebe la densi dad al menos una v...

Page 303: ... a Yamaha dealer w Always use a fuse of the specified rating Never use a material in place of the proper fuse An improper fuse can cause damage to the electrical system which could lead to a fire cC To prevent accidental short circuiting turn off the main switch when checking or replac ing a fuse w q 1 Fuse 2 Spare fuse 1 Fusible 2 Fusible de rechange 1 Fusible 2 Fusible de repuesto Specified fuse...

Page 304: ...urt circuit couper le contact avant de contrôler ou de remplacer un fusible SBU00391 Cambio del fusible 1 El portafusible está situado bajo el asiento 2 Si el fusible salta quite el contacto y colo que un fusible nuevo del amperaje correc to Después active de nuevo el contacto Si el fusible vuelve a saltar inmediatamen te consulte a un concesionario Yamaha XR Use siempre fusibles del amperaje pres...

Page 305: ...t describes a quick easy procedure for making checks If your machine requires any repair take it to a Yamaha dealer The skilled technicians at a Yamaha dealership have the tools experience and know how to properly service your machine Use only gen uine Yamaha parts on your machine Imitation parts may look like Yamaha parts but they are often inferior Consequently they have a short er service life ...

Page 306: ...e plus courte et cela pourrait endommager le véhicule et entraîner des réparations très coû teuses SBU00413 Localización de averías unque las máquinas Yamaha son sometidas a rigurosas inspecciones antes de salir de fábrica pueden surgir fallos durante su funcionamiento Cualquier problema que se presente en los sis temas de alimentación comprensión o encendi do puede dar lugar a dificultades de arr...

Page 307: ... fuel sys tem Fuel can ignite or explode causing severe injury or property damage Make sure there are no open flames or sparks in the area including pilot lights from water heaters or furnaces 8 71 5TH 9 62 8 4 8 03 9 05 PM Page 8 71 ...

Page 308: ...elles à proximité du véhicule y compris les veilleuses de chauffe eau ou de chaudières XR No fumar mientras se comprueba el sistema de alimentación de combustible El combus tible puede arder o explotar y causar graves lesiones y daños materiales Asegurarse de que no haya llamas ni chispas en las proxi midades incluyendo la llama piloto de un calentador de agua o de un horno 8 72 5TH 9 62 8 4 8 03 ...

Page 309: ...plug gap or replace spark plug There is compresson Compression normal Ask a Yamaha dealer to inspect No compression There is fuel Turn the fuel cock to OFF Remove the fuel hose from the fuel cock Some fuel Turn the fuel cock to RES Restart engine No fuel Supply fuel 4 Battery Use electric starter Engine turns over quickly Battery good Engine turns over slowly Check fluid recharge check connections...

Page 310: ...ormale Demander au concessionnaire Yamaha de vérifier Pas de compression Il y a du carburant Tourner le robinet de carburant sur OFF Un peu de carburant Tourner le robinet de carburant sur RES Remettre le moteur en marche Pas de carburant Se ravitailler en carburant 4 Batterie Utiliseer le démarreur électrique Le moteur tourne rapidement La batterie est en bon état Le moteur tourne lentement Contr...

Page 311: ...ormal Pida a un concessionario Yamaha que inspeccione No hay compresión Hay combustible Gire el grifo de combus tible a la posición OFF Algo de combustible Gire el grifo de combus tible a la posición RES Rearranque el motor No hay combustible Suministre combustible 4 Batería Usar el arranque eléctrico El motor gira rápidamente Batería en buen estado El motor gira lentamente Revisar el líquido reca...

Page 312: ...8 76 5TH 9 62 9 4 8 03 6 13 PM Page 1 ...

Page 313: ...life of many components 1 Before cleaning the machine a Block off the end of the exhaust pipe to prevent water entry A plastic bag and strong rubber band may be used b Make sure the spark plug and all filler caps are properly installed 2 If the engine case is excessively greasy apply degreaser with a paint brush Do not apply degreaser to the wheel axles 5TH 9 62 9 4 8 03 6 13 PM Page 298 ...

Page 314: ...r moteur est excessivement gras y appliquer du dégraissant au pinceau Ne pas appliquer de dégraissant sur les axes de roue SBU00420 LIMPIEZA Y ALMACENAMIENTO A LIMPIEZA La limpieza frecuente de su máquina no sólo servirá para realzar su aspecto sino que mejo rará el rendimiento general de la misma y pro longará la vida útil de muchos de sus compo nentes 1 Antes de limpiar la máquina a Tape el extr...

Page 315: ...s have resulted from improper high pressure deter gent applications such as those available in coin operated car washers 4 Once the majority of the dirt has been hosed off wash all surfaces with warm water and mild detergent type soap An old toothbrush or bottle brush is handy for hard to get at places 5 Rinse the machine off immediately with clean water and dry all surfaces with a chamois clean t...

Page 316: ...n absorbant doux 3 Elimine la suciedad y el desengrasante lavando la máquina con un manguera de jar dinero Utilice sólo la presión de agua indis pensable para realizar el trabajo yY Una presión excesiva del agua puede provocar la infiltración de la misma en los cojinetes de rueda frenos retenes de la transmisión y dis positivos eléctricos con el consiguiente dete rioro Muchas facturas de reparació...

Page 317: ...ion cleaner waxes Many contain abrasives which may mar the paint or pro tective finish When finished start the engine and let it idle for several minutes w Wet brakes may have reduced stopping abili ty increasing the chance of an accident Test the brakes after washing Apply the brakes several times at slow speeds to let friction dry out the linings 5TH 9 62 9 4 8 03 6 13 PM Page 302 ...

Page 318: ...nt Tester les freins après le nettoyage Actionner quelques fois les freins en roulant lentement afin de sécher les garni tures 6 Limpie el sillín con un limpiador de tapice rías de vinilo para mantenerlo flexible y bri llante 7 Puede aplicarse una cera de automoción a todas las superficies cromadas y pintadas Evite el empleo de ceras combinadas con limpiadores Muchas de ellas contienen abrasivos q...

Page 319: ... stabilizer if available NOTE Use of fuel stabilizer eliminates the need to drain the fuel system Consult a Yamaha dealer if the fuel system is to be drained instead 2 Remove the spark plug pour about one tablespoon of SAE 10W30 or 20W40 motor oil in the spark plug hole and rein stall the spark plug Ground the spark plug wire and turn the engine over several times to coat the cylinder wall with oi...

Page 320: ...uile sur les parois de cylindre 3 Lubrifier tous les câbles de commande SBU00427 B ALMACENAMIENTO En caso de almacenamiento prolongado de la máquina 60 días o más deberán tomarse algu nas medidas para prevenir su deterioro Una vez completamente limpia la máquina prepárela para su almacenamiento como sigue 1 Llene el depósito con combustible nuevo y si posible añada un producto estabilizador de com...

Page 321: ...re coat all exposed metal surfaces with a light film of oil Do not apply oil to any rubber parts or the seat cover 7 Remove the battery and charge it Store it in a dry place and recharge it once a month Do not store the battery in an excessively warm or cold place less than 0 C or more than 30 C NOTE Make any necessary repairs before storing the machine 5TH 9 62 9 4 8 03 6 13 PM Page 306 ...

Page 322: ...ectuer toutes les réparations nécessaires avant de remiser le véhicule 4 Coloque calzos debajo del chasis para mantener las ruedas separadas del suelo 5 Ate una bolsa de plástico alrededor de la salida del tubo de escape para evitar la entrada de humedad 6 Si se va a realizar el almacenamiento en un ambiente húmedo o salino recubra todas las superficies metálicas expuestas al aire con una fina pel...

Page 323: ...Minimum turning radius 2 400 mm Basic weight With oil and full fuel tank 116 kg Engine Type Air cooled 4 stroke SOHC Cylinder arrangement Single cylinder forward inclined Displacement 79 cm3 Bore Stroke 47 0 45 6 mm Compression ratio 9 6 1 Starting system Electric starter Lubrication system Wet sump EBU00428 SPECIFICATIONS 5TH 9 62 9 4 8 03 6 13 PM Page 308 ...

Page 324: ...o prevent clutch slippage since the engine oil also lubricates the clutch do not mix any chemical additives Do not use oils with a diesel specification of CD or oils of a higher quality than specified In addition do not use oils labeled ENERGY CONSERVING II or higher 20 10 20 30 40 10W30 10W40 20W40 20W50 50 C 0 10 5W30 15W40 5TH 9 62 9 4 8 03 6 13 PM Page 309 ...

Page 325: ... Wet type element Fuel Type For Europe Regular unleaded gasoline For Australia Unleaded fuel only Tank capacity 6 8 L Reserve amount 0 9 L Carburetor Type manufacturer VM16SH MIKUNI Spark plug Type manufacturer CR7HS NGK Gap 0 6 0 7 mm Clutch type Wet multiple disc automatic 5TH 9 62 9 4 8 03 6 13 PM Page 310 ...

Page 326: ...tion ratio 19 18 34 10 3 588 Transmission type Constant mesh 3 speed Operation Left foot operation Gear ratio 1st 39 11 3 545 2nd 35 17 2 059 3rd 31 22 1 409 Chassis Frame type Steel tube Caster angle 1 Trail 3 8 mm Tire Type Tubeless Size Front AT18 7 7 Rear AT18 8 7 Manufacturer type Front DUNLOP KT586 Rear DUNLOP KT587 5TH 9 62 9 4 8 03 6 13 PM Page 311 ...

Page 327: ...t Leading arm Rear Swingarm Shock absorber Front Coil spring Oil damper Rear Coil spring Oil damper Wheel travel Front wheel travel 57 mm Rear wheel travel 56 mm Electrical Ignition system C D I Charging system A C magneto Battery type voltage capacity 12N7D 3B 12V 7Ah Indicator light voltage wattage quantity Neutral 12V 1 7W 1 Fuse 5A 5TH 9 62 9 4 8 03 6 13 PM Page 312 ...

Page 328: ...rde au sol 100 mm Rayon de braquage minimal 2 400 mm Poids en ordre de marche Avec pleins d huile et de carburant 116 kg Moteur Type 4 temps essence refroidissement par air SOHC Disposition des cylindres Monocylindre incliné Cylindrée 79 cm3 Alésage course 47 0 45 6 mm Taux de compression 9 6 1 Système de démarrage Electrique Système de graissage Carter humide 5TH 9 62 9 4 8 03 6 13 PM Page 313 ...

Page 329: ...r tout patinage de l embrayage car l huile de moteur lubrifie également l embraya ge Ne pas utiliser d huile de grade diesel CD ou une huile de grade supérieur à celui spécifié S assurer également de ne pas utiliser une huile portant la désignation ENERGY CONSER VING II ou la même désignation avec un numéro plus élevé 0 80 l 20 10 20 30 40 10W30 10W40 20W40 20W50 50 C 0 10 5W30 15W40 5TH 9 62 9 4 ...

Page 330: ... humide Carburant Type Pour l Europe essence normale sans plomb Pour l Australie carburant sans plomb uniquement Capacité du réservoir 6 8 l Montant de la réserve 0 9 l Carburateur Type Fabricant VM16SH MIKUNI Bougie Type Fabricant CR7HS NGK Ecartement des électrodes 0 6 à 0 7 mm Type d embrayage Humide multidisque automatique 5TH 9 62 9 4 8 03 6 13 PM Page 315 ...

Page 331: ...re 19 18 34 10 3 588 Type de boîte de vitesse Prise constante 3 rapports Commande Au pied gauche Taux de réduction 1ère 39 11 3 545 2e 35 17 2 059 3e 31 22 1 409 Partie cycle Type de cadre Tube en acier Angle de chasse 1 Chasse 3 8 mm Pneu Type Un pneu sans chambre à air Taille de pneu AV AT18 7 7 AR AT18 8 7 Fabricant Type Avant DUNLOP KT586 Arrière DUNLOP KT587 5TH 9 62 9 4 8 03 6 13 PM Page 316...

Page 332: ...oscillant Amortisseurs Avant Ressort hélicoïdal amortisseur d huile Arrière Ressort hélicoïdal amortisseur d huile Débattement de roue Débattement de roue avant 57 mm Débattement de roue arrière 56 mm Partie électrique Système d allumage C D I Système de charge Magnéto A C Type tension capacité de batterie 12N7D 3B 12V 7Ah Tension puissance de lampe témoin quantité Point mort 12V 1 7W 1 Fusible 5A...

Page 333: ...m Radio mínimo de giro 2 400 mm Peso basico Con aceite y depósito de combustible 116 kg Motor Tipo 4 tiempos enfriado por aire SOHC Disposición de cilindros Monocilíndrico inclinado hacia adelante Cilindrada 79 cm3 Calibre Carrera 47 0 45 6 mm Relación de compresión 9 6 1 Sistema de arranque Arrancador eléctrico y de retroceso Sistema de lubricación Sumidero húmedo 5TH 9 62 9 4 8 03 6 13 PM Page 3...

Page 334: ...inaje del embrague porque el aceite de motor también lubrica el embra gue no mezcle ningún aditivo químico No emplee aceites con especificación diesel de CD ni aceites de calidad más alta que la especificada Adicionalmente no emplee aceites etiquetados con ENERGY CONSER VING II ni superiores 20 10 20 30 40 10W30 10W40 20W40 20W50 50 C 0 10 5W30 15W40 5TH 9 62 9 4 8 03 6 13 PM Page 319 ...

Page 335: ...ipo húmedo Combustible Tipo Para Europa gasolina normal sin plomo Para Australia combustible sin plomo exclu sivamente Capacidad del depósito 6 8 L Cantidad de reserva 0 9 L Carburador Tipo Fabricante VM16SH MIKUNI Bujía Tipo Fabricante CR7HS NGK Huelgo de bujía 0 6 0 7 mm Tipo de embrague Húmedo automático disco multiple 5TH 9 62 9 4 8 03 6 13 PM Page 320 ...

Page 336: ... de transmisión 3 velocidades de engrane constante Operación Operación con el pie izquierdo Relación de engranajes Primera 39 11 3 545 Segunda 35 17 2 059 Chasis Tipo de bastidor Bastidor de acero tubular Angulo del eje delantero 1 Base del ángulo de inclinación 3 8 mm Neumático Tipo Sin cámara Tamaño frontal AT18 7 7 trasero AT18 8 7 Fabricante Tipo frontal DUNLOP KT586 trasero DUNLOP KT587 5TH 9...

Page 337: ...mortiguador Delantero Resorte en espiral amortiguador de aceite Trasero Resorte en espiral amortiguador de aceite Trayectoria de la rueda Trayectoria de la rueda frontal 57 mm Trayectoria de la rueda trasera 56 mm Sistema eléctrico Sistema de encendido C D I Sistema estándar Magneto de A C Tipo voltaje capacidad de batería 12N7D 3B 12V 7Ah Voltaje vataje de luz de control cantidad Punto muerto 12V...

Page 338: ...10 16 5TH 9 62 9 4 8 03 6 13 PM Page 323 ...

Page 339: ...L SYSTEM Metric unit Conversion factor Imperial unit Torque m kgf m kgf cm kgf cm kgf 7 233 86 794 0 0723 0 8679 ft lbf in lbf ft lbf in lbf Weight kg g 2 205 0 03527 lb oz Speed km h 0 6214 mi h Distance km m m cm mm 0 6214 3 281 1 094 0 3937 0 03937 mi ft yd in in Volume Capacity cc cm3 cc cm3 L liter L liter 0 03527 0 06102 0 8799 0 2199 oz IMP liq cu in qt IMP liq gal IMP liq Miscellaneous kg ...

Page 340: ...0 8799 0 2199 oz Imp liq cu in qt Imp liq gal Imp liq Divers kg mm kgf cm2 C 55 997 14 2234 1 8 32 lb in psi lbf in2 F Todos los datos de especificaciones que figuran en este manual se expresan en SI y UNIDADES MÉTRICAS Utilice esta tabla para convertir los valores en unidades MÉTRICAS a unidades IMPERIALES Ejemplo MÉTRICO FACTOR DE CONVERSIÓN IMPERIAL 2 mm 0 03937 0 08 in Tabla de conversión SIST...

Page 341: ...5TH 9 62 9 4 8 03 6 13 PM Page 326 ...

Page 342: ...ROPRIÉTAIRE MANUAL DEL PROPIETARIO PRINTED IN JAPAN 2003 4 0 2 1 E F S 5TH 28199 62 YFM80WS PRINTED ON RECYCLED PAPER IMPRIME SUR PAPIER RECYCLE IMPRESO EN PAPEL RECICLADO YAMAHA MOTOR CO LTD 5TH 9 62 Hyosi 4 8 03 9 07 PM Page 1 ...

Reviews:

Related manuals for RAPTOR YFM80WS