background image

5

CHK

ADJ

3-15

CHECKING THE FRONT FORK

1. Stand the vehicle on a level surface.

w

Securely support the vehicle so that there
is no danger of it falling over.

NOTE:

Place  the  vehicle  on  a  suitable  stand  so  that
the front wheel is elevated.

CHECKING AND ADJUSTING THE STEERING HEAD/

CHECKING THE FRONT FORK

e. Check the steering head for looseness or

binding  by  turning  the  front  fork  all  the
way  in  both  directions.  If  any  binding  is
felt,  remove  the  lower  bracket  and  check
the  upper  and  lower  bearings.  Refer  to
“STEERING” in chapter 4.

f. Install  the  oil  tank  bracket,  washer  and

steering  stem  bolt,  and  then  tighten  the
steering stem bolt to specified torque.

▲▲▲▲▲▲▲▲▲▲▲▲▲▲▲▲▲▲▲▲▲▲▲

5. Install:

9

Washer

9

Cap bolt

9

Handle

9

Handle protector
Refer to “STEERING “in chapter 4.

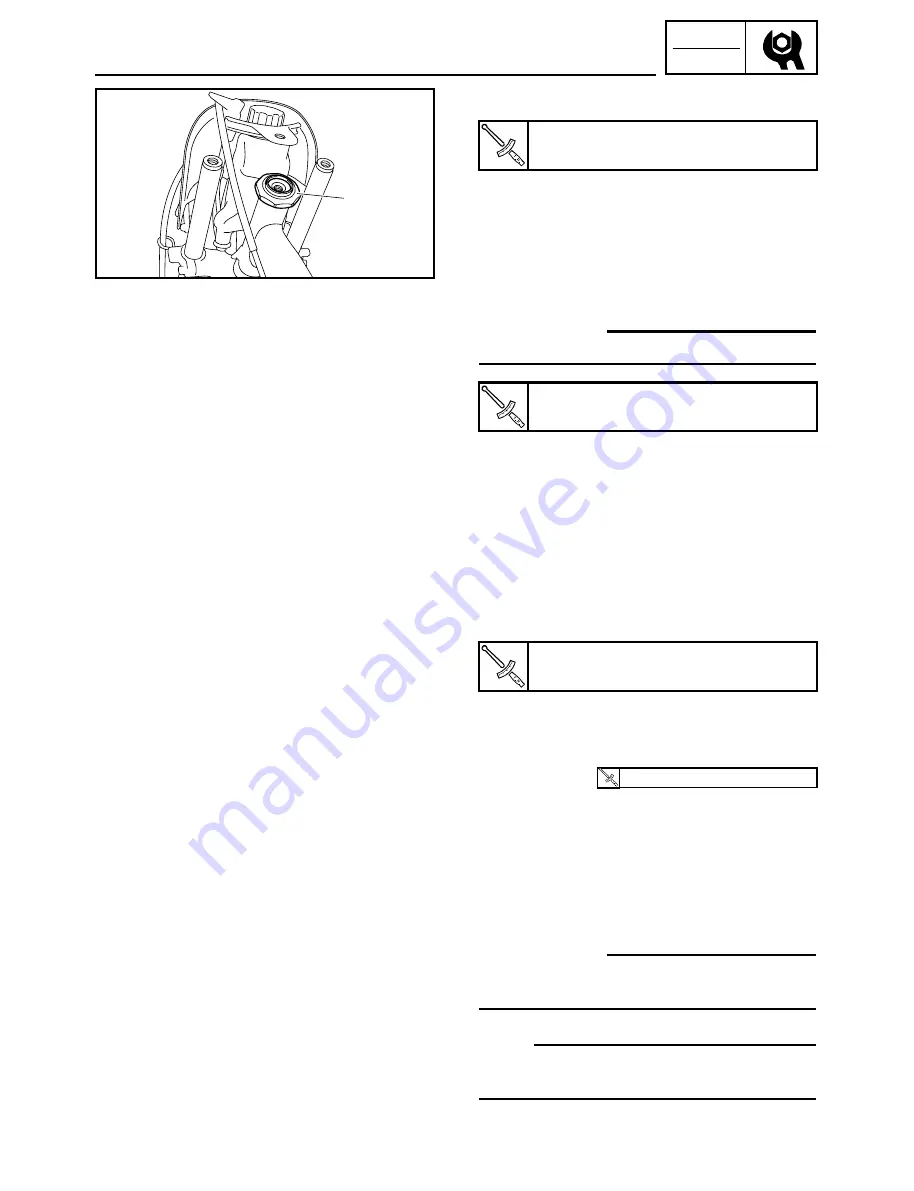
b. Tighten the steering nut 

5

with a wrench.

c. Lock  to  lock  the  steering  head  a  few

times.

d. Fully  loosen  the  steering  nut  and  then

tighten  the  steering  nut  to  specified
torque.

w

Do not over tighten the steering nut.

Steering nut (1st)

10 Nm (1.0 m·kg, 7.2 ft·lb)

Steering nut (2nd)

0.7 Nm (0.07 m•kg, 0.5 ft•lb)

Steering stem bolt

32 Nm (3.2 m•kg, 23 ft•lb)

32Nm (3.2 m•kg, 23 ft•lb)

5PG-7-10   45

06.5.16, 17:42:39

Summary of Contents for PW50W 2007

Page 1: ...SERVICE MANUAL 5PG 28197 10 LIT 11616 20 15 PW50W...

Page 2: ......

Page 3: ...otor Corporation U S A First edition May 2006 All rights reserved Any reproduction or unauthorized use without the written permission of Yamaha Motor Corporation U S A is expressly prohibited Printed...

Page 4: ...intended to provide the customer with the most satisfaction from his vehicle and to conform to federal environmental quality objectives Yamaha Motor Company Ltd is continually striving to improve all...

Page 5: ...except in Chapter 3 PERIODIC CHECKS AND ADJUSTMENTS where the sub section title s appears 3 Sub section titles appear in smaller print than the section title 4 To help identify parts and clarify proce...

Page 6: ...Lubricant w Special tool e Tightening torque r Wear limit clearance t Engine speed y Electrical data Symbols u to s in the exploded diagrams indicate the types of lubricants and lubrication points u...

Page 7: ...IFICATIONS TROUBLESHOOTING ELECTRICALSYSTEM CARBURETOR CHASSIS PERIODIC CHECKSAND ADJUSTMENTS GENERALINFORMATION GEN INFO TRBL SHTG ELEC CARB CHAS CHK ADJ SPEC TABLE OF CONTENTS 4 6 7 8 3 2 1 ENGINE E...

Page 8: ......

Page 9: ...NUMBER 1 1 ENGINE SERIAL NUMBER 1 1 IMPORTANT INFORMATION 1 2 PREPARATION FOR REMOVAL AND DISASSEMBLY 1 2 REPLACEMENT PARTS 1 2 GASKETS OIL SEALS AND O RINGS 1 2 LOCK WASHERS PLATES AND COTTER PINS 1...

Page 10: ...N VEHICLE IDENTIFICATION VEHICLE IDENTIFICATION NUMBER The number 1 is stamped into the frame head pipe ENGINE SERIAL NUMBER The engine serial number 1 is stamped into the crankcase NOTE Designs and s...

Page 11: ...f the parts and place them in trays in the order of disassembly This will speed up assembly and allow for the correct installation of all parts 5 Keep all parts away from any source of fire 1 2 EAS000...

Page 12: ...earing CIRCLIPS Before reassembly check all circlips carefully and replace damaged or distorted circlips Always replace piston pin clips after one use When installing a circlip 1 make sure the sharp e...

Page 13: ...several times 3 Check 9 all connections Loose connection Connect properly NOTE If the pin 1 on the terminal is flattened bend it up 4 Connect 9 lead 9 coupler 9 connector NOTE Make sure all connectio...

Page 14: ...g tool This tool is necessary for removing and installing the rotor 90890 01252 Dial gauge and stand set These tools are for measuring the crankshaft runout Crankshaft instoller pot This tool is neces...

Page 15: ...nkcase 90890 01362 YU 33270 90890 06754 YM 34487 Ignition checker This instrument is necessary for check ing the ignition system components 90890 01307 YM 01307 Hex wrench 22 mm This tool is needed fo...

Page 16: ...FICATIONS 2 1 MAINTENANCE SPECIFICATIONS 2 2 ENGINE 2 2 CHASSIS 2 6 ELECTRICAL 2 10 GENERAL TIGHTENING TORQUE SPECIFICATIONS 2 11 DEFINITION OF UNITS 2 11 LUBRICATION POINTS AND LUBRICANT TYPES 2 12 E...

Page 17: ...verall length 1245 mm 49 0 in Overall width 575 mm 22 6 in Overall height 715 mm 28 1 in Seat height 485 mm 19 1 in Wheelbase 855 mm 33 7 in Ground clearance 105 mm 4 13 in Minimum turning radius 1300...

Page 18: ...uantity 0 30 L 0 32 US qt 0 26 Imp qt Transmission oil Type YAMALUBE 4 10W30 or SAE 10W30 Except for EUROPE SAE 10W30 For EUROPE API service SG type or higher JASO standard MA Total amount 0 35 L 0 37...

Page 19: ...outside diameter 9 994 10 000 mm 0 3935 0 3937 in Limit 9 974 mm 0 3927 in Piston ring Top ring Ring type Keystone Dimensions B x T 1 50 x 1 80 mm 0 06 x 0 07 in End gap installed 0 15 0 35 mm 0 0059...

Page 20: ...15 x 54 11 6 218 Kickstarter Kickstarter type Ratchet Kick clip friction force P 1 5 N 0 34 1 33 lbf 0 15 0 60 kgf Air filter Air filter oil grade Foam air filter oil or SAE10W30SE Carburetor Type x...

Page 21: ...Muffler M8 x 1 25 1 18 1 8 13 Exhaust chamber protector M6 x 1 0 4 9 0 9 6 5 Bearing retainer Main axle M6 x 1 0 2 12 1 2 8 7 Middle driven pinion Screw M45 x 1 5 1 60 6 0 43 Left hand thread Plate b...

Page 22: ...Rim size 10x1 50 Rim material Steel Wheel travel 50 0 mm 1 97 in Radial wheel runout limit 2 0 mm 0 08 in Lateral wheel runout limit 2 0 mm 0 08 in Front tire Type With tube Size 2 50 10 4PR Manufactu...

Page 23: ...rum inside diameter 80 0 mm 3 15 in Limit 80 5 mm 3 17 in Lining thickness 3 5 mm 0 14 in Limit 1 5 mm 0 06 in Shoe spring free length 44 5 mm 1 75 in Steering Steering bearing type Ball and race bear...

Page 24: ...ar shock absorber assembly travel 30 0 mm 1 18 in Spring free length 153 mm 6 02 in Installed length 146 mm 5 75 in Spring rate K1 11 89 N mm 67 94 lb in 1 22 kgf mm Spring rate K2 33 4 N mm 190 71 lb...

Page 25: ...R Engine Front M8 x 1 25 2 29 2 9 21 Bearing housing Rear M8 x 1 25 2 33 3 3 24 Front brake Cam shaft lever M5 x 0 8 1 4 0 4 2 9 Side cover Frame M6 x 1 0 2 7 0 7 5 1 Rear brake Cam shaft lever M5 x 0...

Page 26: ...R B Source coil resistance 297 363 B R B CDI unit model manufacturer 3PT 00 YAMAHA Ignition coil Model manufacturer 2JN YAMAHA Primary coil resistance 0 32 0 48 Secondary coil resistance 5 68 8 52 k M...

Page 27: ...clean dry threads Components should be at room tem perature Unit Read Definition Measure mm Millimeter 10 3 m Length cm Centimeter 10 2 m Length kg Kilogram 103 gram Weight N Newton 1 kg m sec2 Force...

Page 28: ...Kickstarter gear inner surface Kickstarter shaft Crankcase mating surface Yamaha bond No 1215 CHASSIS Lubrication point Lubricant Front wheel oil seal lips Front brake camshaft Rear wheel oil seal lip...

Page 29: ...overflow pipe w Oil delivery pipe e C D I magneto lead wire r C D I unit coupler t Fuel pipe y Control unit coupler u C D I unit lead i Switch cord band o Fuel pipe p Control unit lead Route it under...

Page 30: ...and oil pipe Clamp with the switch cord band the wire harness throttle cable 2 oil pump cable and starter cable behind the igni tion coil lead Pass through the wire har ness stater cable rear brake c...

Page 31: ...Clamp 7 Guide 2 front brake cable 8 Guide 1 Wire harness oil pipe starter cable 9 Oil pipe 0 Oil tank q Wire harness w Switch cord band Clamp the wire harness and starter cable Pass the front brake c...

Page 32: ...E AUTOLUBE PUMP MINIMUM STROKE 3 7 AIR BLEEDING THE AUTOLUBE PUMP 3 9 CHECKING THE EXHAUST SYSTEM 3 10 CLEANING THE SPARK ARRESTER AND EXHAUST CHAMBER 3 11 CLEANING THE AIR FILTER ELEMENT 3 11 CHECKIN...

Page 33: ...7 PERIODIC MAINTENANCE CHART FOR THE EMISSION CONTROL SYS TEM NOTE 9 From 18 months repeat the maintenance intervals starting from 6 months 9 Items marked with an asterisk should be performed by a Yam...

Page 34: ...g bearings Check bearing assemblies for looseness Moderately repack with lithium soap based grease every 2 years 7 Middle and nal gear cases Check for grease leakage Check gears for damage and wear Lu...

Page 35: ...6 7 Nm 0 7 m kg 5 1 ft lb Order Job Part Q ty Remarks Removing the side covers seat Remove the parts in the order listed and fuel tank 1 Flap 1 2 Side cover 1 3 Seat 1 4 Fuel cock 1 Set the fuel cock...

Page 36: ...upright 2 Start the engine warms it up for several minutes and then turn it off 3 Place a container under the transmission 4 Remove 9 Oil filler cap 1 9 Transmission oil drain bolt 2 Completely drain...

Page 37: ...warm up for several minutes 2 Install 9 Digital tachometer onto the spark plug lead 1 of cylinder 3 Check 9 Engine idling speed Out of specification Adjust the throttle stop screw 4 Adjust 9 Engine id...

Page 38: ...LE e Loosen the locknut 1 handle grip side and then turn the adjusting nut 2 in direc tion a or b until the specified throttle cable free play is obtained f Tighten the locknut w After adjusting the t...

Page 39: ...aligned Adjust ADJUSTING THE AUTOLUBE PUMP CABLE ADJUSTING THE AUTOLUBE PUMP MINIMUM STROKE 5 Adjust 9 Autolube pump alignment mark a Loosen the locknut 1 b Turn the adjust nut 2 until align the pin...

Page 40: ...tolube pump minimum stroke a Measure the autolube pump stroke while turning the kick crank slowly b Loosen the locknut 1 and turn the adjust ing bolt 2 direction a or b for proper adjustment c Tighten...

Page 41: ...ump cable slightly and keep the engine speed until all air bubbles flow out from the air bleed hole c When there are no air bubbles left tighten the air bleed screw AIR BLEEDING THE AUTOLUBE PUMP cC 9...

Page 42: ...components 9 Do not start the engine when cleaning the exhaust system 1 Check 9 Exhaust chamber assembly 9 Muffler Cracks damage Replace Exhaust gas leaks Replace the gasket 2 Check 9 Tightening torq...

Page 43: ...rester portion of the tail pipe 9 Tap the tail pipe lightly and remove the carbon deposits from the outside portion of the tail pipe 9 Exhaust chamber If the carbon deposit use the round scraper to re...

Page 44: ...but not dripping 6 Install 9 Air filter element 9 Air filter case cover cC Never operate the engine without the air filter element installed Unfiltered air will cause rapid wear of engine parts and m...

Page 45: ...urn the adjuster 1 in direction a or b until the specified brake lever free play is obtained cC After adjusting the brake lever free play make sure there is no brake drag CHECKING THE FRONT AND REAR B...

Page 46: ...nest portion CHECKING AND ADJUSTING THE STEER ING HEAD 1 Stand the vehicle on a level surface w Securely support the vehicle so that there is no danger of it falling over NOTE Place the vehicle on a s...

Page 47: ...cket and check the upper and lower bearings Refer to STEERING in chapter 4 f Install the oil tank bracket washer and steering stem bolt and then tighten the steering stem bolt to specified torque 5 In...

Page 48: ...pressure Out of specification Regulate w 9 The tire pressure should only be checked and regulated when the tire temperature equals the ambient air tem perature 9 The tire pressure and the suspension m...

Page 49: ...mended If it is absolutely necessary to do so use great care and replace the tube as soon as possible with a good quality replacement Tube wheel Tube tire only Tubeless wheel Tube or tubeless tire w A...

Page 50: ...LS The following procedure applies to both of the wheels 1 Check 9 Wheel Damage out of round Replace w Never attempt to make any repairs to the wheel NOTE After a tire or wheel has been changed or re...

Page 51: ...nd ELECTRICAL CHECKING THE SPARK PLUG 1 Disconnect 9 Spark plug cap 1 Recommended lubricant Lithium soap based grease Recommended lubricant Lithium soap based grease 2 Remove 9 Spark plug cC Before re...

Page 52: ...b CHECKING THE SPARK PLUG 1 2 a 4 Check 9 Electrode 1 Damage wear Replace the spark plug 9 Insulator 2 Abnormal color Replace the spark plug Normal color is medium to light tan 5 Clean 9 Spark plug wi...

Page 53: ...THE HANDLEBAR 4 17 CHECKING THE HANDLEBAR 4 17 INSTALLING THE HANDLEBAR 4 18 FRONT FORK 4 20 REMOVING THE FRONT FORK LEGS 4 22 DISASSEMBLING THE FRONT FORK LEG 4 23 CHECKING THE FRONT FORK LEG 4 24 A...

Page 54: ...4 0 m kg 29 ft lb Order Job Part Q ty Remarks Removing the front wheel Remove the parts in the order listed 1 Brake cable adjusting nut 1 2 Front brake cable 1 3 Pin 1 4 Spring 1 5 Axle nut washer 1 1...

Page 55: ...AND BRAKE 4 2 2 2 3 4 1 Order Job Part Q ty Remarks Disassembling the front wheel Disassemble the parts in the order listed 1 Oil seal 1 2 Bearing 2 3 Spacer coller 1 1 4 Ring 1 1 For assembly revers...

Page 56: ...ted 2 Remove 9 Brake cable adjusting nut 3 Disconnect 9 Front brake cable at the brake camshaft lever 4 Remove 9 Axle nut 9 Washer 9 Wheel axle 9 Front wheel 9 Brake shoe plate 9 Spacer 9 Coller CHECK...

Page 57: ...e wheel bearings DISASSEMBLING THE FRONT WHEEL 1 Remove 9 Oil seals 9 Wheel bearings a Clean the outside of the front wheel hub b Remove the oil seal 1 with a flat head screwdriver NOTE To prevent dam...

Page 58: ...4 or balls 5 Contact should be made only with the outer race 6 NOTE Use a socket 7 that matches the diameter of the wheel bearing outer race and oil seal INSTALLING THE FRONT WHEEL 1 Lubricate 9 Front...

Page 59: ...tightening the wheel axle nut push down hard on the handlebar s several times and check if the front fork rebounds smoothly 4 Connect 9 Front brake cable at the brake camshaft lever 5 Install 9 Brake...

Page 60: ...Nm 0 4 m kg 2 9 ft lb Order Job Part Q ty Remarks Disassembling the front wheel Disassemble the parts in the order listed 1 Brake shoe brake shoe spring 2 1 2 Nut 1 3 Bolt 1 4 Brake camshaft lever 1...

Page 61: ...no danger of it falling over NOTE Place the vehicle on the mainstand so that the front wheel is elevated 2 Remove the front wheel Refer to REMOVING THE FRONT WHEEL 3 Remove 9 Brake shoe plate from th...

Page 62: ...hoe and brake shoe spring as a set w Do not allow oil or grease to contact the brake shoes NOTE Replace the brake shoes as a set if either is worn to the wear limit 3 Measure 9 Brake drum inside diame...

Page 63: ...e brake camshaft so its punch mark a is positioned as shown b Align the projection on the brake shoe wear indicator with the notch in the brake camshaft c Align the punch mark in the brake camshaft wi...

Page 64: ...rder listed brake Side cover Refer to SIDE COVERS SEAT AND FUEL TANK in chapter 3 Muffler Refer to ENGINE REMOVAL in chapter 5 Rear shock absorber lower bolt Refer to REAR SHOCK ABSORBER right ASSEMBL...

Page 65: ...RONT WHEEL REAR WHEEL AND BRAKE 4 12 6 Nm 0 6 m kg 4 3 ft lb 1 2 3 4 5 6 8 7 11 10 9 Order Job Part Q ty Remarks 10 Brake camshaft lever 1 11 Brake camshaft 1 For installation reverse the removal proc...

Page 66: ...ENGINE REMOVAL in chapter 5 3 Remove 9 Swingarm Refer to REAR SHOCK ABSORBER ASSEMBLY AND SWINGARM 4 Remove 9 Brake cable adjusting bolt 1 9 Rear brake cable 2 9 Pin 3 9 Spring 4 at the brake camshaf...

Page 67: ...er to CHECKING THE FRONT BRAKE 3 Measure 9 Brake drum inside diameter Refer to CHECKING THE FRONT BRAKE 4 Check 9 Brake drum inner surface Refer to CHECKING THE FRONT BRAKE 5 Check 9 Brake camshaft Re...

Page 68: ...ly and muffler Refer to CLEANING THE SPARK ARRESTER AND MUFFLER in chapter 3 60 Nm 6 0 m kg 43 ft lb INSTALLING THE REAR WHEEL 1 Stand the vehicle on a level surface w Securely support the vehicle so...

Page 69: ...r listed Front fender Refer to SIDE COVERS SEAT AND FUEL TANK in chapter 3 Oil tank Refer to STEERING 1 Handle protector 1 2 Rear brake cable 1 3 Rear brake lever 1 4 Front brake cable 1 5 Front brake...

Page 70: ...le 9 Throttle grip 2 NOTE While removing the ignition control switch pull back the rubber cover 3 3 Disconnect 9 Rear brake lever 4 Remove 9 Grip 1 NOTE Blow compressed air between the left handle bar...

Page 71: ...the handlebar grip until the rubber adhesive has fully dried INSTALLING THE HANDLEBAR 1 Stand the vehicle on a level surface w Securely support the vehicle so that there is no danger of it falling ove...

Page 72: ...y NOTE Align the same angle of the ignition control switch with left lever holder and then install the ignition control switch 7 Connect 9 Front brake cable 9 Rear brake cable 8 Install 9 Handle prote...

Page 73: ...andlebar Refer to HANDLEBAR Oil tank Refer to STEERING 1 Band 1 2 Front brake cable 1 3 Cap bolt washer 2 2 4 Lower bracket pinch bolt 2 Loosen 5 Front fork 2 Do not disassemble the front fork right F...

Page 74: ...4 21 1 2 3 4 5 1 2 3 4 5 6 7 8 9 32 Nm 3 2 m kg 23 ft lb 23 Nm 2 3 m kg 17 ft lb Order Job Part Q ty Remarks 6 Spring 1 7 Fork spring 1 8 Damper rubber 1 9 Outer tube 1 For assembly reverse the disass...

Page 75: ...s no danger of it falling over 9 Place the vehicle on a suitable stand so that the front wheel is elevated 2 Remove 9 Handlebar Refer to REMOVING THE HANDLEBAR 3 Remove 9 Front wheel Refer to REMOVING...

Page 76: ...a vise with soft jaws cC Do not scratch the inner tube c Remove the dust seal from outer tube d While pressing down on the front fork remove the circlip 2 Remove 9 Inner tube 1 9 Outer tube 2 a Hold t...

Page 77: ...to straighten a bent inner tube as this may dangerously weaken it 2 Measure 9 Spring free length a Out of specification Replace 3 Check 9 Outer tube assembly 1 Damage wear Replace cC When disassembli...

Page 78: ...o replace the following parts 9 Before assembling the front fork leg make sure all of the components are clean 2 Install 9 Damper rubber 1 9 Fork spring 2 9 Spring seat 3 1 Lubricate 9 Inner tube s ou...

Page 79: ...ube INSTALLING THE FRONT FORK LEGS The following procedure applies to both of the front fork legs 1 Install 9 Front fork 1 Temporarily tighten the lower bracket pinch bolt 2 Tighten 9 Lower bracket pi...

Page 80: ...Remove the parts in the order listed Handlebar Refer to HANDLEBAR 1 Steering stem bolt cap bolt 1 2 2 Oil tank cap 1 3 Oil tank 1 Drain the engine oil 4 Oil tank bracket starter cable 1 1 5 Upper bra...

Page 81: ...VING THE HANDLE BAR 3 Remove 9 Steering stem bolt 9 Washer 9 Upper bracket 9 Oil tank bracket 9 Ring nut 1 9 Upper ball bearing 9 Lower bracket 9 Lower ball bearing CHECKING THE STEERING HEAD 1 Wash 9...

Page 82: ...pe could be damaged NOTE 9 Always replace the bearings and bearing races as a set 9 Whenever the steering head is disassem bled replace the rubber seal INSTALLING THE STEERING HEAD 1 Lubricate 9 Upper...

Page 83: ...CHAS STEERING HEAD 4 30 3 Install 9 Oil tank 9 Upper bracket 9 Washer 1 9 Steering stem bolt 2 4 Bleed 9 Autolube pump Refer to AIR BLEEDING THE AUTOL UBE PUMP in chapter 3 1 2 32 Nm 3 2 m kg 23 ft lb...

Page 84: ...t lb 1 29 Nm 2 9 m kg 21 ft lb G Order Job Part Q ty Remarks Removing the rear shock Remove the parts in the order listed absorber and swingarm Side cover Refer to SIDE COVERS SEAT AND FUEL TANK in ch...

Page 85: ...assembly 1 2 CHECKING THE REAR SHOCK ABSORBER ASSEMBLY 1 Check 9 Rear shock absorber rod rear shock absorber assembly Damage wear Replace 9 Rear shock absorber Oil leaks Replace the rear shock absorb...

Page 86: ...rm bolt rear 2 9 Swingarm bolt front 3 3 Loosen 9 Rear axle nut 4 NOTE While applying the rear brake loosen the rear axle nut 4 Remove 9 End cap 5 9 Rear axle nut 9 Swingarm 6 1 4 5 2 6 3 3 CHECKING T...

Page 87: ...ear brake to tighten the rear axle nut 3 Install 9 Exhaust chamber assembly 9 Muffler Refer to ENGINE REMOVAL in chapter 5 29 Nm 2 9 m kg 21 ft lb 33 Nm 3 3 m kg 24 ft lb 60 Nm 6 0 m kg 43 ft lb 23Nm...

Page 88: ...emarks Removing the shaft drive Remove the parts in the order listed Rear shock absorber Refer to REAR SHOCK ABSORBER left right ASSEMBLY AND SWINGARM Swingarm Rear wheel Refer to FRONT WHEEL REAR WHE...

Page 89: ...3 14 15 9 Nm 0 9 m kg 6 5 ft lb 16 26 Nm 2 6 m kg 19 ft lb 26 Nm 2 6 m kg 19 ft lb 50 Nm 5 0 m kg 36 ft lb Order Job Part Q ty Remarks 12 Spacer 1 13 Screw 1 14 Bearing 1 15 Spacer 1 16 Drive pinion g...

Page 90: ...ol 2 3 Remove 9 Spacer 9 Bearing 9 Shim cC The drive pinion gear should only be removed if ring gear replacement is neces sary NOTE Lightly tap on the end of the drive pinion gear with a soft hammer 1...

Page 91: ...ean the contacting surface of rear arm ends before applying the sealant 2 Tighten 9 Rear arm bolt 2 Install 9 Drive pinion gear 9 Shim 9 Bearing 9 Spacer 9 Bearing 1 2 1 1 Hexagon wrench 90890 01307 Y...

Page 92: ...ALVE 5 19 CHECKING THE REED VALVE 5 19 ASSEMBLING AND INSTALLING THE REED VALVE 5 20 CLUTCH 5 21 REMOVING THE CLUTCH 5 23 CHECKING THE PRIMARY DRIVE GEAR 5 24 CHECKING THE PRIMARY DRIVEN GEAR 5 24 CHE...

Page 93: ...ENG CHECKING THE CRANKSHAFT 5 41 INSTALLING THE CRANKSHAFT 5 42 MIDDLE GEAR 5 44 REMOVING THE MIDDLE DRIVE SHAFT ASSEMBLY 5 46 CHECKING THE MEDDLE GEAR 5 46 INSTALLING THE MEDDLE GEAR 5 46...

Page 94: ...m 0 9 m kg 6 5 ft lb 3 Order Job Part Q ty Remarks Removing the muffler and exhaust Remove the parts in the order listed chamber assembly 1 Muffler assembly 1 2 Exhaust chamber assembly 1 3 Gasket 1 P...

Page 95: ...R ASSEMBLYAND SWINGARM in chapter 4 Swingarm Refer to SWINGARM in chapter 4 Rear brake cable Refer to REAR WHEEL in chapter 4 Oil hose autolube pump assembly Refer to AUTOLUBE PUMP Air filter case car...

Page 96: ...vehicle on the mainstand so that the rear wheel is elevated 2 Remove 9 Side cover Refer to SIDE COVERS SEAT AND FUEL TANK in chapter 3 3 Remove 9 Air filter case assembly 1 4 Disconnect 9 Oil hose 9...

Page 97: ...ASSEMBLY AND SWINARM in chapter 4 8 Remove 9 Brake cable adjusting nut 1 9 Rear brake cable 2 9 Pin 3 9 Spring 4 9 Remove 9 Autolube pump cover outer 1 10 Remove 9 Oil hose autolube pump cable 9 Autol...

Page 98: ...le removing the engine pull out the pivot shaft and then remove the frame assembly 9 Be sure to check the wire cable and hose disconnected INSTALLING THE ENGINE w Securely support the engine assembly...

Page 99: ...plug cap 1 3 Tighten 9 Pivot shaft nut 4 Connect 9 CDI magneto lead coupler connector 1 6 Install 9 Autolube pump assembly 1 With the autolube pump cover inner 2 9 Autolube pump cable oil hose 3 9 Aut...

Page 100: ...kg 6 5 ft lb 18 Nm 1 8 m kg 13 ft lb 29 Nm 2 9 m kg 21 ft lb 33 Nm 3 3 m kg 24 ft lb 60 Nm 6 0 m kg 43 ft lb 23Nm 2 3 m kg 17 ft lb 18 Nm 1 8 m kg 13 ft lb 10 Install 9 Carburetor assembly Refer to CA...

Page 101: ...Nm 1 0 m kg 7 2 ft lb 20 Nm 2 0 m kg 14 ft lb E Order Job Part Q ty Remarks Removing the cylinder Remove the parts in the order listed Exhaust chamber assembly Refer to ENGINE REMOVAL Spark plug cap...

Page 102: ...piston Remove the parts in the order listed Cylinder head Cylinder 1 Piston pin clip 2 2 Piston pin 1 3 Piston 1 4 Top ring 1 5 2nd ring expander ring 1 1 6 Connecting rod small end bearing 1 For ins...

Page 103: ...9 Cylinder 9 Gasket 1 REMOVING THE PISTON 1 Remove 9 Piston pin clips 1 9 Piston pin 2 9 Piston 3 cC Do not use a hammer to drive the piston pin out NOTE 9 Before removing the piston pin clip cover t...

Page 104: ...THE CYLINDER HEAD 1 Eliminate 9 Combustion chamber carbon deposits with a rounded scraper NOTE Do not use a sharp instrument to avoid dam aging or scratching 9Spark plug bore threads 2 Eliminate 9 Exh...

Page 105: ...head several times e After resurfacing out of specification Replace the cylinder head CHECKING THE CYLINDER AND PISTON 1 Check 9 Piston wall 9 Cylinder wall Vertical scratches Rebore or replace the cy...

Page 106: ...n to cylinder clearance Cylinder bore C Piston skirt diameter D f If out of specification replace the cylinder and replace the piston and piston rings as set Diameter D 39 952 39 972 mm 1 5729 1 5737...

Page 107: ...place the piston pin and small end bearing as a set Piston pin outside diameter 9 994 10 000 mm 0 3935 0 3937 in Limit 9 974 mm 0 3927 in CYLINDER HEAD CYLINDER AND PISTON a Install a piston ring into...

Page 108: ...a set Piston pin to piston pin bore clearance Piston pin bore diameter b Piston pin outside diameter a Piston pin bore inside diameter 10 004 10 015 mm 0 3939 0 3943 in Limit 10 035 mm 0 3951 in Pist...

Page 109: ...it 3 Install 9 Piston 1 9 Piston pin 9 Piston pin clips 2 NOTE 9 Apply engine oil the piston pin 9 Make sure the arrow mark a on the piston points towards the exhaust side of the cylin der 9 Before in...

Page 110: ...cylinder with the other hand 9 Gasket 9 Cylinder head 4 Tighten 9 Cylinder head nut NOTE Tighten the cylinder head nut 2 stages and in a crisscross pattern 5 Install 9 Spark plug 6 Tighten 9 Spark pl...

Page 111: ...valve Remove the parts in the order listed Side cover Refer to SIDE COVERS SEAT AND FUEL TANK in chapter 3 Engine Refer to ENGINE REMOVAL 1 Intake manifold 1 2 Upper valve seat gasket 1 3 Reed valve...

Page 112: ...ower valve seat gasket CHECKING THE REED VALVE 1 Check 9 Reed valve assembly Cracks damage Replace the reed valve assembly 2 Check 9 Reed valve bending a Out of specification Replace the reed valve 3...

Page 113: ...VALVE 1 Install 9 Reed valve 9 Reed valve stopper 2 Install 9 Lower valve seat gasket 1 9 Reed valve assembly 2 9 Upper valve seat gasket 3 9 Intake manifold 3 Install 9 Carburetor assembly 9 Air fil...

Page 114: ...e parts in the order listed Side cover Refer to SIDE COVERS SEAT AND FUEL TANK in chapter 3 Engine Refer to ENGINE REMOVAL 1 Crankcase cover protector 1 2 Right crankcase cover 1 3 Gasket 1 4 Dowel pi...

Page 115: ...5 6 7 8 9 11 10 9 Nm 0 9 m kg 6 5 ft lb 30 Nm 3 0 m kg 22 ft lb 13 14 12 8 Nm 0 8 m kg 5 8 ft lb 4 Order Job Part Q ty Remarks 12 Straight key 1 13 Thrust plate 1 14 Coller 1 For installation reverse...

Page 116: ...SION OIL in chapter 3 3 Remove 9 Crankcase cover protector 1 9 Right crankcase cover 2 9 Gasket 9 Dowel pin 4 Remove 9 Circlip 1 9 Clutch housing 2 5 Remove 9 Primary drive gear nut 1 9 Washer 9 Clutc...

Page 117: ...ary drive and clutch carri er assembly as a set CHECKING THE CLUTCH HOUSING 1 Check 9 Clutch housing Damage wear Replace the clutch hous ing 1 2 Measure 9 Clutch housing inside diameter Out of specifi...

Page 118: ...34 5 mm 1 36 in Wear limit 35 5 mm 1 40 in INSTALLING THE CLUTCH 1 Install 9 Absorber large 1 9 Absorber small 2 NOTE Install the absorber large to L side a and install the absorber small to S side b...

Page 119: ...6 CLUTCH 5 Install 9 Right crank case cover 1 9 Crankcase cover protector 2 6 Fill 9 Transmission oil Refer to CHANGING THE TRANSMIS SION OIL in chapter 3 1 2 8 Nm 0 8 m kg 5 8 ft lb 9 Nm 0 9 m kg 6 5...

Page 120: ...er assembly Refer to ENGINE REMOVAL 1 Autolube pump cover outer 1 2 Oil delivery hose 1 3 Autolube pump cable 1 4 Oil hose 1 Be sure cap the oil hose by proper bolt to prevent the engine oil to spilt...

Page 121: ...r outer 1 2 Remove 9 Autolube pump assembly 1 with autolube pump cover inner 2 3 Remove 9 Oil pump cable 1 9 Oil delivery hose 2 disconnect the autolube pump side 1 2 1 1 3 2 4 Disconnect 9 Oil hose 3...

Page 122: ...r 2 9 Pin 3 9 O ring 4 9 Oil seal 5 CHECKING THE AUTOLUBE PUMP 1 Check 9 Autolube pump Damage cracks Replace the autolube pump assembly 2 Check 9 Worm wheel gear Worn damage Replace the oil pump drive...

Page 123: ...PUMP 1 Install 9 Autolube pump assembly 1 with autolube pump cover inner 2 5 4 3 2 1 1 2 3 1 2 4 Install 9 Autolube pump cover outer 1 1 4 Nm 0 4 m kg 2 9 ft lb 4 Nm 0 4 m kg 2 9 ft lb 5 Install 9 Air...

Page 124: ...in the order listed Side cover Refer to SIDE COVERS SEAT AND FUEL TANK in chapter 3 Engine Refer to ENGINE REMOVAL Clutch Refer to CLUTCH 1 Kick crank bolt 1 1 2 Pump drive gear 1 3 Torsion spring 1 4...

Page 125: ...Unhook the torsion spring 1 from the stopper a in the crankcase 6 Remove 9 Kick pinion gear 9 Clip CHECKING THE KICK STARTER 1 Check 9 Kick shaft 1 Bend damage Replace the kick shaft 9 Kick gear toot...

Page 126: ...ockwise and hook onto the stopper a in the crankcase 3 Install 9 Oil pump drive gear 3 NOTE Align the oil pump drive gear tooth with oil pump drive gear tooth and then install it 1 2 3 1 2 a 3 4 Insta...

Page 127: ...moving the CDI magneto Remove the parts in the order listed Side cover Refer to SIDE COVERS SEAT AND FUEL TANK in chapter 3 1 Magneto cover 1 2 Rotor nut 1 3 Spring washer 1 4 Washer 1 5 CDI magneto r...

Page 128: ...e rotor holding tool 2 3 Remove 9 Rotor nut 9 Spring washer 9 Washer 9 CDI magneto rotor 1 Use with the flywheel puller 2 9 Woodruff key 5 Remove 9 Stator assembly 1 1 2 1 1 2 1 Rotor holding tool 908...

Page 129: ...ff key INSTALLING THE CDI MAGNETO 1 Install 9 Stator assembly 2 Tighten 9 Stator assembly screw 3 Install 9 Wooruff key 1 to install the crankshaft key way 4 Install 9 CDI magneto rotor 1 9 Washer 2 9...

Page 130: ...ding tool 2 NOTE While holding the CDI magneto rotor with the rotor holding tool tighten the rotor nut 6 Install 9 Magneto cover 7 Connect 9 CDI magneto coupler connecter 2 1 43 Nm 4 3 m kg 31 ft lb R...

Page 131: ...fer to SIDE COVERS SEAT AND FUEL TANK in chapter 3 Engine Refer to ENGINE REMOVAL Cylinder head cylinder piston Refer to CYLINDER HEAD CYLINDER AND PISTON Reed valve Refer to REED VALVE Clutch Refer t...

Page 132: ...ANKSHAFT 1 2 3 3 4 5 6 6 7 7 8 Nm 0 8 m kg 5 8 ft lb 15 Nm 1 5 m kg 11 ft lb E E Order Job Part Q ty Remarks 4 Crankshaft assembly 1 5 Crankcase right 1 6 Bearing 2 7 Oil seal 2 For installation rever...

Page 133: ...uller 2 a 95 mm 3 74 in NOTE 9 Fully tighten the tool holding bolts but make sure the tool body is parallel with the case If necessary one screw may be backed out slightly to level tool body 9 As pres...

Page 134: ...nout a 9 Small end free play b 9 Connecting rod big end side clearance c 9 Crank width d Out of specification Replace the crank shaft assembly Use the dial gauge and thickness gauge 1 2 a a b c d Dial...

Page 135: ...e crankshaft clean the contacting surface of crankcase 9 Apply the lithium soap base grease on the oil seal lip cC Do not use a hammer to drive in the crank shaft 2 Apply 9 Yamaha bond No 1215 Three B...

Page 136: ...ankcase the connect ing rod should be positioned at TDC top dead center 4 Tighten 9 Screw crankcase NOTE Tighten the crankcase tightening screws in stage using a crisscross pattern 5 Remove 9 Sealant...

Page 137: ...in the order listed Engine Refer to ENGINE REMOVAL Clutch Refer to CLUTCH Kick starter Refer to KICK STARTER Rear wheel Refer to FRONT WHEEL REAR WHEEL AND BRAKE in chapter 4 Shaft drive Refer to SHA...

Page 138: ...5 45 MIDDLE GEAR 1 2 3 4 12 Nm 1 2 m kg 8 7 ft lb 6 5 9 8 7 60 Nm 6 0 m kg 43 ft lb G G Order Job Part Q ty Remarks 8 Main axle assembly 1 9 Pinion shim 1 For installation reverse the removal procedu...

Page 139: ...9 Bearing 2 9 Driven pinion 3 9 Thrust shim 4 Hexagon wrench 90890 01306 YM 01306 1 2 1 2 3 4 1 2 CHECKING THE MEDDLE GEAR 1 Check 9 Main axle 1 Galling pitting wear Replace 2 Check 9 Driven pinion 2...

Page 140: ...ENG 5 47 MIDDLE GEAR 2 Install 9 Screw 1 Attach the hexagon wrench 2 NOTE Tighten the screw counterclockwise 3 Install 9 Oil seal Hexagon wrench 90890 01306 YM 01306 1 2 60 Nm 6 0 m kg 43 ft lb...

Page 141: ...CARB CHAPTER 6 CARBURETOR CARBURETOR 6 1 REMOVING THE CARBURETOR 6 3 DISASSEMBLING THE CARBURETOR 6 4 CHECKING THE CARBURETOR 6 4 ASSEMBLING THE CARBURETOR 6 6 INSTALLING THE CARBURETOR 6 8...

Page 142: ...sted Side cover Refer to SIDE COVERS SEAT AND FUEL TANK in chapter 3 1 Air filter assembly 1 2 Fuel hose 1 Set the fuel cock to S 3 Oil delivery hose 1 4 Mixing chamber top 1 5 Carburetor clamp screw...

Page 143: ...embling the carburetor Disassemble the parts in the order listed 1 Throttle stop screw set 1 2 Float chamber body 1 3 Float chamber gasket 1 4 Float pin 1 5 Float 1 6 Needle valve 1 7 Main jet 1 8 Mai...

Page 144: ...9 Seat 9 Clip 9 Air filter assembly 1 2 Remove 9 Oil delivery hose 1 9 Fuel hose 2 3 Remove 9 Mixing chamber top 1 4 Loosen 9 Carburetor clamp screw 2 5 Remove 9 Carburetor assembly 3 6 Remove 9 Thro...

Page 145: ...oat chamber body 1 2 Remove 9 Throttle stop screw set 1 3 Remove 9 Float chamber body 9 Float chamber gasket 2 3 1 4 Remove 9 Float pin 1 9 Float 2 9 Needle valve assembly 3 1 2 3 5 Remove 9 Main jet...

Page 146: ...uretor cleaning solution b Blow out all of the passages and jets with compressed air 3 Check 9 Float chamber body Dirt Clean 4 Check 9 Float Damage Replace 5 Check 9 Needle valve 9 Needle valve seat D...

Page 147: ...ess Replace the throttle valve 9 Check 9 Starter plunger 9 Starter plunger spring Bends cracks damage Replace 10 Check 9 Fuel hose 9 Oil delivery hose Cracks damage wear Replace Obstruction Clean Blow...

Page 148: ...wn position b Measure the distance between the mating surface of the float chamber and top of the float using a vernier calipers NOTE The float arm should be resting on the needle valve but not compre...

Page 149: ...and then install them 6 Install 9 Throttle valve spring 1 9 Needle set 2 9 Throttle valve 3 9 Plunger spring 4 9 Starter plunger 5 1 3 2 4 5 INSTALLING THE CARBURETOR 1 Adjust 9 Engine idling speed R...

Page 150: ...ELEC CHAPTER 7 ELECTRICAL SYSTEM ELECTRICAL COMPONENTS 7 1 CHECKING SWITCH CONTINUITY 7 2 CHECKING THE SWITCHES 7 3 IGNITION SYSTEM 7 4 CIRCUIT DIAGRAM 7 4 TROUBLESHOOTING 7 5...

Page 151: ...ELECTRICAL SYSTEM ELECTRICAL COMPONENTS 1Ignition control switch 2Diode 3Control unit 4CDI unit 5Ignition coil 6Stater assembly 2 3 4 5 1 6 ELEC ELECTRICAL COMPONENTS 7 1...

Page 152: ...ck et tester to 0 and to the 1 range 9 When checking for continuity switch back and forth between the switch positions a few times The terminal connections for switches e g main switch engine stop swi...

Page 153: ...NG THE SWITCHES Check each switch for damage or wear proper connections and also for continuity between the terminals Refer to CHECKING SWITCH CONTINUITY Damage wear Repair or replace Improperly conne...

Page 154: ...W R W R W R W R W R B R B R B R B R B R B R B R B R B R B R B R Y W Y W Y W B B B W Y R R B Y W B W B B Y 1 2 3 4 5 6 7 8 1 Ignition control switch 2 Diode 3 Control unit 4 C D I magneto 5 C D I unit...

Page 155: ...from the spark plug 9Connect the ignition checker 1 as shown 2 Spark plug cap 9Set the main switch to ON 9Crank the engine by pushing the start switch and gradually increase the spark gap until a mis...

Page 156: ...probe terminal 1 Positive tester probe spark plug lead 2 9Measure the secondary coil resistance 9Is the ignition coil OK IGNITION SYSTEM 3 Spark plug cap resistance 9Remove the spark plug cap from th...

Page 157: ...coil resistance 18 0 22 0 at 20 C 68 F between white red and black YES NO Replace the stator coil pickup coil assembly 6 Charge coil resistance 9Disconnect the charge coil coupler from the wire harne...

Page 158: ...W R B R 1 2 Lighting coil resistance 0 57 0 69 at 20 C 68 F between white and black YES NO Replace the stator coil assembly 1 3 2 W R B R B B Y W B YES NO Replace the control unit assembly Control uni...

Page 159: ...iring 9 Check the entire ignition system wiring Refer to CIRCUIT DIAGRAM 9 Is the ignition system wiring properly con nected and without defects YES NO Properly connect or repair the igni tion system...

Page 160: ...E 8 2 FUEL SYSTEM 8 2 ELECTRICAL SYSTEM 8 2 POOR MEDIUM AND HIGH SPEED PERFORMANCE 8 3 ENGINE 8 3 FUEL SYSTEM 8 3 FAULTY CLUTCH 8 3 ENGINE OPERATES BUT VEHICLE WILL NOT MOVE 8 3 FUEL SYSTEM 8 3 ELECTR...

Page 161: ...d piston ring 9 Seized piston ring 9 Seized or damaged piston Air filter 9 Improperly installed air filter 9 Clogged air filter element Crankcase and crankshaft 9 Improperly assembled crankcase 9 Seiz...

Page 162: ...ded circuit 9 Loose connections ENGINE Air filter 9 Clogged air filter element FUEL SYSTEM Carburetor s 9 Faulty starter plunger 9 Loose or clogged pilot jet 9 Loose or clogged pilot air jet 9 Damaged...

Page 163: ...ive CLUTCH SLIPS Clutch shoe spring s 9 Damaged loose or worn clutch shoe spring Clutch shoe s 9 Damaged or worn clutch shoe POOR STARTING PERFORMANCE Clutch shoe s 9 Bent damaged or worn clutch shoe...

Page 164: ...correct grease viscosity EAS28660 FAULTY FRONT FORK LEGS Handlebar 9 Bent or improperly installed handlebar Steering head components 9 Improperly installed upper bracket 9 Improperly installed lower b...

Page 165: ......

Page 166: ...YAMAHA MOTOR CO LTD 2500 SHINGAI IWATA SHIZUOKA JAPAN PRINTED IN U S A...

Page 167: ...O Orange R Red W White W B White Black B Y Black Yellow B R Black Red W R White Red Y W Yellow White COLOR CODE RUN OFF START B B B B B B B B B B B B B B B Y R R R O O O W W B Y B Y B Y W B W B W W B...

Page 168: ...2 Diode 3 Control unit 4 C D I magneto 5 C D I unit 6 Ignition coil 7 Spark plug 8 Ground PW50W 2007 WIRING DIAGRAM RUN OFF START 1 2 3 4 5 6 7 8 Black Orange Red White Black Yellow Black Red White Bl...

Reviews: