18
MODX6/MODX7
8.
MODX7 Disassembling the Keyboard
Assembly
8-1.
Remove the lower case assembly. (See procedure 1)
8-2.
White Keys and Black Keys
8-2-1. Remove the four (4) screws marked [240A]. The two
(2) keyboard angles can then be removed. (Fig . 12)
8-2-2. Remove the twenty two (22) screws marked [240B].
(Fig . 12)
8-2-3. The white and black keys in the set can then be
removed. (Fig. 12)
When removing, unfasten the two (2) hooks at the back
of the black keys upward, and lift the white and black
keys while pulling them toward you a little. (Fig. 10)
8-2-4. To remove the white and black keys from E0 to B0
and from C6 to G6, unhook as described in Procedure
8-2-3, and pull out toward you. (Fig. 12, Fig. 10)
8-3.
Rubber Contact
8-3-1. Remove the white and black keys corresponding to
the rubber contacts to be removed. (Fig. 12)
8-3-2. Remove the rubber contacts. (Fig. 12)
8-4.
76L Circuit Board
8-4-1. Remove the white and black keys from E0 to B3.
(See Fig. 12 and Procedure 8-2.)
8-4-2. Remove the eleven (11) screws marked [200A]. The
76L circuit board can then be removed. (Fig. 12)
*
When installing the 76L circuit board, tighten screws
in the numerical order of 1 through 11 as shown in the
Fig. 13.
8-5.
76H Circuit Board
8-5-1. Remove the white and black keys from C3 to G6.
(See Fig. 12 and Procedure 8-2.)
8-5-2. Remove the thirteen (13) screws marked [200B]. The
76H circuit board can then be removed. (Fig. 12)
*
When installing the 76H circuit board, tighten screws
in the numerical order of 1 through 13 as shown in the
Fig. 13.
8.
MODX7 鍵盤 Ass’y の分解
8-1.
下ケース Ass’y を外します。(1 項参照)
8-2.
白鍵、黒鍵
8-2-1. [240A] のネジ 4 本を外して、鍵盤補強金具 2 個を
外します。(図 12)
8-2-2. [240B] のネジ 22 本を外します。(図 12)
8-2-3. セット内の白鍵、黒鍵のキーを外すことができま
す。 (図 12)
この時、黒鍵の後ろ側にある 2 つのフックを上方
向に外し、白鍵・黒鍵を少し手前に引きながら持
ち上げます。(図 10)
8-2-4. E0 ~ B0、C6 ~ G6 の白鍵、黒鍵は、8-2-3 の項の
様にフックを外して手前に引きながら外します。
(図 12、図 10)
8-3.
接点ゴム
8-3-1. 外そうとする接点ゴムに対応した白鍵・黒鍵を外
します。(図 12)
8-3-2. それぞれの接点ゴムを外します。(図 12)
8-4.
76L シート
8-4-1. E0 ~ B3 の白鍵・黒鍵を外します。(図 12、8-2 項
参照)
8-4-2. [200A] のネジ 11 本を外し、76L シートを外します。
(図 12)
※
76L シートを取り付ける時は、図 13 に示す 1 ~ 11 の数字順
にネジを締めてください。
8-5.
76H シート
8-5-1. C3 ~ G6 の白鍵・黒鍵を外します。(図 12、8-2 項
参照)
8-5-2. [200B] のネジ 13 本を外し、76H シートを外します。
(図 12)
※
76H シートを取り付ける時は、図 13 に示す 1 ~ 13 の数字順
にネジを締めてください。
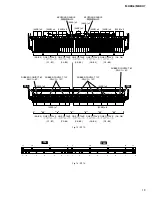
Fig. 11 (図 11)
2
3
4
5
6
7
1
1
2
3
4
5
8
9
10
11
6
7
8
61L
61H
Summary of Contents for MODX6
Page 23: ...23 MODX6 MODX7 C C Pattern side DM Circuit Board C C 2NA ZW84620 1...
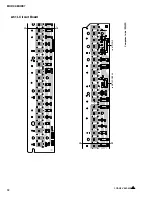
Page 24: ...MODX6 MODX7 24 PNC Circuit Board Component side 2NA ZX42110...
Page 28: ...MODX6 MODX7 28 PNR Circuit Board Component side 2NA ZX42110...
Page 29: ...29 MODX6 MODX7 to PNC CB107 Pattern side PNR Circuit Board 2NA ZX42110...
Page 31: ...31 MODX6 MODX7 TOME4 Circuit Board Component side Pattern side 2NA ZX42110...


