background image

8-9

1. Reservoir tank cap

c. Remove the radiator cover and radi-

ator cap.

d. Remove the drain bolts.

1. Drain plug (

×

2)

e. Drain the coolant completely, and

thoroughly flush the cooling system
with clean tap water.

f. Install and tighten the drain bolts. If

the gaskets are damaged, replace
them.

g. Pour the recommended coolant into

the radiator until it is full.

q

q

q

Tightening torque

Drain bolt:

14 Nm (1.4 m•kg, 10 ft•lb)

 5FK-9-12-3  4/11/0 12:45 AM  Page 10

Summary of Contents for BANSHEE YFZ350M 1999

Page 1: ...be ridden by anyone under 16 years of age OWNER S MANUAL 5FK 28199 12 YFZ350M READ THIS MANUAL CAREFULLY It contains important safety information LIT 11626 13 09 5FK 9 12 tei Hyoshi 4 11 0 11 56 PM Pa...

Page 2: ...A B6 siro 4 11 0 11 14 PM Page 1...

Page 3: ...es basic maintenance and inspection procedures If you have any questions regarding the operation or maintenance of your machine please consult a Yamaha dealer AN IMPORTANT SAFETY MESSAGE 8 READ THIS M...

Page 4: ...fety Alert Symbol means ATTENTION BECOME ALERT YOUR SAFETY IS INVOLVED w Failure to follow WARNING instructions could result in severe injury or death to the machine operator a bystander or a person i...

Page 5: ...d regulations in effect at the time of manufacture Please check your local riding laws and regulations before operating this machine AFFIX DEALER LABEL HERE EBU00012 YFZ350M OWNER S MANUAL 1999 by Yam...

Page 6: ...3 CONTROL FUNCTIONS 4 1 Main switch 4 1 Handlebar switches 4 2 Throttle lever 4 3 Throttle OverRide System 4 4 Speed limiter 4 4 Clutch lever 4 6 Front brake lever 4 6 Rear brake pedal 4 7 Parking br...

Page 7: ...asure tire pressure 5 11 Tire wear limit 5 12 OPERATION 6 1 Starting a cold engine 6 1 Starting a warm engine 6 3 Warming up 6 3 Shifting 6 4 To start out and accelerate 6 5 To decelerate 6 6 Engine b...

Page 8: ...adjustment 8 25 Front and rear brake pad inspection 8 26 Inspecting the brake fluid level 8 27 Brake fluid replacement 8 28 Front brake lever free play adjustment 8 29 Rear brake adjustment 8 30 Park...

Page 9: ...ing 8 41 Troubleshooting chart 8 42 No spark 8 43 CLEANING AND STORAGE 9 1 A Cleaning 9 1 B Storage 9 3 SPECIFICATIONS 10 1 NOISE REGULATION 11 1 MAINTENANCE RECORD 12 1 ATV LIMITED WARRANTY 13 1 9 10...

Page 10: ...safe and proper operation of your ATV Never remove any labels from your ATV If a label becomes difficult to read or comes off a replacement label is available from your Yamaha dealer 1 1 EBU00464 LOC...

Page 11: ...q w 1 e 5FE 21568 01 qWARNING NEVER ride as a passenger Passengers can cause a loss of control resulting in SEVERE INJURY or DEATH 5FE 2151H 40 5FE 2151H 01 5FK 21696 01 5FK 9 12 1 4 11 0 12 32 AM Pag...

Page 12: ...1 3 r t y 5FE 21697 01 5FK 9 12 1 4 11 0 12 32 AM Page 10...

Page 13: ...8 Never operate an ATV without proper training or instruction Take a Training Course Beginners should receive training from a certified instructor Contact an authorized ATV dealer or call 1 800 447 4...

Page 14: ...te at speeds too fast for your skills or the conditions Always go at a speed that is proper for the terrain visibility and operating conditions and your experience 8 Never attempt wheelies jumps or ot...

Page 15: ...faces Shift your weight forward Never open the throttle suddenly or make sudden gear changes Never go over the top of a hill at high speed 8 Always follow proper procedures for going down hills and fo...

Page 16: ...s described in this manual 8 Always be careful when skidding or sliding Learn to safely control skidding or sliding by practicing at low speeds and on level smooth terrain On extremely slippery surfac...

Page 17: ...speed and follow instructions in this manual for carrying cargo or pulling a trailer Allow greater distance for braking FOR MORE INFORMATION ABOUT ATV SAFETY call the Consumer Products Safety Commissi...

Page 18: ...ignition such as the pilot lights of water heaters and clothes dryers qWARNING When transporting the machine in another vehicle be sure it is kept upright and that the fuel cock is in the OFF positio...

Page 19: ...closed area WHAT CAN HAPPEN Exhaust fumes are poisonous and may cause loss of consciousness and death within a short time HOW TO AVOID THE HAZARD Always operate your machine in an area with adequate...

Page 20: ...ake 7 Front shock absorber 17 Main switch 8 Radiator 18 Front brake lever 9 Fuel cock 19 Throttle lever 10 Rear shock absorber 20 Handlebar switch NOTE The machine you have purchased may dif fer sligh...

Page 21: ...om a Yamaha dealer or for reference in case the vehicle is stolen 1 KEY IDENTIFICATION NUMBER 2 VEHICLE IDENTIFICATION NUMBER 3 MODEL LABEL INFORMATION EBU00035 Key identification number The key ident...

Page 22: ...on number is used to identify your machine 1 Vehicle identification number EBU00038 Model label The model label is affixed to the frame Record the information on this label in the space provided This...

Page 23: ...switch Functions of the respective switch posi tions are as follows ON Engine can be started only at this position and the headlight and taillight come on when the light switch is on OFF All electric...

Page 24: ...nd can be used at all times to stop the engine especially in an emergency The engine will not start or run when the engine stop switch is turned to OFF EBU00057 Lights switch LIGHTS Turn the switch to...

Page 25: ...operating smoothly Make sure it returns to the idle position as soon as the lever is released 4 3 q POTENTIAL HAZARD Malfunction of throttle WHAT CAN HAPPEN The throttle could be hard to operate makin...

Page 26: ...m Screwing in the adjuster limits the maximum engine power available and decreases the maxi mum speed of the ATV 1 Locknut 2 Adjuster a 12 mm 0 47 in 4 4 POTENTIAL HAZARD Continuing to ride the ATV af...

Page 27: ...maged Improper throttle operation could result You could lose control have an accident or be injured HOW TO AVOID THE HAZARD Do not turn the speed adjuster out more than 12 mm 0 47 in Always make sure...

Page 28: ...d release the lever to engage the clutch The lever should be pulled rapidly and released slowly for smooth clutch operation 1 Clutch lever EBU00070 Front brake lever The front brake lever is located o...

Page 29: ...e machine espe cially on a slope Squeeze the clutch lever while pushing the button then push in the lock plate to apply the parking brake Squeeze the clutch lever to release the parking brake NOTE Whe...

Page 30: ...ntrol or a collision The brake disc could overheat if you ride the ATV without releasing the parking brake You could lose braking perfor mance which could cause an accident You could also wear out the...

Page 31: ...0089 Kick starter Rotate the kick starter away from the engine Push the starter down lightly with your foot until the gears engage then kick smoothly and forcefully to start the engine This model has...

Page 32: ...will not flow Always turn the lever to this position when the engine is not running ON With the lever in this position fuel flows to the carburetor Normal rid ing is done with the lever in this posit...

Page 33: ...parate starter circuit sup plies this mixture Move in direction a to turn on the starter choke Move in direction b to turn off the starter choke Refer to Starting a cold engine for prop er operation S...

Page 34: ...r upward and pull up the seat at the rear To install the seat insert the projection on the front of the seat into the seat holder and push down on the seat at the rear NOTE Make sure that the seat is...

Page 35: ...uster in direction b 4 13 a b A B C D E q POTENTIAL HAZARD Improper shock absorber adjustment WHAT CAN HAPPEN Uneven adjustment can cause poor han dling and loss of stability which could lead to an ac...

Page 36: ...ng preload 4 14 POTENTIAL HAZARD This shock absorber contains highly pressurized nitrogen gas WHAT CAN HAPPEN The shock absorber could explode caus ing injury or property damage Cylinder damage could...

Page 37: ...tting d Tighten the locknut to the specified torque cC Always tighten the locknut against the spring adjuster and torque the locknut to specification A Tightening torque 54 Nm 5 4 m kg 39 ft lb Instal...

Page 38: ...damping force as follows Turn the adjuster in direction a to increase compression damping force and in direction b to decrease com pression damping force 20 clicks out 10 clicks out 0 MINIMUM STANDARD...

Page 39: ...ed out position Standard 10 clicks in Minimum Soft 0 clicks in Maximum Hard 20 clicks in POTENTIAL HAZARD Suspension components become hot during operation WHAT CAN HAPPEN You could be burned HOW TO A...

Page 40: ...l level 9 Fill with fuel if necessary 5 5 5 6 Transmission oil 9 Check oil level 9 Fill with oil if necessary 5 7 8 5 8 7 Coolant reservoir tank 9 Check coolant level 9 Fill with coolant if necessary...

Page 41: ...ses the possibility of an accident or equipment damage HOW TO AVOID THE HAZARD Always inspect your ATV each time you use it to make sure the ATV is in safe operating condition Always follow the inspec...

Page 42: ...pages 8 29 8 30 2 Brake fluid level Check the brake fluid level Add fluid if necessary See pages 8 27 8 28 NOTE If DOT 4 is not available DOT 3 can be used 3 Brake fluid leakage Check to see if any br...

Page 43: ...d to an accident HOW TO AVOID THE HAZARD Always check the brakes at the start of every ride Do not ride the ATV if you find any problem with the brakes If a problem cannot be corrected by the adjustme...

Page 44: ...ced maintenance cost If unleaded gasoline is not available then leaded pre mium gasoline can be used Gasohol There are two types of gasohol gasohol containing ethanol and that containing methanol Gaso...

Page 45: ...it heats up If the fuel tank is overfilled fuel could spill out due to heat from the engine or the sun HOW TO AVOID THE HAZARD Do not overfill the fuel tank Be careful not to spill fuel especially on...

Page 46: ...el in the reservoir tank when the engine is cold The coolant level will vary with engine temperature The coolant level is satisfactory if it is between the FULL and LOW marks on the tank If the coolan...

Page 47: ...el 0 07 L 0 06 Imp qt 0 07 US qt POTENTIAL HAZARD Removing the radiator cap when the engine and radiator are still hot WHAT CAN HAPPEN You could be burned by hot fluid and steam blown out under pressu...

Page 48: ...y for proper operation EBU00152 Fittings and Fasteners Always check the tightness of chassis fit tings and fasteners before a ride Take the machine to a Yamaha dealer or refer to the Service Manual fo...

Page 49: ...f cm2 4 4 psi Rear 30 kPa 0 30 kgf cm2 4 4 psi 9 Check and adjust tire pressures when the tires are cold 9 Tire pressures must be equal on both sides 3 Tire pressure below the minimum specified could...

Page 50: ...n the gauge could cause the first reading to be incor rect Set pressure with tires cold Set tire pressures to the following specifi cations 1 Low pressure tire gauge 5 11 q 30 kPa 0 30 kgf cm2 4 4 psi...

Page 51: ...EBU00160 Tire wear limit When the tire groove decreases to 3 mm 0 12 in due to wear replace the tire 5 12 a a 3 mm 0 12 in 5FK 9 12 1 4 11 0 12 32 AM Page 49...

Page 52: ...ng familiar with all controls WHAT CAN HAPPEN Loss of control which could cause an accident or injury HOW TO AVOID THE HAZARD Read the Owner s Manual carefully If there is a control or function you do...

Page 53: ...ter choke in position 1 the starter choke should be returned to position 2 to warm up the engine If the engine is started with the starter choke in position 2 keep the starter choke in this position t...

Page 54: ...he engine before starting off Never accelerate hard with a cold engine To see whether or not the engine is warm check if it responds to the throttle normally with the starter choke turned off NOTE Whe...

Page 55: ...stops it will be in first gear Raise the pedal slightly to neutral cC 1 Do not coast for long periods with the engine off and do not tow the machine a long distance Even in neu tral position the trans...

Page 56: ...rottle and at the same time quickly pull in the clutch lever 6 Shift into second gear be careful not to shift into neutral 7 Open the throttle part way and gradual ly release the clutch lever 8 Follow...

Page 57: ...n cause the tires to lose traction reduc ing control and increasing the possibility of an accident 6 6 POTENTIAL HAZARD Engaging a lower gear when the engine speed is too high WHAT CAN HAPPEN The whee...

Page 58: ...throttle operation under load does not harm the engine Each full throttle acceleration sequence should be followed with a substantial rest period for the engine by cruising at lower r min so the engi...

Page 59: ...EBU00212 Parking When parking stop the engine and shift into low gear Turn the fuel cock to OFF and apply the parking brake 6 8 5FK 9 12 1 4 11 0 12 32 AM Page 57...

Page 60: ...Parking on a hill or other incline WHAT CAN HAPPEN The ATV could roll out of control increasing the chance of an accident HOW TO AVOID THE HAZARD Avoid parking on hills or other inclines If you must...

Page 61: ...e a genuine Yamaha accessory or one that is equivalent in design and quality 8 Accessories should be rigidly and securely mounted An accessory which can shift position or come off while you are riding...

Page 62: ...he trailer cannot move around A shifting load can cause an accident 8 Make sure the load does not interfere with controls or your ability to see where you are going 8 Ride more slowly than you would w...

Page 63: ...in vehicle handling which could lead to an accident HOW TO AVOID THE HAZARD Never exceed the stated load capacity for this ATV Cargo should be properly distributed and securely attached Reduce speed w...

Page 64: ...6 13 EBU00558 w Indicates a potential hazard that could result in serious injury or death 5FK 9 12 1 4 11 0 12 32 AM Page 62...

Page 65: ...1 7 1 Riding Your ATV OK OK OK OK 7 1 7 5FK 9 12 2 4 11 0 12 40 AM Page 1...

Page 66: ...7 2 5FK 9 12 2 4 11 0 12 40 AM Page 2...

Page 67: ...TV can be a very enjoy able activity providing you with hours of pleasure But it is essential to familiarize yourself with the operation of the ATV to achieve the skill necessary to enjoy riding safel...

Page 68: ...ell before attempting more difficult maneuvers POTENTIAL HAZARD Operating this ATV without proper instruction WHAT CAN HAPPEN The risk of an accident is greatly increased if the operator does not know...

Page 69: ...ommenda tions for this ATV WHAT CAN HAPPEN Use by children of ATVs that are not rec ommended for their age can lead to severe injury or death of the child HOW TO AVOID THE HAZARD A child under 16 shou...

Page 70: ...Greatly reduces your ability to balance and control this ATV Could cause an accident resulting in harm to you and or your passenger HOW TO AVOID THE HAZARD Never carry a passenger The long seat is to...

Page 71: ...protection can result in an accident and increases your chances of a severe injury in the event of an accident Operating without protective clothing increases your chances of severe injury in the eve...

Page 72: ...ZARD Operating this ATV after consuming alcohol or drugs WHAT CAN HAPPEN Could seriously affect your judgment Could cause you to react more slowly Could affect your balance and percep tion Could resul...

Page 73: ...Always follow the inspection and main tenance procedures and schedules described in the Owner s Manual qWARNING POTENTIAL HAZARD Operating this ATV with improper tires or with improper or uneven tire...

Page 74: ...ts the power and top speed of the machine Turning the screw in decreas es top speed and turning it out increases top speed 7 10 POTENTIAL HAZARD Operating this ATV at speeds too fast for your skills o...

Page 75: ...ENTIAL HAZARD Overloading this ATV or carrying or tow ing cargo improperly WHAT CAN HAPPEN Could cause changes in vehicle handling which could lead to an accident HOW TO AVOID THE HAZARD Never exceed...

Page 76: ...even one hand or foot can reduce your ability to control the ATV or could cause you to lose your balance and fall off of the ATV If you remove a foot from a footboard your foot or leg may come into co...

Page 77: ...7 13 POTENTIAL HAZARD Attempting wheelies jumps and other stunts WHAT CAN HAPPEN Increases the chance of an accident including an overturn HOW TO AVOID THE HAZARD Never attempt stunts such as wheelies...

Page 78: ...ations could lead to an accident HOW TO AVOID THE HAZARD Never modify this ATV through improper installation or use of accessories All parts and accessories added to this vehicle should be genuine Ya...

Page 79: ...where pedestrians or children are not likely to touch it 7 15 POTENTIAL HAZARD Hot exhaust system WHAT CAN HAPPEN Someone touching the exhaust system during or after operation could be burned HOW TO A...

Page 80: ...ng this ATV on paved surfaces WHAT CAN HAPPEN ATVs are designed for off road use only Paved surfaces may seriously affect han dling and control of the ATV and may cause the vehicle to go out of contro...

Page 81: ...erating this ATV on public streets roads or highways WHAT CAN HAPPEN You can collide with another vehicle HOW TO AVOID THE HAZARD Never operate this ATV on any public street road or highway even a dir...

Page 82: ...e extra care when operating this ATV on unfamiliar terrain WHAT CAN HAPPEN You can come upon hidden rocks bumps or holes without enough time to react Could result in the ATV overturning or going out o...

Page 83: ...or vehicle control which could result in an acci dent including an overturn HOW TO AVOID THE HAZARD Do not operate on excessively rough slippery or loose terrain until you have learned and practiced t...

Page 84: ...no trespass ing Do not ride on private property with out getting permission POTENTIAL HAZARD Operating in areas where you might not be seen by other off road vehicles qWARNING WHAT CAN HAPPEN You coul...

Page 85: ...ing to come in contact with these components With the engine idling pull the clutch lever to disengage the clutch and shift into 1st gear and then release the parking brake Open the throttle gradually...

Page 86: ...TIAL HAZARD Opening the throttle abruptly or releas ing the clutch lever too quickly WHAT CAN HAPPEN The machine could wheelie This would increase the chance of an accident including overturn HOW TO A...

Page 87: ...As you do so put your weight on the footboard to the outside of the turn opposite your desired direction and lean your upper body into the turn Use the throttle to maintain an even speed through the...

Page 88: ...le to per form it at higher speeds or in tighter curves Improper riding procedures such as abrupt throttle changes excessive braking incor rect body movements or too much speed for the sharpness of th...

Page 89: ...is important when climbing a hill to make sure that your weight is transferred for ward on the ATV This can be accom plished by leaning forward and on steeper inclines standing on the footboards and l...

Page 90: ...ways check the terrain carefully before you start up any hill Never climb hills with excessively slip pery or loose surfaces Shift your weight forward Never open the throttle suddenly or make sudden g...

Page 91: ...or cause the ATV to overturn HOW TO AVOID THE HAZARD Never attempt to turn the ATV around on any hill until you have mastered the turning technique as described in the Owner s Manual on level ground...

Page 92: ...n gear The ATV could easily tip over back wards Instead dismount the ATV immedi ately on the uphill side POTENTIAL HAZARD Stalling rolling backwards or improper ly dismounting while climbing a hill WH...

Page 93: ...ar brake as well and then lock parking brake Dismount on uphill side or to a side if pointed straight uphill Turn the ATV around and remount following the pro cedure described in the Owner s Manual 5F...

Page 94: ...p angles which could allow the ATV to tip or roll over Carefully choose your path and ride no faster than you will be able to react to obstacles which may appear POTENTIAL HAZARD Going down a hill imp...

Page 95: ...7 31 OK 5FK 9 12 2 4 11 0 12 40 AM Page 31...

Page 96: ...s either up or down hill If your ATV does begin to tip over gradual ly steer in the downhill direction if there are no obstacles in your path As you regain proper balance gradually steer again in the...

Page 97: ...7 33 Avoid hills with excessively slippery or loose surfaces Shift your weight to the uphill side of the ATV OK 5FK 9 12 2 4 11 0 12 40 AM Page 33...

Page 98: ...lly POTENTIAL HAZARD Operating this ATV through deep or fast flowing water WHAT CAN HAPPEN Tires may float causing loss of traction and loss of control which could lead to an accident qWARNING HOW TO...

Page 99: ...have regained proper brak ing ability cC After riding your ATV in water be sure to drain the trapped water by removing the check hose at the bottom of the air filter case Wash the ATV in fresh water i...

Page 100: ...of control and damage to the ATV may result POTENTIAL HAZARD Improperly operating over obstacles WHAT CAN HAPPEN Could cause loss of control or a colli sion Could cause the ATV to overturn HOW TO AVO...

Page 101: ...7 37 5FK 9 12 2 4 11 0 12 40 AM Page 37...

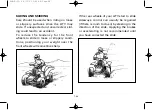
Page 102: ...the front wheels to slide in loose or slippery condi tions positioning your weight over the front wheels will sometimes help If the rear wheels of your ATV start to slide sideways control can usually...

Page 103: ...all control may be lost POTENTIAL HAZARD Skidding or sliding improperly WHAT CAN HAPPEN You may lose control of this ATV You may also regain traction unexpect edly which may cause the ATV to over tur...

Page 104: ...e If necessary gradually let off the throttle and or steer to the outside of the turn See pages 7 23 7 24 8 If your ATV starts to slide sideways Steer in the direction of the slide if you have the roo...

Page 105: ...tip over dismount on the uphill side See pages 7 32 7 33 8 If your ATV encounters shallow water Ride slowly and carefully through slow moving water watching for obstacles Be sure to let water drain f...

Page 106: ...nual and low pressure tire gauge in the vinyl bag and always carry them along with the owner s tool kit under the seat 1 Owner s manual 2 Low pressure tire gauge 3 Tool kit 8 1 q w e POTENTIAL HAZARD...

Page 107: ...the torque settings and adjust them as necessary 8 2 POTENTIAL HAZARD Operating this ATV with improper modi fications WHAT CAN HAPPEN Improper installation of accessories or modification of this vehic...

Page 108: ...heck idle speed starter operation 2 2 2 2 9 Adjust if necessary Spark arrester 9 Clean 2 2 2 Fuel line 9 Check fuel hose for cracks or damage 2 2 2 9 Replace if necessary Throttle operation 9 Inspect...

Page 109: ...NE 1 3 6 6 1 month months months months year Drive chain guard and rollers 9 Check wear and replace if necessary 2 2 2 Steering system 9 Inspect free play clean and lubricate 2 2 2 2 2 Front and rear...

Page 110: ...TE Wait a few minutes until the oil level settles before checking d Remove the dipstick and inspect the oil level e The oil level should be between the maximum and minimum marks If the level is low ad...

Page 111: ...y Conserving contain anti fric tion additives which will cause clutch and or starter clutch slippage result ing in reduced component life and poor engine performance 8 Be sure no foreign material ente...

Page 112: ...or are still hot WHAT CAN HAPPEN You could be burned by hot fluid and steam blown out under pressure HOW TO AVOID THE HAZARD Wait for the engine to cool before removing the radiator cap Always use a t...

Page 113: ...ate the cap counterclockwise to the detent This procedure allows any residual pressure to escape When the hissing has stopped press down on the cap while turning counterclockwise and remove it 1 Radia...

Page 114: ...he coolant completely and thoroughly flush the cooling system with clean tap water f Install and tighten the drain bolts If the gaskets are damaged replace them g Pour the recommended coolant into the...

Page 115: ...the reservoir tank with coolant up to the FULL level k Install the reservoir tank cap and check for coolant leakage NOTE If any leakage is found ask a Yamaha dealer to inspect l Install the radiator c...

Page 116: ...or there could be something wrong with the engine Do not attempt to diagnose such problems yourself Instead take the machine to a Yamaha dealer You should periodically remove and inspect the spark plu...

Page 117: ...ck hose at the bottom of the air filter case If dust or water collects in this hose empty the hose and clean the air filter element and air filter case 1 Remove the seat 2 Remove the air filter case c...

Page 118: ...ilter element when squeezing it 6 Inspect the element If damaged replace it POTENTIAL HAZARD Using low flash point solvents or gaso line to clean the air filter element WHAT CAN HAPPEN Low flash point...

Page 119: ...usty areas Each time filter element maintenance is per formed check the air inlet to the filter case for obstructions Check the air cleaner rub ber joint to the carburetor and manifold fit tings for a...

Page 120: ...the muffler 3 Tap the tailpipe lightly then use a wire brush to remove any carbon deposits from the spark arrester portion of the tailpipe 4 Make sure the gasket is properly posi tioned then insert t...

Page 121: ...cause burns Could cause carbon monoxide poison ing possibly leading to death Could start a fire HOW TO AVOID THE HAZARD When cleaning the spark arrester Always let the exhaust system cool prior to tou...

Page 122: ...ire hazard HOW TO AVOID THE HAZARD Carburetor adjustments should only be performed by a Yamaha dealer Do not qWARNING attempt to perform these procedures unless you have mechanical knowledge and the n...

Page 123: ...ft Temperature Main jet Jet needle Pilot air screw Main jet Jet needle Pilot air screw Above 0 C 200 3rd groove 2 0 turns out 190 3rd groove 2 1 2 turns out 32 F 5 C 15 C 220 3rd groove 1 1 2 turns o...

Page 124: ...ut the drain screw of each carbu retor and drain the fuel 3 Remove the seat 4 Remove the radiator cover and side cover 5 Disconnect the fuel hoses 6 Remove the fuel tank 7 Remove the air filter case c...

Page 125: ...r cap securing plate 9 Loosen the joint screws of each carbu retor 10 Remove each carburetor cap 11 Remove the throttle cables from the throttle valves and then remove the holder 1 Throttle cable 2 Th...

Page 126: ...s 1 Float chamber 13 Remove the floats and needle valves 1 Float 2 Needle valve 3 Main jet 14 Change the main jets and the jet needle clip positions See page 8 18 NOTE Optional main jets can be obtain...

Page 127: ...e projections on the carburetor cap with one of the indents on the securing plate 1 Securing plate cC If the securing plate does not match a pro jection tighten the carburetor cap until they align Do...

Page 128: ...each car buretor to see if the punch mark on the throttle valve is at the specified posi tion a Specified position 4 If not loosen the locknuts and turn the adjusters until proper position is obtaine...

Page 129: ...pilot air screws until they lightly seat 8 Turn out both pilot air screws to specification Refer to the Carburetor settings section 1 Pilot air screw 2 Remove the seat 3 Start the engine and warm it...

Page 130: ...adjust screws are separate adjust ments but they must be adjusted at the same time to achieve optimum engine performance EBU00307 Throttle lever adjustment NOTE Adjust the engine idling speed before a...

Page 131: ...d wear without disassembling the brake Apply the brake and inspect the wear indicators If they are ALMOST in contact with the disc plate ask a Yamaha dealer to replace the pads 1 Wear indicator 2 2 We...

Page 132: ...rve these precautions 1 When checking the fluid level make sure the top of the master cylinder is level by turning the handlebars 2 Use only the designated quality brake fluid Otherwise the rubber sea...

Page 133: ...teriorate painted surfaces or plastic parts Always clean up spilled fluid immediately 6 Have a Yamaha dealer check the cause if the brake fluid level goes down EBU00316 Brake fluid replacement 1 Compl...

Page 134: ...ing with improperly serviced or adjusted brakes WHAT CAN HAPPEN You could lose braking ability which could lead to an accident HOW TO AVOID THE HAZARD After servicing 8 Make sure the brakes operate sm...

Page 135: ...operly serviced or adjusted brakes WHAT CAN HAPPEN You could lose braking ability which could lead to an accident HOW TO AVOID THE HAZARD After servicing 8 Make sure the brakes operate smoothly and th...

Page 136: ...en the locknut and adjusting bolt on the rear brake caliper 3 Screw in the adjusting bolt by hand until it feels tight then screw it out 1 4 turn Tighten the locknut to the specified torque 1 Adjustin...

Page 137: ...EN The brakes could malfunction causing reduced braking performance This could increase the chance of a collision or accident HOW TO AVOID THE HAZARD After adjusting the parking brake block the rear o...

Page 138: ...9 in 3 Tighten the locknut EBU00350 Drive chain slack check Inspect the drive chain while all tires are touching the ground Check the slack at the position shown in the figure The normal vertical defl...

Page 139: ...ck wise and push the wheel forward Turn each adjuster exactly the same amount to maintain correct axle alignment There are marks on each side of the swingarm and on each chain adjuster Use them to che...

Page 140: ...that could damage the O rings 1 O rings EBU00356 Cable inspection and lubrication Lubricate the inner cables and the cable ends If the cables do not operate smooth ly ask a Yamaha dealer to replace t...

Page 141: ...Upper arm and lower arm pivot lubrication Lubricate the upper arm pivot and the lower arm pivot 8 36 Recommended lubricant Yamaha chain and cable lube or SAE 10W30 motor oil Recommended lubricant Lith...

Page 142: ...EBU00369 Rear arm pivot lubrication Lubricate the rear arm pivots 8 37 Recommended lubricant Lithium soap base grease 5FK 9 12 3 4 11 0 12 45 AM Page 38...

Page 143: ...the wheel 3 Remove the wheel assembly EBU00375 Wheel installation When installing the wheels reverse the removal procedure Tighten the wheel nuts to the specified torque 8 38 Front Rear Tightening to...

Page 144: ...older cover turn the bulb holder counterclockwise and remove the defective bulb 8 39 q POTENTIAL HAZARD The headlight bulb is hot when it is on and immediately after it is turned off WHAT CAN HAPPEN Y...

Page 145: ...lector 5 Install the headlight unit assembly Adjust the headlight beam if necessary EBU00409 Headlight beam adjustment cC It is advisable to have a Yamaha dealer make this adjustment 1 Vertical adjust...

Page 146: ...xperience and know how to properly service your machine Use only genuine Yamaha parts on your machine Imitation parts may look like Yamaha parts but they are often inferior Consequently they have a sh...

Page 147: ...d ground to chassis Kick the kick starter strongly Spark weak Spark good Ignition system normal No spark Ask a Yamaha dealer to inspect Adjust plug gap or replace plug s There is compresson Compressio...

Page 148: ...l not stop if the throttle does not close properly This could cause loss of control and an accident You could be burned if you touch the hot exhaust pipe while disconnecting the wire coupler qWARNING...

Page 149: ...8 44 5FK 9 12 3 4 11 0 12 45 AM Page 45...

Page 150: ...degreaser off with a garden hose Use only enough pres sure to do the job cC Excessive water pressure may cause water seepage and deterioration of wheel bear ings brakes transmission seals and elec tri...

Page 151: ...paint or protective finish When finished start the engine and let it idle for several minutes 9 2 POTENTIAL HAZARD Operation with wet brakes after wash ing WHAT CAN HAPPEN Wet brakes may have reduced...

Page 152: ...engine over several times to coat the cylinder walls with oil 3 Clean the drive chain thoroughly and lubricate it See page 8 35 for details Reinstall the chain or store it in a plas tic bag tied to fr...

Page 153: ...Minimum ground clearance 135 mm 5 31 in Minimum turning radius 3 600 mm 141 7 in Basic weight With oil and full fuel tank 187 kg 412 lb Engine Type Liquid cooled 2 stroke Cylinder arrangement Forward...

Page 154: ...t contain anti friction modifiers Passenger car motor oils often labeled Energy Conserving contain anti friction additives which will cause clutch and or starter clutch slippage resulting in reduced c...

Page 155: ...KUNI Spark plug Type manufacturer B8ES NGK W24ES DENSO Spark plug gap 0 7 0 8 mm 0 028 0 031 in Clutch type Wet multiple disc Transmission Primary reduction system Helical gear Primary reduction ratio...

Page 156: ...th 21 24 0 875 Chassis Frame type Steel tube frame Caster angle 9 Trail 40 mm 1 57 in Tire Type Tubeless Size front AT21 7 10 rear AT20 10 9 Brake Front brake type Dual disc brake operation Right hand...

Page 157: ...spring Oil damper Rear shock absorber Coil spring Gas Oil damper Wheel travel Front wheel travel 230 mm 9 1 in Rear wheel travel 220 mm 8 7 in Electrical Ignition system C D I Generator system C D I m...

Page 158: ...he purpose of noise control prior to its sale or delivery to the ultimate purchaser or while it is in use or 2 the use of the vehicle after such device or element of design has been removed or ren der...

Page 159: ...y The chart below is printed only as a reminder to you that the maintenance work is required It is not acceptable proof of maintenance work 11 12 MAINTENACE INTERVAL 1 Month 3 Months 6 Months 12 Month...

Page 160: ...ified in the appropriate owner s manual 2 Give notice to an authorized Yamaha ATV dealer of any and all apparent defects within ten 10 days after discovery and make the machine available at that time...

Page 161: ...e and upon your request at any later date 3 Each Yamaha ATV dealer is held responsible for his setup service and war ranty repair work Q Is the warranty transferable to second owners A Yes The reminde...

Page 162: ...EBU00436 w Indicates a potential hazard that could result in serious injury or death 5FK 9 12 3 4 11 0 12 45 AM Page 58...

Page 163: ...EBU00437 PROTECT YOUR INVESTMENT 5FK 9 12 3 4 11 0 12 45 AM Page 60...

Page 164: ...5FK 9 12 3 4 11 0 12 45 AM Page 61...

Page 165: ...A B6 siro 4 11 0 11 14 PM Page 1...

Page 166: ...w This ATV should n YAMAHA MOTOR CO LTD PRINTED ON RECYCLED PAPER LIT 11626 13 09 PRINTED IN JAPAN 99 4 1 5 1 E 5FK 9 12 tei Hyoshi 4 11 0 11 56 PM Page 1 1 1 Magenta plate...

Reviews: