


AW2400 Owner’s Manual
Adjusting the position of a locate point or marker
Tr
anspor
t/Locate Oper
ation
92
9
3
Move the cursor to the locate point value
that you want to adjust, and use the [DATA/
JOG] dial or [INC]/[DEC] keys to change the
value.
A “Change START Position?” popup window will ask
you for confirmation when you attempt to change the
Start point value. Move the cursor to the OK button
and press the [ENTER] key, and then change the
value.
4
To adjust the location of a quick locator
point, move the cursor to the LOCATOR
button in the Quick Locator/Marker filed
and press the [ENTER] key.
When the LOCATOR button is on, the Quick Locator/
Marker field will list the quick locate points that have
been registered.
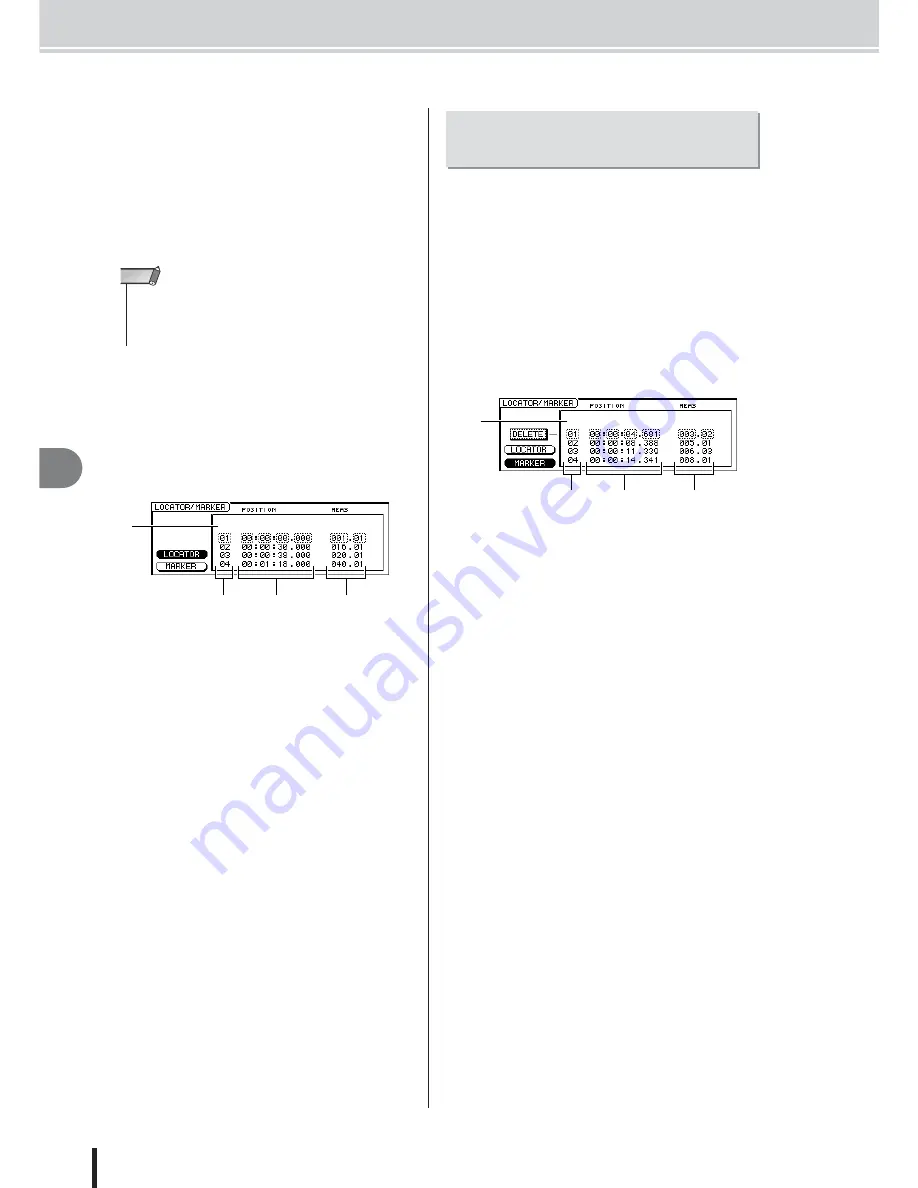
1
List
Lists the quick locator points that have been regis-
tered. The line that is enclosed by a dotted frame is
selected for editing.
B
Quick locator points
These are the quick locator point numbers 1–9.
C
Position
Shows the position of each quick locator point using
the counter display format.
D
Measure/beat
Shows the position of each quick locator point in mea-
sure/beat units.
5
Move the cursor to the quick locator point
numbers, and use the [DATA/JOG] dial or
[INC]/[DEC] keys to scroll through the list
so that the dotted frame encloses the quick
locator point number that you want to edit.
6
Move the cursor to the value that you want
to edit, and use the [DATA/JOG] dial or
[INC]/[DEC] keys to edit the value.
1
Call the EDIT screen Mark Adj. page by
either pressing the Work Navigate section
[EDIT] key as many times as necessary, or
by pressing the [F3] key after pressing the
[EDIT] key.
2
If you want to adjust the position of a
marker, move the cursor to the MARKER
button in the Quick Locator/Marker field.
When the MARKER button is on, the Quick Locator/
Marker field will list the markers that have been regis-
tered.
1
List
Lists the markers that have been registered. The line
that is enclosed by a dotted frame is selected for edit-
ing.
B
Markers
These are the marker numbers 1–99.
C
Position
Shows the position of each marker using the counter
display format.
D
Measure/beat
Shows the position of each marker in measure/beat
units.
3
Move the cursor to the marker numbers,
and use the [DATA/JOG] dial or [INC]/[DEC]
keys to scroll through the list so that the
dotted frame encloses the marker number
that you want to edit.
4
Move the cursor to the value that you want
to edit, and use the [DATA/JOG] dial or
[INC]/[DEC] keys to edit the value.
• Changing the Start point will cause locations already
recorded in a track to move relative to the measure lines
defined by the tempo map. Please keep this in mind if you are
using measure display for the metronome.
NOTE
A
C
D
B
Adjusting the position of a
marker
C
D
B
A
Summary of Contents for AW2400
Page 1: ...EN Owner s Manual ...
Page 14: ...AW2400 Owner s Manual 14 Before you start 1 ...
Page 36: ...AW2400 Owner s Manual 36 Introducing the AW2400 2 ...
Page 46: ...AW2400 Owner s Manual 46 Recording to a sound clip 5 ...
Page 72: ...AW2400 Owner s Manual 72 Overdubbing 7 ...
Page 86: ...AW2400 Owner s Manual 86 Mixdown and bounce operations 8 ...
Page 158: ...158 AW2400 Owner s Manual Pan EQ and Dynamics Processing 16 ...
Page 164: ...164 AW2400 Owner s Manual Scene Memory 17 ...
Page 236: ...AW2400 Owner s Manual 236 USB 24 ...
Page 285: ...285 AW2400 Owner s Manual MEMO ...
Page 286: ...286 AW2400 Owner s Manual MEMO ...


