Quick Guide
14
AUDIOGRAM 6 Owner’s Manual
In this section we’ll try mixing down multiple recorded audio tracks to stereo, and creating a wav file. Mixes
can be stored as WAV or AIFF files, which can then be recorded to audio CDs.
1
Launch Cubase AI and open a project file.
2
Click the [Start] button on the Transport
Panel.
3
While listening to playback, drag the channel
strip level faders up and down to create the
desired initial balance, then adjust the over-
all volume using the bus volume fader.
4
Drag the pan controls on the top of the
channel strips left and right to set the ste-
reo position of each track.
5
At this point you can begin to use EQ to
refine your mix, and add effects.
As an example let’s try adding reverb. Click the
[Edit] button (
) on the left side of the channel
strip to open the VST audio channel settings window.
Click Insert 1 and select Earlier VST Plug-ins
→
Reverb
→
RoomWorks SE.
For further details refer to the pdf manual pro-
vided with the Cubase AI software.
It’s a good idea to lower the channel fader a
bit before adding an effect, since the effect
can cause an increase in the overall channel
level.
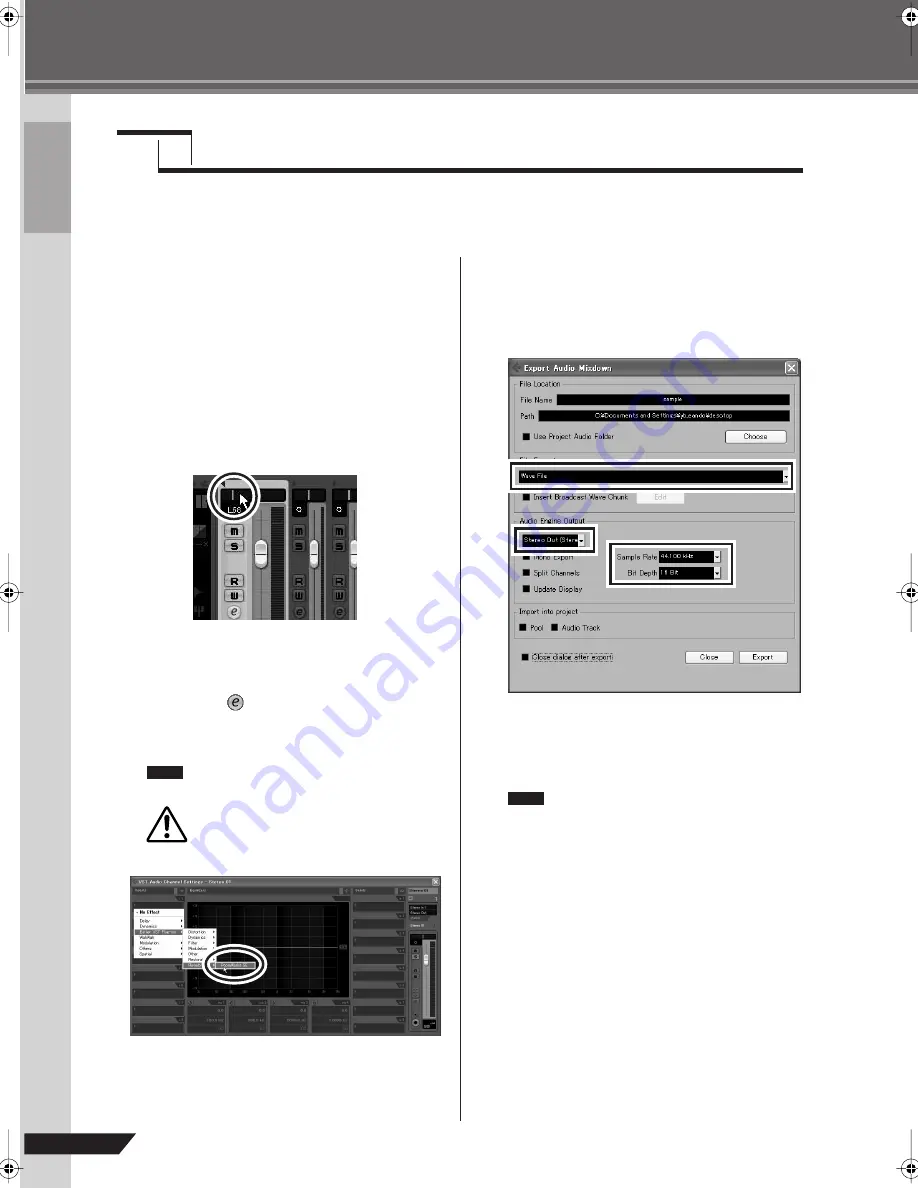
6
When the final mix adjustments have
been made, go to the [File] menu and
select [Export]
→
[Audio Mixdown].
7
Enter a file name and select a destination
for the file as well as a file type.
If you intend to use the file to create an audio CD,
select the WAV file type (AIFF on Macintosh OS X),
Stereo Out (stereo), 44.1 kHz, and 16 bit.
8
Click [Export].
Progress of the mixdown operation will be shown in
a progress window. When the progress window
closes the mixdown is complete.
Files created by mixdown can be directly
played back using the Windows Media
Player, or iTunes.
Step
6
Mixing with Cubase AI
NOTE
CAUTION
NOTE
audiogram6̲en.book Page 14 Wednesday, April 2, 2008 3:46 PM


