


10
1
Press # (program key), enter your prorgam code
and press OK.
2
Select D/- by
scrolling down the
program menu and
press OK.
3
Select Add Devices
and press OK.
¥ Display will show Push
Button On Device to
Add .
4
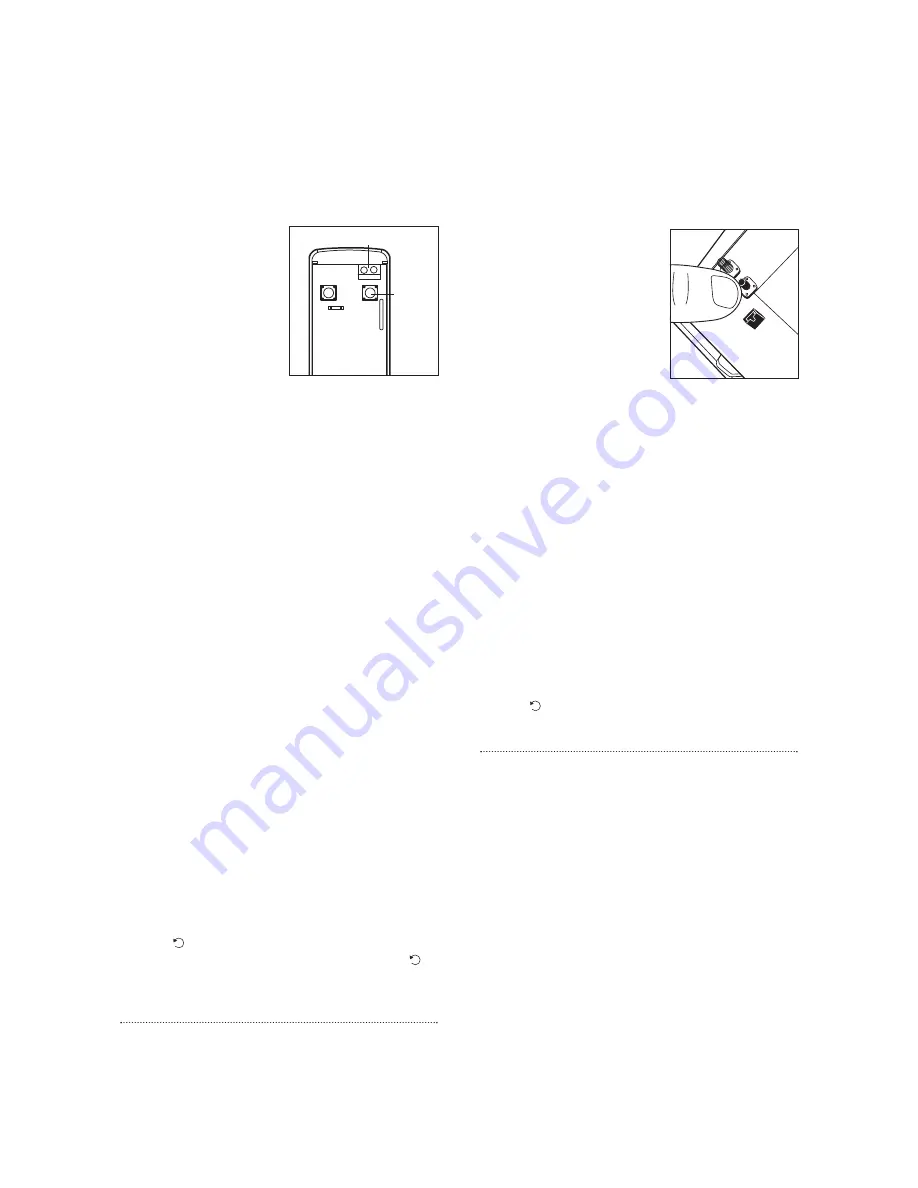
Press the learn/test
button in the rear of the door/window contact.
¥ The control unit will show it has detected the
device by displaying Detected: (Ok?) Door
Contact .
5
Press OK.
6
You are prompted to select a zone. The control
unit displays all the zones available (zones where
no device has been added), with the cursor
flashing at the first free zone (in this instance
zone 1), press OK.
¥ Each device is given a zone number so that the
control unit can indicate the source of an alarm.
¥ Door/window contacts can be used in various
applications to suit your needs, eg home omit
(see Further door/window contact programming
page 22). As most systems require a detector on
the point of entry, for this example the
door/window contact is programmed as an entry
detector. When used as an entry detector, with
the system armed the door/window contact will
start an entry countdown upon activation, giving
you time to disarm the system.
7
Select Entry from the list displayed and press
OK.
8
Enter Front Door (see User Naming on page 8)
and press OK, (if name not required press OK
without entering text).
9
The display now shows selected settings: DC
Front Door E - door/window contact
programmed into zone 1 as an entry point and
located on the front door.
10
Press OK.
¥ Press
to return to previous menu.
¥ To return to Alarm off (normal mode), press
repeatedly.
Add the PIR movement detector
1
Select D/- by scrolling down the
Programming menu and press OK.
2
Select Add Devices and press OK.
3
Press the learn/test button
the rear of the PIR.
¥ The control unit will show
it has detected the device
by displaying Detected:
(Ok?) PIR sensor .
4
Press OK.
5
You are prompted to
select a zone. The cursor
will flash at the next
available zone (in this instance zone 2), press
OK.
¥ As with the door/window contact, PIRs can be
used in various applications to suit your needs
(see Further programming page 21). For this
example the PIR is programmed as a Burglar
detector. When used as a burglar detector, when
the system is armed and the PIR activated, the
alarm will sound instantly.
6
Select Burglar from the list displayed and press
OK.
7
Enter Hall (see User Naming on page 8) and
press OK, (if name not required press OK without
entering text).
8
The display now shows selected settings: IR Hall
B - PIR programmed into zone 2 as a burglar
detector and located in the hall.
9
Press OK.
10
Press
repeatedly until display shows Alarm Off .
Add the smoke detector
When the batteries are first inserted, wait for up
to 11 minutes for the detector to finish its
self-calibration process. When this has finished the
detector can be learnt-in as normal.
1
Enter the D/- menu and select the Add
Device sub menu.
2
When prompted by the control unit, press the
learn test button once on the smoke detector.
3
Assign a zone number to the smoke detector.
4
Enter location name if required.
5
Press OK to confirm.
¥ The smoke detector will indicate a fire by
sounding the built-in siren, lighting the LED, and
signalling the system to alarm.
¥ The smoke detector will produce a warning beep
and the LED will flash every 30 seconds if the
batteries are near exhaustion.
¥ The learn/test button can be used to test the
smoke detector. With the control unit in walk
test, press the learn/test button, the detector will
Learn/Test
button
Learn/
Test
button
Extension terminals
Summary of Contents for HSA3095
Page 27: ...27 ...