


36
Operations
03
11.
Click
(Verify) to compile the entries.
After compiling, the message Done compiling displays on the bottom of the frame.
If there are no errors and the compiling is complete, upload the code to the Robotic Arm board.
12.
Click
(Upload) to upload the codes.
After uploading, the message Done uploading displays and no error on the bottom of the frame.
After uploading, use the button on the control panel to perform user action.
13.
Click
File > Save
to save the file.
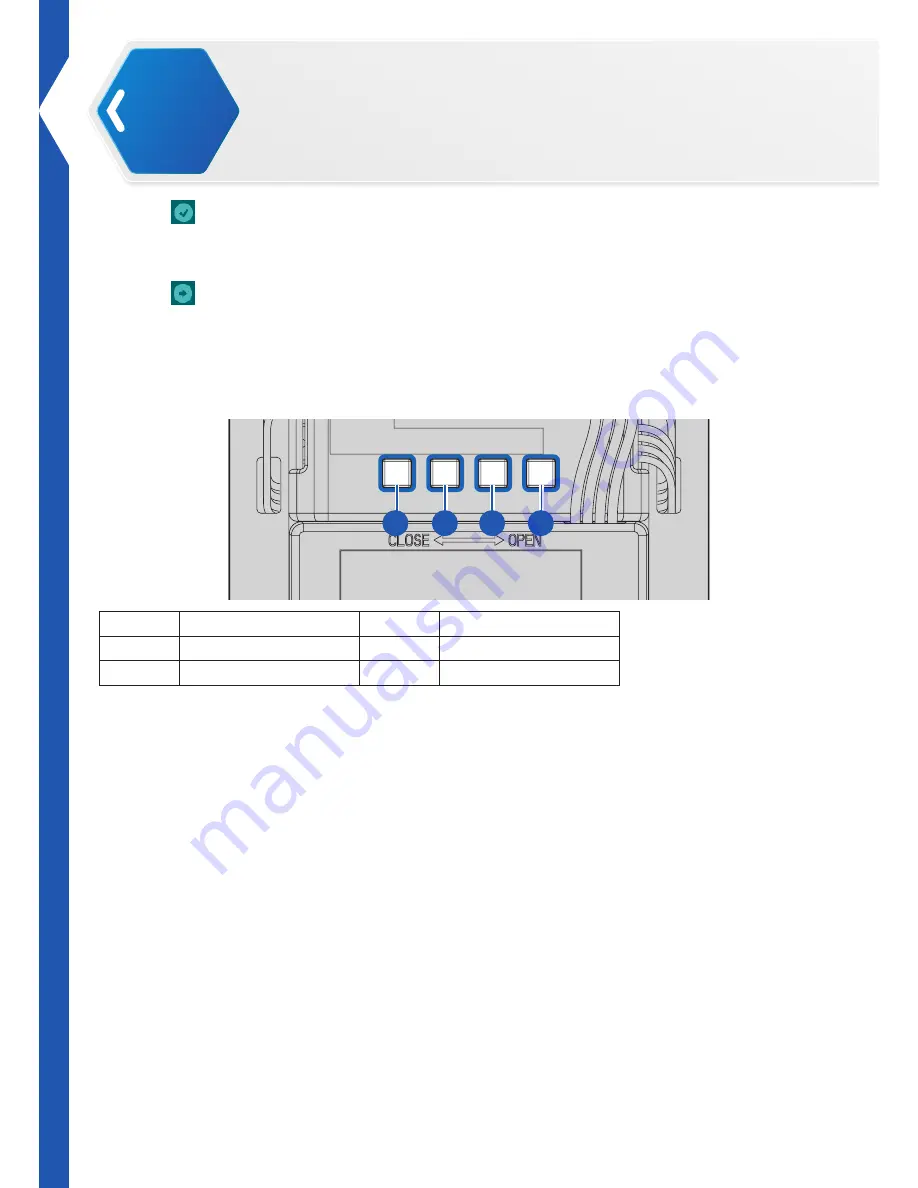
Control Panel Button Mapping
1
2
3
4
No.
Item
No.
Item
1
RB_1
2
RB_2
3
RB_3
4
RB_4
Programming the Remote Control
Now that you’ve defined and modified the variables referencing pose and sequence entries (see
“Before You Start”
on page 33
), you can define the action to be associated with each button on
the remote control.
You can customize the buttons on the remote control with the use of the XYZrobot Editor or the
Arduino application. Customizing the remote control is explained further in the following section.
Customizing Remote Control Buttons on Arduino
To match the new sequence to the selected button on the remote control:
1.
Before starting this procedure, see
“Before You Start”
on page 33
.
2.
Connect the Robotic Arm to your computer. Connect one end of a USB cable to the computer
(USB Type A) and the other end to the Robotic Arm (USB Type Mini-B).
3.
Once connected, power up the Robotic Arm, see “Testing the Robotic Arm” in the assembly
manual.
4.
Open the Arduino software if it is not open already.
5.
Click
File > Open
and select the source file to use in the programming. For instructional
purposes, the file name
OTHERS_USER_MOTION.h
is used here.
6.
To re-define the reference action of a button on the remote control, locate the section
////==== Robot Button Control & Remote Control ====////
.


