background image

8

Setting

Interface Introduction

Please follow the on-screen 

instructions.

Print bed calibration may be 

implemented before the printing 

process.
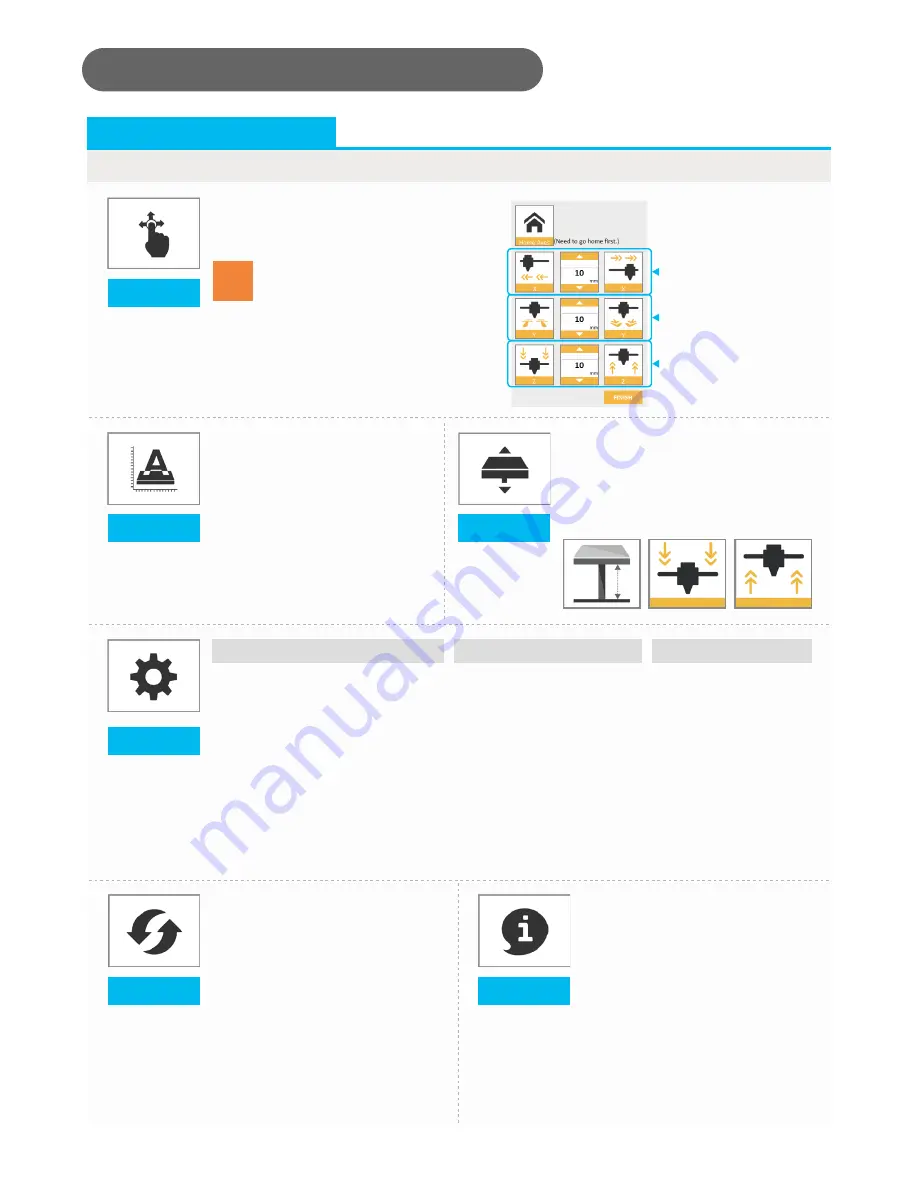
Move the extruder module to the 

lower left corner of the printing 

area. Please refer to the calibrate 

instructions provided by the 

software.

Z-Offset function will help you to 

adjust the printing distance between 

the print bed and extruder module.
Each adjustment has a step of 0.05 

mm.

Manually adjust the movement of X/Y/Z 

Axis for printer maintenance.

Jog Mode

Calibrate

Z-Offset

Move extruder module 

rightwards and leftwards.

Move extruder module 

forwards and backwards.

Move the print axis (Z-AXIS) 

upwards and downwards.

Software Functional Descriptions

Others

Automatic horizontal calibration

Restore Default 

Buzzer

Info

FW upgrade

Automatic horizontal calibration 

may either be ON or OFF.  

Default: ON.
The software would automatically 

implement horizontal calibration 

and compensation accordingly.
Printing speed will be improved if 

automatic horizontal calibration 

has been switched to OFF. 

However, this may affect printing 

quality.

Buzzer may either be ON 

or OFF. Default: ON.
When the buzzer is 

turned on, the printer will 

output an audible signal 

when a button is pressed, 

receiving data, print job 

is finished, or issue is 

detected.

Click 

Restore Default


to reset to default 

setting.

Please upgrade the latest 

firmware version for the best 

printing quality of the printer.

Information related to printer 

setting. 

Note

1. First click on 

Home Axes

The extruder module will be 

returned to the initial axis 

position. 

2. You may manually enter 

the adjustment value:                       

Range: 1 to 150; step: 1 mm

Summary of Contents for da Vinci nano

Page 1: ...nual to learn how to use da Vinci nano correctly This manual describes da Vinci nano safety instructions operating instructions maintenance information and application tips For the latest information...

Page 2: ...n complete To return to stand by mode press the button once 8 9 12 13 14 1 3 5 2 6 4 7 11 10 Print Technology Fuse Filament Fabrication FFF Weight 4 5kg Dimensions 378 280 355 mm Print Dimension 120 1...

Page 3: ...r repair during the warranty period If other packing materials are used instead the printer may become damaged during transportation In such a situation XYZprinting reserves the right to charge a repa...

Page 4: ...in the right direction 10 Ensure that the guide tube has been tightly inserted into the feed module port 07 Feed the guide tube through the top cover 08 09 Direct the bottom locking catches toward the...

Page 5: ...pool ring from both sides of the spool Place the assembled filament spool with the spool ring on the spool holder Take out the filament spool and the sensor chip Use a Phillips head screwdriver to tig...

Page 6: ...start printing Click File Print da Vinci Printer When the printer starts printing you can monitor the status by clicking DASHBOARD The recommended operating temperature is 15 32 59 90 If the room tem...

Page 7: ...oftware Functional Descriptions Information related to filament use Please follow the on screen instructions The extruder module will automatically move to the working position The nozzle will then he...

Page 8: ...atic horizontal calibration Restore Default Buzzer Info FW upgrade Automatic horizontal calibration may either be ON or OFF Default ON The software would automatically implement horizontal calibration...

Page 9: ...d to the best condition before leaving the factory After long periods of use the print bed level may change If you have print adhesion problems you may need to re level the print bed 1 Open the feed m...

Page 10: ...or replace the filament 0029 There is no filament left in spool 1 Please replace spool 1 before printing Replace filament immediately 0030 Printer motor Error X Axis If error persists please contact...

Reviews: