April
2016
P 9
HD23F1JW0D5
da Vinci
Jr.1.0
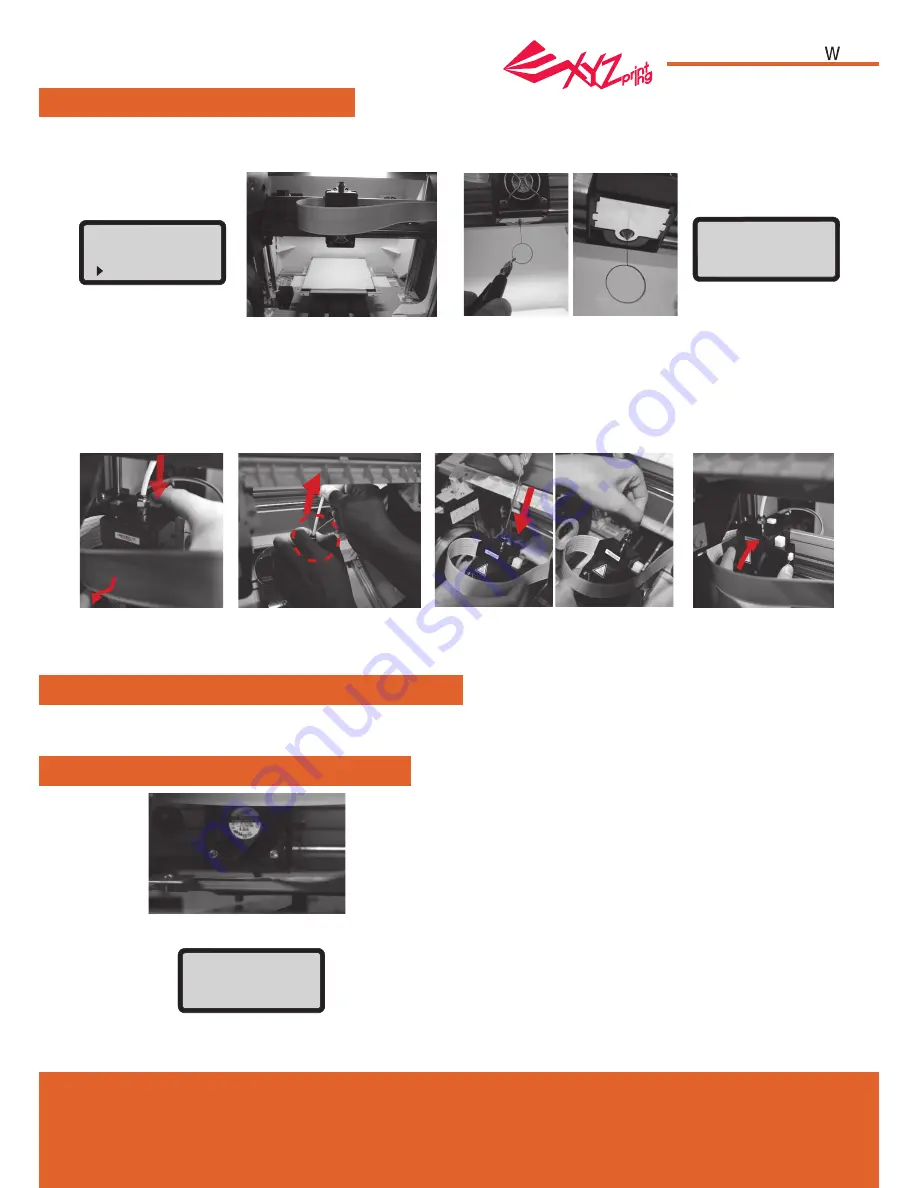
CLEAN NOZZLE
Z OFFSET (adjust the printer module)
Z OFFSET settings adjustment
The user may use the Z OFFSET function to adjust the gap between the printing nozzle and the printing bed.
Caution: This printer has already been tested and adjusted to the optimal gap between the printing nozzle and printing bed before
shipping. We recommend recording the original settings before carrying out any adjustments.
UTILITIES
Over time, carbon deposits or filament dust buildup in the nozzle may decrease its performance. It is advised to clean the nozzle
after every 25 hours of printing.
Also, if the print bed calibration shows “ERR” or if there is any residue on your prints, you may try to clean the nozzle.
To clean the nozzle:
3.Hold the cleaning wire with the
pliers, and carefully pass the wire
through the nozzle openning.
1.Select "YES" to begin.
4.Select "OK" to return.
2.Wait until the extruder heats up and
moves to the front, and the screen
shows “READY FOR CLEAN”
1.The recommended distance between the nozzle and print bed(with bed tape securely fastened) is 0.3mm. This should allow
two sheets of copy paper to be drawn out smoothly but six sheets of copy paper cannot be passed.
2.Increase/decrease the value based on a scale of 0.1mm.
Increasing the value will increase the gap between the print module and print bed by 0.1mm
Decreasing the value will also decrease the gap between the print module and print bed by 0.1 mm
+ [ ^ ]
Z OFFSET 0.1 mm
─ [ v ]
[OK] TO SAVE
If the cleaning cycle does not unclog the extruder, try cleaning the feeding path by following the steps below.
1.Unload filament correctly (refer to “UNLOAD FILAMENT”).
2.Move the extruder and the print bed to the home position by using the HOME AXES function.
3.Activate “UNLOAD FILAMENT” again and wait until the extruder is heat up to 150℃ . (Care should be taken during the
operation to avoid potential burn injuries.)
CLEAN NOZZLE
ARE YOU SURE ?
NO
YES
CLEAN NOZZLE
READY FOR CLEAN
[ OK ] TO RETURN
4.Press the white button
at the back of the
extruder to release it.
5.Lightly press the spring around
the feed hole and remove the
filament guide tube (do not
disconnect the white flat cable)
7.After cleaning the feeding
path, reinstall the guide tube
to the top of the extruder
and install the extruder to the
bracket.
6.Insert the thick cleaning wire into
the feeding path all the way down and
“floss” the inside of the nozzle to pull
the residue out.


