April
2016
P 10
HD23F1JW0D5
da Vinci
Jr.1.0
This chapter introduces how to carry out the setting correctly and to operate the wireless printing function. To understand if your
product is designed with wireless printing function, please refer to the table below.
●da Vinci 1.1 Plus
●da Vinci Jr 1.0w
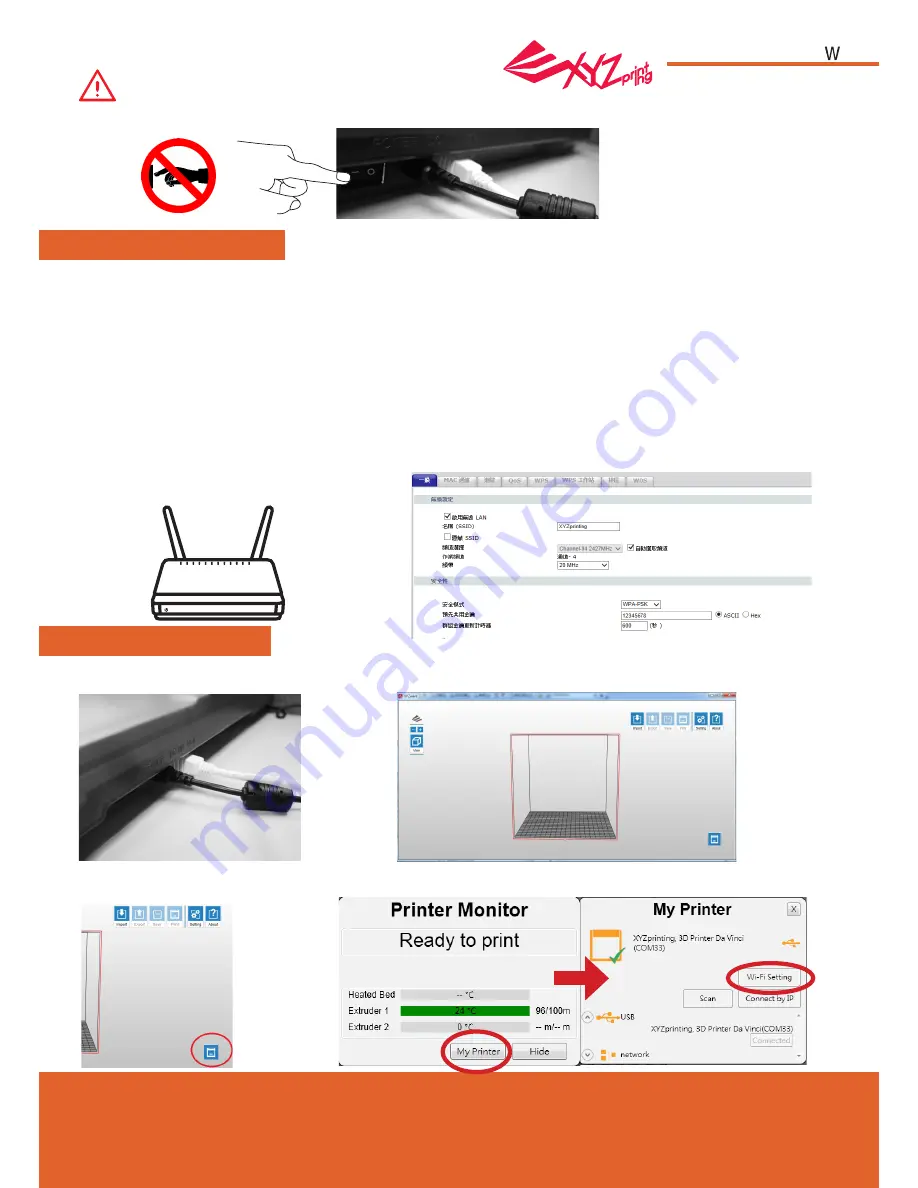
1. Please make sure the connection between computer and printer properly. After completing the connection, activate the
XYZware.
●WEP
●WPA
●WPA2
References:
Please refer to the description of
CLEAN NOZZLE function for removing
the clogging of the print head.
Note:
Turn off the 3D printer only after the print job is complete and the print head cooling fan stops running. Don't turn
off the power directly. Otherwise, the print head may be clogged.
Pre-setting preparation
1. The network printing function is mainly provided for the Intranet. Please set the printer and the computer in same network domain,
i.e. connecting to the same Wireless Access Point.
2. Before connecting the printer, adjust the set value of the connected Wireless Access Point. For details of setting method, please
refer to the Production Operation Manual or the information provided by the original factory.
3. The Channel Width that can be used by the wireless printing function is
20MHz
. Please refer to the Operation Manual compiled
by the original factory for the Wireless Access Point to understand the adjusting method.
4. Please maintain the wireless network function in open status.
5. This machine can support the following connection safety mode. When setting the printer in online status, it is required to input the
Public Key related information.
Wireless printing
Start the setting
Wi-Fi Printing
2. Click on the printer monitoring function to open the printer-related information and then click “My Printer” > "Use Wi-Fi” to access
the Wireless Printing Set page.
(This image is for reference only)


