www.XtremeAirUsa.com
PAGE
7
INSTALLATION
Step 1
Step 2
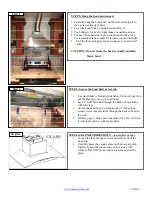
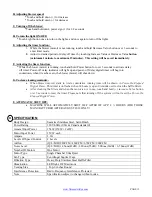
STEP 3: prepare ductwork & single outlet (skip this step if
you already has it)
1.
Have 15amp, 120V, 60Hz, single outlet anywhere inside
the chimney width lines (make sure at least 2 inches
below ceiling line for ceiling bracket mount)
2.
Have 6 inches diameter ductwork hanging down from
ceiling to the mark of mounting screws. (2 inches away
from wall is recommended since you need room for plug
in and out)
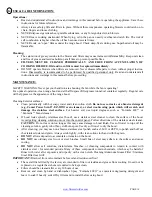
STEP 4: install ceiling bracket, mounting anchors and screws
1.
Place center of upper chimney bracket inline with
centerline and all the way up to ceiling then screw it to
the wall.
2.
Pre-drill holes where your mounting marks are, then
insert wall anchors and mounting screws, make sure
leaving 1/8” space away from the wall.
Step 3 & 4
Step 1
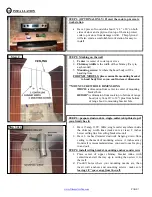
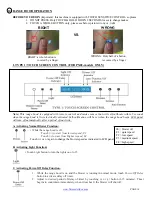
STEP 1: (OPTIONAL ONLY) Protect the cook top & create
work station
•
Have 2 piece of wood stub about 2” x 4” x 20” on both
sides of stove and a plywood on top of them to protect
cook top or stove from damage or dirt. This plywood
will also create a comfortable work station for easy to
install.
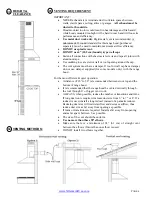
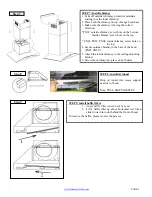
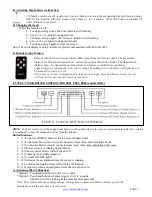
STEP 2: Marking on the wall
1.
Center:
is center of cook top or stove
2.
Chimney width:
is the width of the chimney (Vary in
each model)
3.
Mounting screws:
Is where the hood body will be
handing from.
FOR PX02 MODELS: please assemble mounting bracket
to hood body first so you can find exact dimension
.
**MOUNT SCREW HOLE DIMENSIONS:
WIDTH:
is dimension from center to center of mounting
bracket hole
HEIGHT:
is dimension from cook top to bottom of range
hood (vary from 26” to 30”) plus from bottom
of range hood to mounting bracket hole.
Step 2
09

