background image

CAUTION: The motor may stall if improperly used or overloaded. Reduce the pressure (feed rate) or depth of 

cut to prevent possible damage to the tool if the motor labors.

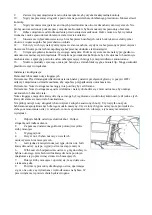
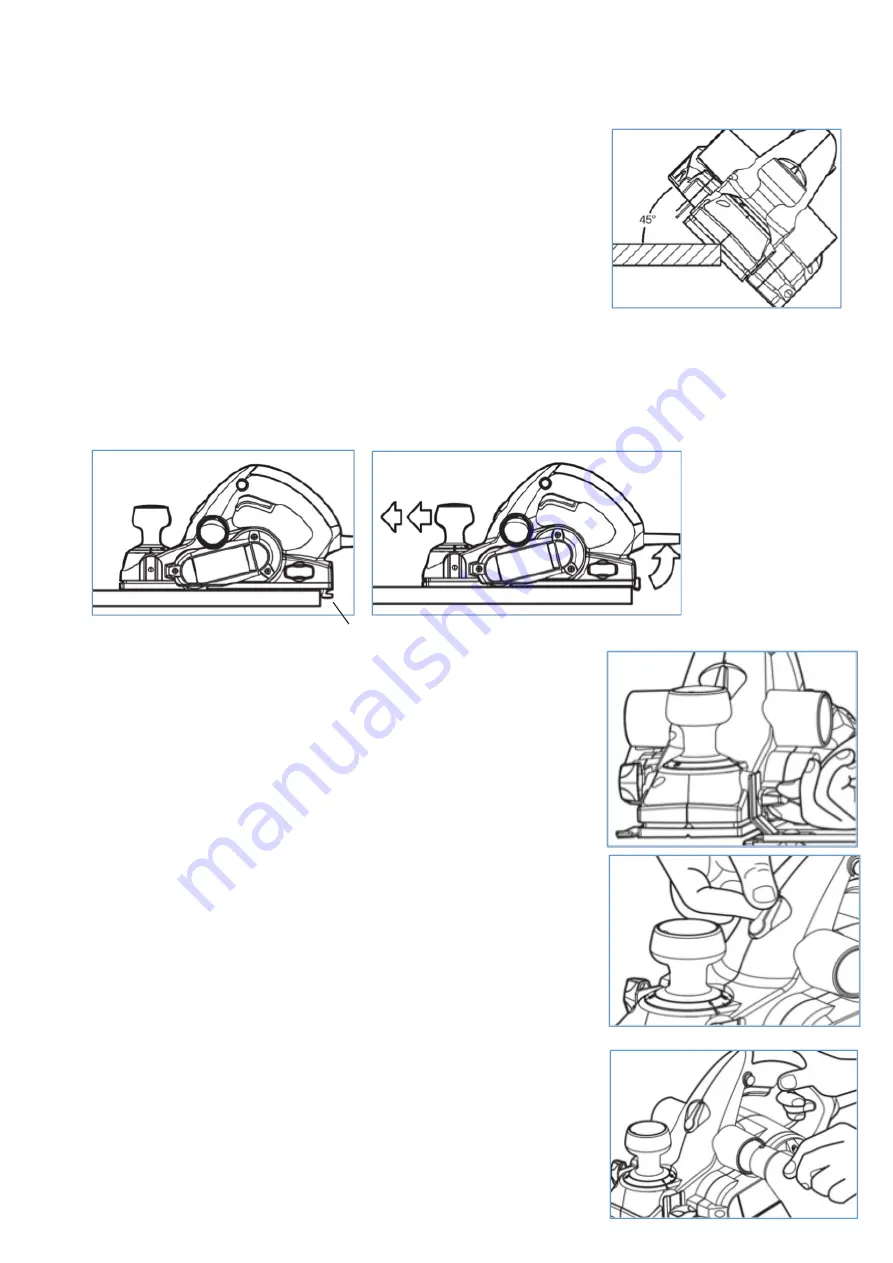
CHAMFERING

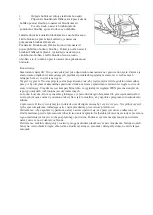
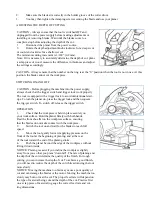
To make a chamfered cut, first align the “V” grooves in the front shoe of the 

planer with the corner edge of the workpiece.

1.

Adjust to desired depth of cut.

2.

Place the “V” groove on the front adjustable shoe over the edge

being beveled. Be sure the blades are not touching the work. Place weight on

the depth adjustment knob so that the “V” groove is absolutely flat on the

edge to be beveled.

3.

Grasp the tool firmly with both hands, turn the tool on and push the

plane forward with steady pressure on the front adjustable shoe.

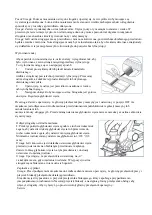
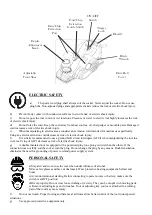
TOOL PARK REST

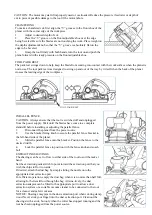
The park rest swings down to help keep the blade from coming into contact with the work surface when the planer is 

not in use. The tool park rest was designed to swing up and out of the way by it itself when the back of the planer 

crosses the leading edge of the workpiece.

TOOL PARK REST

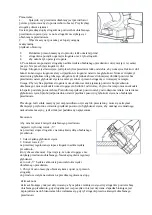
PARALLEL FENCE

CAUTION: Always ensure that the tool is switched off and unplugged 

from the power supply. Wait until the blades have come to a complete 

standstill before installing or adjusting the parallel fence.

1.

Disconnect the planer from the power source.

2.

Use the bracket fixing knob to secure the parallel fence bracket to

the left-hand side of the planer.

3.

Slide the parallel fence onto the bracket. Position the fence to the

desired width.

4.

Lock the parallel fence in position with the fence knob and coach

bolt.

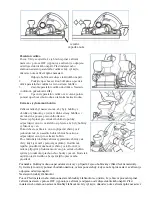
EXTRACTING SHAVINGS

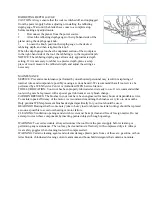
The shavings can be set to flow to either side of the tool to suit the task at

hand.

Set the extraction guide switch to point toward the extraction port that you

wish the chips to flow towards.

If desired, attach the dust bag by simply sliding the nozzle onto the

appropriate dust extraction port.

For efficient operation, empty the dust bag when it is no more than half full,

allowing for better airflow through the bag. Alterna-tively, the dust

extraction adaptor can be fitted to the appropriate port to allow a dust

extraction system or a suitable vacuum cleaner to be connected to the tool

for a cleaner and safer work area.

NOTICE: Shavings may jam in the dust extraction port when cut-ting damp

wood. Never stick your finger into the dust extraction port. Clean out the

shavings with a stick, but only when the cutter has stopped running and the

tool has been unplugged from the power source.

Summary of Contents for XT106372

Page 1: ...06372 HOBL K ELEKTRICK 230V 50Hz 750W 17000 ot min 82x3mm Nap t P kon Ot ky Rozm r no e Hoblovac ka 82mm Nastaviteln b r 0 3mm Hloubka polodr ky 0 18mm Ods v n prachu nastaviteln na ob strany Hmotnost...

Page 2: ...rick n ad de ti vlhku nebo mokru Vnikne li do elektrick ho n ad voda zvy uje se nebezpe razu elektrick m proudem d Nepou vejte pohybliv p vod k jin m el m Nikdy nenoste a netahejte elektrick n ad za p...

Page 3: ...dnou na del lh t Kupuj c m e uplatnit reklamaci osobn nebo zasl n m zbo k reklamaci p epravn slu bou na vlastn n klady v bezpe n m balen Z silka mus obsahovat reklamovan v robek prodejn dokumenty podr...

Page 4: ...ovrchu obrobku Pokud dojde ke kontaktu epele za zen s p edm ty jako jsou nap s h eb ky m e doj t k v n mu zran n vlivem zp tn ho r zu za zen 7 P ed v m nou p slu enstv za zen v dy odpojte od zdroje el...

Page 5: ...na opa n stran up nac ch roub 7 Ut hn te up nac rouby a ujist te se e jsou v echny uta eny stejnou silou 8 Zopakujte tento postup pro druh n a ujist te se e jsou oba no e nastaveny stejn a jsou um st...

Page 6: ...na op t uvoln te Obsluha Hoblov n 1 Zkontrolujte e obrobek spr vn a pevn zaji t n na va em pracovn m povrchu Dr te hobl k pevn ob ma rukama Polo te p edn patku hobl ku na povrch obrobku a ujist te se...

Page 7: ...p pad e je hobl k v klidov m stavu a nepou v n reta n z padka je zkonstruov na tak aby se sama zaaretovala nebo uvolnila v dy kdy zadn st hobl ku p ekro hranu obrobku Areta n z padka no e Paraleln vo...

Page 8: ...anou st obrobku na prav stran za zen je nastavena po adovan hloubka l bkov n Pozn mka Hloubkom r l bkov n dovoluje nastavit pouze p ibli nou hodnoty hloubky Pokud je nutn nastavit hloubku l bkov n p e...

Page 9: ...ubujte z hobl ku po obou bo n ch stran ch rouby s plastovou hlavou Vyjm te bo n dr ky z krabice 2ks a pomoc k dlov matice 2ks a roubu 2ks p i roubujte dr ky nejprve jejich doln m koncem ke kovov z kla...

Page 10: ...t sp na st le stisknut a je mo n obsluhovat hobl k voln ob ma rukama Pozor P ed upnut m areta n ho t m nku v dy nejprve odpojte hobl k z elektrick s t Jinak hroz riziko v n ho razu Pro nasazen t m nku...

Page 11: ...all bearmg 30 Nao iec kabel nao iac k bel Przew d zasilaiacv Power cord 31 Konektor prachov ho s ku Konektor prachov ho vTecka Zl 1cze worka na kurz Dust bag connector 32 Prachov s ek prachov s ok Wor...

Page 12: ......

Page 13: ...ho t la 2008 12 SN EN ISO 14120 Bezpe nost strojn ch za zen Ochrann kryty Obecn po adavky pro konstrukci a v robu pevn ch a pohybliv ch ochrann ch kryt 2017 08 SN EN 55014 1 ed 3 Elektromagnetick kom...

Page 14: ...VOD K POU ITIE XT106372 HOBL K ELEKTRICK 230V 50Hz Nap tie Pr kon Ot ky Rozmer no a Hob ovacie rka Nastavite n ber H bka polodr ky Hmotnos 750 W 17000 ot min 82x3 mm 82 mm 0 3 mm 0 18 mm 3 kg Model P0...

Page 15: ...poveda sie ovej z suvke Nikdy ak mko vek sp sobom neupravujte vidlicu S n rad m ktor m ochrann spojenie so zemou nikdy nepou vajte iadne z suvkov adapt ry Vidlice ktor nie s znehodnoten pravami a zodp...

Page 16: ...n m pozri ni ie a uznan bezplatne oprav servis firmy XT line s r o Miestom pre uplatnenie reklam cie je predajca u ktor ho bol tovar zak pen Reklam cia vr tane odstr nenia vady mus by vybaven bez zbyt...

Page 17: ...no a od v etk ch odrezkov a ne ist t 5 Ak je jedna z hr n no a tup n oto te Ak s hrany no ov tup obe vyberte n a nahra te ho nov m 6 Zasu te nov alebo vhodn n smerom nahor do dr iaka v bubne no a Hre...

Page 18: ...lebo motor Naopak pr li pomal tempo m e v sledn povrch po kodi alebo sp li Spr vna r chlos posunu z vis od typu materi lu a nastavenie reznej h bky Vhodn nastavenie r chlosti posunu a h bky rezu si na...

Page 19: ...e mo n pripoji k pr slu n mu otvoru na extrakciu hobl n syst m pre ods vanie prachu alebo vhodn vys va Bude tak zaisten e te istej ieho a bezpe nej ieho pracovn ho prostredia Pozn mka Hobliny m u upch...

Page 20: ...a enia alebo rezanie abraz vnych materi lov mus by o najsk r vymenen z d vodu prevencie prehrievaniu a po kodeniu motora istenie Vetracie otvory a prep nac gomb ky a p ky musia by udr iavan priechodn...

Page 21: ...72 STRUGARKA ELEKTYCZNA Model Napi cie Moc Pr dko Rozmiar ostrza Szeroko strugania Regulowane usuwanie G boko przylgi Odci g py u regulowany z obu stron Waga 230V 50Hz 750 W 17000 rpm 82x3 mm 82 mm 0...

Page 22: ...Podw jnie izolowane urz dzenie jest wyposa one w uziemion wtyczk jeden wtyk jest szerszy od drugiego Je li z cze nie jest w pe ni dopasowane do gniazda nale y przekr ci wtyczk Nie nale y w aden spos b...

Page 23: ...sta ej powierzchni za pomoc zacisk w lub innych praktycznych metod Trzymanie obrabianego przedmiotu r koma lub cia em jest niestabilne i mo e spowodowa utrat kontroli 4 Zabezpiecz materia kt ry ma by...

Page 24: ...cych Ostrze enie Przed zmian jakichkolwiek ustawie nale y ustawi prze cznik g wny w pozycji OFF i od czy urz dzenie od r d a zasilania aby zapobiec przypadkowemu uruchomieniu Ostrze enie No e do stru...

Page 25: ...trza Strugarka jest gotowa do u ycia Regulacja g boko ci ci cia Przestroga Zawsze upewnij si e g wny prze cznik pracy maszyny jest ustawiony w pozycji OFF i e urz dzenie jest od czone od r d a zasilan...

Page 26: ...I odwrotnie zbyt wolne tempo mo e uszkodzi lub spali powsta powierzchni Prawid owa pr dko posuwu zale y od rodzaju materia u i ustawienia g boko ci ci cia Spr buj odpowiednio ustawi pr dko posuwu i g...

Page 27: ...p ejete aby byly hobliny vyfukov ny ven Pokud chcete m ete k otvoru p ipevnit sb rn vak jednodu e tak e nasad te hubici sb rn ho vaku na odpov daj c otvor pro extrakci hoblin Pro efektivn j obsluhu z...

Page 28: ...Aby utrzyma maksymaln sprawno silnika zalecamy sprawdzanie zawarto ci w gla co dwa do sze ciu miesi cy Urz dzenie jest kompatybilne tylko z oryginalnymi w glami WEN przeznaczonymi do tego typu urz dz...

Page 29: ...GB USER MANUAL XT106372 ELECTRIC PLANER 230V 50Hz 750 W 17000 rpm 82x3 mm 82 mm 0 3 mm Model Voltage Power Speed Blade size Cutting width Cutting depth Rabbeting depth Weight 0 18 mm 3 kg P0009N...

Page 30: ...id a risk of electric shock injury c Do not expose the tool to rain or wet locations Presence of water in electric tool highly increases the risk of electric shock injury d Do not force the cord Keep...

Page 31: ...objects like nails it may cause serious personal injury from kickback 7 Unplug the planer before changing accessories Accidental start ups may occur if the planer is plugged in during an accessory ch...

Page 32: ...lade drum The ridge along the blade should be on the opposite side of the clamping screws 7 Tighten the clamping screws ensuring that they are tightened evenly 8 Repeat for the second blade making sur...

Page 33: ...n the planer on press the trigger lock and then squeeze the trig ger switch To switch off release the trigger switch OPERATION 1 Check that the workpiece is held in place securely on your work surface...

Page 34: ...l the blades have come to a complete standstill before installing or adjusting the parallel fence 1 Disconnect the planer from the power source 2 Use the bracket fixing knob to secure the parallel fen...

Page 35: ...Authorized WEN Service Station TOOL LUBRICATION Your tool has been properly lubricated and is ready to use It is recommended that tools with gears be regreased with a special gear lubricant at every b...

Reviews: