background image

Coax MDU Master Bridge User

’s Guide


6


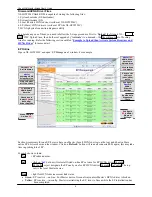
System Setup (TCP/IP Properties)


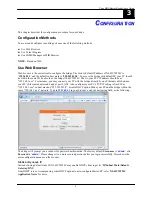
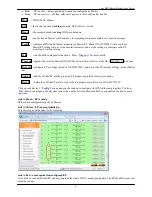
The main window contains the left sub-window for the items to be configured, and the right sub-window displays 
the contents for the selected item. Click your mouse on the item in the left window will pop out the corresponding 
item-window in the right side. Click on the ‗

Apply

‘ button (or ‗

OK

‘ button in some screens) will submit your new 

setting into the bridge and will take effect immediately (Some changes require ‗Reboot‘). 


DHCP Option 82 and Snooping


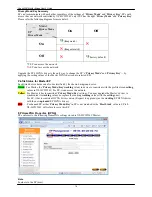
For Host (PC) at EP, XL-HCW224C could pad DHCP ‗Option 82‘ and could snoop DHCP handshaking packets to 
verify host is using the valid IP/MAC granted by DHCP server. Refer ‗

XL-HCW224C Application Notes

‘ for more. 


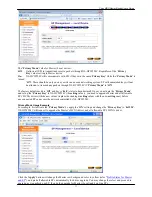
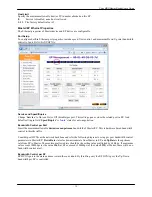
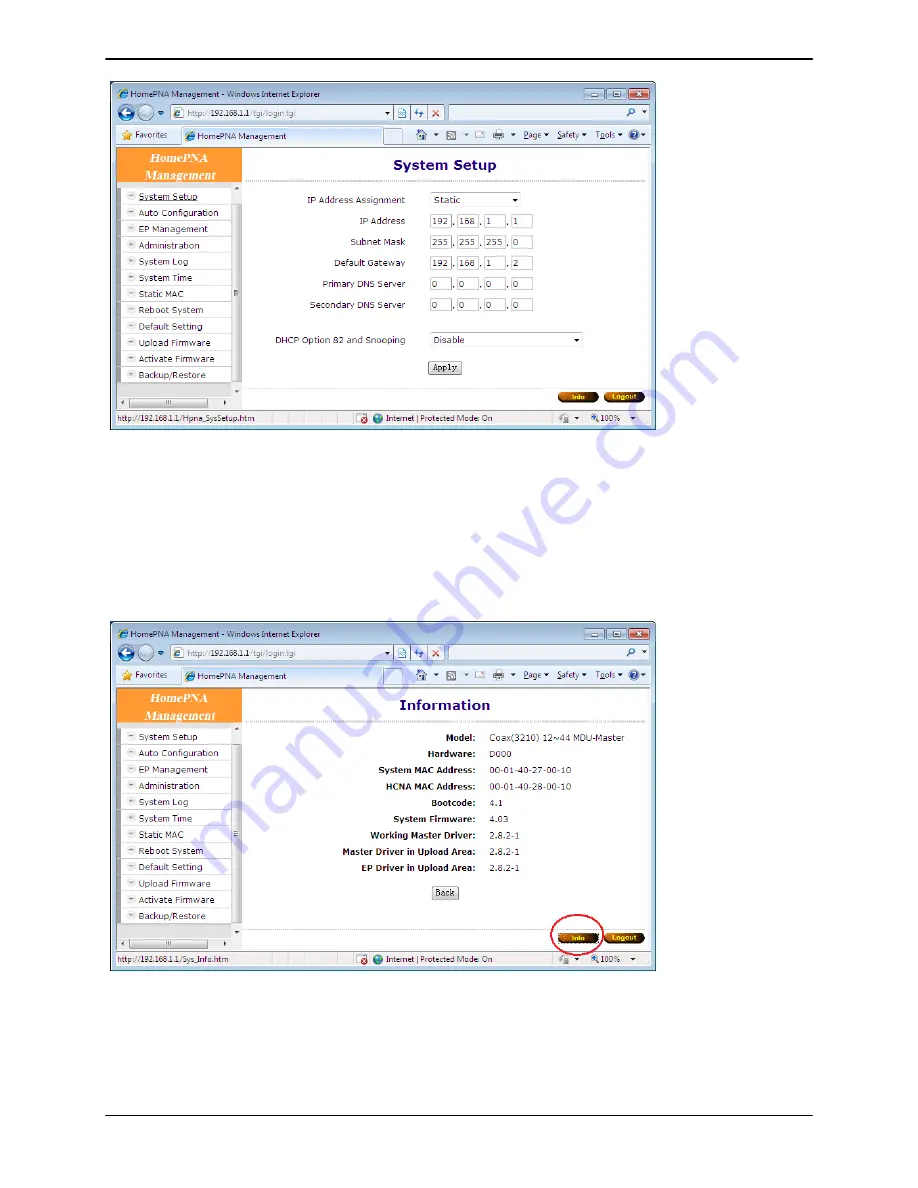
System Assets (Information)


Click on the bottom-right ‗

Info

’ 

icon will pop out the following window, 


Auto Configuration


Let Master retrieve the related config files (

*.shc

*.ep

) from TFTP server, then setup Master and connected EPs 

according to the config script file and overwrite the original settings in Master and EP. Refer ‗

XL-HCW224C


Summary of Contents for XL-HCW224C

Page 1: ...X XL L H HC CW W2 22 24 4C C HomePNA3 1 Coax MDU Master Bridge U Us se er r s s G Gu ui id de e Version 1 1 Oct 2009...

Page 2: ...accordance with the instructions may cause harmful interference to radio communications However there is no guarantee that interference will not occur in a particular installation If this equipment do...

Page 3: ...ement 7 Firmware HCNA Driver Files 8 EP Online 8 Link in Green EP is ready 9 Link in Yellow EP is being initializing 9 Link in Red unrecognized un configured EP 9 EP Offline 10 Link in Gray EP is off...

Page 4: ...ver Version 26 New System Firmware and HCNA Driver Files 27 System Firmware 27 Upload the New System Firmware 27 Check the New System Firmware in Upload Area 30 Activate the New System Firmware 31 HCN...

Page 5: ...time 41 upep 41 upmaster 41 upsys 41 useradd 41 userdel 41 users 41 Use SNMP 42 A AD DV VA AN NC CE ED D F FE EA AT TU UR RE ES S 43 QoS 43 Queue Scheduling 43 Strict Priority SP default mode 43 Weigh...

Page 6: ......

Page 7: ...for 802 1p IP TOS TC UDP TCP Protocols Built in Web Telnet Server to Support Remote Configuration Supports Remote HTTP TFTP Upgrade Function for Master EP System Firmware and HCNA Driver Supports Mas...

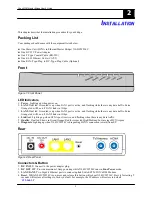
Page 8: ...en LAN2 port is active and flashing while there is any data traffic Extra Orange led will be on if LAN2 links in 1Gbps 4 Link Act Lighting up when HCNA port is active and flashing when there is any da...

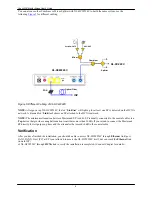
Page 9: ...ng XL HCW224C via DC adapter plug 2 LINE Runs in Line Power mode powering XL HCW224C via the coax cable connected to port HCNA Port HCNA holds both data and power Connecting the Cables To establish a...

Page 10: ...o the HCNA network NOTE The minimum attenuation between Master and EP is 6dB EP is usually connected to the coaxial cable via a Tap device that provides enough attenuation contributes more than 20dB I...

Page 11: ...nnect your PC with the bridge directly by one Ethernet cable between your PC s Ethernet adapter and bridge s port LAN1 Also configures your PC s TCP IP setting to fixed IP as 192 168 1 xxx subnet mask...

Page 12: ...ge and will take effect immediately Some changes require Reboot DHCP Option 82 and Snooping For Host PC at EP XL HCW224C could pad DHCP Option 82 and could snoop DHCP handshaking packets to verify hos...

Page 13: ...net domain System manager needs system IP address and Ethernet MAC address to access XL HCW224C Each XL HCW224C device should be stamped with both Ethernet MAC and HCNA MAC for identification XL HCW22...

Page 14: ...Version Click to Select All EPs at Once EP Working HCNA Driver Version Check box to Select EPs for ReConfig Driver Upgrade Click to List all Hosts User s PCs at EPs Configure Master s HCNA Ethernet Se...

Page 15: ...selected Master EP s HPNA driver with new driver at the XL HCW224C Upload Area ReConfig configure EP s settings stored in XL HCW224C again sync the EP internal settings to what Master has Add EP add...

Page 16: ...delete its obsolete profile manually to save XL HCW224C storage space XL HCW224C could keep up to 62 profiles and serve up to 1 master plus 61 on line EPs concurrently Master HomePNA Properties HPNA...

Page 17: ...de and set up the Privacy Key in XL HCW224C the setting values you need to upgrade Master and all allowable EPs HCNA driver with the new values replace the running working values with the new setting...

Page 18: ...Coax MDU Master Bridge User s Guide 12 Assume this EP is banned un check it for upgrade Click Upgrade button Here we have one banned EP shown in red background after upgrade...

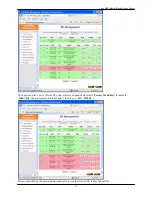
Page 19: ...wer on the 2 extra off line EPs they will also be banned since their Privacy Mode Key as default OFF 0x0 doesn t match with the Master s now key is ON 0x1234 EPs are classified by the shown background...

Page 20: ...tatus for Master EP Each listed device status can also be classified by the shown background color Green For Master the Privacy Mode Key working values in device is consistent with the profile stored...

Page 21: ...ex is Auto states for auto negotiation Bandwidth Control per Port Limit the maximum allowable downstream upstream bandwidth of Master EP This is hardware based bandwidth control to throttle traffic Co...

Page 22: ...kets denoted as Queue0 lowest priority Queue1 Queue2 and Queue3 highest priority By default packet priority is based on 802 1p IPv4 TOS IPv6 TC Refer Chapter ADVANCED FEATURES for more XL HCW224C QoS...

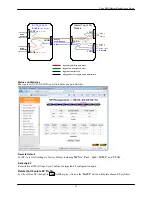
Page 23: ...ty is 0 7 Regard port HCNA as the network trunk Once Tag VLAN is enabled by default port LAN1 and port HCNA are set to the same VLAN also port LAN2 and port HCNA are within the same VLAN Port LAN1 and...

Page 24: ...D 1 Pri 0 VID 1 Pri 0 In All Out Untag HCNA In All Out Tag In All Out Untag LAN2 VID 2 Pri 7 LAN2 VID 2 Pri 7 In All Out Untag Tagged High Priority Path VID 2 Tagged Low Priority Path VID 1 UnTagged P...

Page 25: ...y Path VID 1 Tagged Path VID 1 or 2 UnTagged Path or Tagged Path with Other VID Status and Statistics Show port LAN1 LAN2 HCNA port link status and port statistics Reset to Default For EP to reset all...

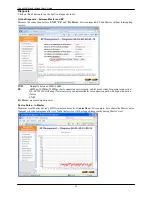
Page 26: ...B 34dB PE 64Mbps 192Mbps 224Mbps best connection carrier speed in bits per second for normal connection XL HCW224C will adopt lower carrier speed automatically for connection path with high attenuatio...

Page 27: ...the EP testee service will be stopped during test test will not influence other online EP Offline Diagnosis between Master and EP This diagnosis will stop service for 10 20 seconds Here s the result...

Page 28: ...of lost packets in one test run Administration The settings include the Administrator account the allowable Host with specified source IP and the protocols like Http Telnet Icmp Snmp in XL HCW224C man...

Page 29: ...Subnet Mask IP Address Subnet Mask For the factory default setting it will accept all incoming packets For example the following filter set permits all Hosts with IP address 192 168 1 xxx to access a...

Page 30: ...Coax MDU Master Bridge User s Guide 24 Telnet Http Snmp Setup Specify that if the built in Telnet server Web server and Snmp agent is enabled or not and assign the port number for the related service...

Page 31: ...CE 6 INFO 7 DEBUG log everything For example XL HCW224C will emit only EMERGENCY event to Server with IP address 192 168 1 111 according to the following System Time In order to provide correct timest...

Page 32: ...ate Firmware or to Upgrade driver Refer the following Example to Upload then Activate System Firmware and HCNA Driver for more detail Activate Firmware To do the real upgrade for Bootcode or System Fi...

Page 33: ...System Firmware and HCNA Driver Files In this example preparing the following binary files to upgrade the XL HCW224C XL HCW224C and the seven connected EPs XL HC224C XL HCW224C_Sysfw_V3 06 bin XL HCW...

Page 34: ...Coax MDU Master Bridge User s Guide 28 Start from the Upload Firmware window and click on Upload button...

Page 35: ...down counter for entering the uploading mode Click Continue button to proceed Click Browse button to locate where the new system firmware resides at your PC then click Start button to upload the file...

Page 36: ...Coax MDU Master Bridge User s Guide 30 Uploading in progress Another count down counter to verify the integrity of uploaded file Verifying is ok click Continue button...

Page 37: ...led time in order not to disturb current operation Check the New System Firmware in Upload Area After the successful uploading you may check the uploaded System Firmware does exist in Upload Area By o...

Page 38: ...the New System Firmware Click Activate button in the System Firmware window will do the real upgrade and replace the old System Firmware OS A progress counter for upgrade XL HCW224C system firmware X...

Page 39: ...NA Driver Follow the similar procedures as to upload new system firmware start from the Upload Firmware window Click Start button to upload the file XL HCW224C_Driver_V2 7 5 3 bin onto your XL HCW224C...

Page 40: ...Bridge User s Guide 34 Also shown on EP Management window Upload Area Upgrade the New HCNA Driver Designate the targeted Master EPs for driver upgrade from version 2 7 5 2 to 2 7 5 3 Click Upgrade bu...

Page 41: ...ser s Guide 35 Then Upgrade button again to confirm Upgrade EP one by one will keep the Master Local for the last Master EP runs the New HCNA Driver The EP Management window that queries the propertie...

Page 42: ...Coax MDU Master Bridge User s Guide 36 Indicate the new driver version 2 7 5 3 is working System Firmware and HCNA Driver Version after Upgrade As shown on the Information window for summary...

Page 43: ...Coax MDU Master Bridge User s Guide 37 Use Telnet Any popular Telnet client could use to configure the bridge remotely For example run Windows built in Telnet to configure the bridge...

Page 44: ...3 36 ip IPv4 address format in nnn nnn nnn nnn where n 0 9 As 192 168 1 1 Also applicable for mask default gateway interface Network interface name eth0 for LAN1 LAN2 interface hpna0 for HCNA interfac...

Page 45: ...EP port statistics of port LAN1 LAN2 HCNA r reset all port statistics counter to 0 epswc m mac t u r d p lan1 lan2 hpna l up down s auto 10h 10f 100h 100f f on off Display or set up remote EP built i...

Page 46: ...count w timeout l pktlen address ICMP ping function count number of ping requests max 65535 timeout expiry timer in each reply 1 60 sec pktlen sent packet length 64 1500 address target IP address rebo...

Page 47: ...g function default is off swqosq t strict wfq mix Display or set up the QoS Queue Scheduling strict strict priority wfq weighted fair queue Q3 Q2 Q1 Q0 service weight 8 4 2 1 mix Q3 is strict Q2 Q1 Q0...

Page 48: ...TFTP command get or put file filename time Display current system time upep a m mac n note Upgrade EP HCNA driver stored in Upload Area this operation also synchronize EP with EP Properties Profile s...

Page 49: ...o manage the bridge system The XL HCW224C bridge system may also be integrated into your original SNMP management system by this MIB file Refer XL HCW224C Application Notes for more SNMP configuration...

Page 50: ...s in different queues are forwarded Strict Priority SP default mode Always transmit packets in higher priority queue first Packets in lower priority will be forwarded after the higher priority queue g...

Page 51: ...N T Remote Management by HTTP TELNET SNMP Protocols Firmware and HCNA Driver are Upgradeable via HTTP or TFTP Auto Configuration via DHCP TFTP Client Enable Disable Endpoint Service Subscriber Host P...

Page 52: ...D I N D I C A T O R Power Ethernet LAN Link Activity per Port HCNA Link Activity HCNA Connection Quality HCNA Endpoint Diagnosis T E R M I N A L D E V I c e E N D P O I N T Cooperate with HCNA Etherne...

Reviews: