5.0 CONFIGURING CLIENT COMPUTERS
Congratulations on installing the XRouter Aero’s hardware! Next we will show you
how to enable communication between the XRouter Aero and client computers.
Part of the process of enabling communication involves setting the IP addresses
for the computer. These computers must have their IP addresses configured such
that they share the same subnet numbering scheme, as does the XRouter Aero’s
default IP address. We will explain this in more detail later in the chapter.
Configuring the IP addresses is a simple task that can be performed through your
computer’s TCP/IP control panel. We have provided instructions for the
configuration process for both Macintosh and PC users. Find the appropriate set
of instructions in the following pages.
5.1 Windows 95/98/Me TCP/IP Configuration
1. Double-click
the
Control Panel
icon in
My Computer
folder or locate it in the
Start Menu. The sub-folder Control Panel is located under Settings.
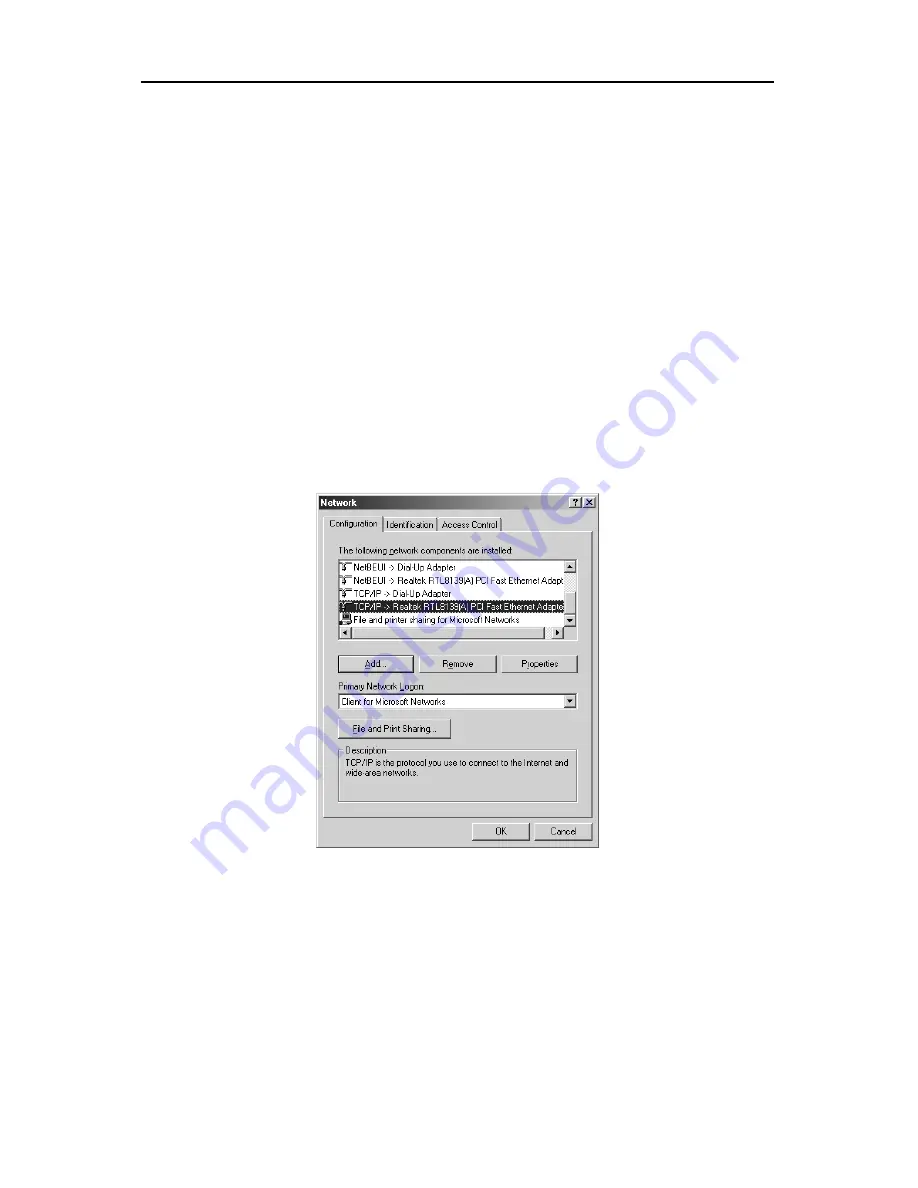
2. In the Control Panel, double-click the
Network
icon. The network interface
card (installed on your computer) appears along with the network protocol on
the Configuration list.
Figure 6
3. Double-click
TCP/IP protocol
on the list. If TCP/IP does not appear on the
list, you must install the TCP/IP protocol first as illustrated in step 4. Clients
with TCP/IP already installed may skip to step 5.
4. To install the TCP/IP protocol:
a. Keep your copy of Windows 95/98/Me CD-ROM on hand. (You will
need it for this installation.)
b. Click
the
Add
button from the Configuration list of the Network window.
A new window appears.


