background image

Contents

-2-

Note on installation -------------------------------------------------------- 3

Precautions ------------------------------------------------------------------ 4

Control Panel Layout ------------------------------------------------------ 4

Remote Control Layout --------------------------------------------------- 5

Wiring Diagram ------------------------------------------------------------- 6

Ganeral Function ---------------------------------------------------------- 7

Bluetooth Operation------------------------------------------------------- 11

Setting Menu --------------------------------------------------------------- 12

Replace the Battery of IR Handset ----------------------------------- 16

Install the unit -------------------------------------------------------------- 17

XM-VRSUN728

Disposal / recycling information --------------------------------------- 19

Summary of Contents for XM-VRSUN728

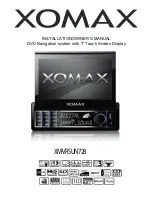
Page 1: ...INSTALLATION OWNER S MANUAL DVD Navigation system with 7 Touch Screen Display XM VRSUN728 ...

Page 2: ...recautions 4 Control Panel Layout 4 Remote Control Layout 5 Wiring Diagram 6 Ganeral Function 7 Bluetooth Operation 11 Setting Menu 12 Replace the Battery of IR Handset 16 Install the unit 17 XM VRSUN728 Disposal recycling information 19 ...

Page 3: ...ent damage to the unit from short circuiting Be sure to connect the correct speaker to the correct terminal Never connect the left and right channel speaker cables to each other or to the vehicle body Do not block vents or radiator panels Doing so will cause heat to build up and may result in fire After completion of installation and replacement of battery press the reset button on the front panel...

Page 4: ...uetooth GPS navigation 8 Diming of the display panel 9 GPS navigation 10 Adjust the angle up of the display panel 11 Open the display panel 12 Adjust the angle down of the display panel 13 USB slot 14 SD slot 15 GPS card slot 16 AUX IN jack 17 Volume up down SELECT key 18 IR sensor 19 Microphone Control Panel Layout 11 12 13 15 14 16 18 19 17 XM VRSUN728 ...

Page 5: ...ber keys 18 GOTO 19 PBC 20 OSD 21 LOC RDM 22 SEEK PREVIOUS TRACK TUNING DOWN 23 AMS REPEAT 24 ST PROG 25 STOP BACK 26 DOWN 27 LEFT 28 ENTER 29 BAND 30 UP BAND ST PROG AMS PRT LOC RDM TITLE MODE POW MUTE SUB T ENTER SEEK SEEK SEL PBC 1 2 3 4 5 6 7 8 9 10 10 GOTO VOL AUDIO OSD SETUP VOL ZOOM SLOW ANGLE 1 2 3 4 9 10 11 12 13 14 15 16 18 5 6 7 8 17 19 20 21 22 23 24 25 26 27 28 29 30 XM VRSUN728 ...

Page 6: ...LLOW VIDEO O UTPUT YELLOW CAMERA INPUT YELLOW SUBWOOFER O UTPUT GREEN SPEAKERR EARR SPEAKERR EARR SPEAKERF RONTR SPEAKERF RONTR SPEAKERF RONTL SPEAKERF RONTL SPEAKERR EAR L SPEAKERR EAR L ANTC ONTROL G ROUND B L AC K WHITE WHITE B L AC K GREEN BLACK GREEN VIOL E T VIOLET BLACK B L UE WHITE GR AY B L AC K GR AY B L UE PARKING C OFFE E BACK PINK ORANGE WHITE KEY1 KEY2 ACC COFFEE BLACK R E D B YE L L...

Page 7: ...N 1 7 USB 8 SD 9 Main Interface display switching 10 Close the display 11 Sourcing indicator Disc USB SD Bluetooth 12 Time indicator 13 Camera input camera is not included in this unit 14 Setting menu 15 Wallpaper switching 16 Compass 17 Counter 18 Gamer center 19 AV IN 2 20 Volume indicator 11 12 13 14 15 20 16 19 18 17 XM VRSUN728 ...

Page 8: ...ong press this key it will search all the frequency and save the radio station Sliding the 3 pages you can enter the preset stations by short press or stored the present frequency in the bar by long press LOCAL DISTANCE Short pressing this icon to enter the LOC DX setting menu it will search the strong signal of local click again to return the distance mode BAND Press BAND button to switch the ban...

Page 9: ... car is being driven from one area to another TA Traffic anouncement Function When it receives traffic announcement it will display the contents on screen When the Traffic announcement is over it will go back to the former playing mode PTY Program Type code Content of program such as news light music sports etc STEREO MONO Select ST to enter stereo sound select mono to enter mono sound VOL UP VOL ...

Page 10: ...e dial keyboard interface 2 Phonebook searching function 3 Display the phonebook 4 Bluetooth music interface 5 Back to main interface 6 Setting interface 7 Back to previous page 10 BLUETOOTH OPERATION XM VRSUN728 ...

Page 11: ... appear in the list on your mobile phone please select MT36 and then input password 0000 3 When successful paired MT36 will be displayed on LCD BLUETOOTH AUDIO A2DP FUNCTION The unit supports Bluetooth audio function If your mobile phone can play stereo audio when the paring is ok you can choose the unit you have paired to play the stereo music button on the front panel of the unit serves as PAUSE...

Page 12: ...SETTING MENU 1 Time setting 12 XM VRSUN728 ...

Page 13: ... 13 XM VRSUN728 2 GPS Path setting Select the EXE file in the GPS card 3 Back ground setting ...

Page 14: ...aults volume Turn on off GPS MIX display the music radio sound in the GPS interface at the same time while GPS is running Report point remove mute turn on off GPS sound mute Bluetooth sound setting 5 EQ SETTING Press EQ or Setting sound setting to select FLAT CLASSIC POP ROCK JAZZ BASS TREBLE BALANCE FADER LOUD ...

Page 15: ...he car is running 3 Turn on off the GPS monitor while the GPS is running other source can play at the same time 4 Calibration of the touch panel 5 Language setting 6 STEERING WHEEL CONTROL Enter the setting menu click the STEER icon to enter steering wheel setting following the steps which notice on the screen ...

Page 16: ...eplace battery with a new CR2025 battery Check the battery polarity before replacement Replace the Battery of IR Handset 16 Pull out the battery holder while pressing the stopper 1 Place battery whth mark facing up into the battery holder Insert the battery holder into the remote controller XM VRSUN728 ...

Page 17: ...ew 6 Starp be sure to use the starp to secure the back of the unit in place The starp can be bent by hand to the desired angle 7 Plain Washer Remove the Unit 1 Frame 2 Insert fingers into the groove in the front of frame and pull out to remove the frame When reattaching the frame point the side with a groove downwards and attach it 3 Lever Insert the levers supplied with the unit into the grooves ...

Page 18: ...on each side Use either truss screws 5 5 mm or flush surface screw 4 5 mm 2 Screw T Position 3 Dashboard or Console Note The mounting box outer trim ring and half sleeve are not used for method B installation Remove the front panel Press REL button in the panel pull out the A then slightly pull out B Please see picture on the left Install the front panel Put notch B shown as picture onto buckle B ...

Page 19: ...t protection or recycling yard please consult your municipal administration Disposal of the battery According to the battery decree we make you aware of your obligation to dispose of empty batteries at municipal collection points Batteries that contain pollutants e g Hg mercury Pb lead Cd cadmium are labelled with the symbol pictured above At our place you can free dispose of the empty batteries p...

Reviews: