www.xmarto.com
25
3)
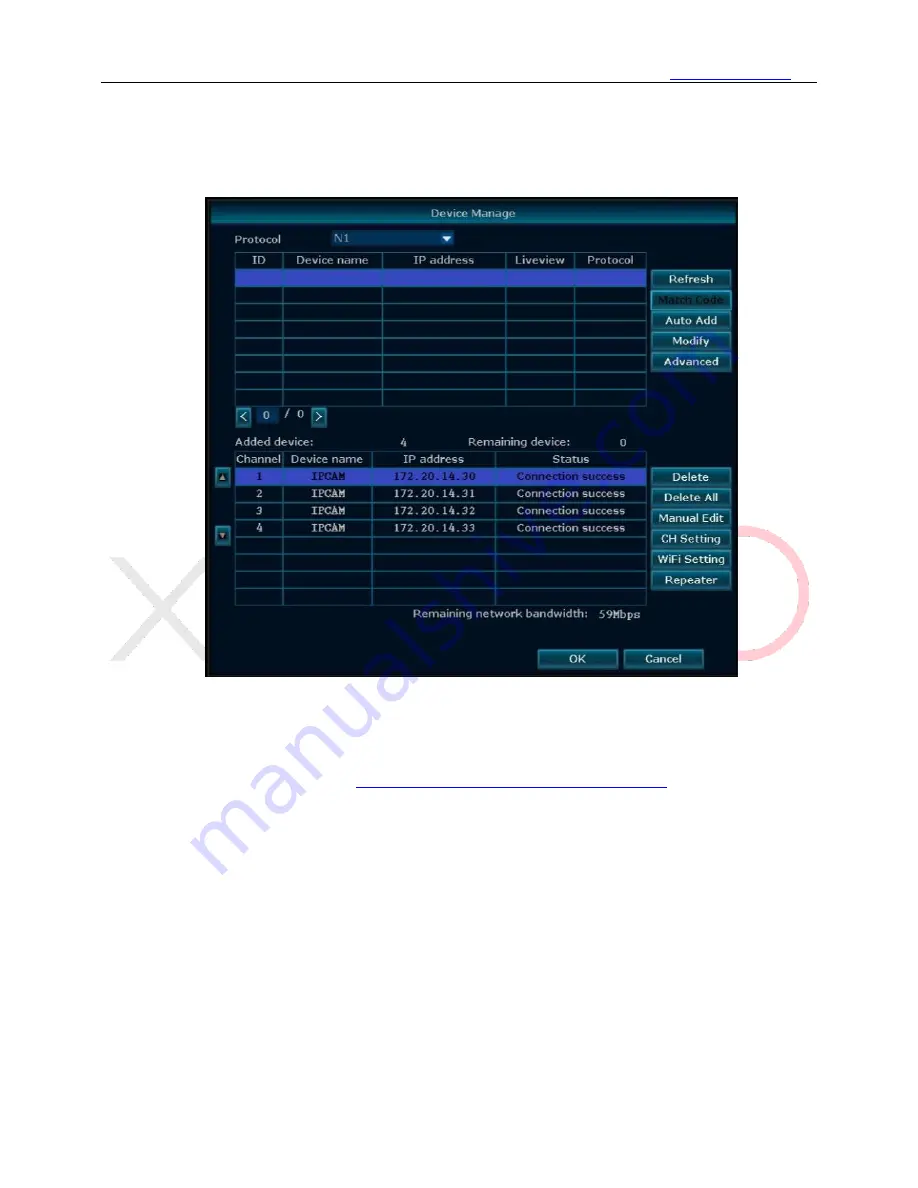
Select the camera in upper box, and select an unoccupied channel from bottom box, click “
Match
Code
”. Wait for them to pair, once finish, you shall see the camera display video on monitor, and
the channel status changes to Connect Success, with assigned IP address 172.20.14. xx. (172.20.14.
xx is camera’s wireless IP address, when it is paired to work wirelessly with NVR, it will be
assigned with a wireless IP address 172.20.14.xx.)
4)
You can then disconnect the camera from NVR and move it to anywhere you want. When it gets
power, it will automatically connect to NVR and display video on monitor. (Camera needs to be in
the NVR’s Wi-Fi range)
More details can be found here:
http://www.xmarto.com/helpcenter/?/article/9
Channel Status:
⚫
Connect Success:
Camera is paired to NVR successfully; you should be able to see the camera
video on your monitor.
⚫
No Video Source:
Unoccupied channel, no camera is paired to this channel, you can pair a new
camera to this channel.
⚫
IPC Disconnect:
Camera is paired to NVR but not connected successfully. The reasons vary,
please contact xmartO support for solution.
5.4.1.2 Configure Camera to work Wired
Function:
If any of your cameras need to be mounted out of NVR’s WiFi range, you can hard wire
cameras to router with network cables, and pair them to NVR to work wired.


