background image

63

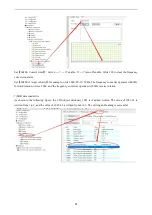
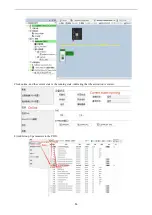
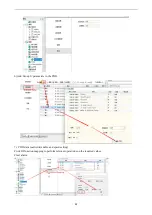
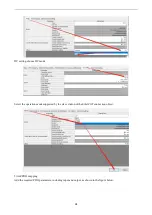
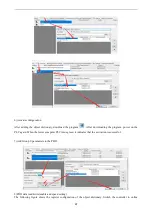
Set velocity:

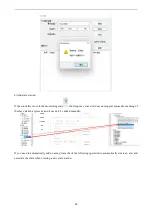
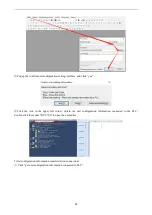
8) SDO data reading and writing

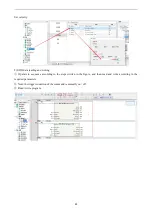
Operate in sequence according to the steps written in the figure, and then read and write according to the

required parameters.

Note: the trigger condition of the command is normally on / off.

Read / write program.

Summary of Contents for VH5 Series

Page 1: ...VH5 VH6 series EtherCAT communication User manual Wuxi XINJE Electric Co Ltd Data No INV C 08 20220623 1 1 ...

Page 2: ...ectrical engineer electrical operator etc The designer Before the above personnel operate or debug the inverter please carefully read the chapter of safety precautions in this manual Statement of responsibility Although the contents of the manual have been carefully checked errors are inevitable and we can t guarantee complete consistency We will often check the contents of the manual and correct ...

Page 3: ... communication area 11 6 3 VFD Internal parameter mapping area manufacturer defined area 14 6 4 Independent Protocol 15 6 5 CiA402 object Driver profile area 16 7 State control 17 7 1 VFD status control 17 7 1 1 state machine 17 7 1 2 Status description 18 7 1 3 Control command 18 7 1 4 Status 18 7 2 Operating mode 19 7 2 1 Speed mode 19 7 2 2 Torque mode 19 8 Independent protocol object 20 9 CiA4...

Page 4: ... 10 3 2 Parameter setting 45 10 3 3 Setup steps 45 10 4 Inovance AM600 CODESYS and VH5 VH6 50 10 4 1 System configuration 50 10 4 2 Parameter setting 50 10 4 3 Setup steps 50 10 5 Inovance H5U and VH5 VH6 58 10 5 1 System configuration 58 10 5 2 Parameter setting 58 10 5 3 Setup steps 58 10 6 KEYENCE PLC KV 7300 and VH5 VH6 64 10 6 1 System configuration 64 10 6 2 Parameter setting 64 10 6 3 Setup...

Page 5: ...ough the label on the board refer to Fig1 Confirm whether the package is complete Refer to Table 1 If the card is damaged the model is wrong or there are omissions in the package please contact the supplier or salesman immediately Please download the XML file of this card on the website www xinje com file name VHX CC100 xml Fig 1 Nameplate label location Table 1 Package Model Content Photo Quantit...

Page 6: ...ics Supported functions Support EtherCAT COE 402 protocol Supported services Support PDO Support SDO Support the object dictionary defined by the manufacture Support SDO to read and write the function code of VFD Supported EtherCAT Synchronization cycle Item Supported specifications Synchronization cycle 250us 1ms 2ms 4ms SDO PDO data description SDO Service Data Object is used to transmit aperiod...

Page 7: ... TxPDO3 TxPDO4 TxPDO5 TxPDO6 TxPDO7 TxPDO8 TxPDO9 TxPDO12 Note RxPDO and TxPDO can be configured with 12 at most RxPDO cannot be added 8 TxPDOs can be fixed and 4 TxPDOs can be added 4 Communication card components 4 1 VH5 CC100 communication card components indicator description The expansion card has three LED lights as shown in the figure The status indicators in the figure are error indicator ...

Page 8: ...icator from top to bottom The descriptions are as follows Type Status Description VFD communication status indicator Normally OFF The expansion card is disconnected from the frequency converter 1Hz flashing The connection between the expansion card and the frequency converter is normal Normally ON The expansion card is establishing connection with the frequency converter Operation indicator Normal...

Page 9: ...nd find the control board 3 Install the hexagon stud at the corresponding position of the board and tighten the M3 single head hexagon stud on the drive plate As shown in the following figure 4 Align the communication card pin with the expansion card slot of the control board and insert it firmly 5 Tighten M3 screws 6 Install the frequency converter cover plate 7 Connect and fix the communication ...

Page 10: ...e VFD 3 Align the communication card pin with the control board expansion card slot and insert it firmly 4 Tighten M3 screws 5 Connect and fix the communication line Note Hot plugging is prohibited 15 min 1 安装 运行前请务必阅读使用说明书 否则会有电击危险 2 在通电状态下和切断电源15分钟以内 请勿拆下盖板 3 进行维护 检查及接线时 请在切断输入侧和输出侧电源后 等待15分钟 待电源指示灯彻底熄灭后开始作业 REST JOG REV ENT DATA MENU ESC STOP RUN R INPUT OUTPUT S T U V W PB P P DC BUS ...

Page 11: ...is all in the device description file i e XML file The XML file of VH5 and VH6 EtherCAT expansion card is VHX CC xml 6 2 COE communication area Index Sub index Name Data type Access 1000h Device type UINT32 RO 1001h Error register UINT8 RO 1008h Manufacture device name STRING 1009h Manufacture hardware version STRING 100Ah Manufacture software version STRING 1018h Identity object 00 Number of entr...

Page 12: ...UINT32 RW 11 11th receive PDO mapped UINT32 RW 12 12th receive PDO mapped UINT32 RW 1A00h Transmit PDO mapping 1 00 Number of entries UINT8 RW 01 1st transmit PDO mapped UINT32 RW 02 2nd transmit PDO mapped UINT32 RW 03 3rd transmit PDO mapped UINT32 RW 04 4th transmit PDO mapped UINT32 RW 11 11th transmit PDO mapped UINT32 RW 12 12th transmit PDO mapped UINT32 RW 1A01h Transmit PDO mapping 2 00 N...

Page 13: ...NT16 RW 03 PDO mapping object index of assigned RxPDO3 UINT16 RW 04 PDO mapping object index of assigned RxPDO4 UINT16 RW 1C13h Sync manager channel 3 00 Number of assigned PDOs UINT8 RW 01 PDO mapping object index of assigned TxPDO1 UINT16 RW 02 PDO mapping object index of assigned TxPDO2 UINT16 RW 03 PDO mapping object index of assigned TxPDO3 UINT16 RW 04 PDO mapping object index of assigned Tx...

Page 14: ...by PDO Other object dictionaries can only be operated based on SDO Index Sub index Parameter Index Sub index Parameter 2000h 00 P0 00 2900h 00 P9 00 2001h 00 P0 01 2901h 00 P9 01 2002h 00 P0 02 0902h 00 P9 02 2003h 00 P0 03 2903h 00 P9 03 201Ah 00 P0 26 291Eh 00 P9 30 2100h 00 P1 00 2A00h 00 PA 00 2101h 00 P1 01 2A01h 00 PA 01 2102h 00 P1 02 2A02h 00 PA 02 2103h 00 P1 03 2A03h 00 PA 03 2123h 00 P1...

Page 15: ... 00 A2 02 2703h 00 P7 03 3203h 00 A2 03 2750h 00 P7 80 3240h 00 A2 64 2800h 00 P8 00 4000h 00 U0 00 2801h 00 P8 01 4001h 00 U0 01 2802h 00 P8 02 4002h 00 U0 02 2803h 00 P8 03 4003h 00 U0 03 2818h 00 P8 24 404Bh 00 U0 75 6 4 Independent Protocol Index Sub index Object Type Name Data Type Access PDO 5000 VAR Command UINT16 RW YES 5010 VAR Target speed UINT16 RW YES 5100 VAR Status UINT16 RO YES 5110...

Page 16: ... UINT32 RW NO 02 VAR Upper limit frequency UINT32 RW NO 6048 RECORD vl velocity acceleration 01 VAT Maximum output frequency UINT32 RO NO 02 VAR Acceleration time UINT16 RW NO 6049 RECORD vl velocity deceleration 01 VAT Maximum output frequency UINT32 RO NO 02 VAR Deceleration time UINT16 RW NO 605B VAR Shutdown option code UINT16 RW NO 605C VAR Disable operation option code UINT16 RW NO 605E VAR ...

Page 17: ...nsition of VFD is shown in the figure below Each box represents a state and the serial number 2 10 15 represents the state control command Note quick stop command is not supported If the master station executes quick stop command it will execute the command of conversion 9 free shutdown ...

Page 18: ...e Voltage Switch On Switch on 0 1 1 0 2 6 8 Switch on Enable operation 0 0 1 1 1 3 Disable voltage 1 1 1 1 3 4 Automatic conversion Quick stop 0 7 9 10 Disable operation 0 1 1 1 5 Enable operation 1 1 1 1 4 Fault reset 0 1 15 7 1 4 Status The bit combination of statusword 6041 hex indicates the working status of the equipment as shown in the following table Status Bit 12 FC Bit 9 RO Bit 6 SOD Bit5...

Page 19: ...operation mode The default is 6060h 2 7 2 1 Speed mode Object Name Description 6040 h Controlword Command to control the frequency converter 6041 h Statusword Returned status word corresponding to the instruction 6042 h vl target velocity Speed command to frequency converter 0 01 6046 h vl velocity min max amount Minimum and maximum allowable output speeds 6048 h vl velocity acceleration Set accel...

Page 20: ...esponding to 257 Reverse running 0x0102 decimal corresponding to 258 Deceleration shutdown 0x0110 decimal corresponding to 256 Free shutdown 0x0100 decimal corresponding to 272 For example 0x0101 is converted to binary 10000001 bit0 is 1 which means forward running and bit8 is 1 which means independent protocol 5010 hex Target Speed Range 0000 FFFF hex Unit 0 01Hz Default value 0000 hex Size 2byte...

Page 21: ... U16 Access RO PDO map Not possible Sub index 6 Cycle time Range Unit ms Default value 0000hex Size 2byte U16 Access RO PDO map Not possible Sub index 1 3 diaplay the status of the communication data frame between the expansion card and the frequency converter Sub index 4 displays the latest error reason 1 2 3 respectively represents sub objects 1 to 3 and 0 represents no error at present Sub inde...

Page 22: ...O map Possible This object controls the working state of the equipment Bit description is as follows Bit Name Details 0 Switch on The state is controlled by these bits Quick stop is not supported 1 Enable voltage 2 Quick stop reserved 3 Enable operation 4 6 Reserved Normally 0 7 Fault reset Faults and warnings are cleared when this bit turns ON 8 15 Error code Unused normally 0 6041hex Statusword ...

Page 23: ... RO PDO map Not possible Sub index 1 vl velocity min amount Lower limit frequency Range 0 FFFFFFFF hex Unit 0 01Hz Default value 00000000hex Size 4byte U32 Access RW PDO map Not possible Sub index 2 vl velocity max amount Upper limit frequency Range 0 FFFFFFFF hex Unit 0 01Hz Default value 00001388hex Size 4byte U32 Access RW PDO map Not possible This object sets the maximum and minimum speed Sub ...

Page 24: ...ion code Range 1 Unit Default value 1 Size 2byte INT16 Access RW PDO map Not possible This object describes the action of canceling operation operation enable switch on When this object is set to 1 it indicates deceleration shutdown otherwise it will free shutdown 605Ehex Fault reaction option code Range 1 Unit Default value 1 Size 2byte INT16 Access RW PDO map Not possible This object describes t...

Page 25: ...x Size 4 byte U32 Access RO PDO map Not possible This object displays the operation mode supported by expansion card Bit description is as follows Bit Supported mode Definition 0 pp Profile Position mode 0 Not supported 1 vl velocity mode 1 Support 2 pv Profile Velocity mode 0 Not supported 3 tq Profile Torque mode 0 Not supported 4 Reserved 0 5 hm Homing mode 0 Not supported 6 ip Interpolated Pos...

Page 26: ...ter station and frequency converter slave station according to the series topology shown in the figure below 10 1 2 Physical wiring Take Xinje XDH series PLC and VH5 as an example the physical wiring is shown in the figure 10 1 3 System configuration 10 1 3 1 Parameter setting The frequency converter slave station needs to be configured as EtherCAT communication mode and the parameters to be modif...

Page 27: ... XDPPro software the XML file of frequency conversion has been included If you need to update the XML file please go to the official website service and support download center to download it by yourself Right click XDPPro software open the location of the file find the directory plugins ethercat vendorxml and add the XML file here 10 1 3 3 New project take XDH 60T4 as an example 10 1 3 4 Master c...

Page 28: ...set arbitrarily except 6 Note The last digit of the computer address and the IP address of the PLC device cannot be set repeatedly 2 PLC configuration After checking the wiring and Ethernet configuration open XDPPRO programming tool click communication configuration double click Ethernet Xnet Configure according to the following figure ...

Page 29: ...ol under CIA 402 protocol and Independent protocol 10 1 4 1 Configuration 1 Click Scan 2 Select the function module User Define Servo Module 3 Click write then click activate 4 Confirm that the State Machine is switched to the OP state 5 Enter the Expert process data and click input and output respectively PDO allocation selection 1600 CiA402 protocol PDO allocation selection 1601 Independent prot...

Page 30: ...conversion 10 1 4 2 CiA402 protocol control 1 Enter the Expert process data and click Input and Output respectively in the SynManager Select 1600 1a00 from PDO list If you need a new address you can add or modify it in the PDO content After checking click configuration write and activate 2 View the register address of the control word through IO mapping Note the specific IO address value shall be ...

Page 31: ...6042h the frequency converter operates at 5 00Hz forward write 1000 and the frequency converter operates at 5 00Hz reverse Set 6071h target torque to set the upper limit value of torque in the speed mode which is 150 0 by default Read 6041h status word to obtain the status feedback of the frequency converter Read 6064h position actual value to obtain encoder position feedback only valid when PG ca...

Page 32: ...to set the torque setting When the torque is given as positive the VFD operates in the forward direction When the torque is given as negative the VFD operates in the reverse direction For example if 1000 is set the frequency converter operates at 10 00 of the rated torque Set 6042h vl target velocity to modify the upper speed limit 0 01 under torque mode corresponding to the percentage of maximum ...

Page 33: ...0Hz if 1000 is written in 5010h the frequency converter operates at 5 00Hz forward write 1000 and the frequency converter operates at 5 00Hz reverse Read 5100h status word to obtain the status feedback of the frequency converter Note Check the version number of the expansion card through the frequency converter U4 09 If U4 09 100 5010h will give the frequency unit 0 01Hz For example if 1000 is wri...

Page 34: ...on time P0 19 through SDO reading instruction According to chapter 6 3 write the object index of deceleration time P0 19 H2013 Note The first slave station ID is 0 not 1 For instructions please refer to XDHXLH motion control manual ...

Page 35: ...meters to be modified are as follows Parameter Name Access Set value Range Explanation P0 02 Operation command channel selection Runtime read only 2 0 2 Communication P0 03 Main frequency A input channel selection Runtime read only 6 0 9 Communication setting P9 00 Communication protocol Runtime read only 1 0 2 EtherCAT P9 12 Slave station No RW 0 65535 After modification it is valid when power on...

Page 36: ...click EtherCAT pop up the EtherCAT configuration screen Right click master device and select Display ESI Library Then in the pop up ESI library we need to add the XML file of VHX CC100 Select this folder to display the path of the storage folder where the VHX CC100 XML type file is placed ...

Page 37: ...device ensure that P9 12 is set The station number can be increased from 1 in actual connection sequence After modification it needs to be powered on again If the controller is online right click the master device to compare and merge the configurations with those of the physical network ...

Page 38: ...38 The actual connection is shown in the following figure ...

Page 39: ...n the left and PDO entries on the right You can add or delete PDO as required To add a PDO select Add PDO entry and the PDO object that can be added will be displayed in the pop up window Select it click OK and then click apply to add it successfully After adding see the following figure 5 Gateway communication settings First check the IP address of the PLC in the multi view browser select Control...

Page 40: ... Controller Communicate setting Select Ethernet Direct connection in the communication setting interface and then click OK to close the interface Note Ethernet connection requires that the IP address of the connected device PC is automatically obtained or within the PLC IP address network segment so confirm whether the IP address setting of the PC meets the requirements before connection ...

Page 41: ...to compare the local project with the project in the controller The local project is different from the project in the controller and out of sync is displayed If you click transfer to controller the local project will be downloaded and the original project of the controller will be overwritten ...

Page 42: ...f the local project and the controller project When the subsequent modified projects are synchronized again the entries different from the controller project will be marked in detail 7 PDO data read write enable and speed setting PDO object data can monitor real time changing values through IO mapping ...

Page 43: ...r the frequency conversion alarm Set 6042h vl target velocity for example write 1000 P0 13 50Hz The frequency converter operates with 5Hz forward rotation writes 1000 and the frequency converter operates with 5Hz reverse rotation 8 SDO data read write Variable definition and assignment ...

Page 44: ...44 Programming The contacts are connected and the input object dictionaries are read and written respectively Abortcode is displayed as 0 after reading and writing is successful ...

Page 45: ...ws Parameter Name Access Set value Range Explanation P0 02 Operation command channel selection Runtime read only 2 0 2 Communication P0 03 Main frequency A input channel selection Runtime read only 6 0 9 Communication setting P9 00 Communication protocol Runtime read only 1 0 2 EtherCAT P9 12 Slave station No RW 0 65535 After modification it is valid when power on again 10 3 3 Setup steps 1 Add XM...

Page 46: ...iguration Connection complete At this time if the controller is not in config mode you need to click this icon to switch the controller to config mode first and then right click Device and click Scan to scan the slave station of EtherCAT ...

Page 47: ...47 The scanning results are as follows 4 Configure activation Click Activate configuration Click online and the current state is the running state indicating that the activation is correct ...

Page 48: ...cess Data click 0x1A00 in PDO list and right click in PDO content to insert U0 00 parameter In config mode add PDO data As shown in the above figure it was added successfully 6 PDO data read write enable and speed setting As shown in the figure below the object words 6040h and 6042h are written successfully ...

Page 49: ... 50Hz The frequency converter operates with 5Hz forward rotation writes 1000 and the frequency converter operates with 5Hz reverse rotation 7 SDO data read write As shown in the following figure the COE object dictionary 10F1 is read and written The value of 10F1 01 is written from 1 to 3 and the value of 10F1 02 is written from 4 to 3 The writing and reading is successful ...

Page 50: ... modified are as follows Parameter Name Access Set value Range Explanation P0 02 Operation command channel selection Runtime read only 2 0 2 Communication P0 03 Main frequency A input channel selection Runtime read only 6 0 9 Communication setting P9 00 Communication protocol Runtime read only 1 0 2 EtherCAT P9 12 Slave station No RW 0 65535 After modification it is valid when power on again 10 4 ...

Page 51: ...odules and place them in order According to the module model and installation sequence used by the actual application system double click the selected module from the expansion module library on the right and drag it to the installation rack To delete a module select the module and press Del to delete it Take AM600 as an example up to 16 expansion modules can be connected to the mainframe includin...

Page 52: ...2 Install through menu tools Choose Tool Device library Select Install in the pop up dialog box Select the EtherCAT XML device description configuration file item in the pop up install device description ...

Page 53: ...h the PLC in the same network segment and click OK after finding it Note Ethernet connection requires that the IP address of the connecting device PC and the IP address of the PLC are in the same network segment so confirm whether the IP address setting of the PC meets the requirements before making the connection action The following figure PLC and slave networking are normal The configuration in...

Page 54: ... Set master station parameters 6 Scan slave station After the configuration information of the background configuration port is consistent with the actual PLC connection port scan the EtherCAT slave device ...

Page 55: ...n the figure below Click Copy scanned device to add all the scanned slave stations to the project The network configuration is shown as follows 7 Configure activation Compile and download the configuration in turn log in and run the PLC ...

Page 56: ...56 Click online and the current state is the running state indicating that the activation is correct 8 Add Group U parameters to the PDO ...

Page 57: ...Write 128 to clear the frequency conversion alarm Set 6042h vl target velocity for example write 1000 P0 13 50Hz The frequency converter operates with 5Hz forward rotation writes 1000 and the frequency converter operates with 5Hz reverse rotation 10 SDO data read write As shown in the following figure the COE object dictionary 10F1 is read and written The value of 10F1 01 is written from 1 to 3 an...

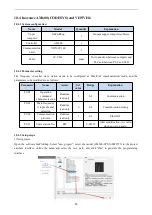
Page 58: ...s Parameter Name Access Set value Range Explanation P0 02 Operation command channel selection Runtime read only 2 0 2 Communication P0 03 Main frequency A input channel selection Runtime read only 6 0 9 Communication setting P9 00 Communication protocol Runtime read only 1 0 2 EtherCAT P9 12 Slave station No RW 0 65535 After modification it is valid when power on again 10 5 3 Setup steps 1 New pro...

Page 59: ...59 2 Add XML file 3 Master station connection configuration ...

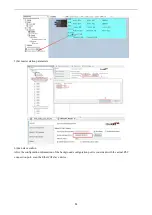
Page 60: ...ncy converter does not support automatic scanning of the slave station at present and it needs to be added manually If you need to automatically add an axis please check the following operation to automatically create an axis and associate the slave when creating a new slave station ...

Page 61: ...nfiguration Click compile to confirm whether the configuration and program are wrong then download the configuration and run it and then monitor it Click status to confirm that all slave state machines are in OP status ...

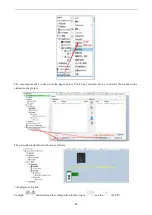
Page 62: ...62 6 Add Group U parameters to the PDO 7 PDO data read write enable and speed setting Click IO function mapping to perform relevant operations on the required values Clear alarm ...

Page 63: ...a reading and writing Operate in sequence according to the steps written in the figure and then read and write according to the required parameters Note the trigger condition of the command is normally on off Read write program ...

Page 64: ...needs to be configured as EtherCAT communication mode and the parameters to be modified are as follows Parameter Name Access Set value Range Explanation P0 02 Operation command channel selection Runtime read only 2 0 2 Communication P0 03 Main frequency A input channel selection Runtime read only 6 0 9 Communication setting P9 00 Communication protocol Runtime read only 1 0 2 EtherCAT P9 12 Slave ...

Page 65: ... Click the icon in the upper left corner obtain the unit configuration information connected to the PLC double click the model KV 7300 to open the unit editor 2 Get configuration information master station connection Click get unit configuration information connected to PLC ...

Page 66: ...66 Click OK 3 ESI file registration Click axis composition setting and ESI file registration Select the XML file ...

Page 67: ...the following figure 4 Add slave configuration As shown in the figure below double click VH5 1 0 to add the first slave station and a configuration interface will pop up after adding Select the extension settings as shown in the following figure ...

Page 68: ...g choose DC mode Select the operation mode supported by the slave station of the EtherCAT connection object 5 Add PDO mapping Add the required PDO parameters including input and output as shown in the figure below ...

Page 69: ...ogram power on the PLC again When the lower computer PLC turns green it indicates that the activation is successful 7 Add Group U parameters to the PDO 8 PDO data read write enable and speed setting The following figure shows the register configuration of the object dictionary Switch the controller to online ...

Page 70: ...he following figure The following figure shows the mapping address of the object dictionary Open the monitor select the expansion unit buffer memory find the mapping address and directly operate the object dictionary 9 SDO data read write Read ...

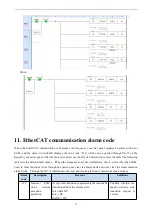
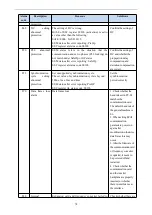
Page 71: ...iled fault causes When the frequency converter itself alarms that is errors other than Err44 need to clear the alarm twice through the panel once clear the alarm itself and once clear the communication alarm Err44 Through the bit7 of controlword the reset and clearing fault only needs to be cleared once Alarm code Description Reasons Solutions 817 Incorrect ESM status request exception protection ...

Page 72: ...orrect The receiving and sending areas of the mailbox overlap with SM2 3 and the addresses of the receiving and sending areas are odd The starting address of the mailbox is outside the range of SyncManager0 1000h 10ffh and syncmanager1 1200h 12ffh Incorrect setting of SyncManager 0 1 length ESC registers 0802h 0803h 080ah 080bh SyncManager0 out of the range of 32 256byte SyncManager1 outside the r...

Page 73: ...tchdog detection timeout value registers 0400h 0402h does not meet the communication cycle 2 condition ESM status after error reporting PreOP ESC register AL status code 001fh Correctly set the watchdog detection timeout value 836 TxPDO distribution abnormal protection The data size of TxPDO mapping exceeds 24 bytes ESM status after error reporting PreOp ESC register Al status code 0024h Confirm t...

Page 74: ...cycle setting abnormal protection Set unsupported synchronization cycle The set value of synchronization cycle is beyond 500us 1ms 2ms and 4ms ESM status after error reporting PreOP ESC register AL status code 0035h Set the synchronization period correctly 870 Data frame loss alarm Data frame loss 1 Check whether the baud rate set in P9 02 matches the communication card The default baud rate of th...

Page 75: ...ve state machine error status When the frequency converter is running the master station requests non OP status without first closing the slave station Or the error code is displayed after the key is reset indicating that the key has no permission to reset the error it may be enabled by the master station Check whether it enters non OPstate during operation If the reset key cannot clear it it is n...

Page 76: ...Wechat ID WUXI XINJE ELECTRIC CO LTD No 816 Jianzhu West Road Binhu District Wuxi City Jiangsu Province China Tel 400 885 0136 Fax 86 510 85111290 www xinje com ...

Reviews: