


Scanning and Configuring One Touch
Xerox
®
DocuMate
®
4790
User’s Guide
6-59
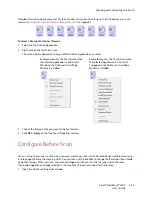
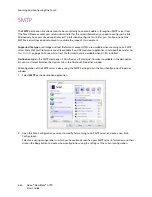
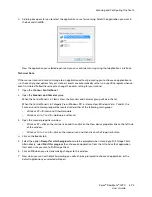
1.
Select
SharePoint
as the destination application.
2.
Open the Scan Configuration you want to modify for scanning to a SharePoint site, or create a new Scan
Configuration.
Select an existing configuration in which you have already specified your SharePoint site information, and
then click on the
Copy
button to create a new configuration using the settings of the current configuration.
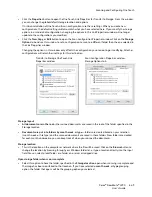
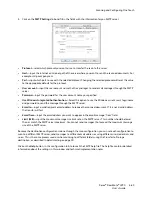
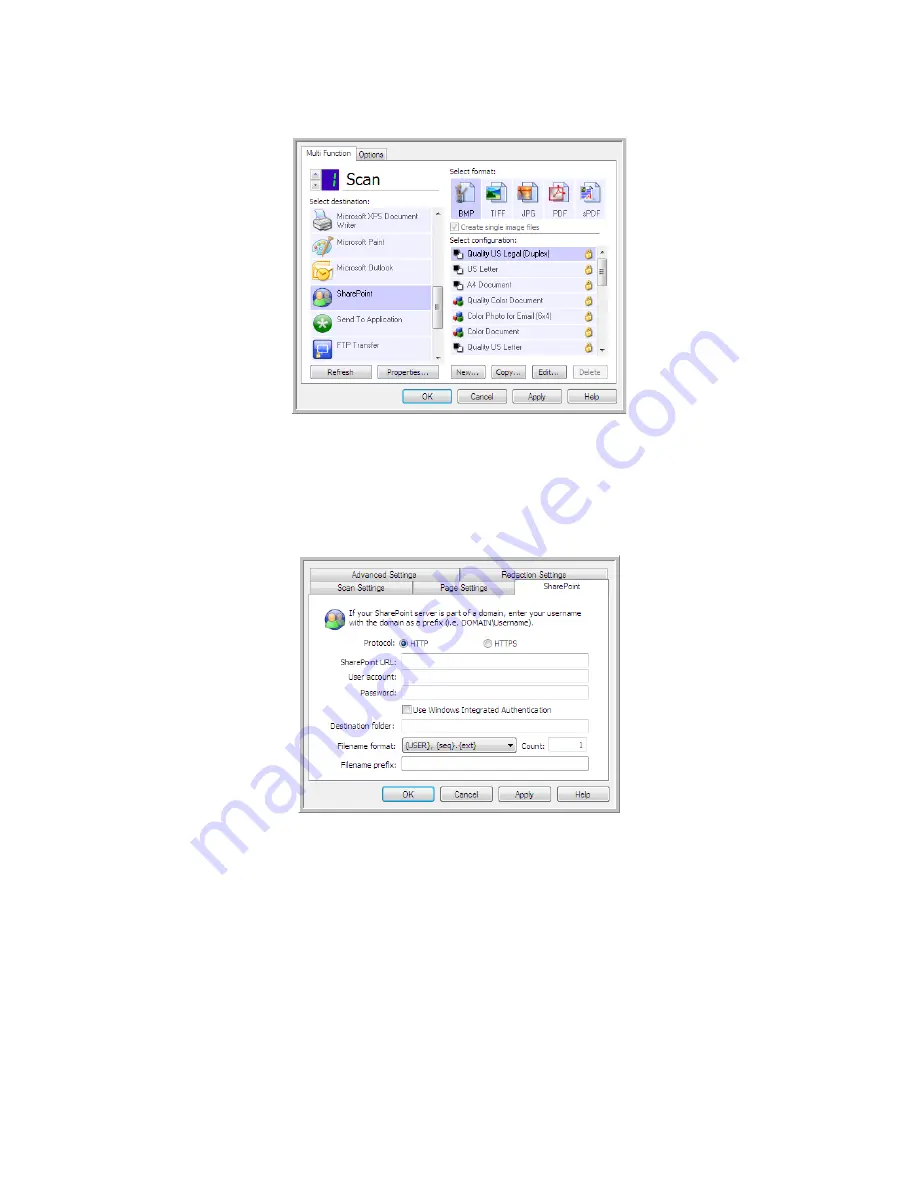
3.
Click on the
SharePoint
tab and fill in the fields with the information for your SharePoint site.
•
Protocol
—select which protocol you want to use to transfer the scan to the server.
•
SharePoint URL
—input the full URL path of the SharePoint site without the http(s):// designation and actual
page. This path should include everything except the destination folder.
For example, if the web browser URL displays
http://sharepoint.site.com/IT/common/shared documents/
default.aspx
, then you would configure the SharePoint server path as follows:
–
Select
HTTP
as the protocol
–
The SharePoint URL would be
sharepoint.site.com/IT/common
–
The Destination folder would be
shared documents
•
User account
—input the user account name that has privileges to save files to the specified SharePoint site
and Destination folder.
Summary of Contents for Xerox DocuMate 4790
Page 1: ...Xerox DocuMate 4790 OneTouch 4 6 March 2013 05 0820 100 User s Guide...
Page 8: ...Xerox DocuMate 4790 User s Guide 8 Table of Contents...
Page 34: ...Loading Documents to Scan Xerox DocuMate 4790 User s Guide 5 26...
Page 160: ...Scanning from ISIS Xerox DocuMate 4790 User s Guide 8 152...
Page 201: ......


