3.3 Setting Paper Types and Sizes
43
Loading Envelopes in the Bypass Tray
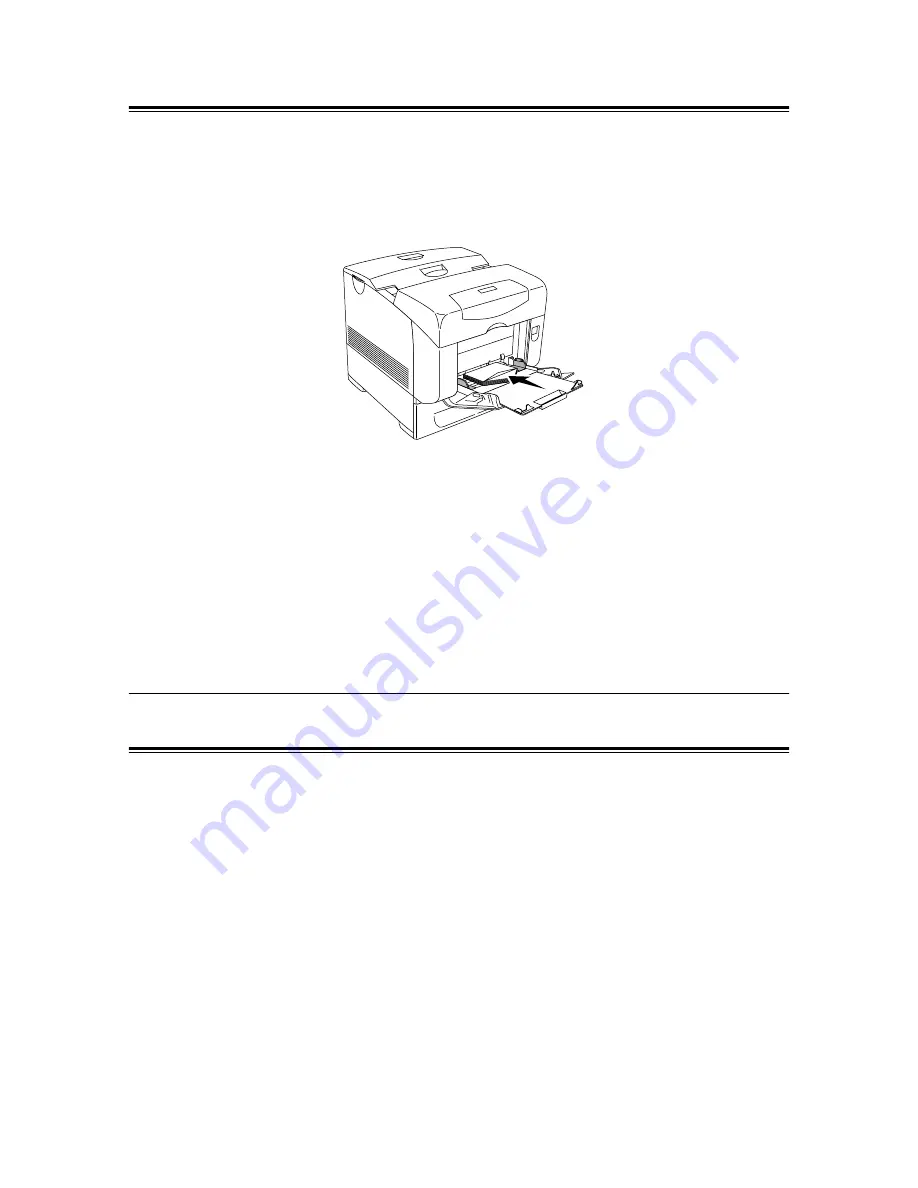
To load envelopes that are less than or equal to 220 mm (8.66 inches) in width in the bypass
tray, insert the envelopes with the flaps open and at the rear. To load envelopes that are
over 220 mm (8.66 inches) in width in the bypass tray, insert the envelopes with the flaps
closed and at the right side. The print side must be facing down. You can load envelopes
up to the maximum fill line in the tray at one time.
Important
• For best performance, do not use envelopes that:
• Have excessive curl or twist
• Are stuck together or damaged in any way
• Contain windows, holes, perforations, cutouts, embossing
• Use metal clasps, string ties, or metal folding bars
• Have an interlocking design
• Have postage stamps attached
• Have any exposed adhesive when the flap is in the sealed or closed position
• Have nicked edges or bent corners
• Have rough, cockle, or laid finishes
3.3
Setting Paper Types and Sizes
Setting Paper Trays
When loading paper in the 550/1100 Sheet Feeder (optional), it is necessary to set the
paper type on the control panel.
When loading paper in the bypass tray, set the paper size and type on the print driver when
printing. When [Bypass Mode] has been set [Panel Specified] ([DriverSpecified] by default)
on the control panel, you can set the paper size and type on the control panel.
This section describes how to set the paper size and type on the control panel.
Note
• When you set [Bypass Mode] to [Panel Specified], printing will be performed only when the settings for
the paper size and type configured on the print driver when printing match the settings on the control
panel. When a mismatch of paper sizes occurs, follow the instructions displayed on the control panel.
• You can also display the message to set the paper size and type on the control panel every time you
load paper into each tray. Refer to the “4.2 Description of Menu Items” (P. 48) for details.


