background image

Clearing paper misfeeds and jams

4-8

 Troubleshooting Guide

Interior labels

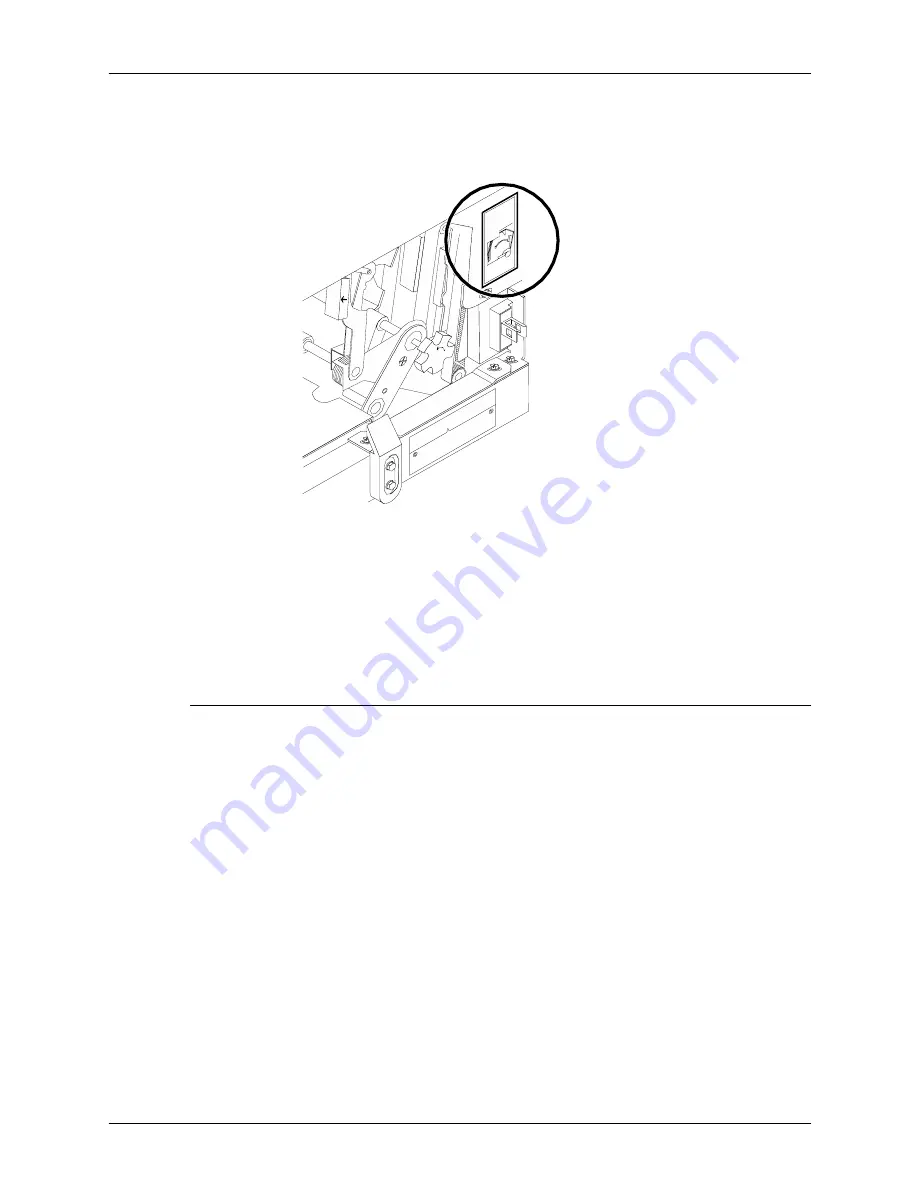
Message labels are located inside of the printer at the point of 
need. 

Figure 4-4. Message labels inside the printer

Each handle, lever, or knob you use to clear a paper jam is bright 
green and marked with an arrow indicating the direction it moves.

When a paper jam occurs in the printer, clear only the area or 
areas indicated by the message and graphic displays.

Job recovery

Checking job

integrity following

a paper jam

There is a slight possibility of duplicate or missing pages when a 
paper jam occurs while a job prints.

Follow this procedure:

1. The printer offsets the first sheet printed following a paper 

jam. Locate that sheet.

2. Check the sheets immediately before and after the offset 

sheet to see if there are any missing or duplicated sheets in 
the job.

3. Check the output for data missing from the pages.

Summary of Contents for DocuPrint 4050 IPS

Page 1: ...Xerox DocuPrint 4050 4090 NPS IPS Troubleshooting Guide 721P90231 Version 8 0 October 2002 ...

Page 2: ...itation material generated from the software programs which are displayed on the screen such as icons screen displays looks etc Printed in the United States of America Publication number 721P90231 Xerox and all Xerox products mentioned in this publication are trademarks of Xerox Corporation Products and trademarks of other companies are also acknowledged Changes are periodically made to this docum...

Page 3: ... xiii About this guide xiii Contents xiii Conventions xiv Related publications xv 1 Calling for service 1 1 Information to have on hand when calling for service 1 1 Enabling and disabling the modem for remote service 1 2 2 Troubleshooting Xerox Client Software installation 2 1 3 Troubleshooting a Novell implementation 3 1 4 Clearing paper misfeeds and jams 4 1 Clearing a feeder tray fault 4 1 Freq...

Page 4: ...paper jams areas A and B 4 26 Adjusting dual stacker tray scuffer arms 4 27 5 Optimizing print quality 5 1 Product features that affect PostScript print quality 5 1 Proprietary PostScript extensions 5 1 Device dependent operators 5 2 Gray shading setscreen and setcolorscreen 5 2 Gray shading settransfer and transfer function 5 3 Smooth curves setflat 5 4 Invisible strokes 0 setlinewidth 5 4 Scan c...

Page 5: ... Welfare for Class 1 laser products Class 1 laser products do not emit hazardous radiation The DocuPrint printers do not emit hazardous radiation because the laser beam is completely enclosed during all modes of customer operation The laser danger labels on the system are for Xerox service representatives and are on or near panels or shields that must be removed with a tool DO NOT REMOVE LABELED P...

Page 6: ...on of the equipment grounding conductor may result in risk of electrical shock Always connect equipment to a properly grounded electrical outlet If in doubt have the outlet checked by a qualified electrician Never use a ground adapter plug to connect equipment to an electrical outlet that lacks a ground connection terminal Always place equipment on a solid support surface with adequate strength fo...

Page 7: ... your local Xerox representative or operating company Operation safety Europe This Xerox product and supplies are manufactured tested and certified to strict safety regulations electromagnetic regulations and established environmental standards Any unauthorised alteration which may include the addition of new functions or connection of external devices may impact the product certification Please c...

Page 8: ...ied electrician To disconnect all electrical power to the product the disconnect device is the power cord Remove the plug from the electrical outlet Ventilation Slots and opening in the enclosure of the product are provided for ventilation Do not block or cover the ventilation vents as this could result in the product overheating This product should not be placed in a built in installation unless ...

Page 9: ...s related to low voltage equipment January 1 1996 Council Directive 89 336 EEC approximation of the laws of the member states related to electromagnetic compatibility March 9 1999 Council Directive 99 5 EC on radio equipment and telecommunications terminal equipment and the mutual recognition of their conformity A full declaration of conformity defining the relevant directives and referenced stand...

Page 10: ...21 a specification for terminal equipment for use on analog switched telephone networks in the European Economic area The product may be configured to be compatible with other country networks Please contact your Xerox representative if your product needs to be reconnected to a network in another country This product has no user adjustable settings NOTE Although this product can use either loop di...

Page 11: ...For further information For more information on Environment Health and Safety in relation to this Xerox product and supplies please contact the following customer help lines Europe 44 1707 353434 USA 1 800 8286571 Canada 1 800 8286571 ...

Page 12: ...Safety xii Troubleshooting Guide ...

Page 13: ...and conventions Contents This section lists the contents of this guide Chapter 1 Calling for service describes the information to have on hand when calling for support service Chapter 2 Troubleshooting Xerox Client Software installation provides solutions to common problems with software installation Chapter 3 Troubleshooting a Novell implementation describes some ways to troubleshoot a Novell imp...

Page 14: ...ts Variable information or the position of a specified argument in the command syntax appears in angle brackets for example List Fonts Pattern Bold Within procedures text and numbers that you enter are shown in bold for example enter privilege operator The word enter within procedures The two step process of keying in data and pressing ENTER for example enter y Italics Document and library names a...

Page 15: ...rinting refer to the Solutions Guide for IPDS Printing Guide to Configuring and Managing the System Guide to Managing Print Jobs Guide to Performing Routine Maintenance Guide to Submitting Jobs from the Client Guide to Using Page Description Languages System Overview Guide Troubleshooting Guide Solutions Guide for IPDS Printing Decomposition Service and Tools Guide Glossary Master Index Customer I...

Page 16: ... your Jobs from Windows NT 4 0 QuickPrint Quick Reference Card Submitting your Jobs Using Windows NT 4 0 Drivers Quick Reference Card The documentation set also includes an electronic version the DocuPrint NPS IPS Interactive Customer Documentation CD ...

Page 17: ...Before calling make note of the following Status code numbers and messages that appear on the controller screen and the printer console Indicator lights that are lit Name of your printer DocuPrint 4050 or 4090 NPS IPS Serial number for your printing system located on the frame inside the printer behind the door to the feeder trays 1 and 2 Problems you are having with the system Additional informat...

Page 18: ... An external modem allows your system to be accessed by remote service technicians You may be instructed to enable the modem so that the technician can dial into your system Follow this procedure 1 Stop all printing and queueing during the remote service session 2 Follow the instructions of your service representative to enable the modem 3 When the remote service session is complete disable the mo...

Page 19: ...ure that the environment variable path includes the subdirectory usr xerox nps client bin and usr bin before the subdirectory containing the local print command Also resolve any print command aliases that might be set in the cshrc file If you see the message Server or Directory Unreachable after executing a print command perform the following steps 1 If the printer controller software is newly ins...

Page 20: ...e installation commands use to install the Client Software The attempt to communicate to the Print__Controller__Name has failed Make sure the name Print__Controller__Name is correct Make sure your etc hosts file contains correct information Make sure the machine is operational and is in the network mode UNIX clients only Indicates that the installation script s attempt to communicate with the Prin...

Page 21: ...here is an external connectivity problem Check Novell file server console screen for messages Check that the server is running and connected to the network If it is an incorrect framing type or server name your Xerox service representative must change the configuration on the printer controller Log message says there is an error in connecting to the file server NPS IPS is getting SAP packets with ...

Page 22: ... server should only have a PSERVER defined with the same name as the printer s PSERVER there should not be an instance of PSERVER running under that PSERVER definition Stop the PSERVER instance Log message says Error finding queue Queue not created At the file server create the queue set up the printer for the PSERVER and be sure it will service the appropriate queue Log message says Netware PServ...

Page 23: ...ackets advertising the print server There is a basic connectivity or routing problem The incorrect framing type has been set The print server is not running For RPRINTER there must be a PSERVER running on the file server with the name specified to NPS IPS at installation time If there is an external connectivity problem PSERVER should work when it is repaired If it is an incorrect framing type you...

Page 24: ...Troubleshooting a Novell implementation 3 4 Troubleshooting Guide ...

Page 25: ...der the right conditions Refer to Helpful Facts About Paper for information on paper selection and care Clearing a feeder tray fault When paper is misfed from the paper trays complete the following steps 1 Go to the paper tray indicated by the message and graphic displays of the printer console 2 Press the Tray Unlock button on the front left of the paper tray ...

Page 26: ...and jams 4 2 Troubleshooting Guide 3 When the Ready To Open indicator is lit pull the bar up and out to open the tray Pull the tray all the way out for best results 4 Press the green lever to unlatch the paper feeder assembly ...

Page 27: ...and that the stack is not higher than the MAX line on the length guide Make sure that the length guide is firmly touching the back edge of the stack 6 Latch the paper feeder assembly by pressing the green dot until the assembly clicks into place 7 Slide the tray back into the printer until the tray latches and press the Continue button to resume printing ...

Page 28: ...se of one tray misfeeding more than another tray when the same kind of paper is used Glazing is caused by a buildup of the chemicals found on most papers If you suspect that the belt is glazed try cleaning it with film remover that is obtained from your service representative CAUTION Clean the feed belt only to correct misfeeds not as routine maintenance Because the belt is rubber frequent cleanin...

Page 29: ... the same direction as the ribs on the belt Wiping from side to side might pull the belt off its track Allow a few seconds for the film remover to evaporate 3 Latch the paper feeder assembly by pressing down on the bright green dot Slide the paper tray completely back into the printer Operate the system as usual If you continue to experience misfeeds place a service call ...

Page 30: ...as it leaves the feeder trays or moves through the paper path You must clear the paper jam before you can continue to print The two illustrations below show the areas along the paper path in which jams may occur Figure 4 1 Areas along the simplex paper path Figure 4 2 Areas along the duplex paper path ...

Page 31: ...printer console displays the following information The message display describes the areas of the printer you must check and clear The graphic display shows the location of the jams and the doors you open to access them Figure 4 3 Message and graphic displays on printer console 1 Message display 2 Graphic display 1 2 ...

Page 32: ...urs in the printer clear only the area or areas indicated by the message and graphic displays Job recovery Checking job integrity following a paper jam There is a slight possibility of duplicate or missing pages when a paper jam occurs while a job prints Follow this procedure 1 The printer offsets the first sheet printed following a paper jam Locate that sheet 2 Check the sheets immediately before...

Page 33: ...e stitcher stacker areas A and B The purpose of the diagram is to give you an overall perspective of the locations of all the printer areas relative to each other Note that an actual printer cannot have both a dual stacker and a stitcher stacker Figure 4 5 Overview of all printer jam areas Clearing paper jams from areas 1 and 1A To clear paper jams from areas 1 and 1A 1 Open the middle door and lo...

Page 34: ...g paper misfeeds and jams 4 10 Troubleshooting Guide 2 Remove and discard any paper you find in the areas indicated 3 Close the door 4 Open the high capacity feeder front door and locate area 1A Area 1 Area 1 ...

Page 35: ... 4 11 5 Remove and discard any paper you find in the area 1A 6 Close the door and press the Continue button to resume printing Clearing paper jams from areas 2 and 2A To clear paper jams from areas 2 and 2A 1 Open the middle door and locate area 2 Area 1A ...

Page 36: ...hooting Guide 2 Lift the three green handles one by one Each time you lift a handle remove and discard any paper you find beneath the open section 3 Lower the handles and close the door 4 Open the high capacity feeder front door and locate area 2A ...

Page 37: ...Clearing paper misfeeds and jams Troubleshooting Guide 4 13 5 Lift the green handle Remove and discard any paper you find in this area ...

Page 38: ...jams 4 14 Troubleshooting Guide 6 Lower the handle close the door and press the Continue button to resume printing Clearing paper jams from area 3 Follow these steps to clear jams in area 3 1 Open the middle door and locate area 3 ...

Page 39: ...d discard any paper you find in this area 4 Release the handle close the door and press the Continue button to resume printing NOTE When paper jams occur in areas 3 through 5 three extra blank sheets are sent through the printer to ensure that the fuser is clean These sheets are sent to the top tray and should be discarded You are not charged for these sheets ...

Page 40: ...ams from area 4 WARNING The laser safety label located on the inside left front door of the printer advises you that the panel below it must not be removed except by a service representative 1 Open the middle and left doors and locate area 4 Remember to clear the jam in area 5 first if you are directed to clear both areas ...

Page 41: ...until the fuser unit latches in the fully open position 3 Raise the small green handle at the front of the fuser assembly CAUTION Do not use a sharp object to remove paper wrapped around the fuser rolls Attempting to do so could damage the roller and require its replacement 4 Remove and discard any paper you find in this area 5 Return the small green handle to its original position 6 Push down on ...

Page 42: ...jams 4 18 Troubleshooting Guide 7 Close the doors left one first and press the Continue button to resume printing Clearing paper jams from area 5 Follow these steps to clear jams in area 5 1 Open the middle door and locate area 5 ...

Page 43: ...4 and 5 first turn the green knob in the direction of the arrow marked on it This ensures that the paper has completely moved into area 5 where you can remove it without tearing it 3 Push and hold the green handle to the left in the direction of the arrow marked on it Remove and discard any paper you find there ...

Page 44: ...en handle 5 Close the door and press the Continue button to resume printing Clearing paper jams from areas 6 and 6A Follow these steps to clear jams in areas 6 and 6A 1 Open the printer left most top cover Remove and discard any paper you find in this area 2 Close the top cover ...

Page 45: ...be opened 4 Remove and discard any sheets under the high capacity feeder cover If the printer console message display also indicates a problem in the output module remove and discard those sheets as well 5 Close the top covers and press the Continue button to resume printing Clearing paper jams from area 7 Area 7 of the paper path is used only during duplex printing 1 Open the middle door and loca...

Page 46: ...Clearing paper misfeeds and jams 4 22 Troubleshooting Guide 2 Pull the block shaped set separator toward you and hold it in that position ...

Page 47: ...er misfeeds and jams Troubleshooting Guide 4 23 3 Remove and discard any paper in the duplex tray 4 Return the set separator to its upright position 5 Close the door and press the Continue button to resume printing ...

Page 48: ... the output module as indicated on the graphic display of the printer console 2 Remove and discard any paper you find in this area 3 Lower the top cover and press the Continue button to resume printing Clearing paper jams from area 9 If your printer has a stitcher stacker see the Correcting stacker problems chapter 1 Open the right door and locate the green handle on the upper right side of area 9...

Page 49: ...reen handle down and to the left in the direction of the arrow marked on it to hold the assembly open while you remove and discard any paper you find in this area 3 Return the handle to its original position and close the door 4 Press the Continue button to resume printing ...

Page 50: ...pen the top cover of the stitcher stacker and locate area A in the center 2 Remove and discard the paper under the paper guide The paper guide is a spring loaded heavy wire form guide that pops up when you open the cover 3 Locate the side cover of area B on the right 4 Push the cover to the right in the direction of the large green arrow at the front of the cover to open it Area A ...

Page 51: ...aper jams can occur when the paper does not stack smoothly in the stacker trays If some papers stack well while others do not the scuffer arms may need to be adjusted NOTE The scuffer arm weights on some printers are bolted in place These must be adjusted by a service representative The adjustable weights are located on the underside of the scuffer arms on a track down the center To adjust them 1 ...

Page 52: ...ffer arm 2 Clear all paper jams following the jam clearance instructions provided by the message and graphic displays on the printer console 3 Discard any pages sent to the sample tray or to a used stacker tray when the jam was detected 4 Press the Continue button on the printer console to resume printing 1 ...

Page 53: ...ostScript masters that use proprietary printer features may cause appearance inconsistencies between different PostScript printers Some PostScript printers contain proprietary PostScript extensions For example some versions of the Apple Macintosh PostScript driver download encrypted proprietary image smoothing operators to Apple LaserWriters The downloaded PostScript code uses the product operator...

Page 54: ... PostScript masters look different on almost every different model of PostScript printer The operators are also used to perform pattern fills since PostScript Level 1 does not have a pattern fill operator PostScript Level 2 has pattern fill operators As stated in the PostScript Language Reference Manual first edition Remember that everything pertaining to halftones is by definition device dependen...

Page 55: ...ue and gray The PostScript language provides a scheme for overwriting the internal transfer function of a printing device by providing the settransfer and setcolortransfer operators However some Xerox PostScript devices do not allow you to overwrite their internal transfer function Typically a master tries to replace the internal transfer function with a null transfer function such as settransfer ...

Page 56: ...scription that is intended to be device independent Invisible strokes 0 setlinewidth PostScript masters that use the PostScript operator setlinewidth are not consistent across different PostScript printers setlinewidth controls the width of a stroked line When setlinewidth is executed with an input of zero it produces a line that is one pixel wide On devices whose dot size is small single pixel wi...

Page 57: ...r in the indicated tray 2 If the paper is not the correct size load the correct size paper If the paper size is correct press the Continue button to resume printing The number displayed in the Wire Percentage indicator of the printer console begins to flash and the message STITCHER LOW ON WIRE appears when you start a new print job Stitching wire has decreased to a percentage predetermined by the ...

Page 58: ...cuffer arm weights are out of adjustment If printer has adjustable weights under the scuffer arms slide them to the right or the left Refer to Clearing paper misfeeds and jams chapter in this guide If the weights are bolted in place ask your service representative to adjust them Symptom Probable cause Action ...

Page 59: ...vailable are turned far enough to the left to brighten the screen 3 If the monitor is powered on and controls are turned to the left call the service representative The first job to print after a reboot or a diagnostics session takes 30 to 60 seconds longer than usual This is normal operation No action is needed Subsequent jobs should print without a delay User says a job is not printing The jobs ...

Page 60: ...document does not print there may be a system problem Printer controller is not communicating with the network Does not apply to channel attached host Ping the printer controller check the cabling connections Reconnect the network cable Use the network diagnostics to check the network devices Printer controller is off or needs to be restarted Check the printer controller operation Restart the prin...

Page 61: ...tering print options from the client workstation Enter Show Document Attributes Resend if necessary using correct options or enter Change Document Attributes to specify the desired attributes Job prints correctly on the right media but an error message on the trailer page indicates a media error There are PostScript setpagedevice operators in the job that specify the media to use and the job submi...

Page 62: ...ops and sends a not ready message to the host 1 Enter Show Status to ensure there is no other problem If you have a stoppage due to the status shown correct the problem status 2 Enter List Virtual Printer or Show IPDS Virtual Printer to see if the virtual printer is stopped 3 Enter Start Virtual Printer vpname Queueing has stopped The job pool manager cannot accept any jobs when queuing has stoppe...

Page 63: ...18 area 5 4 18 4 20 area 7 4 21 4 23 area 8 4 24 area 9 4 24 4 25 areas 1 and 1A 4 9 4 11 areas 2 and 2A 4 11 4 14 areas 6 and 6A 4 20 4 21 stacker tray paper jams 4 27 stitcher stacker tray paper jams areas A and B 4 26 4 27 conventions xiv D device dependent operators 5 2 documentation xv E eofill 5 4 error condition restarting printer 7 4 error messages Client Software installation 2 2 F feeder...

Page 64: ...eatures affecting 5 1 problems printer 6 1 stacker 6 1 system 7 1 procedures feed belt cleaning 4 4 4 5 paper trays clearing misfeeds 4 1 4 4 printers restarting 7 4 product operator 5 1 PServer problems 3 1 publications xv R Ready To Open indicator 4 2 remote service 1 2 requirements hard disk 2 2 RPrinter problems 3 3 S safety hotline numbers vii laser v operation vi ix SAP packets 3 1 scanconve...

Page 65: ...transfer 5 3 transfer functions 5 3 Tray Unlock button 4 1 troubleshooting Novell implementation 3 1 3 3 Xerox Client Software installation 2 1 2 2 X Xerox Client print command 2 1 Xerox Client Software troubleshooting installation 2 1 2 2 ...

Page 66: ...Index INDEX 4 Troubleshooting Guide ...

Reviews: