9-4
XEROX DFC165 & DWC165c Service Manual
2 INSTALLING THE LINKFAX 8 MODULE
The
LinkFax 8
communication module consists of
four main components
, which can be selected
individually:
1 LinkFax Scanning and Internet Applica-
tion
. Acquires black and white images via the
facsimile machine (scanning), irrespective of
the application that will be used to process
them. It can also be used to partially process
acquired images, to save images in the de-
sired format and to send them as electronic
mail, if this feature is available. Furthermore,
it can be used to partially process colour im-
ages loaded from the PC.
2 TWAIN.
Acquires images from within the ap-
plication that will be used to process them.
TWAIN therefore provides a standard inter-
face between the facsimile machine and most
popular picture processing applications.
3 Printer driver
. Handles the facsimile machine
as a
printer
attached to a PC.
4 Fax Manager
. Enables the facsimile machine
to be used as a
multifunctional
product,
which can be run simultaneously with other
applications. Since the Fax Manager compo-
nent is essential to the running of LinkFax 8, it
is always installed automatically and cannot
be selected.
The Compact Disk supplied with the kit also con-
tains the installation program. This program guides
you through a series of dialog boxes to enable
you to install what you require onto the hard disk
of your PC.
WARNING
The following general conditions apply to the
dialog boxes that appear during the
installation procedure:
•
optional elements
can only be
selected
using the mouse
;
•
buttons
can be
selected
either using the
mouse, or by pressing the
←
and
→
ar-
row keys;
•
the
selected button
can be confirmed
using the
mouse
, or by pressing the
En-
ter
key.
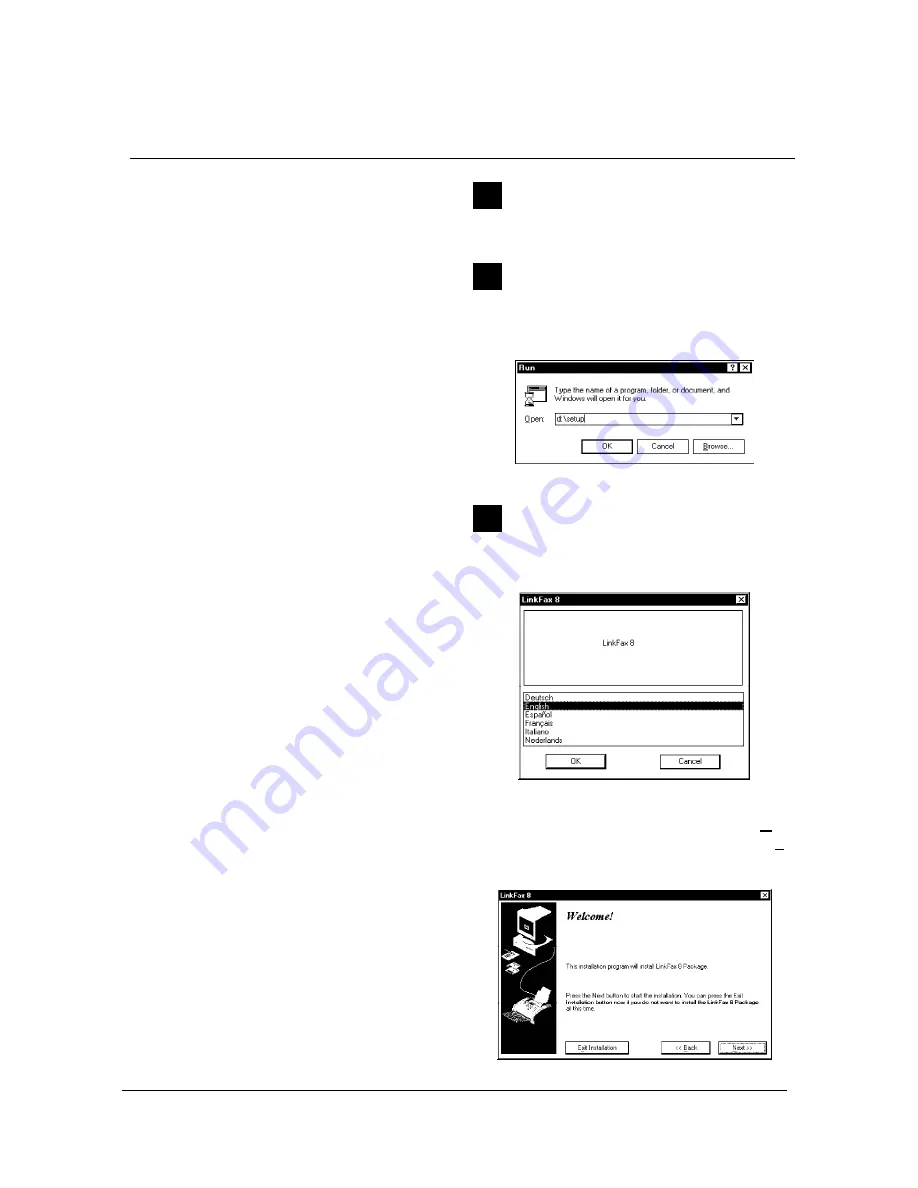
1
Power on the PC, wait for
Windows 95
to start
and then insert the
CD in the CD ROM drive
.
2
From the
Start
menu, select
Run
and type
x:setup
, where
x
is the name of the CD ROM
drive (for example,
d
):
... then click on
OK
to confirm.
3
Select your
mother language
, if it is not already
selected:
... and click on
OK
to confirm. A welcome mes-
sage is displayed explaining how to continue (
Next
>>
), or abort the installation procedure (
Exit
Installation
):


