background image

Maintenance

Xerox

®

 DocuMate

®

 5445/5460

User Guide

37

2.

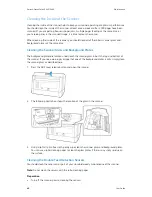
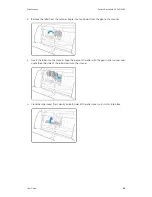
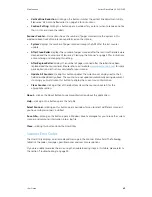
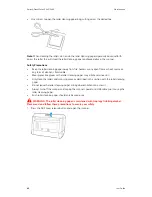
Remove the jammed paper and close the cover.

To reduce the number of paper jams, smooth and straighten the paper before scanning, adjust 
the guides to the paper size, and insert the paper evenly into the ADF.

Note: 

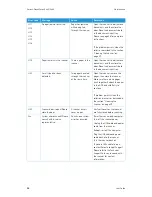
If the paper jam occurs only at the exit area, remove the exit guides and then try scanning 

again.

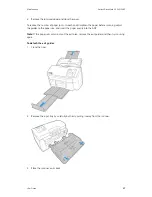
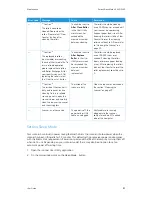
To detach the exit guides:

1.

Close the trays. 

2.

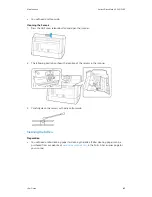
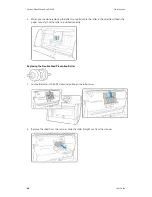
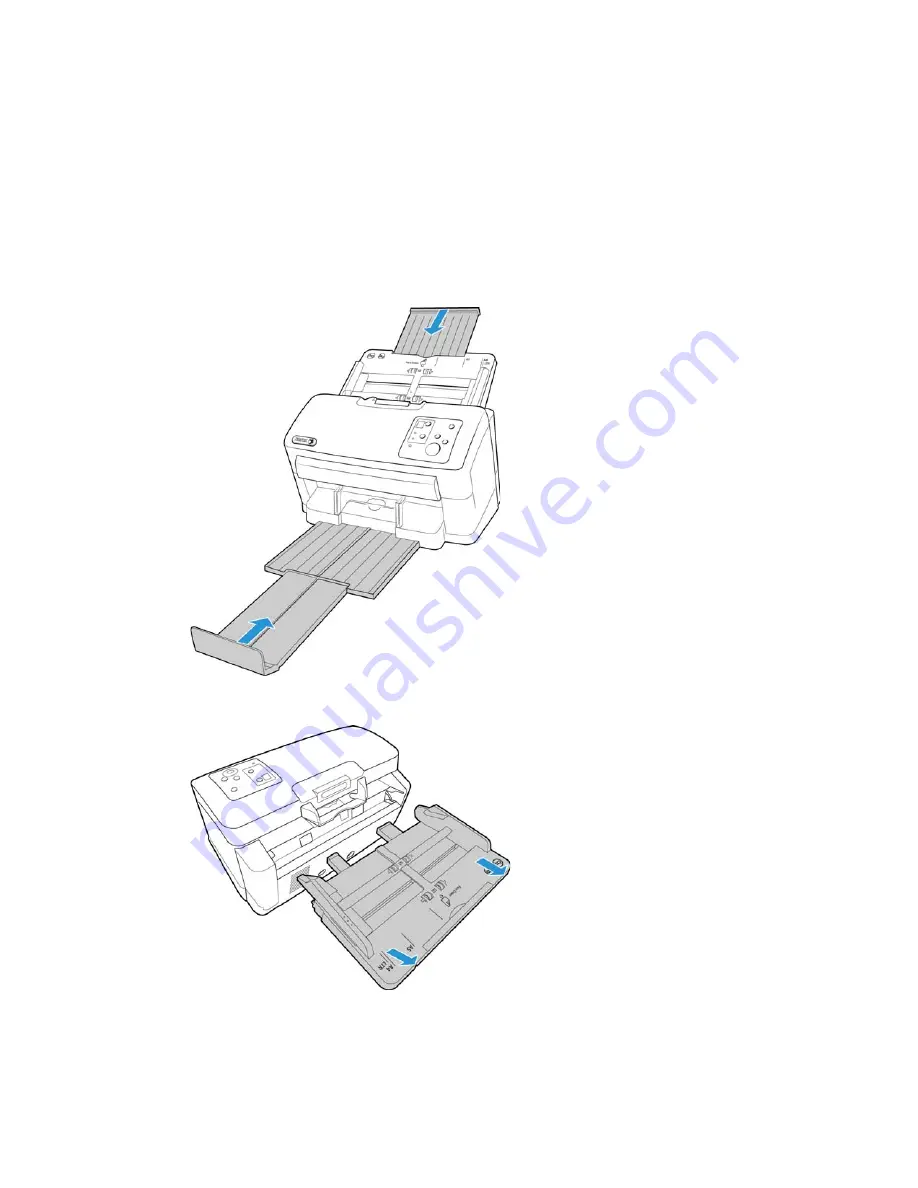
Remove the input tray by carefully but firmly pulling it away from the scanner.

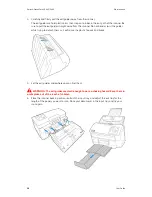
3.

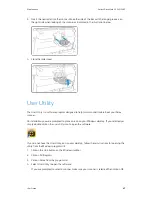
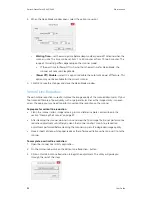
Place the scanner on its back.

Summary of Contents for DocuMate 5445

Page 1: ...October 2016 05 0857 200...

Page 2: ...nd SharePoint is a registered trademark of Microsoft Corporation ZyINDEX is a registered trademark of ZyLAB International Inc ZyINDEX toolkit portions Copyright 1990 1998 ZyLAB International Inc All R...

Page 3: ...umentation 2 The Xerox DocuMate 5445 5460 Scanner Features 4 Scanner Setup 7 Unpack the scanner 7 Attach the Input Tray 8 Connect the Scanner Power Cord 9 Installation 11 Install the Software and Conn...

Page 4: ...the Scanner 39 Cleaning the Inside of the Scanner 40 Replacing the Rollers 44 User Utility 47 Main Screen Options 48 Scanner Error Codes 49 Setting Sleep Mode 51 Vertical Line Reduction 52 Uninstalli...

Page 5: ...y Information Your Xerox equipment and supplies have been designed and tested to meet strict safety requirements These include safety agency examination approval and compliance with established enviro...

Page 6: ...not be placed in the direct field of view Electrical Information Warning Electrical Safety Information 1 The power receptacle for the machine must meet the requirements stated on the data plate on the...

Page 7: ...lace the outlet Disconnect Device The power cable is the disconnect device for this equipment It is attached to the back of the machine as a plug in device To remove all electrical power from the equi...

Page 8: ...not perform any maintenance procedures unless you have been trained to do them by an authorized local dealer or unless a procedure is specifically described in the user manuals Product Safety Certific...

Page 9: ...in the Box Before proceeding check the contents of the box If items are missing or damaged contact the dealer where you purchased the scanner System Requirements Intel Pentium 4 or equivalent processo...

Page 10: ...dows documentation for instructions on setting the color quality and resolution for the monitor Documentation The following printed documentation is provided in the box Installation guide abbreviated...

Page 11: ...cument stack Also make sure the application you are using is not set to automatically scale the page to fit on the paper in your printer Patch code sheets use with an application that supports detecti...

Page 12: ...g scanning 4 Output Tray Holds documents after being scanned Exit tray extension extends to support various document lengths Exit stopper holds documents in the exit tray Exit Guides helps to keep pap...

Page 13: ...lect here overrides the selected option in the OneTouch Properties window when you scan by pressing the green start button 4 Power button turns the scanner power on or off Press the button to turn the...

Page 14: ...Xerox DocuMate 5445 5460 Welcome 6 User Guide...

Page 15: ...tape holds fragile parts in place for shipping Note we recommend you remove the tape from the scanner in the order indicated in the illustrations below Also remove any protective foam from the inside...

Page 16: ...e computer Keep clear space on every side of the scanner for the input and exit tray extensions performing maintenance and to have sufficient air flow for ventilation Attach the Input Tray 1 Align the...

Page 17: ...onnect the Scanner Power Cord Note Only use the power supply PNLV6507Y included with your scanner Connecting any other type of power supply may damage your scanner and will void its warranty 1 Plug th...

Page 18: ...Xerox DocuMate 5445 5460 Scanner Setup 10 User Guide...

Page 19: ...ing installation asking you to allow the installation to proceed Although the messages will differ based on the software your computer is running in each case you should allow the installation to proc...

Page 20: ...indow opens Note If the disc does not start check the following Make sure the disc drives door is completely shut Make sure the disc was inserted in the drive in the proper direction label side up To...

Page 21: ...elect Install software 5 Make sure the boxes for Scanner Driver and Visioneer OneTouch are selected as well as any other applications you want to install Note The software provided with your scanner m...

Page 22: ...t scanning profiles You will see this prompt if you already have a previous version of the scanner driver installed Select the option in the installation window only if you want the existing profiles...

Page 23: ...s on screen diagram for connecting the scanner stop and follow the instructions below Connect the USB Cable and Turn on the Power 1 Remove any tape from the USB cable 2 Plug the USB cable into the USB...

Page 24: ...is receiving power Your computer recognizes that a scanner has been plugged into the USB port and automatically loads the appropriate software to run the scanner 4 When you re certain that the softwar...

Page 25: ...not be installed 2 The next screen lets you choose where the installation files are going to be on your computer Click on Browse to change the location where the files are installed We recommend that...

Page 26: ...Setup Wizard Note there may be an option in the installation window to remove any current scanning profiles You will see this prompt if you already have a previous version of OneTouch installed Select...

Page 27: ...ageView such as adding notes to image files modifying image colors and touch up the image using the erase and or auto correct options You can see more information about this application at www nuance...

Page 28: ...scanning using OneTouch TWAIN scanning guide Instructions for accessing and scanning using the TWAIN interface Click on View software documentation to access the user guides for the software applicat...

Page 29: ...canner for our customer service contact information 1 Open an Internet Explorer window or any other Internet browser you have installed on your computer 2 In the web address field type www xeroxscanne...

Page 30: ...Xerox DocuMate 5445 5460 Installation 22 User Guide...

Page 31: ...stack thickness indicated on the paper guides Maximum amount of paper in the input tray Approximately 75 pages of 20 lb 75 80 g m2 new printer paper Document size Minimum size width x length 1 9 x 2...

Page 32: ...can be loaded in the input tray The maximum height of the 3 cards stacked in the input tray should not exceed 0 2 inches 5 mm Scan the cards in the landscape horizontal orientation Use the mixed batc...

Page 33: ...rors or paper jams Carbon paper that will leave residue in the scanner and on the rollers that will transfer to the next set of documents scanned Documents with hard items attached such as paper clips...

Page 34: ...ape lift up on the card guide to remove it from the scanner After you remove the card guide from the scanner you can attach it to the back of the input tray Slide the paper guide into the tabs on the...

Page 35: ...e separated Bend and then flatten the document stack to make sure the horizontal edges are aligned to help prevent paper from skewing while being pulled through the scanner Pinch the ends to align the...

Page 36: ...removing and storing the card guide You can now scan the documents using the scanner buttons OneTouch or one of the other scanning interfaces Scanning Thick Pages or Bound Documents With this scanner...

Page 37: ...ner 4 Close the ADF door When you close the ADF door the double feed prevention roller will no longer touch the feed roller 5 Place a single item in the input tray and scan When you are scanning thick...

Page 38: ...rk drive OneTouch Button Panel Use this scan option when you want to scan from the computer screen Scanning from the on screen OneTouch Button Panel is the same as selecting a scanning option on the s...

Page 39: ...en click the Scan button in the TWAIN interface window Please see the TWAIN Scanning Guide on the installation disc for instructions You can also click the Help button in the TWAIN interface to open t...

Page 40: ...Xerox DocuMate 5445 5460 Loading Documents to Scan 32 User Guide...

Page 41: ...scanner If your scanner has a power cord and or power switch always turn off the scanner and unplug the power cord before performing maintenance unless the maintenance instructions below specifically...

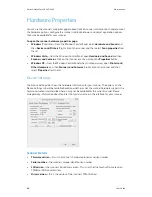
Page 42: ...the Windows Control Panel when in category view open Printers and Other Hardware and then Scanners and Cameras Right click on the scanner and then select Properties from the list Device Settings The D...

Page 43: ...rent version if you do not want to update the firmware Update click this button to update the scanner s firmware with the latest revision provided in the driver installer Follow the instructions on sc...

Page 44: ...please try the following Reduce the number of items placed in the input tray Clean the rollers and sensors as described in the section Cleaning the Scanner on page 39 Use the slow scanning mode in the...

Page 45: ...paper before scanning adjust the guides to the paper size and insert the paper evenly into the ADF Note If the paper jam occurs only at the exit area remove the exit guides and then try scanning again...

Page 46: ...not bend or twist the guides while trying to detach them as it will cause the plastic to crack and break 5 Set the exit guides aside where you can find them T WARNING The exit guides are small enough...

Page 47: ...e scanner back in position reattach the input tray and adjust the exit tray for the length of the paper you want to scan Cleaning the Scanner Regular maintenance of your scanner can help to ensure con...

Page 48: ...The background plates are located underneath the scanner glass in both the top and bottom of the scanner If you see a warning message that one of the background plates is dirty simply clean the scanne...

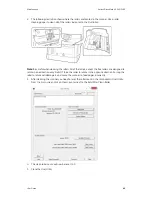
Page 49: ...2 The following illustration shows the location of the sensors in the scanner 3 Carefully clean the sensors with a dry cotton swab Cleaning the Rollers Preparation You will need a roller cleaning pap...

Page 50: ...lcohol is flammable Wear protective gloves as the roller cleaning paper may irritate sensitive skin Only clean the rollers and scanning areas as described in this section with the roller cleaning pape...

Page 51: ...ers except the free rollers are designed to rotate in one direction only Do NOT force the roller to rotate in the opposite direction Forcing the roller to rotate will damage it and cause the scanner t...

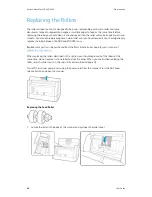
Page 52: ...eplace the roller between 160 000 and 200 000 scans Replacement parts can be purchased from the Parts Accessories page for your scanner at www xeroxscanners com When replacing the rollers described in...

Page 53: ...out and away from the gear in the scanner 3 Insert the roller into the scanner Align the gear on the roller with the gear in the scanner and angle the other side of the roller down into the scanner 4...

Page 54: ...y rotate the roller in the direction it feeds the paper to verify that the roller is installed correctly Replacing the Double Feed Prevention Roller 1 Locate the roller in the ADF door and pull open t...

Page 55: ...scanner On installation you were prompted to place an icon on your Windows desktop If you selected yes simply double click on the user utility icon to open the software If you do not have the User Ut...

Page 56: ...er Error Codes on page 49 for the full list of error codes and steps to resolve the issue Scanner Information this area displays the current hardware specifications of the scanner Model the scanner ha...

Page 57: ...ns and instructions available for your scanner Update All Counters clicking this button updates the current count display next to the 3 fields described directly above The counters do not update autom...

Page 58: ...same time Open the scanner remove the pages then close the scanner Make sure there are no pages stuck together Restack the paper in the ADF and click Retry to continue If problem persists clean the r...

Page 59: ...ing roller count back to 0 Please refer to Cleaning the Scanner on page 39 Caution The replaceable rollers consumable are reaching the end of their usable life To insure reliable operation please repl...

Page 60: ...nal scanned files are of poor quality such as perpendicular lines or the image clarity is uneven across the page you may need to perform a vertical line reduction on the scanner To prepare for vertica...

Page 61: ...s through as it sets the adjustment This window will automatically close when the initial adjustment is complete 7 Depending on your scanner model you may be prompted to put 3 sheets of clean white pa...

Page 62: ...ograms in the Windows Control panel Windows XP Open Add Remove Programs Windows Vista and later Open Programs and Features Uninstalling the scanner driver 1 In the list of installed programs click on...

Page 63: ...ble connections Make sure the cables are plugged in securely Is the scanner s status light on Turn on the scanner s power If the status light doesn t come on plug the power supply into another electri...

Page 64: ...n the keyboard it wakes the computer back up and restores full power to the system This power fluctuation during the computer s hibernating period may sometimes cause the scanner to lose communication...

Page 65: ...ay need to be replaced Please see Replacing the Rollers on page 44 Problem If the USB cable is disconnected during a scan the scanner does not reconnect when the USB cable is plugged back in Unplug th...

Page 66: ...ace Hi Speed USB 2 0 compatible with USB 1 1 Certifications UL C UL FCC Class B CE CB WEEE RoHS ENERGY STAR Operating Temperature 50 90 5 F 10 32 5 C without condensation Scanner Specifications Resolu...

Page 67: ...inutes without scanning can be adjusted by software 0 1 Watt power off Cable Information AC Power Cord US 2P AC125V 3A or AC125V 10A 2C 18AWG BLACK RoHS EUR CEE 2P AC250V 2 5A 2C 0 75mm2 BLACK RoHS UK...

Page 68: ...60 Parts List Part Name Part Number Input Tray 57 0148 000 Roller Exchange Kit Separation Roller Feed Roller 70 0567 000 USB Cable 35 0241 000 AC Power Cord 35 0242 000 or 35 0243 000 US 35 0244 000 o...

Page 69: ...equipment and receiver Connect the equipment into an outlet on a circuit different from that to which the receiver is connected Consult the dealer or an experienced radio TV technician for help This d...

Page 70: ...or by contacting Environment Heath and Safety The Document Company Xerox Bessemer Road Welwyn Garden City Herts AL7 1HE England Telephone 44 0 1707 353434 Turkey RoHS Regulation In compliance with Ar...

Page 71: ...mission of the copyright owner has been obtained or the reproduction falls within the fair use or library reproduction rights provisions of the copyright law Further information of these provisions ma...

Page 72: ...da or a department board Commission or agency established by the Government of Canada or of a province or of a government of a state other than Canada 7 Impressed or adhesive stamps used for the purpo...

Page 73: ...ulatory Information Xerox DocuMate 5445 5460 User Guide 65 Note this list is not inclusive and no liability is assumed for either its completeness or accuracy In case of doubt contact your legal couns...

Page 74: ...Xerox DocuMate 5445 5460 Regulatory Information 66 User Guide...

Page 75: ...ining devices such as batteries Special handling may apply please see http www dtsc ca gov hazardouswaste perchlorate European Union RoHS and WEEE Compliance This product is compliant with RoHS Regula...

Page 76: ...Program is a team effort between U S European Union and Japanese governments and the office equipment industry to promote energy efficient copiers printers fax multifunction machine personal computer...

Page 77: ......
Reviews: