


Maintenance and Consumables
Xerox
®
ColorQube™ 9301/ 9302/ 9303
XEROX®, XEROX and Design® and ColorQube® are trademarks of Xerox Corporation in the United States and/or other countries. ©
2010 Xerox Corporation. All rights reserved.
1
3
5
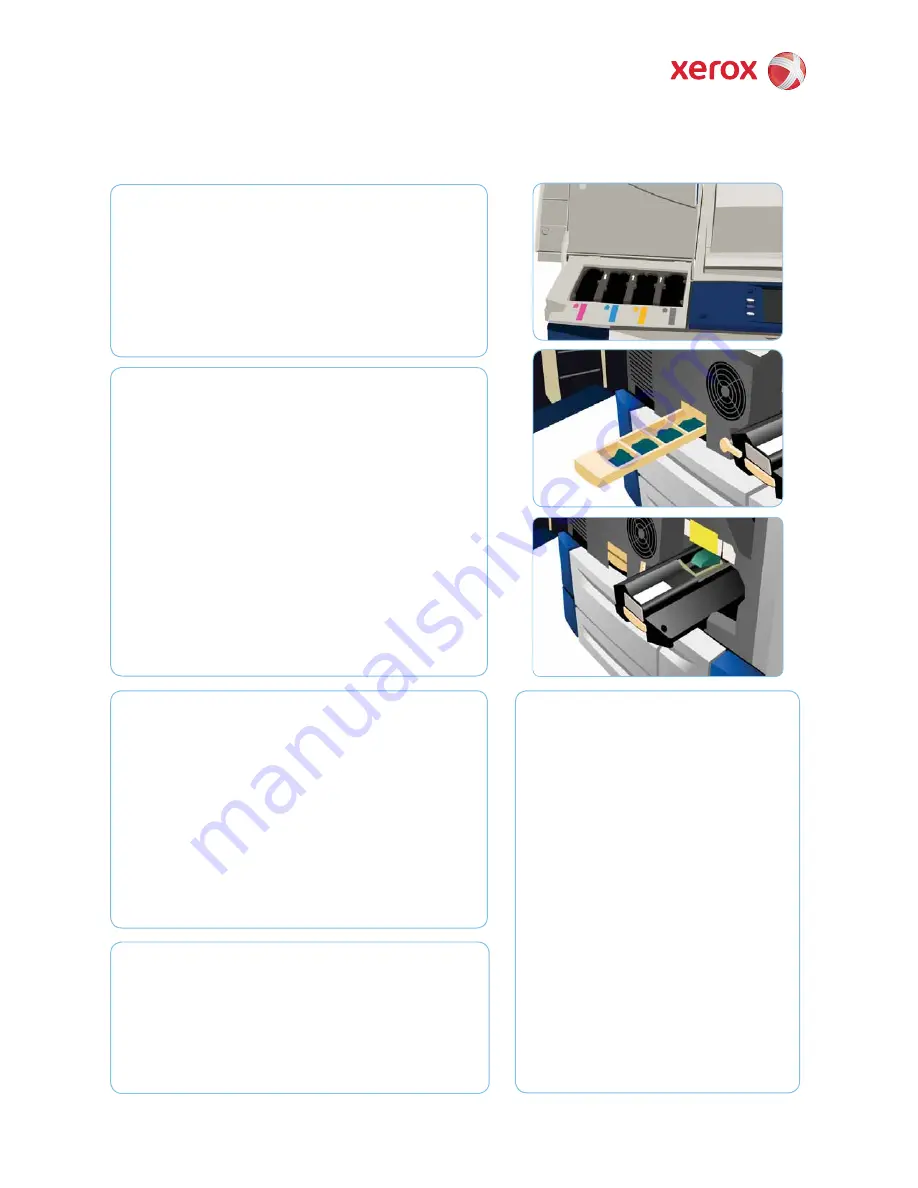
Ink Sticks
Load
1.
Solid Ink Sticks
in the Ink Loading area, up to
6
Solid Ink Sticks
per color can be loaded while the device is running.
When loading Solid Ink Sticks, check that the
2.
correct
color
is loaded
in the
correct
ink loading slot.
Waste Ink Tray
The
3.
Waste Ink Tray
accumulates ink debris resulting from printhead
maintenance.
The device will not work if the
4.
Waste Ink Tray
is full, you must
empty the Tray. The waste ink is
non-toxic
and can be disposed of
through your normal refuse collection.
Print Quality
Maintenance
There are a number of tasks which are performed
automatically
by the device to maintain print
quality.
If a problem occurs the device may need to run
blank sheets
through the paper path to clean the
system. These pages will be directed to the top
tray and should be
discarded
.
For additional options in correcting image quality
access the
Tools
section.
Press the
10.
Machine Status
button. Select the
Tools
tab.
Select
11.
Troubleshooting
.
Select
12.
Fix Image Quality
.
Select
13.
Light Lines
,
Smears
or
Advanced
to
correct problems.
Cleaning Unit
The
5.
Cleaning Unit
applies a Silicone Oil release agent to the print
drum.
Replace the unit using the instructions provided on the touch screen
6.
and
recycle
the old unit as directed on the packaging or by your
local Xerox Representative.
Staple Cartridges and Hole
Punch Waste
If your device is equipped with the
7.
Offi ce Finisher
or
High Volume
Finisher
, you will be required to replace the
Staple Cartridge
or
Cartridges
when the device displays a message instructing you to do
so.
If your fi nisher has the optional
8.
Hole Punch Unit
, you will also be
required to empty the Hole Punch Waste Container when prompted.
Detailed instructions are provided on the
9.
touch screen
.
More information
For more information, please refer to:
User Guides
•
http://www.support.xerox.com
•