Summary of Product
Service Manual 4-3
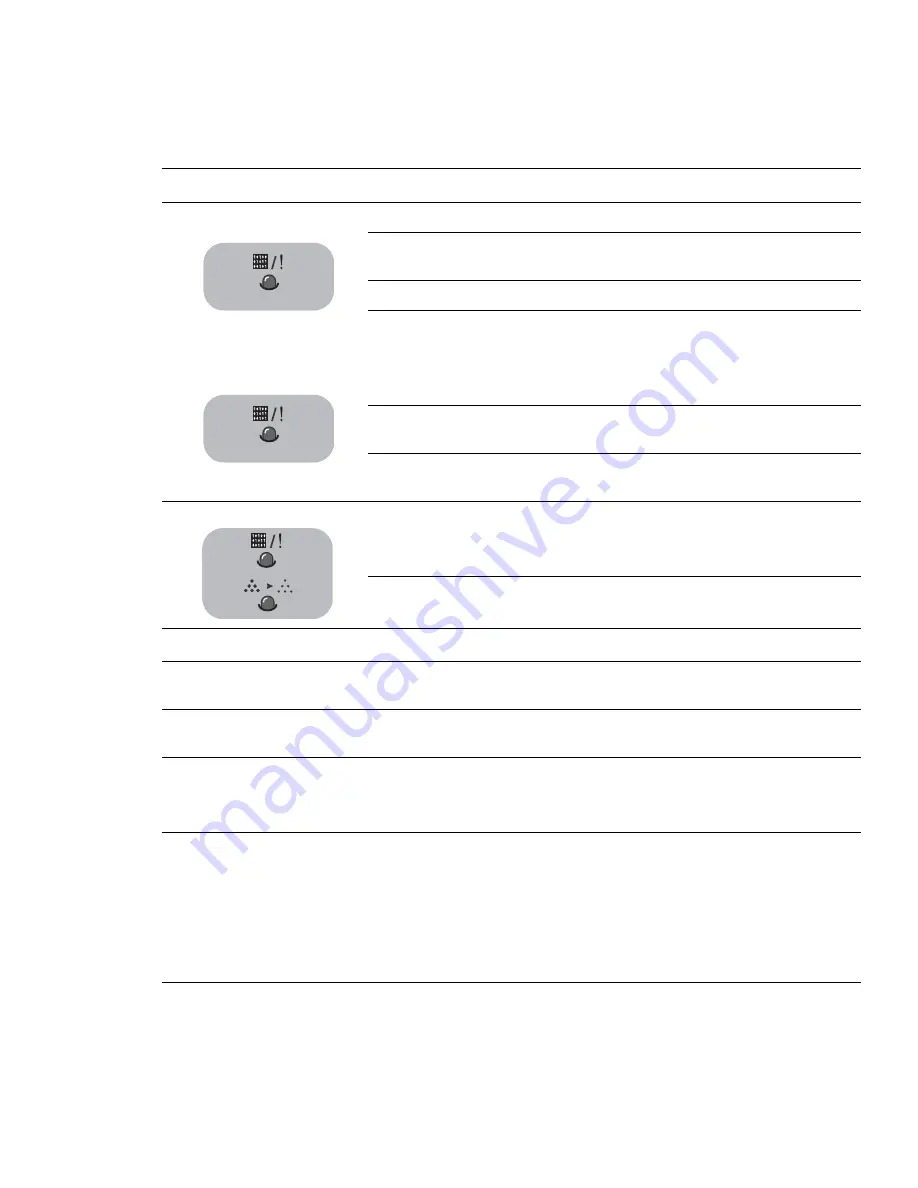
ON Line/Error and Toner Save LED’s
LED
Description
The On Line/Error LED is green, when the printer is Ready to Print.
The On Line/Error LED slowly blinks green when the printer is receiving data,
and blinks rapidly while printing.
The On Line/Error LED is red if an error occurs in the printer.
The On Line/Error LED will blink red if:
■
The user presses the Cancel button to cancel a print job.
■
The printer is in manual feed mode and there is no paper in the
Tray1/MPT.
If the On Line/Error LED is blinking red and orange alternately the printer has
detected a non-Xerox toner cartridge.
If the installed toner cartridge is empty the On Line/Error LED blinks orange
and the toner cartridge needs to be replaced.
If the On Line/Error and Toner Save LEDs all blink at the same time, an
internal or hardware malfunction is present.
Refer to Section 6.6 for troubleshooting procedures.
The Toner Save LED comes on when Toner Save mode is enabled. This can be
set in the printer driver.
Cancel Button Functions
Printing the Demo Page
In Ready mode, press and hold the Cancel button until all LEDs blink slowly
and then release, (approximately 2 seconds).
Printing the
Configuration Page
In Ready mode, press and hold the Cancel button until all LEDs blink quickly
and then release, (approximately 6 seconds).
Cleaning inside the
printer
In Ready mode, press and hold the Cancel button until all LEDs turn on and
then release (approximately 10 seconds).
After cleaning, one cleaning sheet is printed.
Canceling a print job
To cancel a print job, press the Cancel button.
The On Line/Error LED blinks while the print job is cleared from both the
printer and the computer. The printer then returns to Ready mode. This may
take some time depending on the size of the print job.
Note
Note
Note
In Manual Feed mode it is not possible to cancel the print job by pressing
this button.
Summary of Contents for 3150 - Phaser B/W Laser Printer
Page 1: ...laser printer Phaser 3150 Service Manual ...
Page 2: ......
Page 14: ...Precautions 1 6 ...
Page 22: ...Specifications 3 4 ...
Page 38: ...Summary of Product 4 16 ...
Page 76: ...Alignment and Adjustments 6 12 ...
Page 94: ...Troubleshooting 7 18 ...
Page 112: ...Parts List 8 18 ...
Page 114: ...Block Diagram 9 2 ...
Page 116: ...Connection Diagram 10 2 ...


