


7
XenData SXL-4200 Getting Started
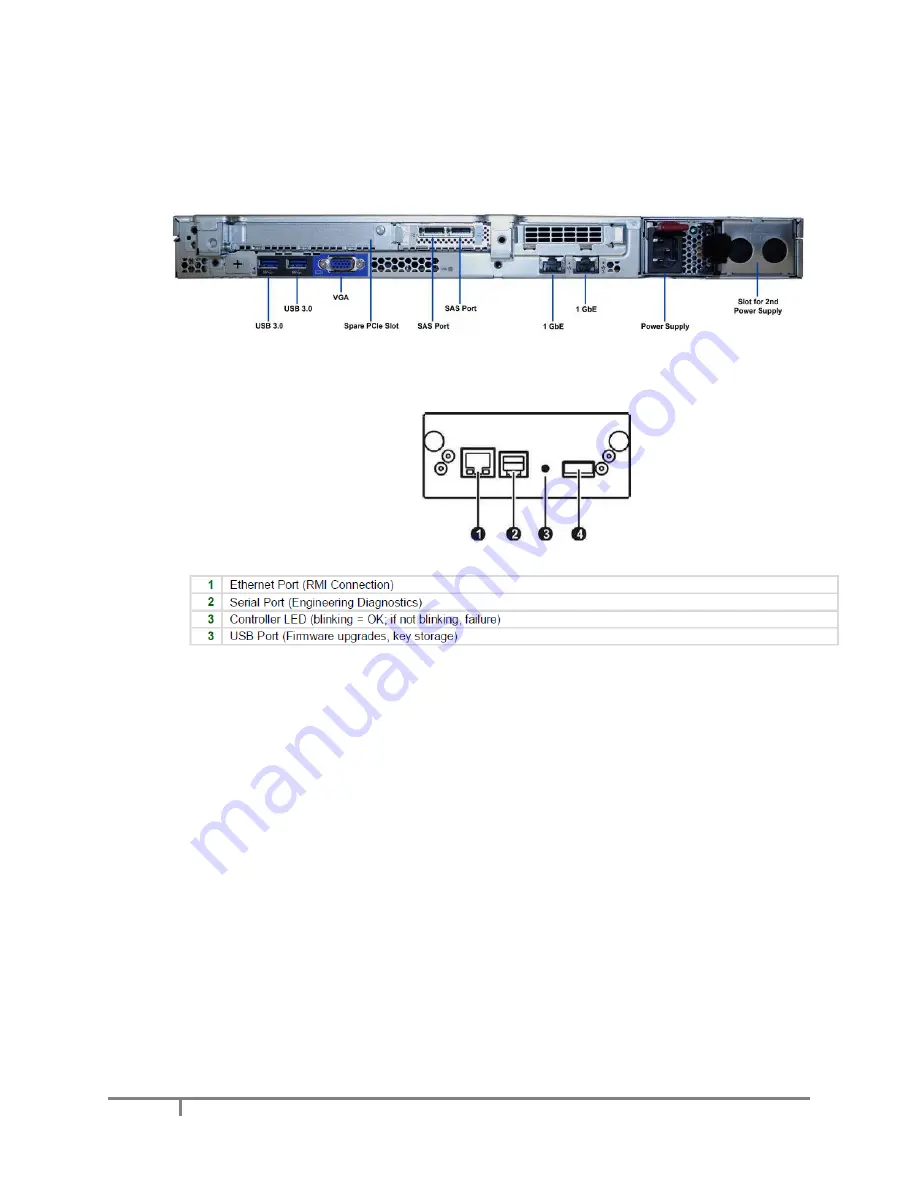
2.3 Make Archive System Internal Connections
Connect Port A on each of the LTO library drives to the SX-250 using the supplied SAS cable(s).
The SAS cable may be connected to either of the 6 Gb/s SAS ports on the SX-250, as identified
below:
Using the supplied green Ethernet cable, connect the 1 GbE Ethernet port 2 on the rear of the SX-
250 to the RMI Ethernet port on the rear of the LTO library as shown below:
2.4 Make External Connections
Make all I/O connections to the SXL-4200. First make external network connections and connect a
keyboard, mouse and monitor or KVM to the server. Then connect power cables to the SX-250 and
LTO-7 library.
2.5 Power-on the System
Follow the power-on procedure as described in section 3.
2.6 Configure Windows Server Essentials
Configure Windows Server Essentials using the Microsoft wizard that will launch automatically.
2.7 Label Writable LTO Cartridges
Carefully attach barcode labels to the LTO cartridges. (Do not use the CLN barcode labels, as
these should only be used with cleaning cartridges.)
2.8 Import LTO Cartridges
Import at least one LTO data cartridge into the library as described in Section 4.1.
Summary of Contents for SXL-4200N
Page 14: ...14 XenData SXL 4200 Getting Started A2 2 Back Panel Library controller...
Page 16: ...16 XenData SXL 4200 Getting Started OCP Information Menu...
Page 17: ...17 XenData SXL 4200 Getting Started OCP Commands Menu...
Page 18: ...18 XenData SXL 4200 Getting Started OCP Configuration Menu...


