


45
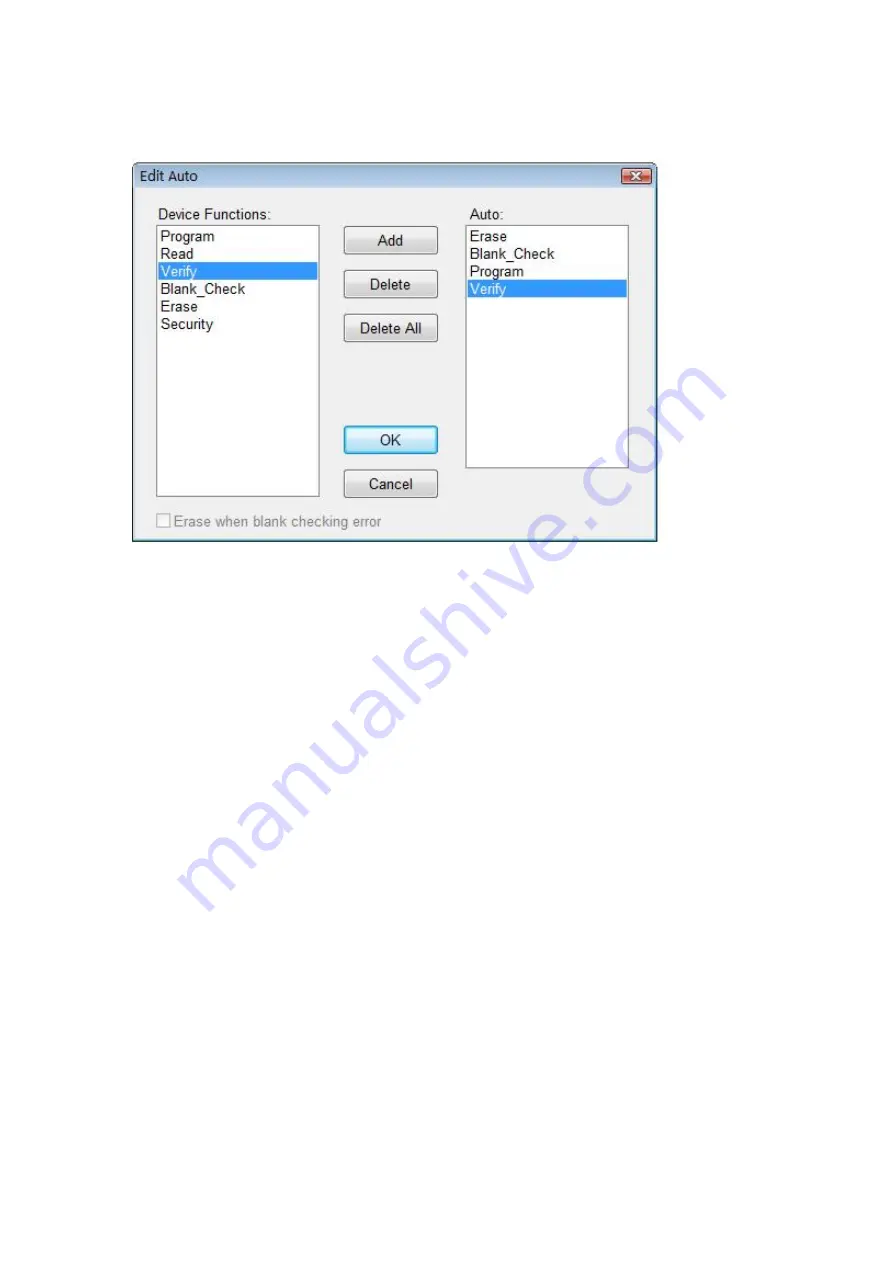
In the diagram above, the operation execution order is Erase, Blank_check, Program,
Verify, Lock_Bit123.
The ‘Add’ button: add the highlighted function in the left column to the end of the
right ‘Auto’ column.
The ‘Delete’ button: delete the highlighted function in the ‘Auto’ column.
The ‘Delete All’ button: remove all the functions from the Auto column.
Double clicking the function in the left ‘Device Functions’ column is the same as
clicking the ‘Add’ button when the function is highlighted.
Double clicking the function listed in the ‘Auto’ column is the same as clicking the
‘Delete’ button when the function is highlighted.
4.1.4.3 Production Mode
This function is applied to program devices in large quantity. With the help of the
Insertion Test, the programmer automatically detects the insertion and taking-out of
the devices and carries out the whole programming process. In this mode, the user
does not need to use mouse or keyboard.
If a non-support information window pops up, that means the selected device does not
support production mode.
Our advice: First select the device and edit the ‘Auto’ menu. After the test is
conducted, select production mode (tick off the item in the menu), and execute the
‘Auto’ function according to the info displayed in the ‘Operation Info’ window.
The programmer waits for the chip insertion: ‘Please, insert a device into the


