6
7
How to Program a timed event
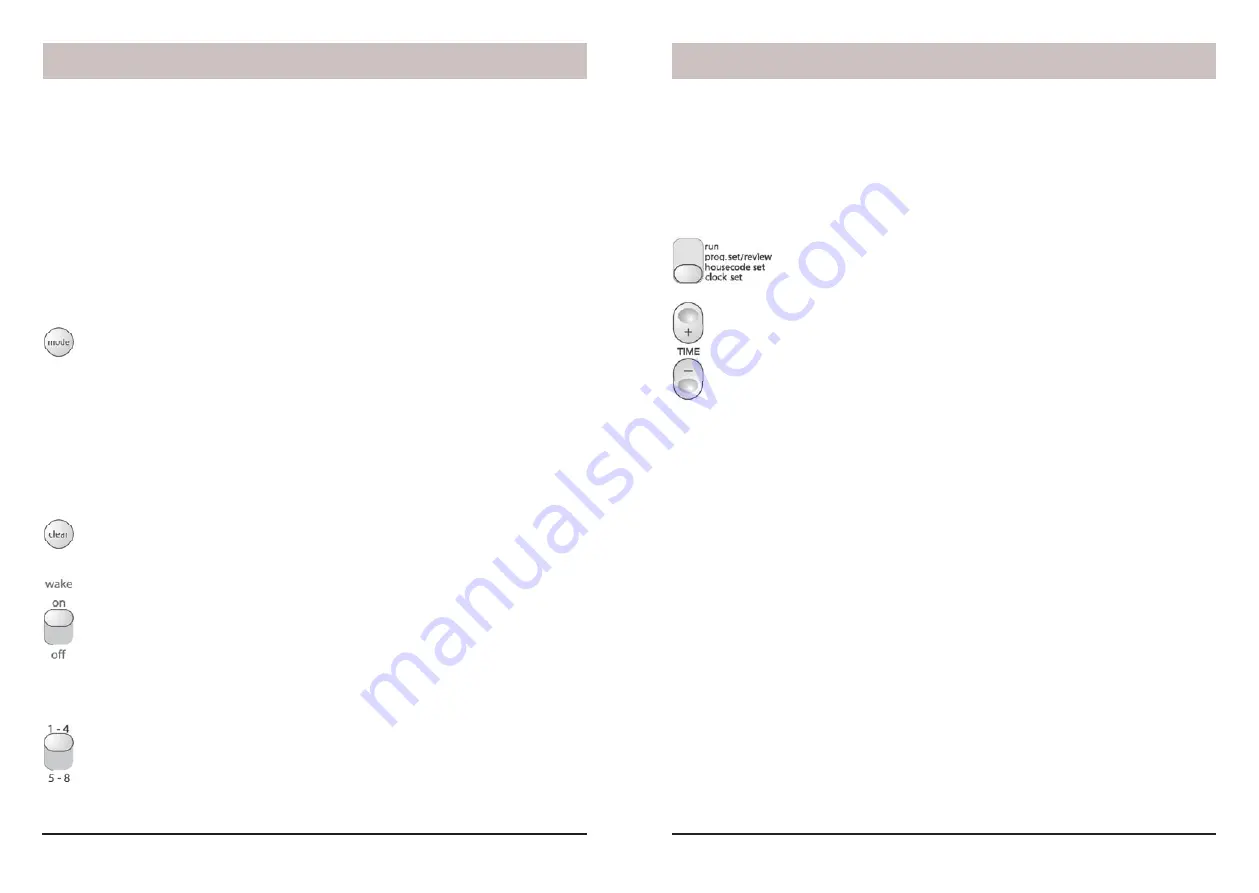
1. Place the mode switch in “Prog Set/Review” position.
2. Advance to the desired time.
3. Set the 1-4/5-8 switch to the desired position.
4. Press any of the 4 ON or OFF buttons to set an On or Off time for that Module. This
will program the Mini Timer to turn that Module on (or off) at that time
every day
.
5. Advance to another time, and press another ON or OFF button as desired.
6. Set the Mode switch back to RUN.
Special Programming Buttons
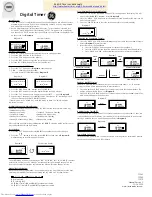
1. Mode
button.
If within 4 seconds after setting an On or Off time, you press
the “Mode” button once or twice until Once shows in the display, you will
modify the program to carry out your programmed event only Once and it will
not
repeat on the next day.
Press again (within 4 seconds after setting an On or Off time) until Security is
shown in the display, to modify the program so that your lights (or appliances)
will go on or off at a slightly different time every day (within the programmed
hour). With each press the display shows whether you've selected Once, or
Security. If neither Once nor Security is displayed, the event happens at the
same time every day.
2. Clear
Button
. Pressing this (in the Prog/Review Mode) cancels the On time
or Off time being displayed.
3. Wakeup
Switch
. In the “ON” position an internal wake up buzzer will sound
at the time programmed for Module number 1. When this sounds you can turn
it off by pressing any button to obtain the “snooze” feature. This will turn the
buzzer back on in 10 minutes and will do so each time you operate snooze.
The alarm can be cancelled by moving the Buzzer switch to “OFF” and back
to “ON” (for wake up the next morning).
4. Selector
Switch.
Used to select whether you want your Mini Timer to
instantly control Modules set to Unit Codes 1 thru 4 or 5 thru 8. You can move
the selector switch back and forth to achieve instant control of 8
X10
Modules.
You can also move the switch during programming to select which modules
(1-4 or 5-8) you are setting times for.
Setting the clock
Plug the Mini Timer into any convenient AC outlet. Fit two AA alkaline batteries in the
battery compartment to protect the time and program for up to 48 hours in the event of
a power outage. If the battery is low, dead, or not installed, the low battery indicator will
show in the display.
When you fi rst plug in the Mini Timer the display fl ashes. It also fl ashes if you have had a
power outage and have not installed 2 AA alkaline batteries or if the batteries are dead.
1. Set the mode switch to “Clock Set.”
2. Press the top of the “Time” rocker to advance to the correct time. A
quick press on the rocker will advance the time by 1 minute. If you
hold the rocker down the display will advance to the correct time
faster. If you overshoot, you can use the bottom rocker to go back.
Controlling X10 Modules
Follow the steps below to make sure you can control your Modules before you program the
Mini Timer.
1. Install and set up all of your
X10
Modules referring to the instructions included with
them.
Be sure to turn off the power at the main circuit breaker panel when
installing Wall Switch Modules.
2. Set all of your Modules to the same Housecode as the Mini Timer (default is A).
3. Set each Module to a Unit Code Between 1 and 8.
4. Set the Mode Switch on the Mini Timer to the “RUN” position.
5. To turn On a particular Module, set the selector switch to 1-4 or 5-8, then press the
ON button corresponding to the number you set on the Module you want to control.
Then (optionally) press and hold Brt or Dim to brighten or dim the light (Lamp and Wall
Switch Modules only).
6. To turn Off a particular Module, set the selector switch to 1-4 or 5-8, then press the OFF
button corresponding to the number you set on the Module you want to control. The
display shows On or Off next to the module number for the button you pressed.
To turn on ALL lights
connected to Lamp Modules and Wall Switch Modules (with the
same Housecode as the Mini Timer), press the “All Lights On” button. This does not affect
appliances.
To turn off ALL lights AND appliances
connected to any kind of
X10
Module (with the
same Housecode as the Mini Timer), including Appliance Modules, press the “All Off”
button.
Quick Tour
Setting up the Mini Timer
Summary of Contents for MT13A
Page 1: ...Mini Timer Owner s Manual Model MT13A...
Page 10: ...18 19 NOTES NOTES...