background image

iCPlate2

30

3.6.6 Measuring paper


For paper measurements, automatic color selection allows for    


quicker work, as no switching between the CMY colors is required.  


Color contrast is very slight with tones under 0%, so that manual  


color setting is recommended. For measurements on black, the    


color (K) must always be selected manually.


The iCPlate2 is equipped with a video camera, which measures the  


geometrical dot size, relevant for plate readings. For prints, the    


densitometric dot size needs to be measured, as this measurement  


corresponds to the visual impression. Therefore, the iCPlate2 is    


not the ideal device for measurements of the dot area on paper.   


Nevertheless, it can be used  for visual dot analysis of prints.

3.6.7 Measurement Values


3.6.7.1 Dot area


This value represents the area coverage of the measured patch.    


With the image analysis algorithm, dust and image errors are 


eliminated.


3.6.7.2 Screen ruling


Depending on the settings, the screen ruling is displayed either in  


Lines/inch or Lines/cm.


Important:

 The screen ruling is not shown for FM screening and for middle    


tones, especially for chain dots in AM screening. 

In a regular screen

, the  


screen ruling 

will always be shown if the dot area has closed dots 


(highlights and shadows). 

iCPlate2

3•Operation

3

Summary of Contents for iCPlate2

Page 1: ...iCPlate2 EN iCPlate2 Plate Measuring Device User Guide Edition 2 1 ...

Page 2: ......

Page 3: ...ty Software 11 2 6 2 CaptureTool software 11 2 6 3 iCPlate2Target 11 3 OPERATION 13 3 1 FUNCTIONAL ELEMENTS 15 3 2 FIRST STEPS FOR USE 16 3 2 1 Power saving mode 16 3 2 2Toolbar 17 3 2 3 Identifying the symbols 17 21 3 3 ADJUSTING DEVICE SETTINGS 22 3 4 FOGRA Measuring Bar FMB setting 23 3 5 INPUTTING A REFERENCE CURVE 24 25 3 6 MEASURING 26 3 6 1 General 26 3 6 2 Calibration 28 3 6 3 Measuring st...

Page 4: ...NG A PLATE CHARACTERISTIC CURVE 32 33 3 9 iCPlate2 MAINTENANCE AND CARE 34 3 9 1 RESET 34 3 9 2 Replacing the batteries 35 4 APPENDIX 37 4 1TECHNICAL DATA 39 40 4 2 SERIAL INTERFACE 41 4 3 Upgradeto iCPlate2 XT 42 4 4 DECLARATION OF CONFORMITY 43 4 5 Warranty Information 44 ...

Page 5: ...al 5 2 1 INTRODUCTION 7 2 2 BRIEF GUIDETOTHE MANUAL 8 2 3 SAFETY 9 2 3 1 Warning 9 2 3 2 General safety tips 9 2 4 PACKAGING ANDTRANSPORT 10 2 5 BASIC EQUIPMENT AND ACCESSORIES 10 2 6 ACCESSORIES 11 2 6 1 PlateQuality Software 11 2 6 2 CaptureTool software 11 2 6 3 iCPlate2Target 11 ...

Page 6: ......

Page 7: ...e2 supports measurement values according to the Fogra Measuring Bar FMB Through a purchased password the iCPlate2 X can be upgraded to an iCPlate2 XT at any time The power saving electronics and LED technology allow up to 30 000 measurements for each set of batteries 2 ordinary commercial AA batteries which means that no limits are placed on mobility With the icon based graphical user interface X ...

Page 8: ...iCPlate2 2 General 2 2 Brief guide to the manual Descriptions marked with a only apply to the iCPlate2 XT and are not part of the iCPlate2 X specification 2 ...

Page 9: ...etic fields Use the iCPlate2 in ambient temperatures between 10 C 50 F and 40 C 104 F and do not expose the iCPlate2 to direct sun light iCPlate2 should never be opened up The guarantee expires immediately upon unauthorized opening of the device Contact your official specialist dealer if repairs prove to be necessary To avoid incorrect handling the iCPlate2 should only be used by trained personnel...

Page 10: ...2 during transport that can be traced back to inadequate packaging or an unsaved measuring foot 2 5 Basic equipment and accessories The iCPlate2 and the associated standard accessories are supplied in a device case Please check the contents of the device case for completeness on delivery The following components must be present iCPlate2 device iCPlate2 target Quick start guide Data cable iCPlate2 ...

Page 11: ...to copy these into a given program e g word processor spreadsheet The screen dot as well as the associated measurement values will be transferred and can then be used for statistical analysis This software is an ideal tool for documenting measuring results 2 6 3 iCPlate2 Target The iCPlate2Target is a long term stable absolute reference You can use the iCPlate2Target to test the device for its exa...

Page 12: ......

Page 13: ...ING A REFERENCE CURVE 24 25 3 6 MEASURING 26 31 3 6 1 General 26 27 3 6 2 Calibration 28 3 6 3 Measuring standard plates 28 3 6 4 Measuring polyester plates 29 3 6 5 Measuring film 29 3 6 6 Measuring paper 30 3 6 7 Measurement values 30 31 3 7 VISUALLY CHECKINGTHE DOT 32 3 8 MEASURING A PLATE CHARACTERISTIC CURVE 33 34 3 9 iCPlate2 MAINTENANCE AND CARE 35 3 9 1 RESET 35 3 9 2 Replacing the batteri...

Page 14: ......

Page 15: ...iCPlate2 EN 15 3 Operation 3 1 Functional elements 3 iCPlate2 3 Operation Display Positioning Aid ENTER button DOWN button RESET button 0 edge Locking device RS232 interface UP button ...

Page 16: ...eries please communicate this information to the manufacturer The device s factory settings have been selected to enable you to begin measuring plates immediately The iCPlate2 is configured as follows Standard plate Lines cm Regular screen AM Red LED a standard plate is typically measured with the red LED 3 2 1 Power saving mode The iCPlate2 changes over automatically to power saving mode after ap...

Page 17: ...g the ENTER button In normal operating mode the cursor fades out after approximately 5 seconds so that no undesired function is executed by the user mistakenly pressing the ENTER button To re display the cursor simply tap the UP or DOWN button 3 2 3 Meaning of the symbols 3 2 3 1 Change display mode 3 Next display Previous display Change to image display for a visual dot inspection Increase repres...

Page 18: ...iCPlate2 3 Operation 18 3 3 2 3 2 Move the sub cursor Shift the sub cursor from left to right Shift the sub cursor from right to left Shift the sub cursor downwards Shift the sub cursor upwards ...

Page 19: ...s inch Regular screening AM Stochastic screening FM Illumination for plate measurement R Red LED G Green LED B Blue LED Color for paper measurement C Cyan LED M Green LED Y Blue LED K Green LED Automatic CMY color recognition during paper measurement Positive dot Negative dot iCPlate2 Measurement Mode Fogra Measuring Bar FMB Measurement Mode ...

Page 20: ...asurement and data transfer Device is changing over to power saving mode Add reference value Delete reference value Restart and delete all previous settings 3 2 3 5 Symbols for measurement results Screen ruling in lines cm or lines inch Dot diameter in mm based on a circular dot of the same surface area Screen angle in Visual coverage iCPlate2 3 Operation ...

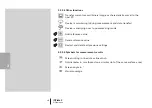
Page 21: ...Red illumination for plate measurement Green illumination for plate measurement Blue illumination for plate measurement Cyan color measured on paper Magenta color measured on paper Yellow color measured on paper Black color measured on paper iCPlate2 Measurement Mode Fogra Measuring Bar FMB Measurement Mode AM FM R G B C M Y K iCPlate2 3 Operation 3 ...

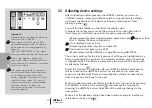
Page 22: ... pressing the ENTER button This enables you to move the subcursor double black frame surrounding the symbols consecutively from one group of settings to the next When the desired group of settings is selected fix the cursor by pressing the DOWN button on the symbol and execute the function by pressing the ENTER button Selection of the settings changes to the next option When all of the desired set...

Page 23: ...ent algorithm where the dots can be accurately detected FOGRA Measuring Bar FMB measurement mode The iCPlate2 measures according to the FOGRA Measuring Bar FMB standard This reference for check up measurements is the offset sample plate Fogra Measuring Bar FMB from the German research institute Forschungsgesellschaft Druck fogra e V München Fogra Measuring Bar FMB can be ordered over the internet ...

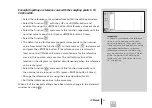
Page 24: ...n All reference values are reset by selecting the function You preset the nominal value using and The position of the nominal value is marked by a small black arrow on the X axis of the diagram After initially selecting the nominal value select to input the value Thereafter the increment and decrement functions will be highlighted in the toolbar Per default the reference value is the same as the n...

Page 25: ... function and execute this function repeatedly until the nominal value is equal to 5 press ENTER button 5 times Select the function The default value for this sample point corresponds to the nominal value Now select the function to increment or to decrement and press the ENTER button If the reference curve is altered at least once the iCPlate2 will create a sample point for the reference curve in ...

Page 26: ...and stable surface Please always position the entire instrument on the medium the 4 feet and the measuring head The measuring device shows the measurement result after a successful measurement You will find the toolbar on the left side of the LCD with the following functions Important For repeatable measurements it is recommended to hold the measur ing head on the right and left side approximately...

Page 27: ...orithms makes it possible to measure individual dot sizes in stochastic screens as well The dot size will be displayed if the stochastic screen is set and screen tones 10 are measured This means the laser image quality can be verified easily For regular screening in the display you will find DOT xx x Measured dot area All or only some of the measurement results are shown depending on the patch mea...

Page 28: ... blue LED or green LED is only recommended when the coloring of the plate has a strong proportion of light pink hues e g AGFA N90A as little image contrast is obtained with red illumination Important As the measurement algorithm is designed and optimized for finding dots in a picture measuring a 0 patch or a 100 patch can be difficult since the software is designed for having the best possible per...

Page 29: ...suring dots measurements below 5 or on a 100 patch can sometimes be incorrect Therefore the measuring range for exact readings is limited to 5 to 99 Please note that incorrect measurements for 0 or 100 patches do not indicate that the instrument is functioning poorly If you were to get incorrect measurements for 0 or 100 patches please use the iCPlate2 Target to check the accuracy of the device se...

Page 30: ...nds to the visual impression Therefore the iCPlate2 is not the ideal device for measurements of the dot area on paper Nevertheless it can be used for visual dot analysis of prints 3 6 7 Measurement Values 3 6 7 1 Dot area This value represents the area coverage of the measured patch With the image analysis algorithm dust and image errors are eliminated 3 6 7 2 Screen ruling Depending on the settin...

Page 31: ...Hold the iCPlate2 parallel to the edge of the plate to get a correct value of the screen angle in degrees Important The screen angle is not shown for FM screening and for middle tones especially for chain dots in AM screening In a regular screen the screen angle will always be shown if the dot area has closed dots highlights and shadows 3 6 7 5 Visual Coverage The visual coverage is a density meas...

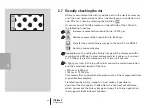
Page 32: ...icron x 2 micron A light gray ruler in the top left corner shows the current resolution and the associated length of the line 200µm at 6 350 ppi 100µm at 12 700 ppi This means that an absolute size comparison of the represented dots is possible immediately Transferring the binary image to a host makes it possible to document the dot quality X Rite offers the CaptureTool software which can accept t...

Page 33: ...ted accordingly after each measurement Next patch to be measured the nominal value of the next patch to be measured is shown on the lower left edge of theY axis and its expected reference value is shown above it If all of the patches have been measured this display is empty Current measurement value the measurement value of the patch just measured is shown in black on the top left corner of theY a...

Page 34: ...asure the 10 patch The measured value is shown at the top edge of theY axis and the 10 reference value is shown below it The nominal value of 30 and the reference value of 30 are shown for the next patch Should you have measured the 20 patch instead of the 10 patch put the measurement cursor back by one patch by selecting the function with the UP or DOWN button and then pressing the ENTER button T...

Page 35: ...ging batteries or another disruption then press the RESET button red button on the bottom side of the measuring head The device will respond with the start up display If you have technical questions for the manufacturer you will find the firmware version and serial number in this display Please state these when requesting verifications ...

Page 36: ...cially available flat tip screwdriver Remove the cover from the battery compartment Remove the two old batteries Insert the new batteries while taking the polarity into account The polarity and the mounting position are illustrated in the battery compartment Put the battery cover back on again Tighten the battery cover screw Dispose of the old batteries in accordance with regulations Push the RESE...

Page 37: ...ate2 3 Operation 4 APPENDIX 37 4 1TECHNICAL DATA 39 40 4 2 SERIAL INTERFACE 41 4 3 Upgradeto iCPlate2 XT 42 4 4 DECLARATION OF CONFORMITY 43 4 5 Warranty Information 44 1 2 3 4 Table of Contents General Operation Appendix ...

Page 38: ...iCPlate2 38 ...

Page 39: ...ments References 100 references Test measurements Standard plates X X Polyester plates X X Film X Paper X Positive and negative samples X X Regular screen AM X X Stochastic screen FM 1st and 2nd order X X Measurement technique Sensor CMOS 648 x 488 Sensor resolution 12 700 ppi Viewing area per pixel 2 µm x 2µm Viewing area ca 1 3mm x 1mm Analysis Image analysis algorithms Illumination RGB LED ring...

Page 40: ...iented Power supply Power supply 2 AA batteries Measurements per set of batteries 30 000 typ Data interface Interface Serial RS232 Baud rate 115 200 Mechanical data Dimensions 4 8 x 7 3 x 14 5cm 1 7 x 2 9 x 5 7 in Weight Approx 400 g Operating conditions Temperature 10 C to 40 C Relative humidity 10 to 80 non condensing Storage conditions Temperature 20 C to 70 C Relative humidity 10 to 90 non con...

Page 41: ...S232 interface To obtain access to the serial interface socket remove the black cover on the rear of the measuring head The serial interface is configured as follows in the factory Standard RS232 withTxD cable 115 200 baud 8 bit 1 stop bit no parity iCPlate2 4 Appendix 4 ...

Page 42: ...followed 1 Press the RESET button and keep it pressed 2 Press the DOWN button and keep it pressed 3 Release the RESET button 4 Release the DOWN button Thereafter the iCPlate2 is in the programming mode A four4 digit code is displayed 5 Use the UP and DOWN button to set the code for this digit 6 Press the ENTER button the cursor moves the next digit 7 Repeat step 5 and 6 until all digits are entere...

Page 43: ...dix 4 4 CE Declaration Hereby X Rite Incorporated declares that this iCPlate2 Series is in compliance with the essential requirements and other relevant provisions of Directive s EMC 2004 108 EC and RoHS 2011 65 EU Category 9 4 43 ...

Page 44: ...e expired warranty nor shall the same extend the duration of a warranty Customer shall be responsible for packaging and shipping the defective product to the service center designated by X Rite X Rite shall pay for the return of the product to Customer if the shipment is to a location within the region in which the X Rite service center is located Customer shall be responsible for paying all shipp...

Reviews: