19
GB F E D I N FIN
18
1.
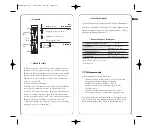
Turn off the laser (17).
2.
While keeping “Man” (19) pressed, turn on the laser (17).
3.
After the 3 LEDs blink in sequence, release Man key.
4.
The X LED (20) will blink.
5.
Press the “MAN” key (19) to change to Z axis. The Z LED (22)
will blink rapidly for a bit and then slowly, indicating it’s ready to
be calibrated in Z axis. The beam will not be rotating.
When it’s in calibration mode, rotate the beam by pressing the
scan key, and make these adjustments:
1.
Use the < and > keys (13 and 14) until the beam is perfectly
vertical and parallel to the plumb line.
2.
Move the beam slightly so that the beam is over the plumb line
for the final check.
3.
After completing the Z calibration, press the
-
or
.
key (15) to
save it. The laser will shut off. If you are not sure of the calibration
and do not wish to save it, turn the laser off with the On/Off key.
4.9 Cone error checking
1.
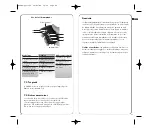
Set up the laser about 2 feet (60 cm) away from a wall (A)
or a pole and 100 feet (30 m) from another wall or pole (B).
2.
Turn the laser on.
3.
After it has self-leveled, stop the rotation and mark the loca-
tion of the beam (center of the beam) on the near wall (A). Use
a detector if ambient conditions are too bright.
4.
Rotate the laser 180°. Mark the location of the center of the
beam on the far wall (B).
5.
Set up the laser about 2 feet (60 cm) away from the far
wall. After the laser has self leveled, line up the beam near the
previous mark (B), and make a new mark (B').
6.
Mark the location of the beam (A’) on the other wall near the
first mark (A) using the detector if necessary.
7.
Compare the two sets of marks on the wall. If the difference
between AA’-BB’ exceeds 3/16" (5 mm), contact your local
service center.
6.
Use the arrow keys to move the beam up or down to the
halfway mark. If the Y axis is toward the wall with the marks, use
the < key
(13)
to raise the beam, and the > key
(14)
to lower the
beam.
7.
After completing the Y calibration, press the
-
or
.
key (15) to
save the calibration you have just made on Y axis. The laser will
shut off. If you are not sure of the calibration and do not wish to
save it, turn the laser off with the On/Off key.
4.6 Final X to Y Check
As a final check of the horizontal axes, compare X and Y axes
to be sure that your adjusted calibration is within the specs of ±
3/32”. The marks for X, X’, Y, and Y’ should be no more than
3/16” apart at 100 ft. (5mm at 30m). If X and Y are within
spec, proceed to checking Z axis.
4.7 Checking Z axis
1.
Place the laser in vertical mode on a solid, stable surface about
20 ft. away from a plumb line (plumb bob or heavy object hanging
on a string, at least 8 ft. high). You will be comparing the rotating
beam to the plumb line. If you need to calibrate, the beam will be
easier to see in a darkened room.
2.
Use the support plate (8) for stability.
3.
Turn on the laser.
4.
Use either scan or rotation mode. Using the scanning beam is
easier, but if you cannot see the beam, work in rotation mode with
a detector.
5.
Move the scan to the wall over the plumb line, sliding the laser
left or right to line up the beam over the plumb line. If in rotation
mode, use the < or > keys (13 or 14) to move the beam.
6.
Move the scan up and down the entire length of the plumb line.
If the beam is slanted, and not vertical like the plumb line, the Z
axis needs to be calibrated.
4.8 Calibrating Z axis
The laser must be calibrated to bring the rotating Z beam parallel
to the plumb line.
WLA08-pg1-124 22/05/08 19:53 Page 18


