26
Special safety directions for work with wire brushes:
a) Please note that the wire brushes also lose wires during standard use. Do not
overload the wires by applying too much grinding pressure.
Wire pieces that fly off at the side can very easily penetrate through thin clothing
and/or the skin.
b) If a protective hood is recommended ensure that you cannot touch the
protective hood and the wire brushes.
The diameter of disk and pot brushes can increase due to the grinding pressure
and centrifugal forces.
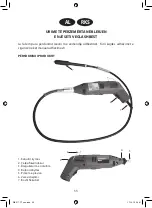
Assembly of the flexible shaft
The flexible shaft is used for fine engraving or grinding work. In order to assemble the
flexible shaft, it is necessary to pull out the free end of the shaft core ca. 3-5 cm from the
cover and to remove the plastic ring on the forepart of the machine, in order to be able
to insert and firmly tighten the shaft core into the grips of the machine. When tightening
the aluminum ring of the flexible shaft on the machine cover’s screw thread, the shaft
core is conducted automatically into the corresponding drill chuck’s adapter.
Installation of the accessory on a machine
• Attention! Before installing or exchanging the accessories, the combitool
must absolutely be separated form the electricity network, in order to avoid an
accidental start.
• In order to dismantle the clamping nut please press the lock button and turn the
drill chuck until the lock button clicks and the motor shaft is blocked.
• Place the tool shank of the insert tool into the grips.
• Let the motor shaft lock in place with a pressed lock button and tighten the
clamping nut with the aid of the hook wrench until the tool is held tight.
For the insertion of new grips, the clamping nut must be removed first.
• Plug the new grips into the opening of the motor shaft and affix the clamping nut
again.
• Use only original grips, which are included with the device.
• Use only the grips that suit the tool shank diameter of the machine tool.
• Do not try to insert a tool having a too thick tool shank into the grips by force.
The machine tool should be easily plugged in grips and armed firmly.
WB 217 CT neu.indd 26
17.12.12 09:41
Summary of Contents for WB 18 217 CT
Page 50: ...49 BG WORKERS BEST COMBITOOLS 1 2 3 4 5 6 7 4 5 6 3 1 2 7 WB 217 CT neu indd 49 17 12 12 09 41...
Page 52: ...51 1 a b c 2 a b c d e f 3 a b WB 217 CT neu indd 51 17 12 12 09 41...
Page 53: ...52 c d e f g h i j k 4 a b c WB 217 CT neu indd 52 17 12 12 09 41...
Page 54: ...53 d e f g 5 a b a b WB 217 CT neu indd 53 17 12 12 09 41...
Page 55: ...54 c d e f g h i WB 217 CT neu indd 54 17 12 12 09 41...
Page 56: ...55 j k l m n o WB 217 CT neu indd 55 17 12 12 09 41...
Page 57: ...56 a b c d e a b c d WB 217 CT neu indd 56 17 12 12 09 41...
Page 58: ...57 e a b c d e f a WB 217 CT neu indd 57 17 12 12 09 41...
Page 59: ...58 a a b 3 5 Combitool WB 217 CT neu indd 58 17 12 12 09 41...
Page 60: ...59 Combi Tool 25 0 Combitool WB 217 CT neu indd 59 17 12 12 09 41...
Page 61: ...60 Combitools 1 2 Combi Tool WB 217 CT neu indd 60 17 12 12 09 41...
Page 114: ...113 WORKERS BEST 1 2 3 4 5 6 7 MK 4 5 6 3 1 2 7 WB 217 CT neu indd 113 17 12 12 09 41...
Page 116: ...115 1 a b c 2 a b c d e f 3 a b WB 217 CT neu indd 115 17 12 12 09 41...
Page 117: ...116 c d e f g h i j k 4 a b c WB 217 CT neu indd 116 17 12 12 09 41...
Page 118: ...117 d e f g 5 a b X a b WB 217 CT neu indd 117 17 12 12 09 41...
Page 119: ...118 c d e f g h i WB 217 CT neu indd 118 17 12 12 09 41...
Page 120: ...119 j k l m n o WB 217 CT neu indd 119 17 12 12 09 41...
Page 121: ...120 a b c d e a b c d WB 217 CT neu indd 120 17 12 12 09 41...
Page 122: ...121 e a b c d e f a WB 217 CT neu indd 121 17 12 12 09 41...
Page 123: ...122 a a b 3 5 cm WB 217 CT neu indd 122 17 12 12 09 41...
Page 124: ...123 25 mm 0 WB 217 CT neu indd 123 17 12 12 09 41...
Page 125: ...124 1 2 WB 217 CT neu indd 124 17 12 12 09 41...

