2
Install a washer
(WB002)
and two 1/4" spacers
(BUSH002)
on the knobs
(5864).
Using the side/arm assembly
with the height adjuster arm attached to it, set the arm in the
groove in the router block. Install the ratchet handle thru the
slot in the arm, screwing it into the barrel nut. Slide the router
block as far down on the arm as possible (away from the height
adjuster arm) and tighten the knob. Flip the assembly over
and connect the remaining side/arm assembly to the opposite
side of the router block in the same manner.
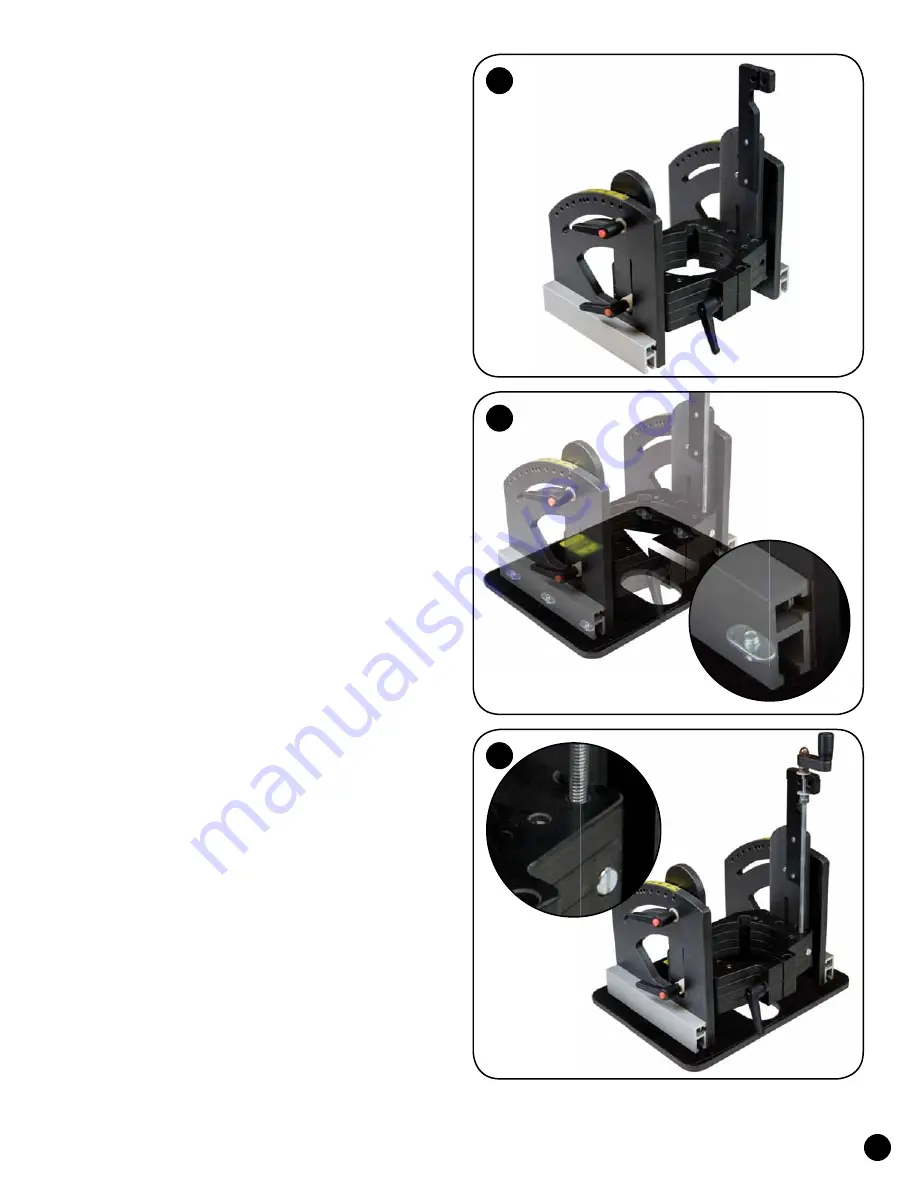
See fig. 5 & 6
ATTACH ASSEMBLY TO PLATE
Insert 3/4" screws
(MF010)
thru the six countersunk
holes in the router plate
(1470P or 576P)
and start oval
nuts
(5760B - flat side first)
on the ends of the screws.
Line the oval nuts up with the T-slot in the double
tracks and slide the assembly on to the oval nuts.
If you have the
1470P
plate, position the assembly so
the back edge of the sides are 11/16" from the edge of the
plate and tighten the screws. The opening in the router block
should be over the bit opening in the router plate.
See fig. 7.
If you have the
576P
plate, position the assembly so the
back edge of the sides are flush with the edge of the plate and
tighten the screws. The opening in the router block should
be over the bit opening in the router plate.
See fig. 7.
INSTALL HEIGHT ADJUSTER
Install a barrel nut
(5791B)
in the hole in the front of
the router block. Use a flat blade screwdriver to align the
threaded hole in the barrel nut with the cross hole in the
router block. Get the 1475 Height Adjuster package. Spread
the two nylon washers on the threaded rod of the height
adjuster
(1475B)
apart enough so the rod slips in the groove
in the adjuster arm (installed earlier) and the washers are on
each side of it. Continue screwing the threaded rod into the
barrel nut until the nylon washer on the top of the adjuster
arm is snug against the top of the adjuster arm.
See fig. 8.
6
7
8


