


3-57
show blending
•
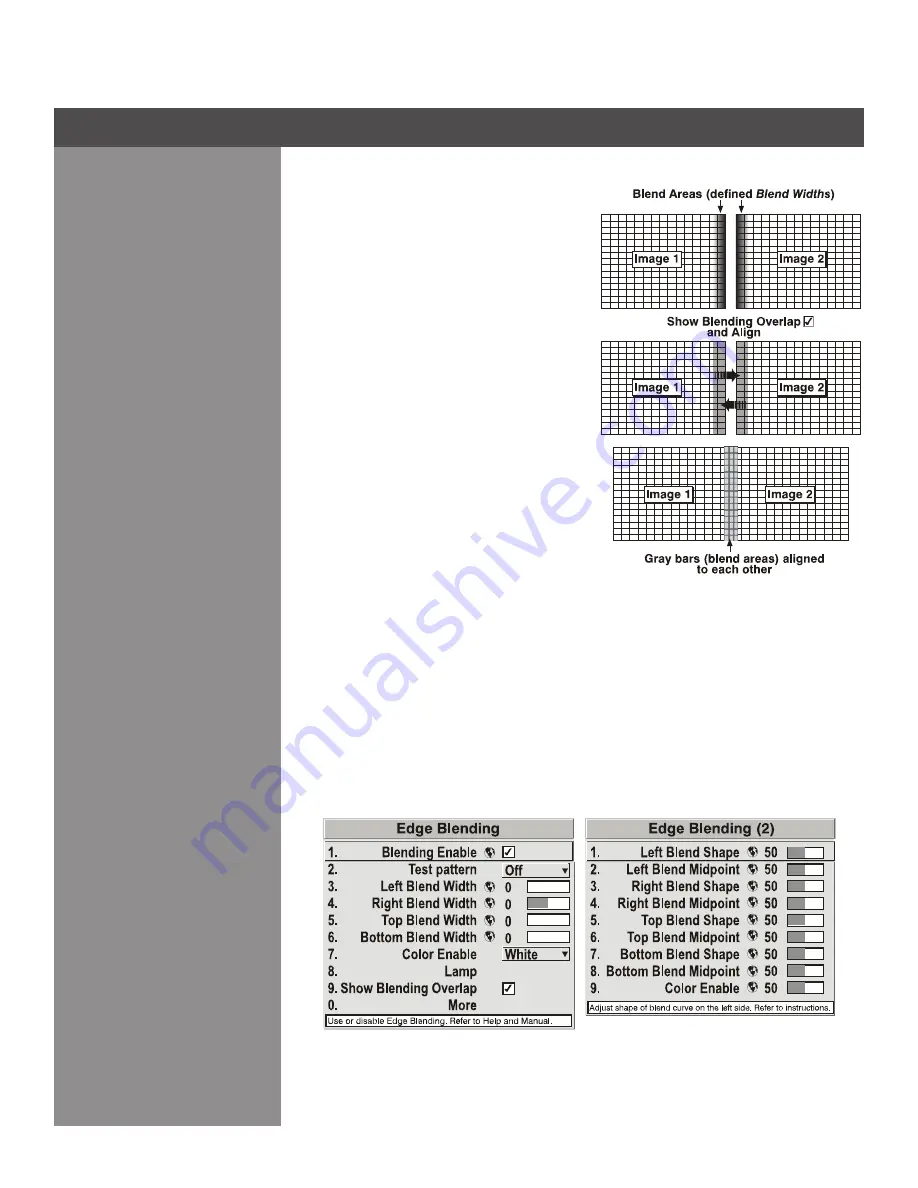
Overlap turns your defined
blend width area to solid gray so that, if
needed, simply overlapping the gray bars
can seamlessly align two adjacent images.
Toggle the Show Blending Overlap off to
reactivate the blend effect.
noTe:
Blending Overlap appears as
Reserved when Wolf WARP is installed.
oTheR fUnCTIons
For convenience, the
Edge Blending
submenu
also includes related options for enabling a
specific color and/or test pattern, or for working
with colors or the lamp. Such functions duplicate
those provided elsewhere in the menu system.
eDge blenDIng PRoCeDURe
noTe:
Before attempting to work with edge blending software functions, you must 1) physically
align the projectors/images by correctly overlapping the displays from your intended external
source, and 2) Match colors and White Field Uniformity.
IMPoRTanT:
For a shared edge, all
Blend
procedures and settings should be identical on BOTH
projectors.
Start with two projectors. Display full white field test pattern from both.
1.
In the
2.
Edge Blending
submenu, enable
Edge Blending
by entering a checkmark in the top
checkbox.
SET STARTING POINTS FOR ADJUSTMENT:
3.
Set all blend widths to 0.
•
Go to “More” and set everything in the
•
Edge Blending (2
) menu to 50.
Section 3 ► Operation
Figure 3.27. Set Starting Points for Each Projector
Figure 3.26. Blend Areas


