


WireCrafters
Slide Door Receiver
Note:
Component parts attach using self-drilling
screws. Use variable speed screw gun with
adjustable clutch or depth locating nose piece
when installing self-drilling screws. DO NOT
USE IMPACT TYPE GUNS.
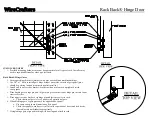
RECEIVER LOCATION :
1.
Measure from floor to center of the
installed slide door’s lock opening-
normally 49” for stock doors.
a.
Be sure proper sweep space has
been set before measuring.
2.
Subtract 10” from the above
measurement to get the dimension from
the floor to the bottom of Lock Receiver
(A)-normally 39” for stock doors.
a.
Mark post.
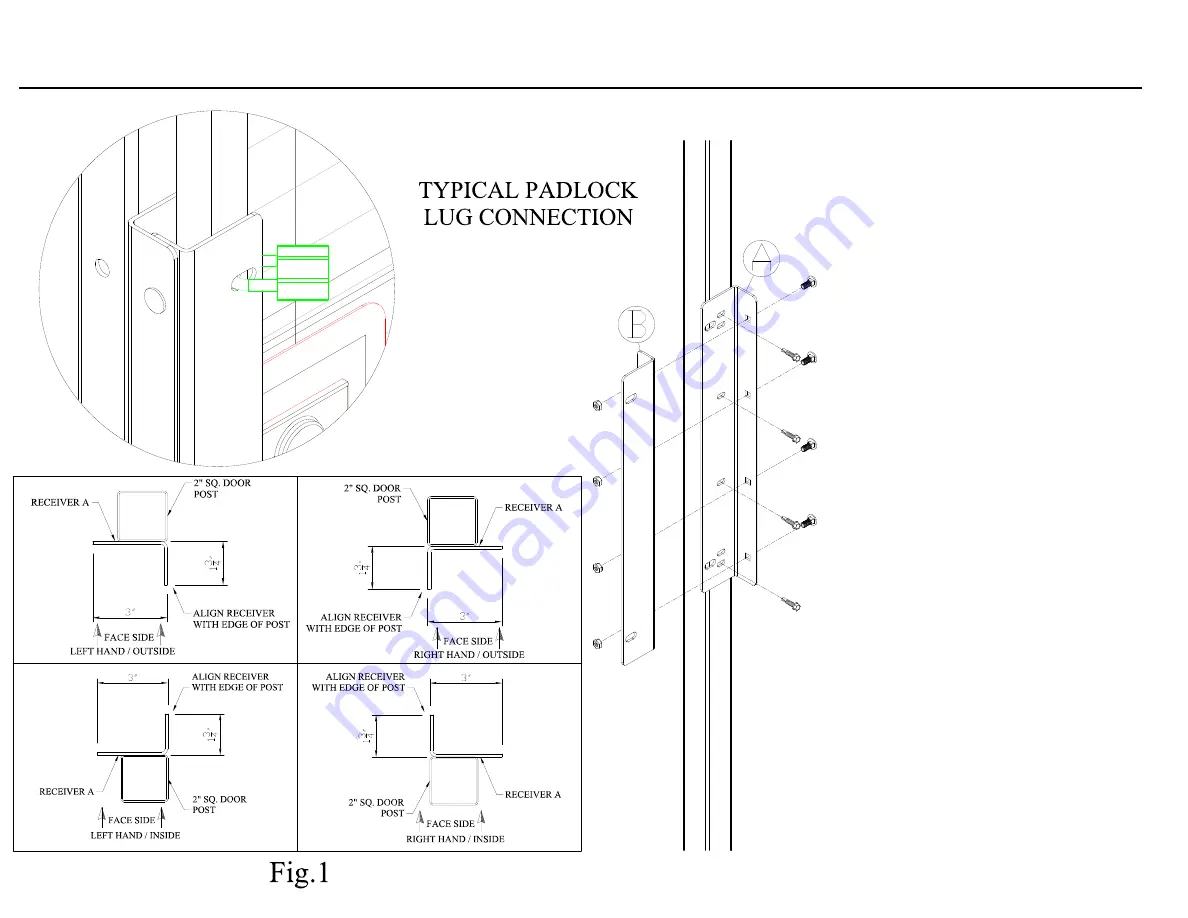
3.
Place leg of Lock Receiver (A) with
eight slotted holes against receiver post.
a.
See Fig.1 for receiver (A)
orientation.
b.
Align bottom of receiver with
spot marked in Step 2 above.
4.
Align opposing leg of Lock Receiver (A)
with square holes with edge of post.
5.
Attach Lock Receiver (A) to door post
with four self-drilling screws.
6.
Using four 5/16” x 1” carriage bolts,
securely attach Lock Receiver (B) to
(A).
7.
Fine tune door up or down so that the
door’s tubular lock tongue guard
overlaps lock receiver tube. DOOR
MUST BE LEVEL.


