13
FUNCTIONAL OVERVIEW
Front Panel
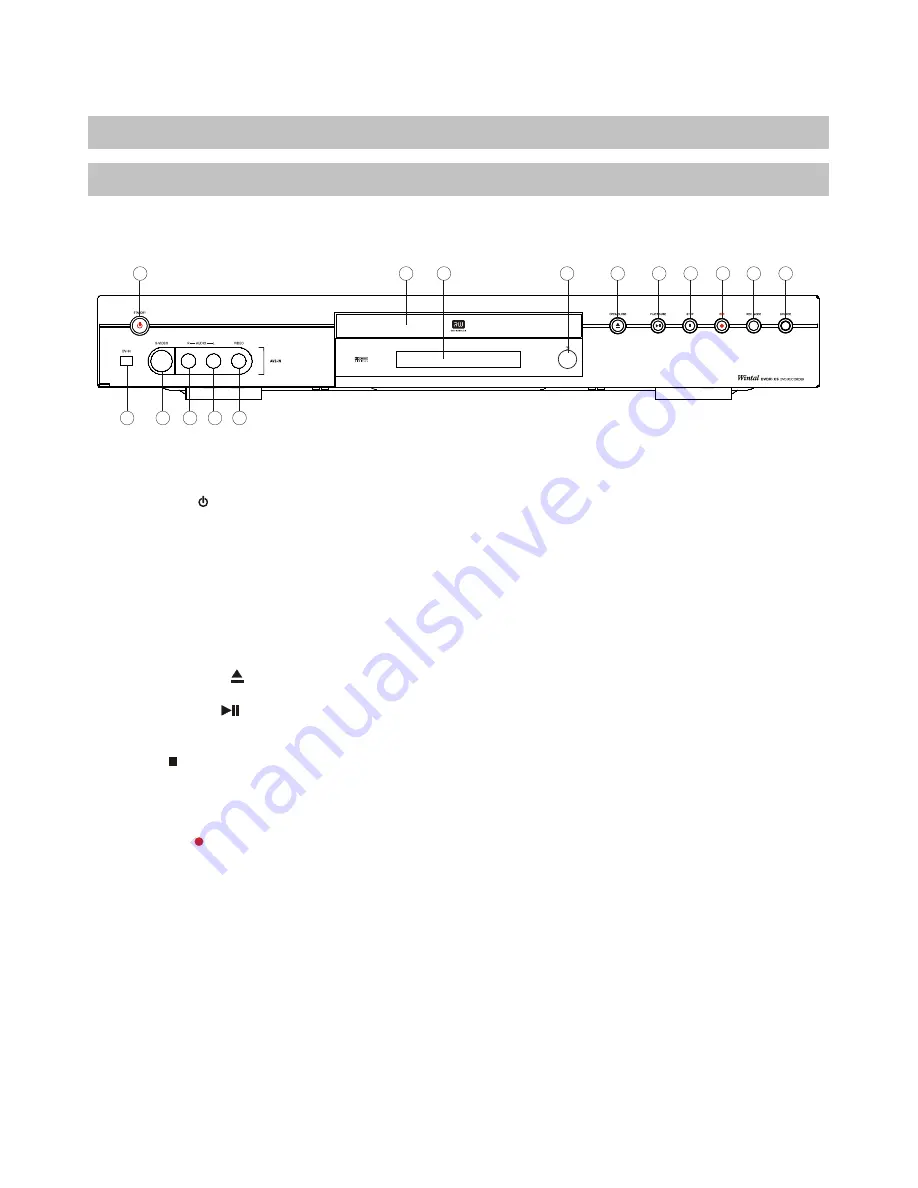
9. REC MODE
-
Selects the recording quality mode
HQ, SP, EP, SLP.
10. SOURCE -
Selects Input Sources when the
Recorder is in Live Record mode - TV Tuner, VIDEO
IN 1 / 2, S-VIDEO IN 1 / 2, DV, SCART (if support).
And switch DVD Recorder mode to live recorder
mode.
11.DV IN (1394FIRE WARE)-
The i-link(1394 fire
ware)DV input Jack connect the DV or Digtial
camcorder for recording.To select this input,use the
SOURCE button and choose DV IN.
12.S-VIDEO INPUT -
S-VIDEO input for recording.
To select this input, use the SOURCE button and
choose FRONT S-VIDEO.
13.STEREO AUDIO INPUTS -
Use with S-VIDEO
IN or VIDEO IN for recording.
14.VIDEO INPUT -
Composite Video input for
recording. To select this input, use the SOURCE
button and choose FRONT CVBS.
1
2
3
4
5
6
7
8
9
10
11
12
13
13
14
1. STANDBY -
Turns the unit on and sends the
unit to standby mode. In standby mode, the unit will
use a minute amount of power to enable power-on by
the remote control.
2. DISC TRAY -
Loads DVD+R/RW, DVD, CD,
SVCD, MP3, JPG and other optical discs.
3. VFD DISPLAY -
The front Display shows
information about the unit's operation, such as current
chapter and elapsed time during playback and disc tray
status.
4. REMOTE RECEIVERS
5. OPEN/CLOSE -
Press to open or close the
disc tray.
7. STOP -
Press once to stop playback of a disc and
save the location of the stop point. The disc can be
played back from the stop point by pressing PLAY. To
erase the stop point and reset the play location to the
beginning of the disc, press STOP a second time.
8. RECORD
-
Begins a Live Recording.
6. PLAY/PAUSE
-
Begins playback of a disc,
chapter or track. Press again during playback to pause,
and again to resume playback.


