background image

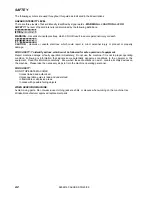
SAFETY 

86324160 AXCESS 03/23/09 

2-3 


GROUNDING INSTRUCTIONS 


This appliance must be grounded.  If it should malfunction or breakdown, grounding provides a path of least 
resistance for electric current to reduce the risk of electric shock.  This appliance is equipped with a code 
having an equipment–grounding conductor and grounding plug.  The plug must be inserted into an 
appropriate outlet that is properly installed and grounded in accordance with all local codes and ordinances. 


WARNING 


Improper connection of the equipment-grounding conductor can result in a risk of electric shock.  Check with a 
qualified electrician or service person if you are in doubt as to whether the outlet is properly grounded.  Do not 
modify the plug provided with the appliance – if it will not fit the outlet, have a proper outlet installed by a 
qualified electrician. 
 
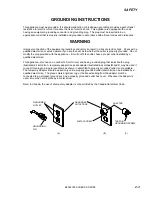
This appliance is for use on a nominal 120-volt circuit, and has a grounded plug that looks like the plug 
illustrated in sketch 

A.  

A temporary adaptor looks like adaptor illustrated in sketches 

B

 and

 C

, may be used it 

connect this plug to a 2-pole receptacle as shown in sketch

 B

 if a properly grounded outlet is not available.  

The temporary adaptor should be used only until a properly grounded outlet (sketch 

A

) can be installed by a 

qualified electrician.  The green colored rigid ear, lug or the like extending from the adaptor must be 
connected to a permanent ground such as a properly grounded outlet box cover.  Whenever the adaptor is 
used, it must be held in place by a metal screw. 
 
Note: In Canada, the use of a temporary adaptor is not permitted by the Canadian Electrical Code. 


GROUNDING 
PIN

GROUNDED 
OUTLET

ADAPTER

METAL SCREW

TAB FOR 
GROUNDING SCREW

GROUNDED
OUTLET BOX

(A)

(B)

(C)

Summary of Contents for 1.012-063 0

Page 1: ...86324160 F 11 28 11 Operating Instructions ENG MODELS 1 012 063 0 Read instructions before operating the machine Polisher...

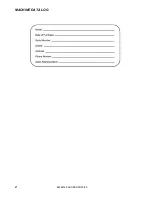
Page 2: ...MACHINE DATA LOG 86324160 AXCESS 03 23 09 2...

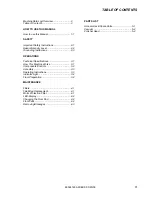
Page 3: ...g Instructions 2 3 OPERATIONS Technical Specifications 3 1 How This Machine Works 3 1 Components Controls 3 2 Assembly 3 3 Operating Instructions 3 3 Indicator Light 3 4 Floor Preparation 3 4 MAINTENA...

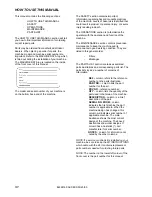
Page 4: ...nce to keep the machine and its components in good working condition They are listed in this general order Filters Blockages The PARTS LIST section contains assembled parts illustrations and correspon...

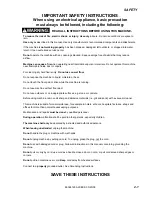
Page 5: ...while the machine is running Do not use machine without floor pad Do not use outdoors or on inappropriate surfaces e g stone or concrete Before using machine remove all sharp and abrasive materials i...

Page 6: ...of equipment Report machine damage or faulty operation immediately Do not use the machine if it is not in proper operating condition Following is information that signals some potentially dangerous c...

Page 7: ...ill not fit the outlet have a proper outlet installed by a qualified electrician This appliance is for use on a nominal 120 volt circuit and has a grounded plug that looks like the plug illustrated in...

Page 8: ...4 5 kg 18 5 lbs 8 4 kg Dimensions Height 48 in 123 cm Housing Injection molded high impact ABS and PP plastic Cable 31 ft 9 5 M 18 3 SJT POWER HEAD Detachable Head ITEM DIMENSION CAPACITY Motor 200 Wa...

Page 9: ...e Handle 10 Carrying Handle 11 Exhaust Filter 12 Filter Retaining Rings 13 Release Button 14 Swivel Neck 15 UHS floor polisher 16 Foot Pedal 17 LED operation light green 18 LED overload light red 19 B...

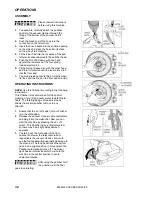
Page 10: ...TRUCTIONS NOTE Use this Polisher according to the following instructions This Polisher is recommended for the optimal cleaning of your high quality water resistant hard floors The rotating design of t...

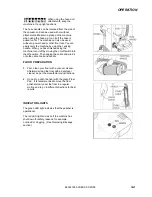
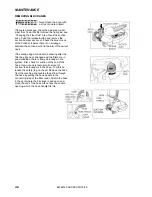
Page 11: ...ne turn it off by moving the on off switch into the off position Then unplug the cable and wind it onto the cable hook and handle FLOOR PREPARATION 1 First clean your floor with a vacuum cleaner After...

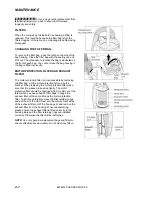
Page 12: ...is only accessible by removing the filter bag Lift the motor protection filter up by the bracket When replacing the motor protection filter make sure that it is pressed in position tightly The motor...

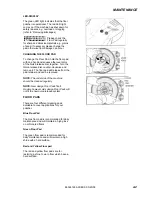
Page 13: ...Quick release disc counter clockwise and remove it The floor pad will release from the pad retainer and can be removed NOTE The underside of the machine should be cleaned regularly NOTE New design Fl...

Page 14: ...f the swivel neck If the orange bag full indicator is showing after the filter bag has been changed and the filters are in good condition there is likely a blockage in the system First check for sucti...

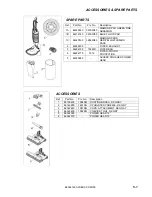
Page 15: ...ADS RED YELLOW COMBO PACK 2 86309330 FILTER EXHAUST 3 86284790 7029WI FILTER BAG 4 86284770 7012 FILTER MOTOR PROTECTION 5 86323990 AXCESS POLISHER POWER HEAD Ref Part No Prv No Description 1 86138400...

Page 16: ...VACUUM 86324160 AXCESS 03 23 09 5 2...

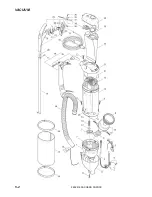
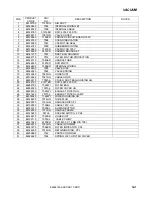
Page 17: ...SC 18 86322520 7028 VAVLE SPRING 19 86142680 7090HG HOSE DUCT 20 86139340 7027HG CABLE HOOK 21 86309310 7092hg COVER DUST BAG HOUSING HG 22 86144790 01017ER SCR 4X20 T20 STS 23 86284790 7029WI FILTER...

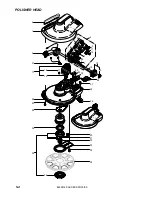
Page 18: ...POLISHER HEAD 86324160 AXCESS 03 23 09 5 4 1 3 2 14 18 19 36 17 22 16 23 20 33 32 20 31 30 20 34 26 25 27 24 11 5 12 8 7 6 9 4 10 5 13 29 20 28 21 15 35...

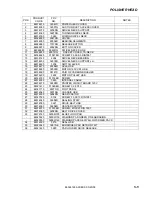
Page 19: ...4470 2938ER AXLE HSB 17 86314480 3252ER MOTOR 120V CPL HSB 18 86138390 05141S PAIR OF CARBON BRUSHES 19 86314490 3222 MOTOR PULLEY HSB 20 86144780 01016ER SCREW 21 86314500 3245 INTERNAL CABLE 22 8631...

Page 20: ...NOTES 86324160 AXCESS 03 23 09 5 6...

Page 21: ...ng a Windsor product Warranty registration is quick and easy Your registration will allow us to serve you better over the lifetime of the product To register your product go to www windsorind com Warr...

Page 22: ...86324160 F 11 28 11 06048AX 11 28 11...

Reviews: