background image


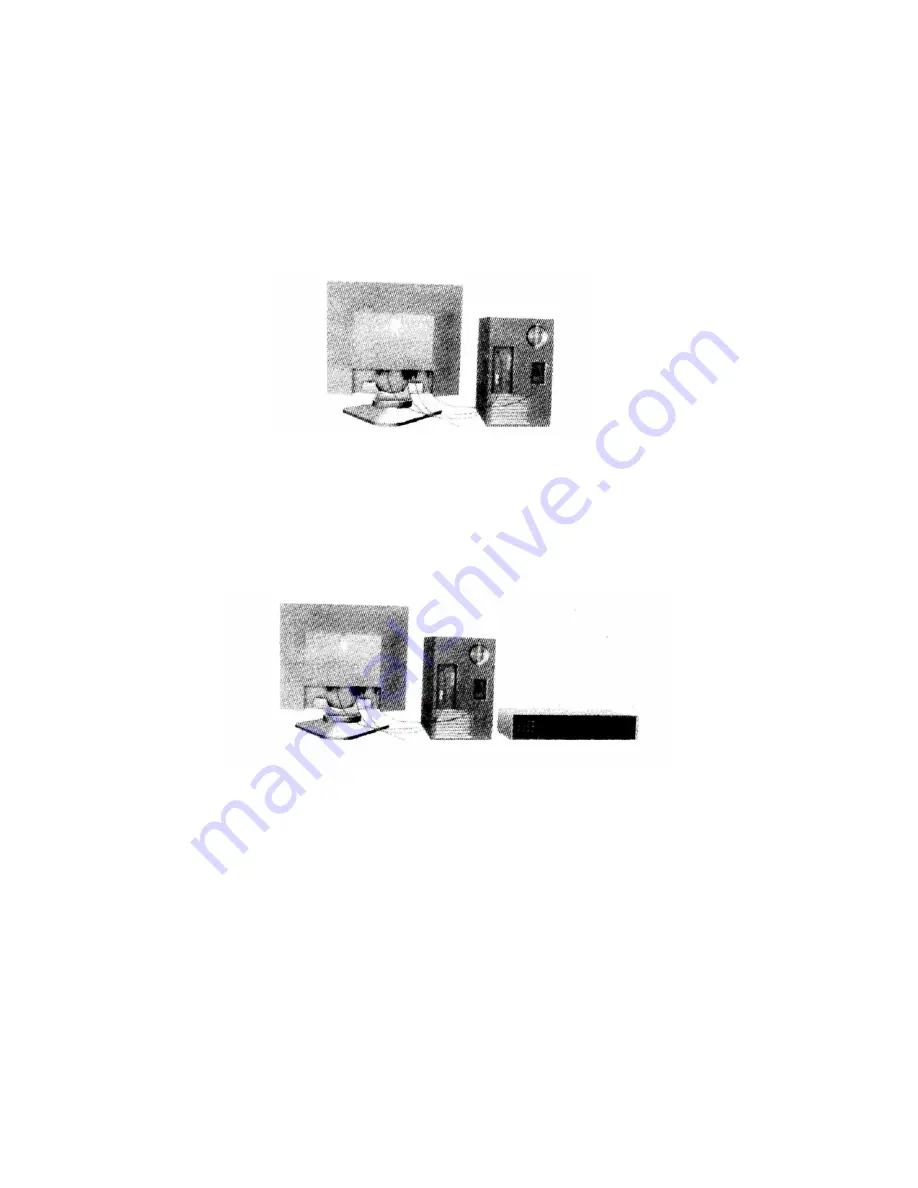
(Optional) Connect one end of Video Cable to LCD Monitor and other end to the DVD; 
Connect one end of Audio Cable to LCD Monitor and other end to the DVD; Connect the 
AC plug of Adapter into AC outlet. Plug the DC12V output of Adapter into DC12V 
socket. Please refer to the connector configuration.


4. Adjust the tilt base 

Adjust the panel the by adjusting the round desk for our maximum viewing comfort. 


Page 7 


Summary of Contents for 2K701

Page 1: ...TFT 17 LCD 2K701 USER MANUAL...

Page 2: ...afety Precautions 3 Installation Package Contents 4 Control Description 4 Connection with External Equipment 6 Adjust tilt base 7 Operation On Screen Display Menu Function Table 8 Power Management Sys...

Page 3: ...x 1024 non interlaced Its multiscan function automatically adjusts the monitor to the scanning frequency of your video card Its non interlaced and higher refreshing rate offers flicker free image whic...

Page 4: ...iate radio frequency energy If not installed and used in accordance with the instructions it may cause interference to radio communications However there is no guarantee that interference will not occ...

Page 5: ...irect sunlight Dusty surroundings Equipment that generates strong magnetic fields 2 Precautions Sit at least 18 from the TFT LCD Monitor Do not apply pressure to the screen The LCD screen is delicate...

Page 6: ...package includes the following 1 17 TFT LCD Monitor 2 Power Cord 3 VGA Cable 4 Audio Cable 5 User s manual 6 AC DC Adapter Video Cable optional S Video Cable Audio Cable optional Remote controller 2 C...

Page 7: ...olor see the later for more information 3 Select When selecting menu item pressing this key can confirm to enter the submenu 4 Auto config Pressing this key can adjust phase clk position automatically...

Page 8: ...S video cable TV system port optional Using coaxial cable with 75 ohm to obtain radio signal or TV cable signal If there is any technical change we will not inform 3 Connection with External Equipmen...

Page 9: ...dio Cable to LCD Monitor and other end to the DVD Connect the AC plug of Adapter into AC outlet Plug the DC12V output of Adapter into DC12V socket Please refer to the connector configuration 4 Adjust...

Page 10: ...lly adjust Image Position Horizontal Size or Fine setting Press UP or DOWN button to adjust the settings antonatically Brightness Controls the brightness of the LCD Use or button to increase or decrea...

Page 11: ...automatically Green Highlighting this item when adjusting the brightness or black level only Green color can be changed automatically Blue Highlighting this item when adjusting the brightness or blac...

Page 12: ...and image stability by changing the horizontal image size Use or button to increase or decrease the setting AUTO CONFIG Automatically adjust Image phase clk Position Horizontal Size or Fine setting P...

Page 13: ...the vertical image position within the display of the LCD Use the or button to move the OSD up or down Native mode Dos mode selecting off show 700 x 4001Hz GAMMA MOIRE Selecting this item can show the...

Page 14: ...t System Power Mode LED Color Power Consumption On Green 40W Standby Red flash 5W Suspend Red flash 5W Active Off No indication 5W 3 Preset Timing Modes Please use VESA 1280x1024 75Hz for the best per...

Page 15: ...r l 80 80 Contrast Ratio 10 u d 80 80 Input Signal Analog RGB 0 7Vpp 75ohm Separate TTL level H Freq 31 60KHz V Freq 56 75Hz Power Supply Input DC 12V 3 3A Adapter Input AC 100V 240 47 63Hz Adapter Ou...

Page 16: ...colors If any color red green or blue is missing check video cable to make sure it is securely connected Loose pins in the cable connector can cause a bad connection Connect monitor to another comput...

Page 17: ...e protector reduce number of devices plugged in Verify refreshing rate vertical frequency is 70Hz or lower Make sure graphics card in your computer can use non interlaced mode at desired frequencies T...

Reviews: