background image

GB

 The glue applied on the gaskets leaves traces of 

grease on the glass. Before using the appliance, we 
recommend you remove these with a special non-
abrasive cleaning product. During the first few hours 
of use there may be a smell of rubber which will 
disappear very quickly.

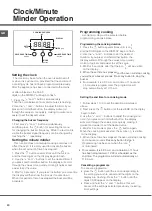
Switching the cooking zones on and off

To switch on a cooking zone, turn the corresponding 
knob in a clockwise direction.
To switch it off again, turn the knob in an anticlockwise 
direction until it is in the “0” position.
If the COOKING ZONE ON indicator light is lit, this 
shows that at least one pf the cooking zones on the 
hob is switched on.

Cooking zones

The hob is equipped with electric  heating elements. 
When they are in use the following items on the hob 
become red.
The hob is equipped with electric hilite heating 
elements. When they are in use the following items on 
the hob become red.

A. The cooking zone with radiant 
heating elements.
B.The cooking zone with a hilite 
heating element.
C. The residual heat indicator 
light: this indicates that 
the temperature of the 

corresponding cooking zone is greater than 60°C, 
even when the heating element has been switched off 
but is still hot.

Cooking zones with hilite heating elements

These emit heat via radiation from the hilite lamps they 
contain. They have similar properties to gas burners: 
they are easy to control and reach set temperatures 
quickly, allowing you to actually see the power they are 
providing.

Description of the heating elements

The circular radiant heating elements become red 10 - 
20 seconds after they have been switched on.
The circular hilite heating elements guarantee even 
heat distribution in addition to the usual advantages 
that hilite heating elements bring. 
Hilite lamps emit high levels of heat and light as soon 
as they are switched on, offering the following practical 
advantages:
·  rapid heating (in relation to a gas burner)
· rapid cooling
·  even temperature across the whole surface (due to 

the circular heating elements).

They are similar to the other cooking zones on the hob 
and are therefore easy to use.  To ensure you use the 
hob correctly, all you need to do is consult the cooking 
tables in the instruction booklet.

Practical advice on using the hob

•  Use pans with a thick, flat base to ensure that they 

adhere perfectly to the cooking zone.

•  Always use pans with a diameter that is large 

enough to cover the hotplate fully, in order to use all 
the heat produced.

•  Always make sure that the base of the pan is 

completely clean and dry: this ensures that the pans 
adhere perfectly to the cooking zones and that both 
the pans and the hob remain effective for a longer 
period of time.

•  Avoid using the same cookware that is used on gas 

burners: the heat concentration on gas burners may 
have warped the base of the pan, causing it not to 
adhere to the surface correctly.

•  Never leave a cooking zone switched on without a 

pan on top of it, as doing so may cause the zone to 
become damaged.

A

B

C

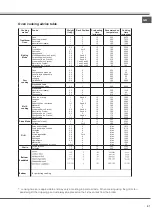
Pos.

Radiant Ceramic Hot Plate
Normal or Fast Hot Plate

Ceramic Halogen Hot Plate
Automatic Hot Plate

0

Off

Off

1

To cook fish

To melt butter or chocolate

2

To cook potatoes (steam),
soup, chickpeas, beans

To reheat liquids

3

To continue cooking large
quantities of food, vegetable
soup

4

To roast (medium)

For sauces (including cream

sauces)

5

To roast (well done)

6

To brown or quickly bring to a

boil

To cook at boiling point

7

8

For roasts

9

10

For stews

11

12

To fry

Using the glass ceramic 

hob

43

Summary of Contents for ACMT 6533/IX

Page 1: ...ACMT 6533 WH ACMT 6533 IX ...

Page 2: ...izare 48 RO Românã Românã Instrucюiuni de folosire ARAGAZ ЄI CUPTOR Sumar Instrucюiuni de folosire ARAGAZ ЄI CUPTOR Sumar Funcÿionarea ceasului temporizatorului 51 Întreÿinere ÿi curÿÿire 54 FR Français Mode d emploi CUISINIERE ET FOUR Sommaire Mode d emploi 1 Consignes de s ecurit e 16 Description de l appareil Vue d ensemble 56 Description de l appareil Tableau de bord 56 Installation 57 Mise en...

Page 3: ...osowanie jest niedozwolone np ogrzewanie pomieszczeń Urządzenie i jego dostępne części nagrzewają się podczas używania małe dzieci powinny być trzymane z dala od urządzenia Nie dopuść aby urządzenie weszło w kontakt z tkaniną lub innymi materiałami palnymi do momentu aż wszystkie elementy całkowicie ostygną Podczas użycia oraz po użyciu nie wolno dotykać elementów grzejnych lub wewnętrznych powier...

Page 4: ...z urządzenie dopiero po zakończeniu instalacji Szafki kuchenne dotykające urządzenia muszą być odporne na wysoką temperaturę minimum 90 C Po instalacji dolna część urządzenia nie może już być dostępna Dla prawidłowego funkcjonowania urządzenia nie należy zasłaniać minimalnego odstępu między blatem i górną krawędzią piekarnika Urządzenie nie może być zamontowane za dekoracyjnymi drzwiami aby zapobi...

Page 5: ...ależy zatem pozbyć się odpowiedzialnie w pełnej zgodności z lokalnymi przepisami dotyczącymi utylizacji odpadów ZŁOMOWANIE SPRZĘTU AGD Podczas złomowania urządzenia upewnij się że nie będzie nadawać się do użytku odcinając kabel zasilania i usuwając drzwi oraz półki jeśli obecne tak aby dzieci nie mogły łatwo wejść do środka i zostać uwięzione Urządzenie jest wykonane z materiałów nadających się d...

Page 6: ...p i model piekarnika numer serwisu posprzedażowego numer podany po słowie Service na tabliczce znamionowej znajdujący się po wewnętrznej stronie klapy schowka Numer serwisowy jest również podany w karcie gwarancyjnej swój dokładny adres swój numer telefonu Po naprawy skontaktuj się z Autoryzowanym serwisem obsługi posprzedażnej określonym w gwarancji Jeśli jakakolwiek praca jest wykonywana przez t...

Page 7: ...components have cooled down completely During and after use do not touch the heating elements or interior surface of the appliance risk of burns Overheated oils and fats catch fire easily Always remain vigilant when cooking foods rich in fat oil or alcohol e g rum cognac wine Never leave the appliance unattended during food drying If alcoholic beverages are used when cooking foods e g rum cognac w...

Page 8: ...stallation procedure has been completed Kitchen units in contact with the appliance must be heat resistant min 90 C After installation the bottom of the appliance must no longer be accessible For correct appliance operation do not obstruct the minimum gap between the worktop and the upper edge of the oven The appliance must not be installed behind a decorative door in order to avoid overheating Th...

Page 9: ...rity regulations governing waste disposal SCRAPPING OF HOUSEHOLD APPLIANCES When scrapping the appliance make it unusable by cutting off the power cable and removing the doors and shelves if present so that children cannot easily climb inside and become trapped This appliance is manufactured with recyclable or reusable materials Dispose of it in accordance with local waste disposal regulations For...

Page 10: ...address your telephone number For repairs contact an Authorised After Sales Service indicated in the warranty If any work is carried out by technicians not belonging to the Manufacturer s authorised After Sales Service centres request a receipt specifying the work performed and make sure the replacement parts are original Failure to comply with these instructions can compromise the safety and qual...

Page 11: ...te Copiii nu trebuie să se joace cu echipamentul Curăţarea şi operaţiunile de întreţinere realizate de utilizator nu vor fi realizate de copii nesupravegheaţi Echipamentul şi piesele sale accesibile se încing în timpul folosirii copiii mici trebuie ţinuţi departe Nu permiteţi echipamentului să intre în contact cu cârpe sau alte materiale inflamabile decât după ce toate componentele s au răcit comp...

Page 12: ...ngi de plastic bucăţi din polistiren etc la îndemâna copiilor în timpul şi după instalarea echipamentului AVERTISMENT Modificarea echipamentului şi metoda sa de instalare sunt esenţiale pentru folosirea echipamentului în condiţii de siguranţă şi corect în toate celelalte ţări Folosiţi mănuşi de protecţie pentru a efectua toate operaţiunile de despachetare şi instalare După despachetarea echipament...

Page 13: ...e de siguranţă Contactaţi un centru de service autorizat Nu puneţi echipamentul în funcţiune dacă are cablul de alimentare sau ştecărul avariat dacă nu funcţionează normal sau dacă a fost avariat sau scăpat Nu scufundaţi cablul de alimentare sau ştecărul în apă Ţineţi cablul de alimentare departe de suprafeţe fierbinţi Keep the cord away from hot surfaces Nu atingeţi echipamentul cu nicio parte ud...

Page 14: ...uncarea deşeurilor CASAREA ECHIPAMENTELOR GOSPODĂREŞTI Atunci când casaţi un echipament gospodăresc faceţi l neutilizabil tăind cablul de alimentare şi îndepărtând uşile şi rafturile dacă există astfel încât copiii să nu aibă acces facil în interior rămânând blocaţi Acest echipament este produs cu materiale reciclabile sau reutilizabile Aruncaţi le în conformitate cu reglementările locale de trata...

Page 15: ...niţi l pentru a vedea dacă problema persistă Dacă problema persistă după verificările de mai sus contactaţi cel mai apropiat service post vânzare Specificaţi tipul defecţiunii tipul exact şi modelul cuptorului numărul servicului post vânzare numărul de după cuvântul Service de pe plăcuţa identificatoare aflat înăuntrul clapetei compartimentului de stocare Numărul de service este de asemenea furniz...

Page 16: ... avec l appareil Le nettoyage et l entretien par l utilisateur ne doivent pas être effectués par les enfants sans surveillance L appareil et ses parties accessibles deviennent chauds pendant l utilisation Par conséquent les jeunes enfants doivent être tenus à l écart Ne laissez l appareil entrer en contact avec des tissus ou d autres matériaux inflammables que lorsque tous les composants ont compl...

Page 17: ... d installation Après avoir déballé l appareil assurez vous que la porte se ferme bien En cas de problème contactez votre revendeur ou le service après vente le plus proche Pour éviter tout dommage retirez le four de son socle en mousse de polystyrène seulement au moment de l installation L appareil doit être manipulé et installé par deux personnes ou plus Avant d effectuer toute opération d insta...

Page 18: ...isé Une cuisson de courte durée doit être surveillée en permanence N utilisez pas la table de cuisson comme surface de travail ou appui AVERTISSEMENT Une cuisson sans surveillance sur une plaque de cuisson avec de la graisse ou de l huile peut être dangereuse et peut causer un incendie N essayez jamais d éteindre un incendie avec de l eau Arrêtez plutôt l appareil et ensuite couvrez les flammes pa...

Page 19: ...grimper facilement et se coincer à l intérieur Cet appareil est fabriqué à partir des matériaux recyclables ou réutilisables Mettez le au rebut conformément à la réglementation d élimination des déchets locaux Pour de plus amples renseignements sur le traitement la récupération et le recyclage des appareils électroménagers contactez votre autorité locale compétente le service de collecte des déche...

Page 20: ...qué après le mot service sur la plaque signalétique situé à l intérieur du rabat du compartiment de rangement Le numéro du service est également mentionné dans le livret de garantie votre adresse complète votre numéro de téléphone Pour les réparations contactez un Service après vente agréé indiqué dans la garantie Si des travaux sont effectués par des techniciens ne relevant pas des centres de ser...

Page 21: ... пиролиза Дръжте децата далеч от фурната по време на цикъл пиролиза Следи от покапване и всеки предмет трябва да бъде отстранен от фурната преди да започнете цикъл на почистване само за печки с функция Пиролиза Уредът е предназначен изключително за домашна употреба за приготвяне на храна Никоя друга употреба не е разрешена например за отопление на стаи Уредът и достъпните му части да се нагорещява...

Page 22: ...изкия сервиз за следпродажбено обслужване За да се предотврати всякаква повреда само отстранете фурната от основата от пенополистирол по време на инсталацията Уредът трябва да се мести и инсталира от две или повече лица Уредът трябва да бъде изключен от захранването преди извършването на работа по инсталацията По време на инсталацията се уверете че уредът няма да повреди захранващия кабел Включете...

Page 23: ...о фурната е инсталирана под плот уверете се че всички горелки или електрически котлони са изключени по време функцията за самопочистване пиролиза Отстранете всички аксесоари преди да стартирате функцията за пиролиза също и страничните решетки Не използвайте абразивни или разяждащи продукти почистващи препарати базирани на хлор или стъргалки за тиган BG ОПАЗВАНЕ НА ОКОЛНАТА СРЕДА ИЗХВЪРЛЯНЕ НА ОПАК...

Page 24: ... съхранение Сервизният номер е даден в гаранционната книжка пълния Ви адрес телефонния Ви номер За ремонт свържете се с Оторизирания сервиз посочен в гаранцията Ако дадена дейност се извършва от технически лица които не принадлежат към оторизираните центрове за следпродажбено обслужване на производителя поискайте разписка с посочване на извършената работа и се уверете че частите за подмяна са ориг...

Page 25: ...Taca NA OCIEKAJĄCY TŁUSZCZ 5 Regulowane nóżki 6 SZYNY do wsuwania rusztów 8 pozycja 4 9 pozycja 3 10 pozycja 2 11 pozycja 1 7 pozycja 5 3 Przesuwany 2 Panel Pokrętło WYBORU FUNKCJI Pokrętło TERMOSTATU Pokrętła kontrolne ELEKTRYCZNEJ PŁYTY GRZEJNEJ Kontrolka ELEKTRYCZNEJ PŁYTY GRZEJNEJ 1 2 3 3 4 4 Kontrolka TERMOSTATU 5 6 M M M Programator elektroniczny 25 ...

Page 26: ...uzji za kuchenką lub w odległości mniejszej niż 200mm od jej boków Wszelki okapy muszą być zamontowane zgodnie z instrukcjami zawartymi w odpowiedniej instrukcji użytkowania Poziomowanie Jeśli konieczne jest wypoziomowanie urządzenia służą do tego regulowane nóżki znajdujące się w każdym rogu kuchenki patrz rysunek Nóżki pasują do otworów umieszc zonych w podstawie kuchenki Postępuj zgodnie z poni...

Page 27: ...leży użyć podkładki Ściany betonowe wymagają użycia wkrętu o średnicy co najmniej 8mm i długości 60mm Upewnij się że łańcuszek jest przymocowany do tylnej ścianki kuchenki i ściany tak jak to pokazano na rysunku aby po montażu był on naprężony i ułożony poziomo do podłogi Urządzenie jest uziemione a wtyczka spełnia przepisy bezpieczeństwa Gniazdko jest w stanie wytrzymać maksymalną moc urządzenia ...

Page 28: ...TIN zalecane jest nieprzekraczanie temperatury 200 C OÊwietlenie piekarnika Ustawienie pokr t a na symbolu umo liwia w àczenie oÊwietlenia piekarnika niecznoÊci w àczania adnych elementów grzejàcych bez ko OSTRZEŻENIE Piekarnik jest wyposażony w system zatrzymywania rusztów podczas ich wyciągania aby zapobiec ich wypadnięciu 1 Jak pokazano na rysunku aby wyciągnąć je do końca po prostu je unieś tr...

Page 29: ... a także włącza się nawiew Kombinacja tych funkcji podwyższa efektywność jednokierunkowego emitowania gorąca dostarczanego przez elementy grzejne w całym piekarniku poprzez wymuszony nawiew Zapobiega to przypalaniu się powierzchni potraw i pozwala wysokiej temperaturze przenikać do ich wnętrza Tryby GRILL i GRATIN wymagają zamkniętych drzwi piekarnika Tryb ROZMRAŻANIA Wentylator umieszczony w dnie...

Page 30: ...ia pieczenia 1 Naciśnij kilkakrotnie przycisk aż ikonka AUTO i napis DUR na wyświetlaczu zaczną migać 2 Użyj przycisków i do ustawienia żądanego czasu trwania jeśli naciśniesz i przytrzymasz którykolwiek z przycisków cyfry będą się zmieniać szybciej ułatwiając i przyspieszając ustawienie wartości 3 Odczekaj 5 sekund po upływie których na wyświetlaczu pojawi się ikonka AUTO 4 Po upływie ustawionego...

Page 31: ... Ciasto śliwkowe Chrupki serowe 0 3 0 6 0 2 2 2 2 200 180 210 15 18 45 10 12 Multı Cookıng Pizza na 2 rusztach Lasagne Jagnięcina Pieczony kurczak ziemniaki Makrela Ciasto śliwkowe Ptysie na 2 rusztach Herbatniki na 2 rusztach Ciasto biszkoptowe na 1 ruszcie Ciasto biszkoptowe na 2 rusztach Pikantne pierogi 1 1 1 1 1 1 1 0 5 0 5 0 5 1 1 5 2 i 4 3 2 2 i 4 2 2 2 i 4 2 i 4 2 2 i 4 3 15 10 10 15 10 10...

Page 32: ...ż 60 C element grzejny nawet po wyłączeniu pozostaje jeszcze gorący odpowiadającej jej strefy Strefy grzejne z promiennikowymi elementami grzejnymi Emitują one ciepło poprzez lampy promiennikowe w które są wyposażone Są one podobne do palników gazowych Opis urządzenia elementów grzejnych Okrągłe elementy grzejne promiennikowe zaświecą się na czerwono po około 10 20 sekundach od ich włączenia Eleme...

Page 33: ...gąbek z ostrymi powierzchniami mogą one bezpowrotnie porysować powierzchnię Zwykle wystarczy po prostu wymyć płytę wilgotną gąbką i wytrzeć do sucha papierowym ręcznikiem kuchennym Jeśli płyta grzejna jest szczególnie brudna natrzyj ją specjalnym produktem do czyszczenia szkła ceramicz nego następnie wypłucz dokładnie i wytrzyj do sucha Aby usunąć uporczywy brud użyj odpowiedniej drapaczki do kupi...

Page 34: ... rozdziale Czyszczenie i konserwacja 6 Włóż z powrotem taflę szklaną OSTRZEŻENIE Piekarnika nie można używać gdy wyjęta jest wewnętrzna szyba drzwi OSTRZEŻENIE Podczas wkładania z powrotem wewnętrznego szklanego panelu drzwi upewnij się że jest włożony właściwie a napis na panelu nie jest odwrócony i może być z łatwością odczytany 7 Włóż z profil powrotem kliknięcie będzie oznaczać że część jest u...

Page 35: ...foot 6 GUIDE RAILS for the sliding racks 7 position 5 8 position 4 9 position 3 10 position 2 11 position 1 GB Description of the appliance Control panel GB 1 SELECTOR knob 2 THERMOSTAT knob 4 Indicator light for THERMOSTAT 5 Hob ELECTRIC HOTPLATE control knobs 6 Indicator light for ELECTRIC HOTPLATE 1 2 3 4 5 6 M M M 3 Electronic cooking programmer 35 ...

Page 36: ...cessary to level the appliance screw the adjustable feet into the positions provided on each corner of the base of the cooker see figure The legs fit into the slots on the underside of the base of the cooker Electrical connection Fitting the power supply cable To open the terminal board Insert a screwdriver into the side tabs of the terminal board cover Pull the cover to open it To install the cab...

Page 37: ...o replace it Do not use extension cords or multiple sockets Once the appliance has been installed the power supply cable and the electrical socket must be easily accessible The cable must not be bent or compressed The cable must be checked regularly and replaced by authorised technicians only The manufacturer declines any liability should these safety measures not be observed Data plate is located...

Page 38: ...ing by turning the SELECTOR knob to the 0 position Never put objects directly on the bottom of the oven this will avoid the enamel coating being damaged Only use position 1 in the oven when cooking with the rotisserie spit Always place cookware on the rack s provided Cooking modes A temperature value can be set for all cooking modes between 60 C and Max except for the following modes GRILL recomme...

Page 39: ...m the element at the bottom If you use more than one rack at a time switch the position of the dishes halfway through the cooking process GRILL The central part of the top heating element is switched on The high and direct temperature of the grill is recommended for food that requires a high surface temperature veal and beef steaks fillet steak and entrecôte This cooking mode uses a limited amount...

Page 40: ...ier to set the value 3 Wait for 5 seconds after that the icon will be visible 4 When the set time has elapsed and the oven will stop cooking you will hear a buzzer sounds Press any button to stop the buzzer For example it is 9 00 a m and a time of 1 hour and 15 minutes is programmed The programme will stop automatically at 10 15 a m Setting the end time for a cooking mode 1 Follow steps 1 to 3 to ...

Page 41: ... 0 4 2 2 2 2 2 2 2 250 200 220 200 200 180 220 12 20 30 35 25 35 25 30 15 20 Pre cooked food Golden chicken wings 0 4 2 200 20 25 Fast cooking Fresh Food Biscuits short pastry Plum cake Cheese puffs 0 3 0 6 0 2 2 2 2 200 180 210 15 18 45 10 12 Multi cooking Pizza on 2 racks Lasagne Lamb Roast chicken potatoes Mackerel Plum cake Cream puffs on 2 racks Biscuits on 2 racks Sponge cake on 1 rack Spong...

Page 42: ...e the door until the clamps stop the door will remain open for 40 approx see photo WARNING Oven must not be operated with inner door glass removed WARNING When reassembling the inner door glass insert the glass panel correctly so that the text written on the panel is not reversed and can be easily legible 7 Replace the profile a click will indicate that the part is positioned correctly 8 Open the ...

Page 43: ...ee even heat distribution in addition to the usual advantages that hilite heating elements bring Hilite lamps emit high levels of heat and light as soon as they are switched on offering the following practical advantages rapid heating in relation to a gas burner rapid cooling even temperature across the whole surface due to the circular heating elements They are similar to the other cooking zones ...

Page 44: ... possible without waiting for the appliance to cool to avoid residues forming crusty deposits You can obtain excellent results by using a rustproof steel wire sponge specifically designed for glass ceramic surfaces soaked in soapy water If plastic or sugary substances have accidentally been melted on the hob remove them immediately with the scraper while the surface is still hot Once it is clean t...

Page 45: ... GHIDAJE alunecare rafturi 7 nivelul 5 8 nivelul 4 9 nivelul 3 10 nivelul 2 11 nivelul 1 Descriere aparatului Vedere de ansamblu RO 1 2 3 4 5 6 M M M Descriere aparatului Panoul de control RO 3 Programator electronic 2 Buton TERMOSTAT 1 Buton PROGRAME 4 Indicator TERMOSTAT 5 Butoane comandi ochiuri aragaz 6 Indicator aragaz electric 45 ...

Page 46: ...FX DWH WHKQLFH ÌQ FD XO HIHFWXăULL OHJăWXULL GLUHFWH OD UHĠHD HVWH QHFHVDU Vă VH PRQWH H vQWUH DSDUDW úL UHĠHD XQ vQWUHUXSăWRU RPQLSRODU FX GHVFKLGHUHD PLQLPă D FRQWDFWHORU GH PP GLPHQVLRQDW OD VDUFLQă FRQIRUP QRUPHORU 1 UXO GH vPSăPkQWDUH QX WUHEXLH Vă H vQWUHUXSW GH vQWUHUXSăWRU DEOXO GH DOLPHQWDUH WUHEXLH Vă H SR LĠLRQDW DVWIHO vQFkW Vă QX DWLQJă vQ QLFL XQ SXQFW R WHPSHUDWXUă FX SHVWH WHPSHUDW...

Page 47: ...L 35363 H05VV F 4x4 CEI UNEL 35746 1 3 2 4 5 N L3 L1 L2 400V 3N H05RR F 5x2 5 CEI UNEL 35363 H05VV F 5x2 5 CEI UNEL 35746 1 3 2 4 5 Conexiunea electrică Montarea cablului de alimentare cu energie Pentru a deschide panoul de conexiuni Introduceţi o şurubelniţă în lateralele capacului panoului de conexiuni Trageţi de capac şi deschideţi l Pentru a instala cablul urmaţi instrucţiunile de mai jos Deşu...

Page 48: ...u cient astfel cum se arată în desen să le ridicaĠi prinzându le din partea din faĠă ú i să le trageĠi 2 La prima aprindere vă recomandăm să lăsaţi cuptorul să funcţioneze în gol timp de aproximativ o oră cu termostatul la maxim şi uşa închisă Stingeţi apoi cuptorul deschideţi uşa şi aerisiţi camera Aparatul poate emana un miros neplăcut datorită evaporării substanţelor protectoare folosite în tim...

Page 49: ...e suprafaţă mai mare fripturi de vită şi mânzat fileuri şi antricoate Acest mod de gătire foloseşte o cantitate limitată de energie şi este ideal pentru a face mici feluri de mâncare la grătar Puneţi mâncarea în centrul poliţei deoarece nu va fi gătită în mod adecvat dacă stă în colţ GRATINARE Elementul de încălzire de deasupra şi elementul pentru rotisare atunci când e prezent sunt acti vate şi v...

Page 50: ...i care necesită timpi de gătit diferiţi şi temperaturi diferite setaţi o temperatură la jumătate intervalului dintre cele două temperaturi recomandate vezi tabelul de sfaturi pentru gătirea la cuptor şi plasaţi mâncărurile mai delicate pe poliţă în poziţia 4 Scoateţi mai întâi mâncarea care necesită un timp mai scurt de gătire Atunci când gătiţi pizza pe mai multe poliţe cu temperatura setată la 2...

Page 51: ...tat înainte de programare Programarea duratei de gătit 1 Apăsaţi butonul de mai multe ori până când pictograma AUTO şi cifrele DUR de pe AFIŞAJ încep să clipească 2 Folosiţi butoanele şi pentru a ajusta durata dorită dacă apăsaţi şi ţineţi apăsat oricare dintre butoane afişajul va defila printre valori mai rapid stabilirea valorii dorite făcându se mai rapid şi mai simplu 3 Aşteptaţi 5 secunde dup...

Page 52: ...reparată Aripioare de pui aurii 0 4 2 200 20 25 Mâncare proaspătă Biscuiţi pateuri mici Plumchec Pufuleţi cu brânză 0 3 0 6 0 2 2 2 2 200 180 210 15 18 45 10 12 Gătire multiplă Pizza pe 2 poliţe Lazane Miel Pui fript cartofi Macrou Plumchec Choux a la creme pe 2 poliţe Biscuiţi pe 2 poliţe Pandişpan pe 1 poliţă Pandişpan pe 2 poliţe 1 1 1 1 1 1 1 0 5 0 5 0 5 1 1 5 2 şi 4 3 2 2 şi 4 2 2 2 şi 4 2 şi...

Page 53: ... plita vor dura mai mult evitaţi folosirea aceleaşi vase folosite pe arzătoarele cu gaz concentraţia de căldură pe arzătoarele cu gaz poate deforma fundul vasului care pierde aderenţă nu lăsaţi niciodată o zonă de gătit aprinsă fără cratiţă pentru că s ar putea deteriora Folosirea plitei vitroceramice Pos Piastra radiante 0 Spento 1 Per sciogilere burro cioccolata 2 Per riscaldare liquidi 3 4 Per ...

Page 54: ... umed după care să l ştergeţi cu hârtie absorbantă de bucătărie Dacă plita este deosebit de murdară ştergeţi cu un produs specific pentru curăţarea suprafeţelor vitroceramice clătiţi şi uscaţi Pentru a elimina acumulările de murdărie mai consistente folosiţi o racletă specială nu este furnizată Interveniţi cât mai curând posibil fără a aştepta ca aparatul să se răcească pentru a preveni încrustare...

Page 55: ...oduce geamul corect astfel încât text scris pe panoul nu este inversat și poate fi ușor lizibile 7 Înlocuiți profil un clic va indica faptul că parte este poziționat corect 8 Deschideți complet ușa 9 Închideți suporturi vezi foto 10 Acum ușa poate fi închisă complet și cuptorul poate fi pornit pentru o utilizare normală Panouri catalitice laterale şi posterior Sunt panouri acoperite cu un email sp...

Page 56: ...port LECHEFRITE 5 Pied de réglage 6 GLISSIERES de coulissement 7 niveau 5 8 niveau 4 9 niveau 3 10 niveau 2 11 niveau 1 FR 1 Manette PROGRAMMES 4 Voyant lumineux thermostat 2 Manette du THERMOSTAT 3 PROGRAMMATEUR ETETRONIQUE 5 Manette de la plaque électrique VTC 6 Voyant de fonctionnement de la plaque électrique Description de l appareil Tableau de bord 56 ...

Page 57: ... conformer aux instructions de leur notice d emploi Nivellement Pour mettre l appareil bien à plat visser les pieds de réglage fournis aux emplacements prévus aux coins à la base de la cuisinière vedi figura Montage des pieds fournis avec l appareil par encastrement sous la base Raccordement électrique Montage du cordon d alimentation Ouverture du bornier Faites pression à l aide d un tournevis su...

Page 58: ...ourant doivent être facilement accessibles Le câble ne doit être ni plié ni excessivement écrasé Le câble doit être contrôlé périodiquement et ne peut être remplacé que par un technicien agréé Nous déclinons toute responsabilité en cas de non respect des normes énumérées ci dessus L étiquette collée est à l intérieur du portillon ou sur la paroi intérieure gauche visible après avoir sorti le tiroi...

Page 59: ...culinaires voir tableau cuisson au four En cours de cuisson il est possible à tout moment de modifier le programme de cuisson à l aide du bouton PROGRAMMES modifier la température à l aide du bouton THERMOSTAT interrompre la cuisson en ramenant le bouton PROGRAMMES sur 0 Il faut toujours enfourner les plats sur la grille fournie avec l appareil ATTENTION Le four est équipé d un système d arrêts de...

Page 60: ...ak de veau et de bœuf filet entrecôte Ce programme idéal pour griller de petites préparations permet de réduire la consommation d électricité Attention à bien placer le plat au milieu de la grille car dans les coins la chaleur ne suffit pas à le cuire GRATIN Mise en marche de la résistance de voûte de la turbine et du tournebroche si l appareil en est équipé L irradiation thermique unidirectionnel...

Page 61: ...isson avant la programmation Programmation de la durée de cuisson 1 Appuyez plusieurs fois sur le bouton jusqu à ce que l icône et les chiffres DUR sur l écran commencent à clignoter 2 Utilisez les boutons et pour régler la durée souhaitée si vous appuyez et maintenez enfoncé l un de ces boutons l écran va défiler entre les valeurs très rapidement ainsi le réglage de la valeur sera facile et rapid...

Page 62: ...iscuits sur 2 niveaux Génoise sur 1 niveau Génoise sur 2 niveaux Tartes salées 1 1 1 1 1 1 1 0 5 0 5 0 5 1 1 5 2 et 4 3 2 2 et 4 2 2 2 et 4 2 et 4 2 2 et 4 3 15 10 10 15 10 10 10 10 10 10 15 230 180 180 200 180 170 190 180 170 170 200 15 20 30 35 40 45 60 70 30 35 40 50 20 25 10 15 15 20 20 25 25 30 Four Pizza Pizza Rôti de veau ou de bœuf Poulet 0 5 1 1 3 2 2 ou 3 15 10 10 220 220 180 15 20 25 30...

Page 63: ...haleur résiduelle il signale une température supérieure à 60 C du foyer correspondant et ce même après extinction de ce dernier Foyers radiants ou hilite Les résistances circulaires des foyers radiants deviennent rouges 10 20 secondes à peine après allumage Conseils d utilisation du plan de cuisson Utiliser des casseroles à fond plat et de forte épaisseur pour qu elles adhèrent parfaitement à la z...

Page 64: ...t pas réparé Remplacement de l ampoule d éclairage du four 1 Débrancher le four enlever le couvercle en verre du logement de la lampe voir figure 2 Dévisser l ampoule et la remplacer par une autre de même type tension 230 V puissance 25 W culot E 14 3 Remonter le couvercle et rebrancher le four au réseau électrique Ne pas utiliser la lampe du four comme éclairage de la pièce Nettoyage du plan de c...

Page 65: ... verre enlevé AVERTISSEMENT Réassembler le correctement afin que le signe sur le verre est lisible avec la porte du four verre correctement AVERTISSEMENT Le four ne doit pas etre utilisé en verre enlevé AVERTISSEMENT Réassembler le correctement afin que le signe sur le verre est lisible avec la porte du four verre correctement 40 40 40 FR 65 Nettoyageautomatiquedufourparcatalyse Dans certains modè...

Page 66: ...ъзгащите се скари 7 позиция 5 8 позиция 4 9 позиция 3 10 позиция 2 11 позиция 1 Описание на уреда Общ преглед BG Описание на уреда Панел за управление BG 1 СЕЛЕКТОРЕН бутон 4 Индикаторна лампичка на ТЕРМОСТАТА 2 Копче на ТЕРМОСТАТА 3 Електронен програматор за готвене 5 Копче за управление на електрическия КОТЛОН 6 Индикаторна лампичка на ЕЛЕКТРИЧЕСКИЯ КОТЛОН 66 ...

Page 67: ...ирани в съответствие с указанията от съответното ръководство с инструкции Нивелиране А к о у р едъ т т р я б в а д а бъде нивелиран завиите нивелиращите крачета в предназначените за тях легла разположени в основата на печката виж фигурата Крачетата се монтират в сглобката под основата на печката Електрическо свързване Инсталиране на захранващия кабел За да отворите кутията с изводите Поставете отв...

Page 68: ... уреда означено на табелката с характеристиките захранващото напрежение е в границите на стойностите означени на табелк ата с характеристиките контактът е съвместим с щепсела на уреда Ако контактът не е съвместим с щепсела обърнете се към оторизиран техник за подмяната му Не използвайте удължители или разклонители Уредът трябва да бъде инсталиран така че кабелът и контактът да са лесно достъпни Ка...

Page 69: ...ръчително да се настройва само на MAX МАКС ОГРЕТЕН препоръчително да не надвишава 200 C BG ПРЕДУПРЕЖДЕНИЕ Фурната е снабдена със стоп система при издърпване на скарите която не им позволява да изскочат от фурната 1 Както е показано на илюстрацията за да ги издърпате докрай просто вдигнете скарите държейки ги за предната част и ги издърпайте 2 Практически съвети за готвене В режим на готвене ГРИЛ п...

Page 70: ...о пържоли филе бифтек Този режим на готвене използва ограничено количество енергия и е идеален за печене на малки ястия Поставете храната в центъра на скарата тъй като няма да се сготви добре ако се постави в някои от ъглите ОГРЕТЕН Горният нагревателен елемент и скарата при наличие се активират и вентилаторът започва да работи Тази комбинация от характеристики увеличава ефективността на еднопосоч...

Page 71: ...н преди програмата да започне Програмиране на продължителността на готвене 1 Натиснете бутона няколко пъти докато AUTO иконата и DUR цифри на ДИСПЛЕЯ започнат да мигат 2 Използвайте и бутоните за да настроите желаната продължителност ако натиснете и задържите някой от бутоните дисплеят ще премине по бързо между стойностите правейки настройването на стойността по бързо и лесно 3 Изчакайте 5 секунди...

Page 72: ...2 Мулти готвене Пица на 2 та скара лазаня Агне Печено пиле картофи Скумрия Кей със стафиди Еклери на 2 решетка бисквити на 2 решетка Пандишпан на 1 решетка пандишпан на 2 решетка пикантни пайове 1 1 1 1 1 1 1 0 5 0 5 0 5 1 1 5 2 и 4 3 2 2 и 4 2 2 2 и 4 2 и 4 2 2 и 4 3 15 10 10 15 10 10 10 10 10 10 15 230 180 180 200 180 170 190 180 170 170 200 15 20 30 35 40 45 60 70 30 35 40 50 20 25 10 15 15 20 ...

Page 73: ...твене на стъклокерамичния плот е включена Описание на нагревателните елементи Кръглителъчистинагревателниелементисезачервяват 10 20 сек след като са били включени Кръглите лъчисти нагревателни елементи гарантират равномерно разпределение в допълнение към обичайните предимства които лъчистите нагревателни елементи имат Лъчистите нагревателни елементи излъчват високи нива на топлина и светлина ведна...

Page 74: ...ние 230 V мощност 25 W свързване E 14 3 Сменете крушката и свържете фурната към електрозахранващата мрежа Не използвайте лампата на фурната като за вътрешно осветление Почистване на стъклокерамичния стъклен плот Избягвайте използването на абразивни или корозионни препарати за почистване например спрей флакони за барбекю и фурни продукти за почистване на петна и продукти против ръжда почистващи пре...

Page 75: ...о на вратата поставете правилно стъкления панел така че текстът върху панела да не е обърнат обратно и да може лесно да се чете 7 Сменете профила едно кликване ще покаже че частта е правилно разположена 8 Отворете вратата докрай 9 Затворете опорите виж фотото 10 Сега вратата може да се затвори докрай и фурната може да започне да работи нормално 75 Странични и задни каталитични обшивки При някои мо...

Page 76: ...XEROX FABRIANO 11 2015 195137300 01 Whirlpool EMEA S p A Via Carlo Pisacane n 1 20016 Pero MI Italy VAT number IT00693740425 www whirlpool com ...

Reviews: