background image

VeriEKO User Manual

26

•  A silicon or rubber spatula (optional);

• Tissues;

•  A bin and clear plastic bag;

•  Air compressor or blower (optional); and

•  Personal protective equipment (PPE), i.e. chemical resistant gloves.

Note:

 We strongly recommend that you wear a respirator if you are working with 3D 

printing materials for an extended period of time.

To clean the vat:

Step 1

  Prepare a bin and clear plastic bag to collect the waste.

Step 2

  Put the funnel and mesh filter in place on the bottle.

Step 3

  Remove the vat from your printer.

CAUTION:


You must always remove the build platform before removing the vat 
from the printer.

Step 4 

Pour the resin into the bottle using one of the grooves in a corner.


•  You can use a rubber spatula to push the resin down to preserve more resin. 

Never use metal tools on the vat film.

Step 5 

Put the vat down on the table.

Step 6 

Spray cleaning alcohol into the vat.

Step 7 

Use a card to mix the alcohol and remaining resin with the spatula.

Step 8 

Use tissues to absorb the resin.

Step 9 

Dispose of the alcohol and resin mixture.


•  Some resin gets trapped between the vat frame and vat film. You must 

remove this resin.

Step 10 

Use the card or spatula to gently push the vat film down so there is a small gap 
between the vat frame and the vat film.

Step 11 

Spray alcohol into the gap between the vat frame and vat film.

Step 12 

Use the card or spatula to push a tissue into the gap to absorb the alcohol and 
resin mixture.


•  Repeat this process until there is no resin between the vat frame and vat film.

Step 13 

Spray more cleaning alcohol into the center of the vat.

Step 14 

Use tissues and compressed air to dry the remaining alcohol.

Summary of Contents for VeriEKO

Page 1: ...VeriEKO Printer Price Speed Performance No compromise User Manual ...

Page 2: ...reen 9 2 8 Web interface 10 3 Setting up Your Printer 3 1 Setup environment 10 3 1 1 Temperature 18 25 C 10 3 1 2 UV Filtered Lighting 10 3 1 3 Ventilation 11 3 2 Connecting to a Network 11 3 2 1 Connecting to a wired network 11 3 2 2 Connecting to a wireless network 11 3 2 3 Configuring a static IP address 12 3 3 Attaching the vat 12 3 4 Adding resin to the vat 12 3 5 Attaching the build platform...

Page 3: ... Fan 21 5 2 5 3 Z Axis 22 5 2 5 4 LCD 22 5 2 5 5 Touch Panel 23 5 2 5 6 Reset 23 5 2 5 7 Advanced 23 6 Maintaining your printer 6 1 Using the Clean Vat function 24 6 2 Cleaning the vat 25 6 3 Updating Printer Firmware 27 Das Benutzerhandbuch ist auf www whipmix com in deutscher Sprache verfügbar Le manuel d utilisation est disponible en français sur le site www whipmix com El manual del usuario se...

Page 4: ...ons 3D printing technology Monochrome LCD Panel Machine size 271 L 292 W 416 H mm Weight 15 Kg Print size 128 x 80 x 140 mm XY resolution 49 μm Slice thickness 30 150 μm Resin wavelength 385 405 nm Power supply 100 240 V 50 60 Hz 1 2 Features 49 micron pixel size for super smooth finish High speed printing up to 4 5 cm hr Anti drip LCD protection Automated cloud based updates Replace most parts in...

Page 5: ...n metallic materials can fade colors and can be damaging to plant life Shield all plastic rubber or other non metallic parts plant life etc which may be exposed to direct or reflected ultraviolet rays Electrical Shock Hazard Always disconnect power to the printer and unplug before performing any service or maintenance Do not operate without proper electrical ground To prevent the risk of severe or...

Page 6: ...onents Step 8 Remove the plastic wrap and the Quick Start Guide Step 9 Raise the hood and make sure the Vat and Build Platform are in place 2 2 What you need In addition to the contents of the package you must have several other items in order to use your printer effectively and make a complete print This section outlines the items that you must acquire in addition to the items shipped with the pr...

Page 7: ...cohol 75 Another method for cleaning your prints and workspace Air blower or compressed air Use the compressed air to remove alcohol and to clean the part your equipment or workspace Rubber or silicone spatula Use this to move or mix the resin in the vat Scraper or knife A sharp blade is useful for removing the part from the build platform Dull scrapers can damage the build platform Rubber mallet ...

Page 8: ...e your printer via a networked computer i e web console 2 4 1 Home Screen There are three buttons on the left side of the Home screen From top to bottom they are the Print Clean Vat and Settings buttons Table 2 Home Screen Buttons Button Description Print Press the Print button to show the Queue History and USB tabs at the top of the screen Clean Vat Use the Clean Vat function whenever the print f...

Page 9: ...ttached USB device You can select a print file on this tab and add it to the Queue 2 6 Clean Vat Screen You can use the Clean Vat function to remove pieces of print that did not securely attach to the build platform during the print process Please refer to Using the Clean Vat function for more information 2 7 Settings Screen The Settings screen gives you access to system wide settings and informat...

Page 10: ... arranged in a browser friendly format To get access to the web console you must connect your printer to a network and key the printer s IP address into a browser on a connected computer 3 Setting up Your Printer 3 1 Setup environment Consider the following when choosing where to set up your printer and your workspace 3 1 1 Temperature 18 25 C Keep your printer and your resins in a dry temperature...

Page 11: ... to your network settings When your computer and printer are connected you can open an Internet browser on the computer and key the IP address into the address bar of the browser The printer s web console appears in the Internet browser 3 2 2 Connecting to a wireless network Connect your printer to a Wi Fi network so that you can get access to the web console and start prints via an internet brows...

Page 12: ... Step 1 Select a specific resin for the application Step 2 Follow the resin manufacturer s mixing instructions Step 3 Open the bottle Step 4 Pour the resin in the vat starting at one side and moving to the other so that the resin is evenly distributed across the bottom of the vat More info There are level indicators on the vat to show the volume of resin i e 100 ml and 150 ml Step 5 Close the bott...

Page 13: ...int file on a USB device More info You can swipe up and down to view a long list of files Step 5 Select the IBF file that you want to print Step 6 Press Add to Queue to add the selected file to the print queue Step 7 Select the Queue tab and select the file you just added Step 8 Review and confirm your print details i e the file name the resin profile the volume of resin and the number of layers S...

Page 14: ...file Step 7 You can select Printer or USB on the drop down list at the top left of the screen to select the directory where you are browsing for your print file Step 8 You can click History to view and select a previous print job More info The Material option is described in Material Settings Step 9 Select the print file and click Next Step 10 Confirm your print details and press Print to start yo...

Page 15: ... Settings screen shows system wide settings and information To get access to the Printer Settings screen go to Settings Printer Table 1 Printer Settings Setting Description Firmware version The currently installed version of the printer firmware Machine ID The unique ID for this printer This is not the same as the serial number which is on a label affixed to the back side of the printer Storage Us...

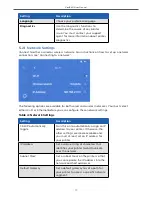
Page 16: ...tion All the same functionality exists in the printer console Table 3 System Settings Setting Description Network Connect to either a wired or wireless network For instructions on how to set up a network connection see Connecting to a network System View system information change your printer s name and choose whether to share diagnostic information with Whip Mix Update Configure your printer syst...

Page 17: ...works You must select either Wi Fi or Ethernet before you can configure these network settings Table 4 Network Settings Setting Description Find IP automatically toggle Turn this on to automatically assign an IP address to your printer Otherwise the other settings are made available and you must at least set an IP address for your printer IP Address Set a unique string of characters that identifie...

Page 18: ...or printer if you need to control it over a wide area network WAN Secondary DNS server Set the second point of contact for printer if you need to control it over a wide area net work WAN 5 2 2 System Settings Information The System screen gives you access to system information and allows you to set a name for your printer and control whether you share diagnostic information with Whip Mix To get ac...

Page 19: ...e of all print jobs 5 2 2 2 Printer Name Select Printer Name to give your printer any name for your own reference 5 2 2 3 Share Diagnostics You have the option to share diagnostic information with Whip Mix If you consent to sharing this technical data we may use it to make further developments and improvements Please note that if you submit a request for support you must provide the log file avail...

Page 20: ...nguage Set the preferred language for the user interface on your printer 5 2 5 Diagnostics The diagnostic tools are designed to help you resolve common printer issues You can get access to these tools via Settings System Diagnostics ...

Page 21: ...System or Print processes You must submit this file whenever you submit a request for support To download the log file from your printer go to Settings System Log You must have a USB device connected if you access this screen via the printer 5 2 5 2 Fan The Fans screen shows whether the three cooling fans in your printer operate as expected ...

Page 22: ...tion and reddening of the skin In order to safely diagnose issues with the print screen you must wear personal protection equipment UV filter safety glasses or an ultraviolet blocking face shield to protect eyes and exposed skin Under no circumstances should you look directly at the print screen when it is illuminated and you are unprotected Always keep the hood closed during the print process You...

Page 23: ...ough a series of colors each time you press the button 5 2 5 6 Reset Reset the printer to the factory settings that are configured for the current version of the firmware Note This process will delete any custom settings you have applied to your printer 5 2 5 7 Advanced The advanced settings are password protected and provided only for further diagnostics by an Whip Mix approved technician ...

Page 24: ... strongly recommend that you wear a respirator if you are working with 3D printing materials for extended periods of time To use the Clean Vat function Step 1 Press the Clean button on the Home screen Step 2 Click and drag the spinner to set a value for the length of curing time for the Clean Vat function You can also use the up and down arrow buttons to set the time value in seconds We strongly r...

Page 25: ...an the vat or put the vat back in place and start the print process again More info You can always press the Tip button in the top left corner to get directions while using the printer 6 2 Cleaning the vat If you want to change resins or check the vat film for damage it is best to completely clean the vat Tip We strongly recommend keeping a different vat for each type of resin that you use instead...

Page 26: ...h the resin down to preserve more resin Never use metal tools on the vat film Step 5 Put the vat down on the table Step 6 Spray cleaning alcohol into the vat Step 7 Use a card to mix the alcohol and remaining resin with the spatula Step 8 Use tissues to absorb the resin Step 9 Dispose of the alcohol and resin mixture Some resin gets trapped between the vat frame and vat film You must remove this r...

Page 27: ...outcome Your printer asks you to confirm that you want to update the firmware Step 2 Check for software update Step 3 The system checks for the update file online If it finds a more recent version of the firmware it shows the confirmation screen and asks you whether you want to update the firmware Step 4 Press the Update button to complete the update process or press Cancel ...

Page 28: ...ue Louisville KY USA 40209 whipmix com For technical support please contact us via productsupport whipmix com or phone number 800 626 5651 extension 1437 For additional material and user information go to https www whipmix com verieko PIR 21 0002 VUMP Rev A ...

Reviews: