75
WHL-016 REV. 12.18.14
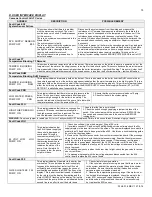
D. USER INTERFACE DISPLAY
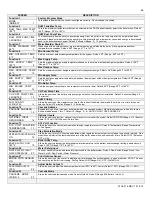
Cascade Control FAULT Codes
SCREEN
DESCRIPTION
POSSIBLE REMEDY
Fault Code EO3
System Sensor Failure
SYS SUPPLY SENSOR
PUMP OFF E03
This screen shows that there is a problem
with the system sensor circuit. The circuit
could be open or shorted. Possible reasons
for this error are:
There is no system sensor connected to the
Master Boiler.
The system sensor is faulty.
There is a short circuit in the system sensor
wiring; possibly from a staple placed
through the wire, or damage to the wire
causing both conductors to touch.
The system sensor wiring is open due to
defect or damage.
Disconnect the system sensor from the wiring and measure the
resistance of it. Compare the measured resistance to the table in this
manual to see if it corresponds to the temperature of the sensor. If the
resistance does not agree with the sensor, replace the sensor. If the
sensor is OK, disconnect the sensor wiring from both the boiler and the
sensor and check continuity using an ohmmeter. Repair or replace as
necessary.
If this error is present, all boilers in the cascaded group will run and ignite
simultaneously when there is a heat demand. Each boiler will modulate
to maintain set point temperature on its own supply sensor. This code
will reset automatically when repair is complete. This code will not
display if system setting function ERROR SYSTEM SENS is set to OFF.
Fault Code TT
Temperature Blocking TT Demand
TEMPER BLOCKING
PUMP ON TT
This screen indicates a temporary hold on the burner. There is a demand on the boiler, the pump is powered on, but the
temperature of the water at the supply sensor is too high for the boiler to ignite. This occurs because the water tempera-
ture measured by the supply sensor is higher than the boiler temperature
– ignition diff setting. This error will clear itself
when the water temperature measured by the supply sensor is less than the boiler temperature
– ignition diff setting.
Fault Code DHW
Temperature Blocking DHW Demand
TEMPER BLOCKING
PUMP ON DHW
This display indicates a temporary hold on the burner. There is a demand on the boiler from the DHW circuit for heat,
the pump is powered on, but the boiler supply sensor indicates that the water temperature is too high to ignite. This is a
temporary hold on the burner only and all other functions will remain functioning properly. This error will clear itself when
either the boiler supply temperature drops below the BOILER SUPPLY minus boiler supply differential (5
o
F) or DHW
SETPOINT is satisfied and no longer calls for heat.
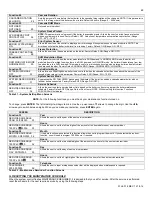
Fault Code PRO
LOW WATER PRESS
PUMP OFF PRO
This display indicates that there is low water pressure in the
boiler. This code will reset automatically after the water
pressure is high enough for the boiler to run safely. The
second line indicates the status of the pump. Note that while
the water pressure is low, the pump will be off.
1. Assure that the system pressure is above 10 psig.
2. Check for leaks in the system piping.
Fault Code FLU
HIGH FLUE PRESS FLU
PUMP ON
This display indicates that there is excessive flue
pressure. This code resets automatically after
the high pressure condition is resolved. The sec-
ond line indicates the status of the pump.
1. Assure that the flue is not blocked.
2. Check the switch wiring by applying a jumper in place of the
switch. If the code clears with the jumper in place, REPLACE the
flue switch and connect the wires to the new switch BEFORE
running boiler.
WARNING:
Do not use jumper to remedy an FLU error. Faulty switch MUST be replaced. Failure to do so could result in serious injury or death.
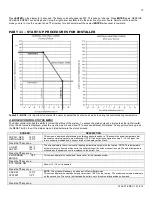
Fault Code LOU
24 VOLT LOW LOU
PUMP ON
This display indicates that
the 24 volt power supply on
the control is damaged or
overloaded. This code
resets automatically if it is
the result of an overload and
that overload condition is
removed. The second line
indicates the status of the
pump. Note that while 24
volt power is low, the pump
output will be on.
1. Check line voltage. It must be between 100 and 128 volts.
2. If available, connect PC, and using
Westinghouse
service software check the 24v
supply display in the lower left corner of the screen. The number displayed here must be
greater than 128 and should be no greater than 250. Use this as a troubleshooting guide
as you follow the steps below.
3. Remove the 10 pin Molex connector from customer connection board. If the message
clears, then the problem is with the external sensor wiring. Examine the external sensor
wiring for shorts to the ground, repairing as necessary. If the message is still present
and the boiler is so equipped, disconnect the UL 353 low water cut-off to see if the
message clears. Replace the faulty part. Check the low voltage wire harness in boiler for
shorts to ground.
4. If a message only occurs when the burner tries to light, check the gas valve for exces-
sive current draw.
5. If a message is present with the low voltage harness disconnected from the 926
control board, replace the 926 control board.
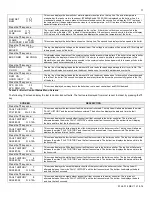
Fault Code F00
WATER HIGH TEMP F00
PUMP ON
This display indicates if the water in the boiler has
overheated. This code indicates a serious safety
issue and the boiler will not restart until it cools
sufficiently and a technician repairs the cause of
overheating and pushes the RESET button on the
display. This is a serious situation and is indicated
by the red light on the display illuminating and the
word LOCKOUT flashing on the display. During this
lockout fault, the pump will be on as indicated on the
second line in an effort to cool the boiler down.
1. Check circulator pump operation
2. If the circulator pump is running, be sure that there is water
in the system and that the water is moving through the system
as intended. Be sure that all correct ball valves and or zone
valves are open or closed as intended.
3. Observe the temperature/pressure gauge. If the water is not
too hot and this message is displayed, check the wiring to the
water ECO sensor and repair if necessary. If the wiring is ok
and this code is still present and the water is not excessively
hot, replace the ECO sensor.
Summary of Contents for WBCNG399W
Page 14: ...14 WHL 016 REV 12 18 14 SPECIFICATIONS AND DIMENSIONS Figure 2 Specifications and Dimensions ...
Page 24: ...24 WHL 016 REV 12 18 14 Figure 8 Piping Symbol Legend ...
Page 59: ...59 WHL 016 REV 12 18 14 Figure 32 Cascade Master and Follower Wiring ...
Page 60: ...60 WHL 016 REV 12 18 14 Figure 33 Internal Connection Diagram LP 293 J ...
Page 83: ...83 WHL 016 REV 12 18 14 055 080 110 PARTS BREAKDOWN Figure 36 Replacement Parts LP 387 J ...
Page 85: ...85 WHL 016 REV 12 18 14 155 199 285 399 PARTS BREAKDOWN ...
Page 86: ...86 WHL 016 REV 12 18 14 Figure 38 Replacement Parts LP 387 KK ...
Page 87: ...87 WHL 016 REV 12 18 14 155 199 285 399 MODEL PARTS BREAKDOWN ...
Page 91: ...91 WHL 016 REV 12 18 14 ...
Page 92: ...92 WHL 016 REV 12 18 14 ...


