WESTERN DIGITAL HARD DRIVE
INSTALL THE HARD DRIVE WITH A CONTROLLER CARD - 8
INSTALLATION GUIDE
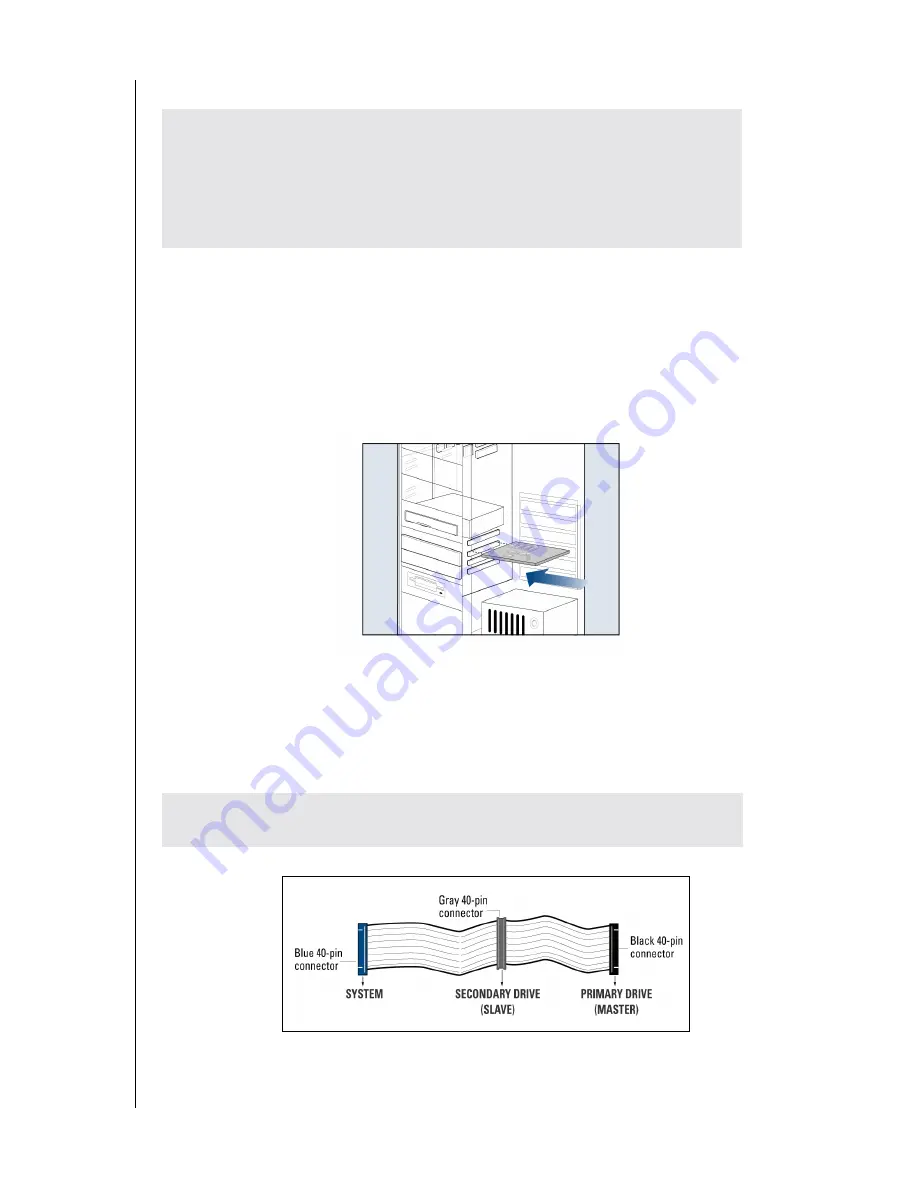
Install the Controller Card
The Western Digital Ultra ATA controller card fits into any available 32-bit PCI (must be
PCI 2.1 or 2.2 compliant) expansion slot on your system motherboard.
1. Turn off the computer, unplug the power cord from the system, and remove the outside
cover.
2. Remove the outside slot cover of an available 32-bit PCI slot on the motherboard.
3. Install the controller card into the open slot. Handle the controller by the sides only to
avoid touching the circuit board components.
4. Secure the controller card bracket to the system case.
NOTE:
If you wish to connect the hard drive activity LED to your new Western Digital
hard drive, refer to your system manual for instructions.
Install the Hard Drive
IMPORTANT (Windows NT 4.x/2000/XP Users Only):
Hard drives
connected to the Ultra ATA controller card will not boot into the Windows
operating system without driver support. If you wish to use your current bootable
hard drive with an existing Windows operating system on the controller card, you
must first install the drivers onto the old drive prior to installing your new
Western Digital hard drive. Proceed to "Install Ultra ATA Drivers" on page 11.
IMPORTANT
: Your new Western Digital hard drive must be installed using the
40-pin, 80 conductor cable included in the kit.


