background image


13 

7.7


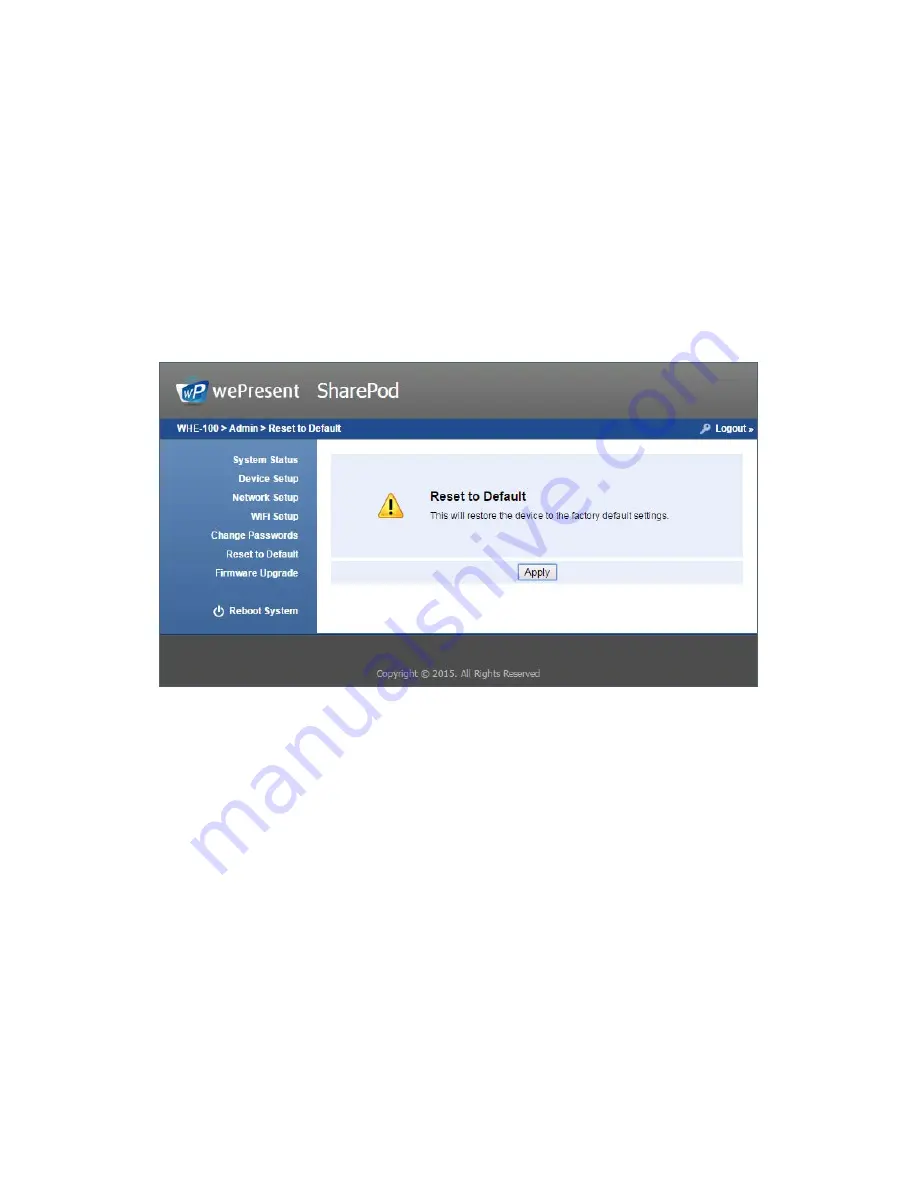
Reset to Default 

1)


Click on “Reset to Default” option to restore factory default settings. 

<Apply>

: Confirm and take action.   

*** You can also restore factory default setting from SharePod box reset button. You 
can find the reset button underneath the box. Please follow below procedures. 

1.


Press 

[Reset] 

button and 

Hold.


2.


Turn on wePresent SharePod box.   

3.


Press more than 10 seconds and release [

Reset

] button. 

4.


Factory settings will then be restored. 


7.8


Firmware Upgrade 

1)


<Firmware Version> <Release Date> 

Shows the current firmware on the SharePod. 

2)


<Check for Update> 

Check the latest firmware available on the server.   

3)


Firmware Upgrade 
1.


First, download the most recent firmware version available to your local drive. 

2.


Click 

<Browse> 

to specify firmware file you want to upgrade to. 

3.


Click 

<Upgrade> 

to start. 

4.


A warning message and count down counter will appear on the screen. 

5.


After a few minutes, a complete message will show on the screen.   

6.


Restart wePresent SharePod to take effect.   

Summary of Contents for SharePod WHE-100

Page 1: ...1 wePresent SharePod User s Manual Model WHE 100 Version 0 5...

Page 2: ...2 MANUAL PAIRING 6 6 WEPRESENT SHAREPOD MIRRORING 7 6 1 SHAREPOD MIRRORING 7 6 2 ADVANCED COLLABORATION WITH WEPRESENT 8 7 WEB ADMIN 9 7 1 LOGIN ADMIN PAGE 9 7 2 SYSTEM STATUS 9 7 3 DEVICE SETUP 10 7...

Page 3: ...ion required Furthermore you can utilize the advance features on the wePresent device such as the 4 to 1 projection Annotation WebSlides and Conference Control for better meeting room or classroom col...

Page 4: ...4 2 Package Contents wePresent SharePod device Power Adapter DC 5V 1 2A Setup Guide Warranty Card CE DoC 3 Physical Details...

Page 5: ...Laptop or DVD Player Micro USB cable HDMI Cable 5 wePresent SharePod pairing 5 1 Auto Pairing Plug in the micro USB cable from SharePod to the wePresent device and pairing will begin automatically The...

Page 6: ...P Address the IP address of target wePresent device Login Code the login code of target wePresent device WiFi Name the WiFi name of target WiFi Access Point device Security Type WiFi Security type suc...

Page 7: ...dby mode or you can press the PLAY button to manually begin mirroring The blue LED indicates that the system is ready for mirroring and it will switch to red LED when mirroring Note a Please pair the...

Page 8: ...ntrol page or OSD to start the full screen 4 to 1 projection The meeting host or teacher can moderate the meeting in an efficient way If SharePod is rejected by Conference Control mode while pressing...

Page 9: ...Status 1 Click on System Status option it will show current system status Model Name Product model name Versions Firmware version no Product firmware version number Network Status IP address IP addre...

Page 10: ...Setup option it will show the device setting items Receiver IP Address The IP address of target wePresent device Login Code The login code of target wePresent device Sender Name The name of the connec...

Page 11: ...168 100 10 7 5 WiFi Setup Wireless LAN The default setting is Enable Connect to Existing AP Press the Scan button to scan all available AP devices and then select the WiFi AP that you want to connect...

Page 12: ...band is not supported 7 6 Change Passwords 1 Click on Change Password option you can change the password setting for Admin Enter New Password Length up to 8 characters Confirm New Password Apply Confi...

Page 13: ...Reset button 4 Factory settings will then be restored 7 8 Firmware Upgrade 1 Firmware Version Release Date Shows the current firmware on the SharePod 2 Check for Update Check the latest firmware avai...

Page 14: ...14 Warning Do not power off wePresent SharePod while firmware upgrade in progress otherwise your SharePod will be damaged and must be returned to the vendor for service and repair...

Page 15: ...t System option to restart the SharePod Click on Reboot button reboot system automatically 7 10 Logout 1 Click on logout on the upper right corner to logout of the administration webpage and return ba...

Page 16: ...orrect the interference by one of the following measures Reorient or relocate the receiving antenna Increase the separation between the equipment and receiver Connect the equipment into an outlet on a...

Reviews: