


14
ON/OFF SWITCH WITH SAFETY KEY
The power switch includes a safety key to prevent unauthor-
ized use of the sander to increase safety.
WARNING
: Remove the safety key whenever the
sander is not in use. Place the key in a safe place
and out of the reach of children.
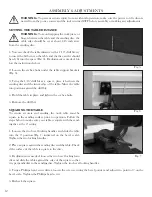
1. To turn the sander ON, insert the safety key (Fig. 8) into
the key slot in the center of the switch. Push the switch to the
ON position to start the sander.
2. To turn the sander OFF, push switch to the OFF position
and remove the safety key. The sander will take about 4.5
minutes to come to a complete stop.
OPERATION
BEVEL SANDING
The worktable can be tilted for bevel sanding. Loosen the two locking handles, and tilt the worktable to the desired
angle as indicated on the bevel gauge. Re-tighten the table locking handles.
WARNING:
To avoid jamming fingers or workpiece between the table and sanding surface, the table
should maintain a maximum of 1/16" distance from the sanding disc. Check and reposition the table as
necessary.
WARNING:
Do not operate this tool until all parts have been properly assembled. To prevent serious
injury, make sure all the warnings and instructions have been read and understood before operation.
SANDING OPERATION
Your disc sander is for designed for sanding outside edges
and the ends of workpieces. The sanding disc rotates coun-
terclockwise, so you should ONLY work on the left side of
the disc, where the disc applies downward pressure on the
workpiece against the table. Sanding on the wrong side of
the disc will cause the workpiece to fly up and cause injuries.
1. Turn ON the sander. It will take a few seconds for the disc to reach full speed.
2. Hold the workpiece down firmly against the table. Carefully feed the workpiece into the left side of the disc. Move
workpiece back and forth against the sanding disc; do not hold workpiece in one place for too long to avoid burning
the work surface. Do not use excessive pressure to prevent overloading the sander.
NOTE:
When sanding small workpieces, make sure to use proper support, such as the included miter gauge or
other jigs. Small workpieces must be adequately supported, otherwise they may fly out and cause injuries.
3. When the sanding operation is finished, turn off the sander and remove the safety key. It will take about 4 min-
utes and 30 seconds for the disc to stop. DO NOT touch the sanding disc while it is still rotating.
Fig. 8
Fig. 9
Summary of Contents for 65812
Page 16: ...EXPLODED VIEW PARTS LIST 16 ...
Page 20: ...THANKS FOR REMEMBERING ...


