background image


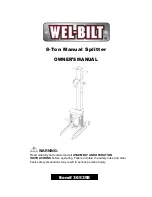
8-Ton Manual Splitter 

OWNER’S MANUAL 


WARNING:


Read carefully and understand all 

ASSEMBLY AND OPERATION 

INSTRUCTIONS

 before operating. Failure to follow the safety rules and other 

basic safety precautions may result in serious personal injury. 


Item# 365398 


Summary of Contents for 365398

Page 1: ...R S MANUAL WARNING Read carefully and understand all ASSEMBLY AND OPERATION INSTRUCTIONS before operating Failure to follow the safety rules and other basic safety precautions may result in serious pe...

Page 2: ...g splitter is designed to split logs quickly and efficiently Adjustable splitting wedge handles different sized logs up to 24in L max TECHNICAL SPECIFICATIONS 8 ton capacity Splits logs up to 23in lon...

Page 3: ...eject small pieces of wood at any moment To avoid eye injuries it is strongly recommended users wear safety goggles or safety glasses with side shields which comply with current national standards or...

Page 4: ...workbench platform by pushing by hand or applying pressure to the platform 2 Next make sure there is NO pressure on the jammed log workbench platform or splitting wedge 3 Remove by hand jammed log and...

Page 5: ...rt 14 Note please use inner hex wrench to assemble this pump Step 3 Attach Base Feet Attach Base Feet part 22 to bottom of main post near hydraulic pump One foot per side Secure each foot using two M1...

Page 6: ...ydraulic pump slot Tighten hex bolt part 6 to secure the foot pedal to the hydraulic pump Step 5 Attach Pull Springs Attach each pull spring part 13 into center hole of foot leg first Then attach oppo...

Page 7: ...splitter continue with even strokes of the hydraulic foot pedal until the log is split 7 Remove the wood pieces and clear the area of any debris 8 To lower the splitter workbench apply downward press...

Page 8: ...pump 2 Use a 6mm inner hex wrench to remove the two cap screws that hold the hydraulic pump to the base 3 Position the pump horizontally and remove the round rubber oil plug on the back of the pump ho...

Page 9: ...Page of 11 9 DIAGRAM PARTS LIST...

Page 10: ...ulic Pump 1 13 Pull Spring 2 14 Inside Hex Screw M8x16 2 15 Wheel 2 16 Spacer 2 17 Flat Washer 16 2 18 Back Ring 17 2 19 Hex Bolt M10x25 4 20 Lock Washer 10 6 21 Hex Nut M10 6 22 Angle Foot 2 23 Torsi...

Page 11: ...Page of 11 11 WARRANTY One year limited warranty Distributed by Northern Tool Equipment Co Inc Burnsville Minnesota 55306 6936 Made in China...

Reviews: